
Fuel - Tank
Add a tank record for each of your fuel tanks. Tanks on a flotation (manifold) system that are physically connected should be set up as one tank with the combined capacity. If you have tanker trucks that drive around fueling assets in the yard, add tank records for them as well.
Refer to Setting Up Roving Fuel Tanks (Wet Fueling).
Where to Find Tanks
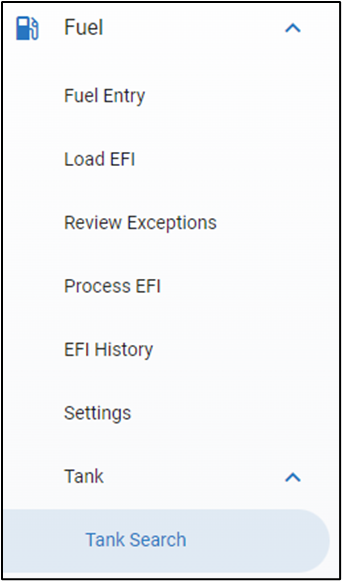
In the left menu expand Fuel, expand Tank, then click Tank Search.
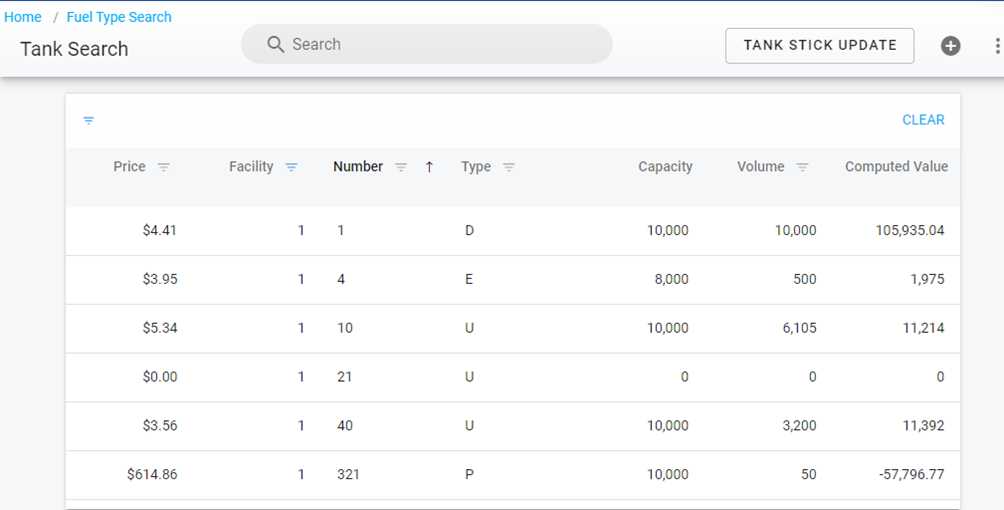
Tank Search lists every tank with its Price (average price per gallon), Facility, Number, Type (fuel type), Capacity, Volume (the current computed inventory) and Computed Value. Click a row to open the tank. The buttons at the top are:
Tank Stick Update - enter physical stick readings for your tanks (see Entering Stick Readings below). Shown only to users with the Edit Stick Readings permission.
Pump to Tank Transfer - move fuel from a pump to a tank, for example filling a tanker truck. Shown only when the feature is enabled for your system and the user has the Pump to Tank Transfer permission. Fuel Tank - Pump to Tank Transfer
+ - add a new tank.
Adding a Tank
From Tank Search click the + button.
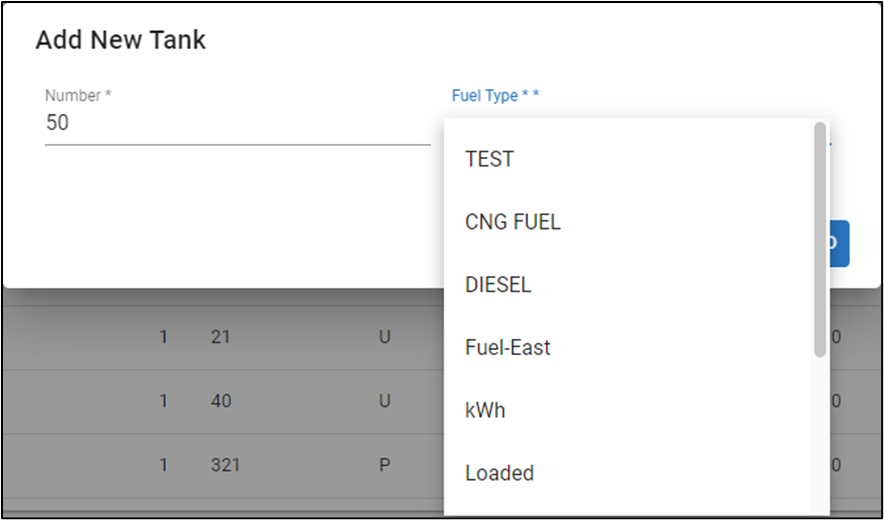
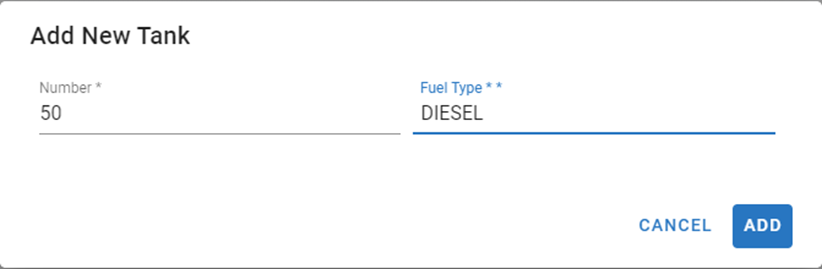
Enter the tank Number (a whole number) and select the Fuel Type. Fuel types are set up in Fuel > Settings. Tanks containing different fuel types can use the same number.
Click Add.
Open the new tank from the list and fill in the rest of the record (capacity, starting inventory, price, part number, reorder values). Fields save as you edit them - there is no separate Save button.
Tank Record Fields
The tank screen is titled with the tank number and fuel type. Use the Delete Tank and Tank Delivery buttons at the top for those actions.

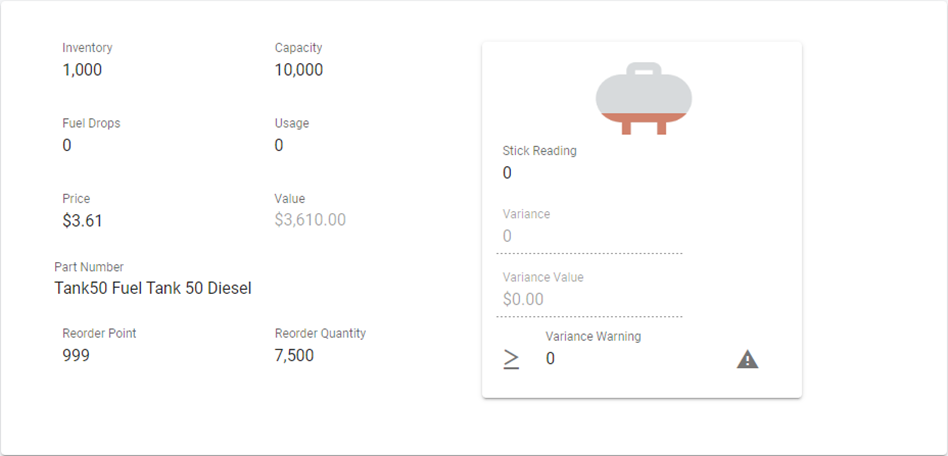
Fields you can edit (click the value to change it):
Inventory at Start of Period: the fuel in the tank at the beginning of the current period. Fleet360 sets this for you at End of Period (see below); you only need to type it when you first set the tank up or when you are correcting the inventory.
Tank Capacity: the maximum quantity the tank can hold. Used for the tank level graphic.
Fuel Added Since Start of Period: fuel received this period. Updated automatically by Tank Deliveries, Pump to Tank Transfers into this tank, and purchase order receipts of the linked part.
Usage Since Start of Period: fuel pumped out this period. Updated automatically when fuel transactions are posted to the pumps attached to this tank (Fuel Entry and Open Fuel Transactions posting).
Price per Gallon: the average price of the fuel in the tank. Recalculated automatically when a delivery is recorded.
Part Number: the part record that represents this tank's fuel, if you purchase fuel through purchase orders. See Linking a Part Number to a Tank below.
Reorder Point and Reorder Quantity: the inventory level at which you want to reorder fuel and how much to order. See Linking a Part Number to a Tank; without a part number they are for your reference only.
Variance Warning: the variance (in gallons) at which the tank shows a warning icon. When the difference between Computed Inventory and Stick Reading is equal to or larger than this amount the warning icon displays.
Fields calculated by Fleet360 (read-only):
Computed Inventory: Inventory at Start of Period + Fuel Added Since Start of Period - Usage Since Start of Period. This is what Fleet360 thinks is in the tank, and the Volume shown on Tank Search.
Value: Computed Inventory x Price per Gallon.
Stick Reading: the last physical reading entered with Tank Stick Update.
Variance: Computed Inventory - Stick Reading. A positive number means Fleet360 shows more fuel than is physically in the tank.
Variance Value: Variance x Price per Gallon.
Linking a Part Number to a Tank
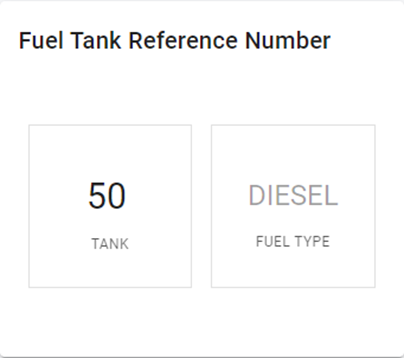
If you buy fuel on purchase orders, create a part record for the fuel (part type Fuel) and select it in the tank's Part Number field. The part's Details tab then shows a Fuel Tank Reference Number card with the tank and fuel type it is linked to.
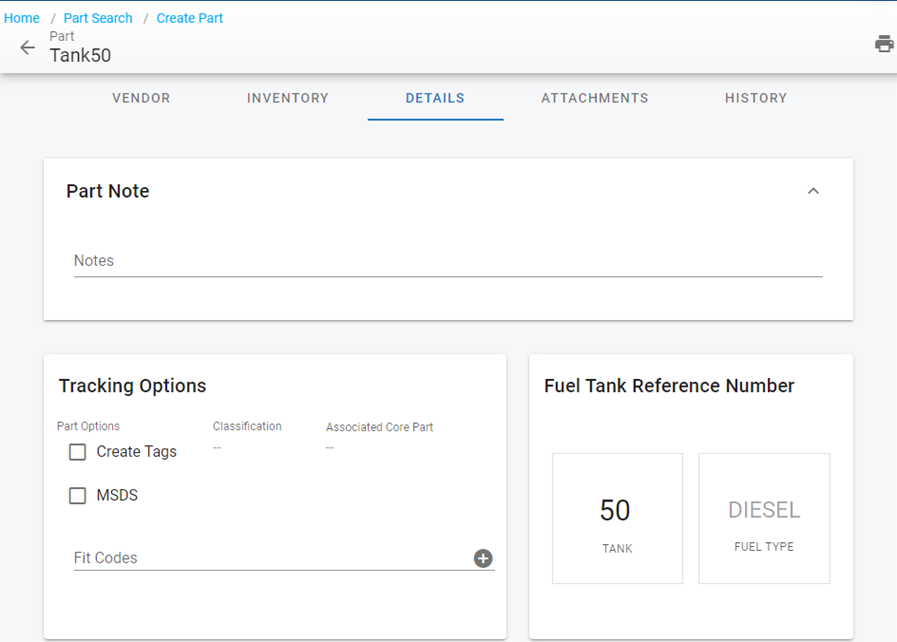
What the link does:
Receiving fuel on a purchase order updates the tank. When a PO line for the linked part is received, Fleet360 records a Tank Delivery for that tank automatically: Fuel Added Since Start of Period increases by the received quantity, Price per Gallon is recalculated, and the delivery is written to the fuel history.
Reordering. When the tank's Computed Inventory drops to or below its Reorder Point (checked when a delivery is recorded or the tank record is edited), Fleet360 flags the linked part as a stocked part so it is picked up by parts reordering and requisitions.
The link does not take fuel out of Parts inventory. Fuel pumped into assets is tracked on the tank (Usage Since Start of Period) and in fuel history, not as an issue of the part. Posting fuel transactions never reduces the part's on-hand quantity, so the part's quantity in Parts is not a measure of what is in the tank - use Computed Inventory and Stick Reading on the tank for that.
Recording a Tank Delivery
Use this when a fuel delivery arrives that was not received through a purchase order.
Open the tank and click Tank Delivery. The dialog shows the tank's current inventory, price and value.
Enter the Delivery Quantity, the Delivery Price (total price of the delivery) and the Delivery Date.
Save the delivery. Fuel Added Since Start of Period increases, Price per Gallon is recalculated as a weighted average, and the delivery is recorded in fuel history.
Requires the Receive Fuel Deliveries permission.
Entering Stick Readings
A stick reading is the physical measurement of fuel in the tank. Entering it does not change the Computed Inventory - it is compared to it to show the Variance.
From Tank Search click Tank Stick Update.
The dialog lists each tank with its Facility, Tank number and Previous Reading. Type the New Reading for the tanks you measured; leave the others unchanged.
Save. Only the tanks whose reading you changed are updated, and the previous reading and date are kept with the tank.
Requires the Edit Stick Readings permission. For the most accurate variance, take stick readings at the same time you record pump meter readings and after all fuel transactions for that time have been posted.
Correcting Tank Inventory
If the inventory Fleet360 shows for a tank does not match what is physically there, work through these steps in order so you fix the cause rather than just the number.
Post everything that is outstanding. Post open fuel transactions (Open Fuel Transactions (Post To Pump & Tanks)), enter any missing fuel tickets (Fuel Ticket Entry), record any delivery that was not received on a PO (Tank Delivery above) and any Pump to Tank Transfer. Each of these updates Fuel Added or Usage and therefore the Computed Inventory.
Enter the current stick reading with Tank Stick Update. The tank now shows the Variance between Computed Inventory and the physical reading.
Review the variance. A small variance is normal (temperature expansion, meter drift, rounding). A large one usually means a delivery, ticket or transfer was entered with the wrong quantity or against the wrong tank or pump - correct that entry and the Computed Inventory follows. The Fuel Variance Report (Fuel Reports) shows variance by pump, tank and fuel type to help find it.
Adjust the computed inventory only if the records are right and the number is still wrong (for example an incorrect starting figure when the tank was set up, or fuel lost to a leak or evaporation). Open the tank and edit Inventory at Start of Period up or down by the variance amount; Computed Inventory recalculates immediately. Editing Fuel Added or Usage Since Start of Period has the same effect but makes the period totals in your fuel history harder to reconcile, so prefer Inventory at Start of Period. Requires the Edit Tanks permission.
Overwriting Inventory at Start of Period does not create a fuel transaction, so the adjustment is not visible in fuel history. If you need an audit trail of the adjustment, record it as a Tank Delivery (for fuel added) or a fuel ticket (for fuel removed) instead.
What happens at End of Period: when the fuel End of Period runs, Inventory at Start of Period is set to the current Computed Inventory, Fuel Added and Usage Since Start of Period are reset to zero, and the current Stick Reading becomes the period's starting reading. Make sure deliveries, transactions and stick readings are posted before the period closes.
Deleting a Tank
Open the tank from Tank Search.
Click Delete Tank at the top of the screen and confirm.
Requires the Delete Tanks permission. Pumps attached to the tank should be moved to another tank first.
Refer to Fuel - Pumps.
Refer to Fuel - Settings.
Refer to Fuel Tank - Pump to Tank Transfer.
Refer to User Permission Definitions Chart.