Contact Custom Fields
Organization>Settings>Contact Custom Fields
Adding Custom Fields to Your Contacts Page
Summary:
You can now customize your Contacts page by adding custom fields specific to your organization’s needs. This is especially useful for tracking additional driver details like ID numbers, fueling PINs, badge numbers, and more. These custom fields will appear in each contact’s profile, giving you quick access to critical info.
Instructions:
Navigate to Organization
Go to Settings>Contact Custom Fields
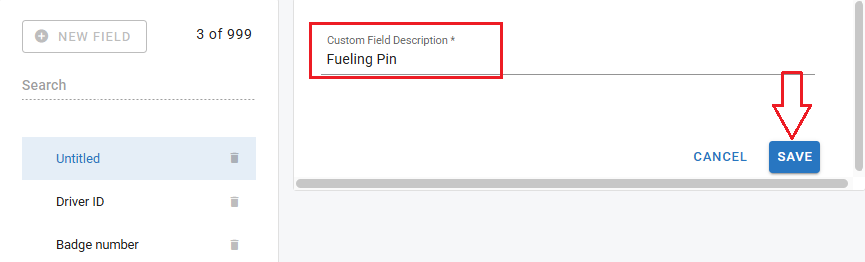
Add a New Custom Field
Click the ( + ) icon to add a new field.
Choose a name/description for your field (e.g., “Driver ID”, “Fueling PIN”, “Badge Number”).
Save Your Changes
Click Save to add the field to your system.
View Custom Fields in Contact Profiles
Once saved, the new fields will automatically appear in each contact's profile under the Custom Fields section.
You can now fill in or update the information for each contact as needed.
Field/Option | Field/Option Description |
|---|---|
Disable Selector | Check this box if this custom field should no longer be added to a vendor file. When this box is checked, when searching the list to add to Vendor Custom Fields in the vendor file, a disable custom field will not appear in that available list. |
Dropdowns Selector | Check this box to leverage secured dropdown values which limit users to selecting only the items listed in the dropdown as a field value. This helps with data accuracy and consistency. |
Tip:
Use consistent naming for your fields to keep your contact database clean and searchable.
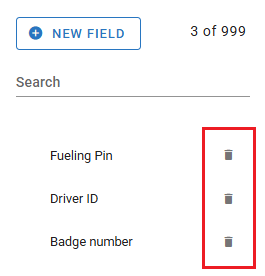
Deleting a Custom Field
You can delete a custom field by clicking on the trashcan icon next to the field name, confirm Delete when the pop-up window shows.