Posting Tires
Posting tires on a work order is a critical step in accurately tracking tire usage, costs, and inventory within your fleet management system. This article outlines the process for properly posting tire transactions, ensuring maintenance records remain up-to-date and asset histories are complete. Following these steps helps support accurate reporting and lifecycle analysis.
Posting a Tire
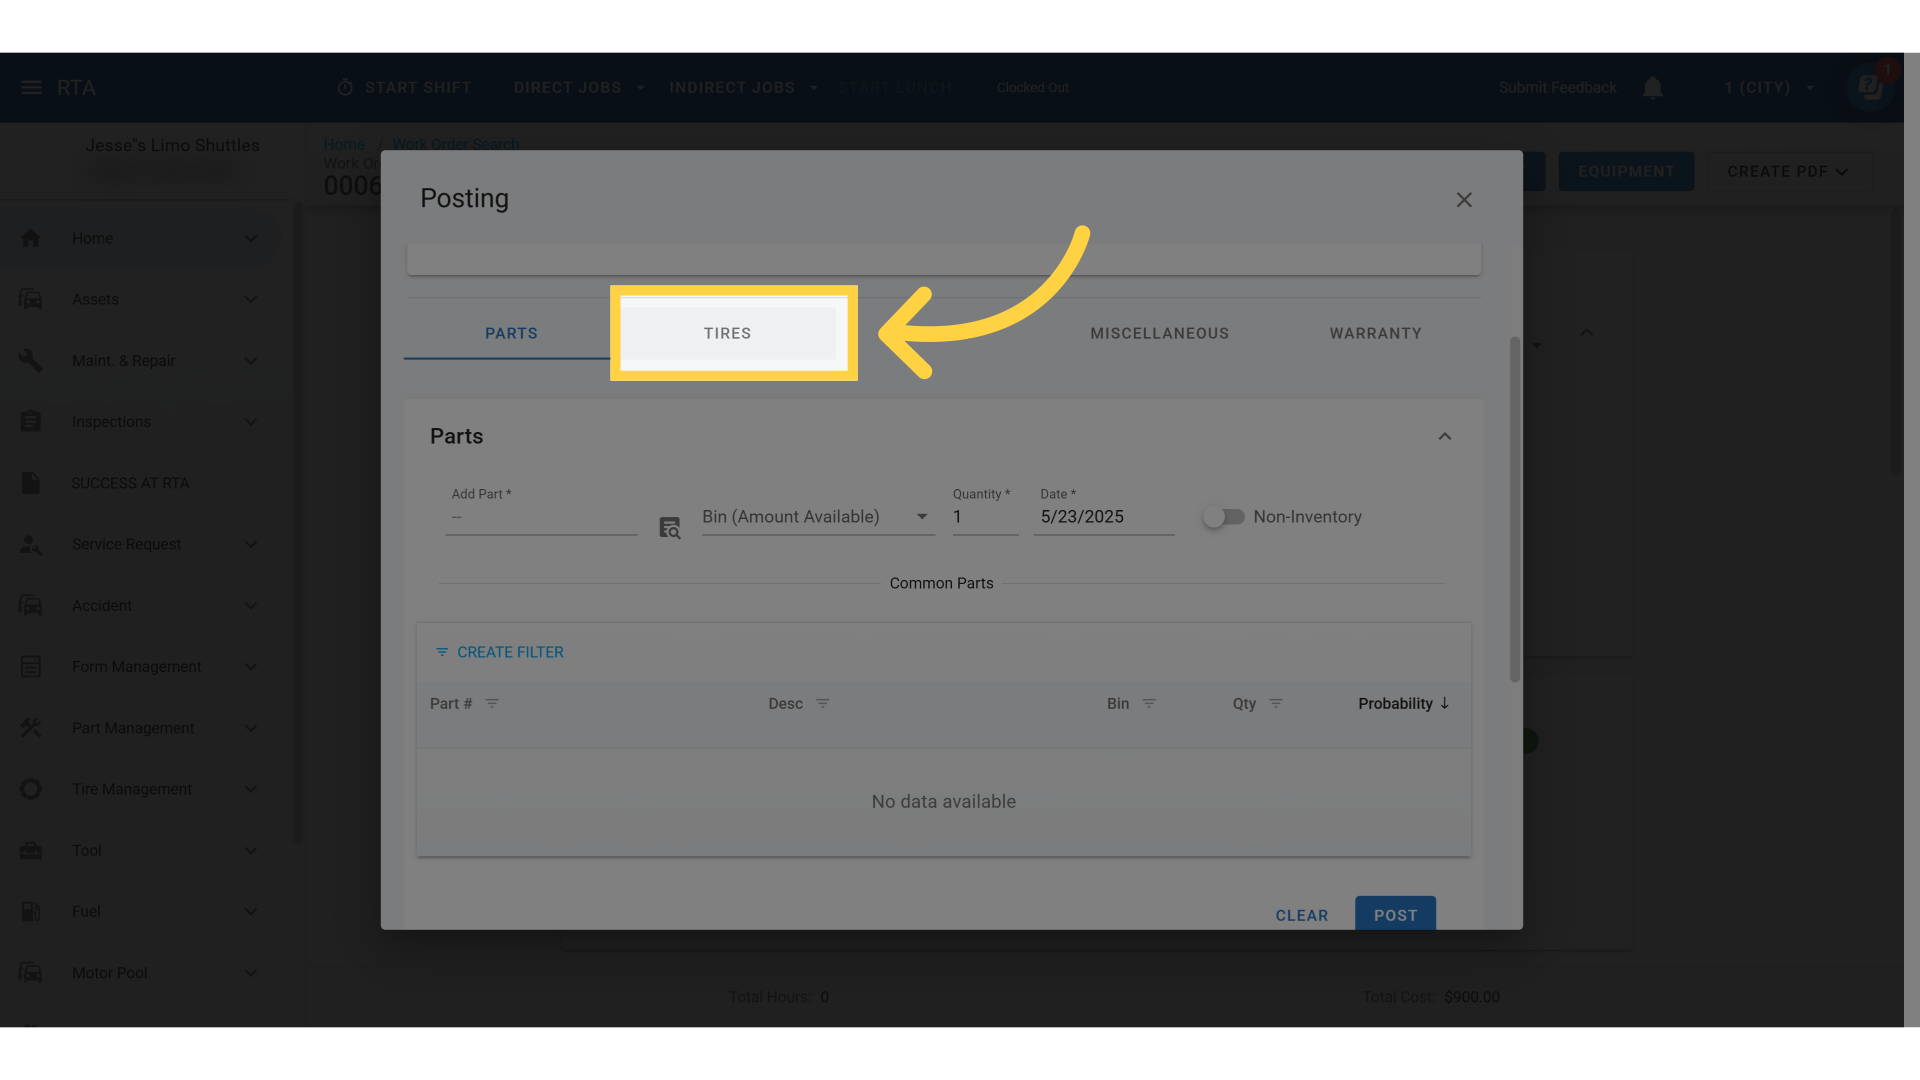
1. Click "Tires"
Access the tires tab
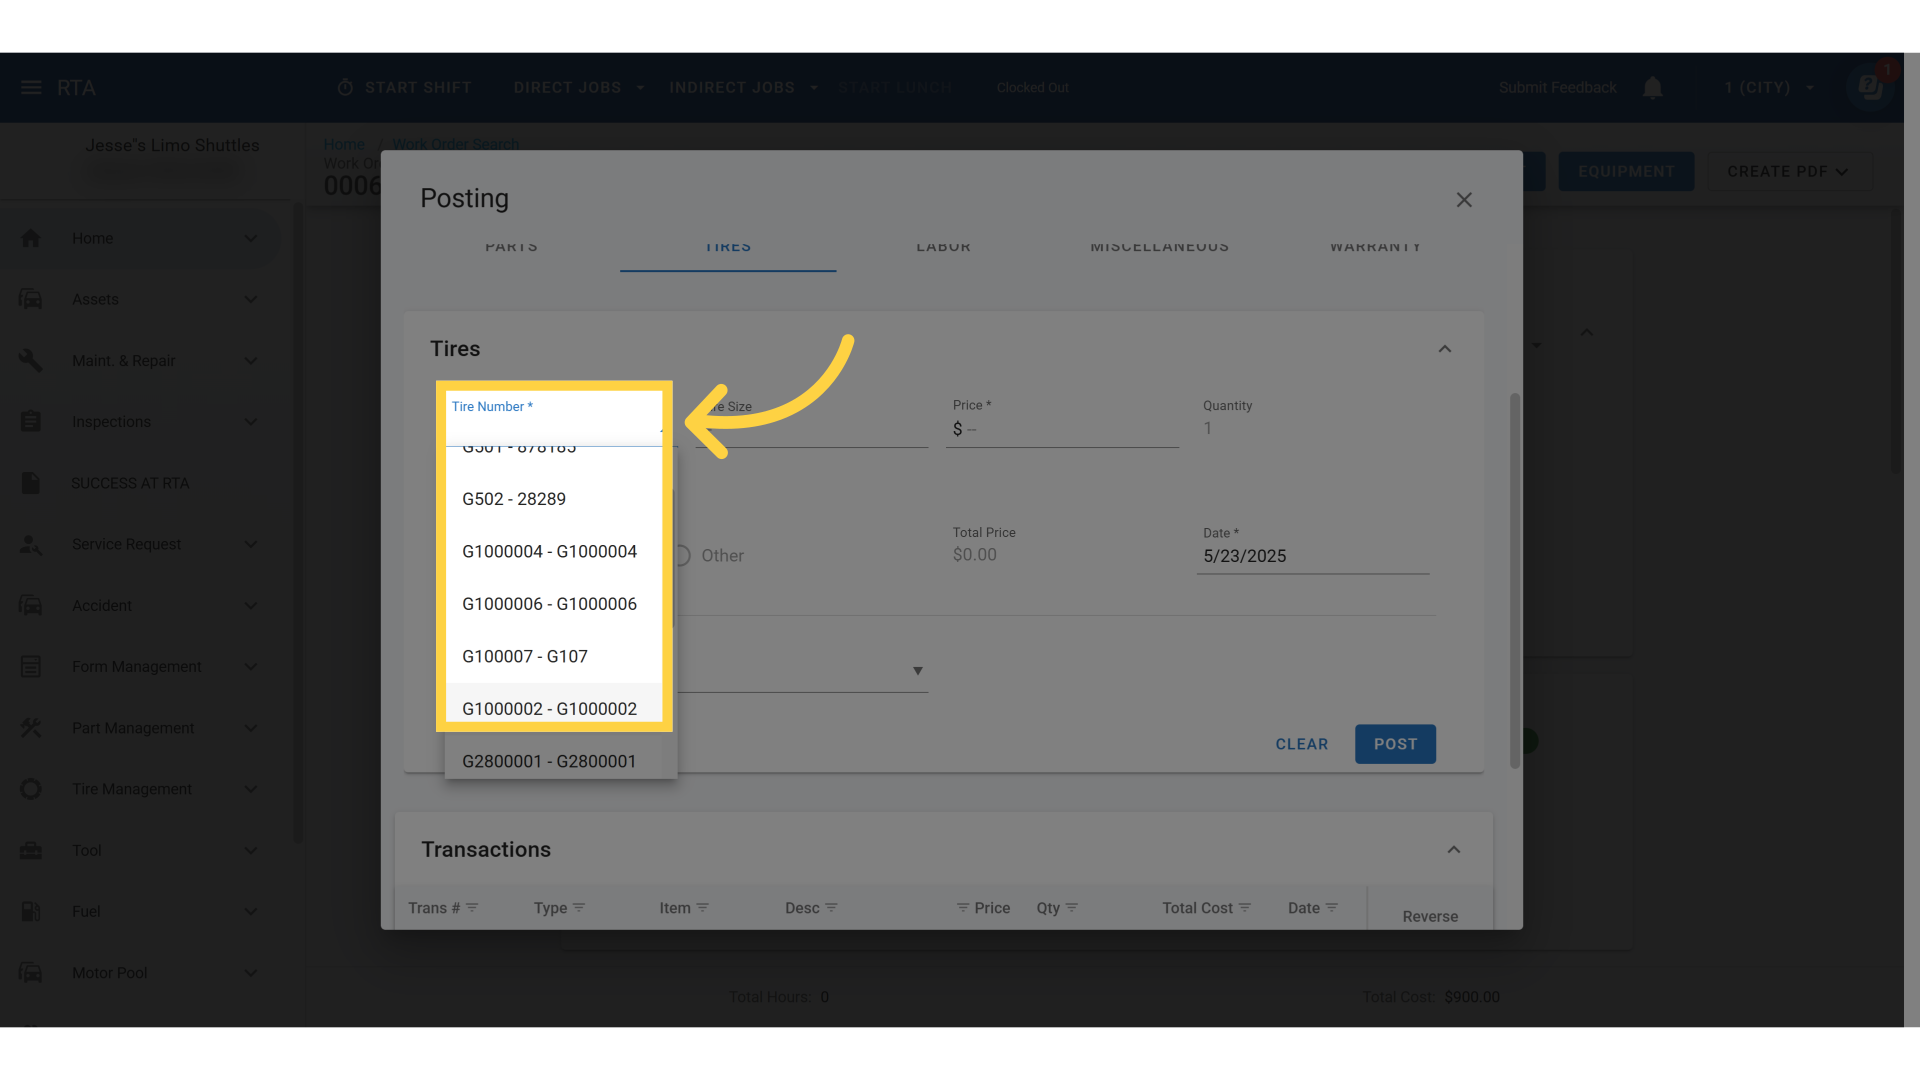
2. Click "Tire Number"
Select the proper tire number.
The tire number represents the specific tire file as seen on the "Tires" list
To learn how to create a new tire see “Creating New Tire”
3. Pre-filled Items
Once selected the proper tire number the following are pre-filled from the tire file:
Tire Size
Price
Tire Type
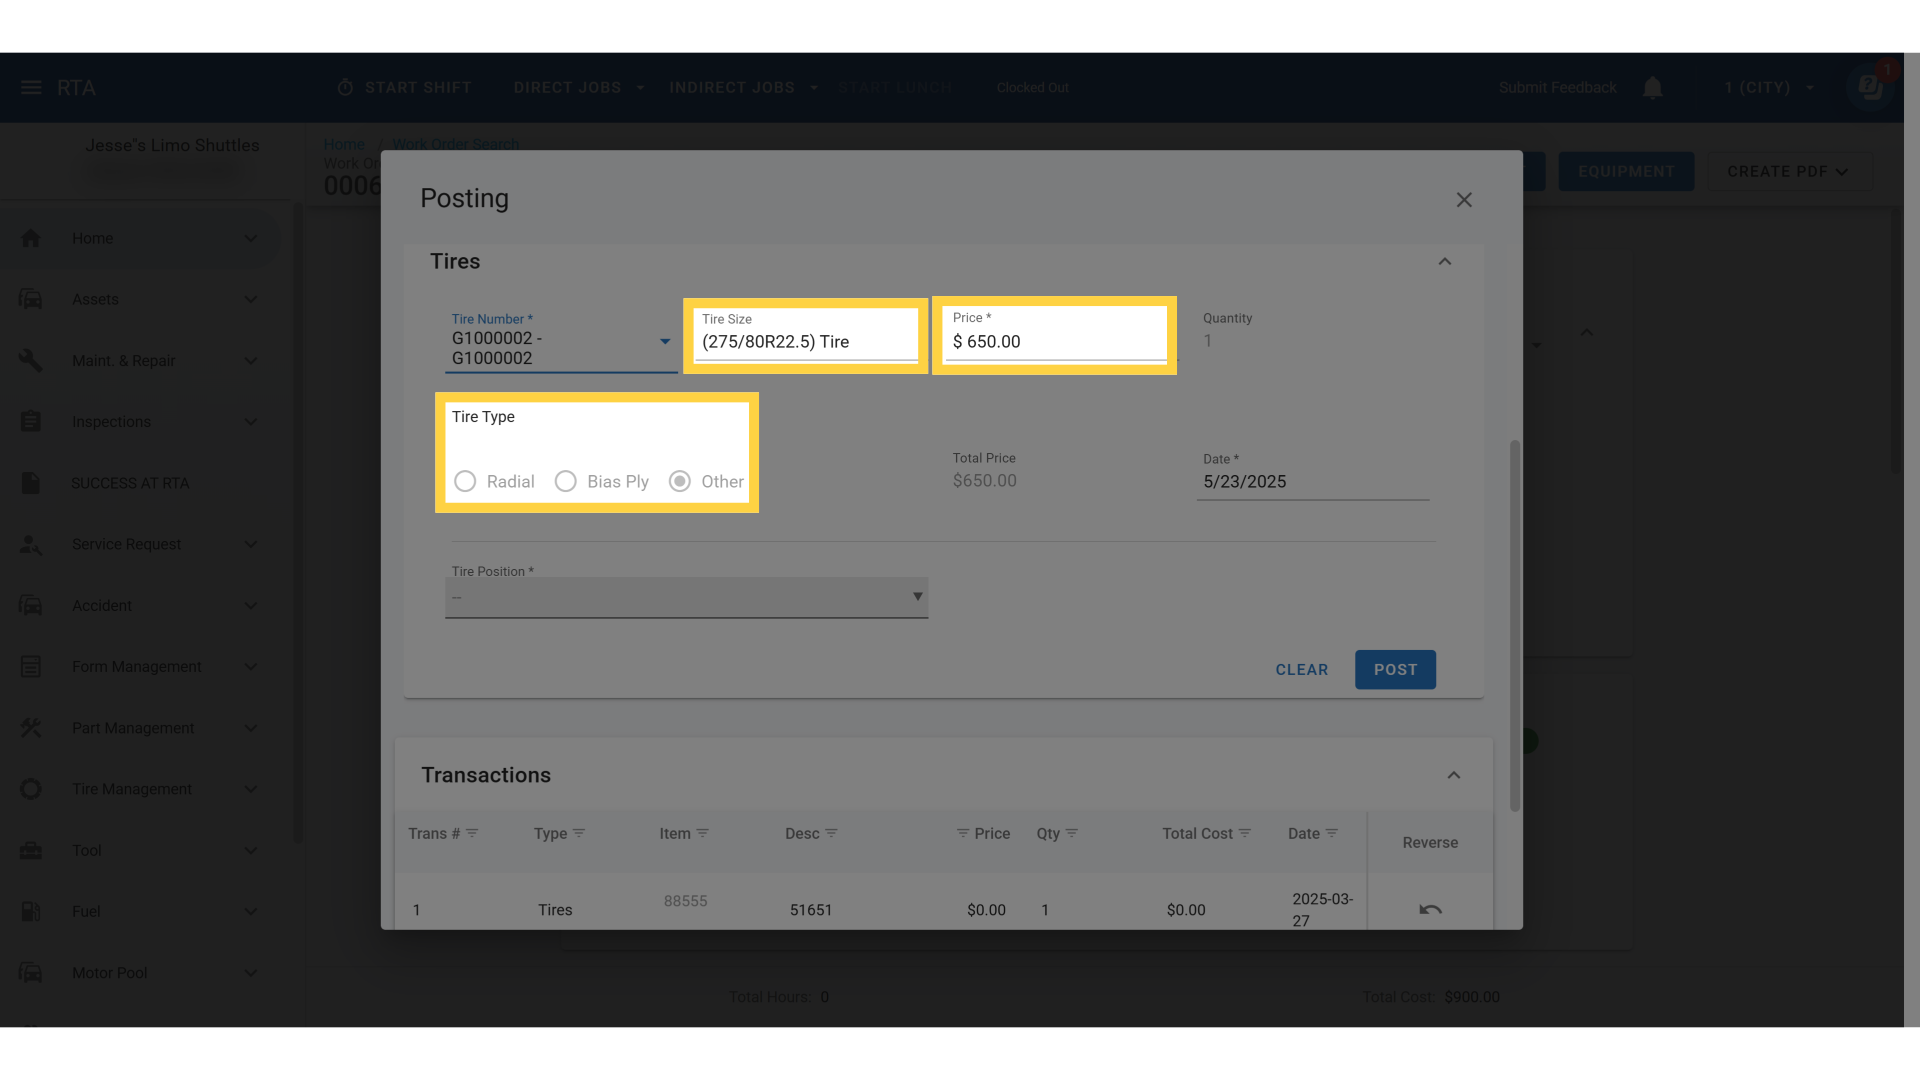
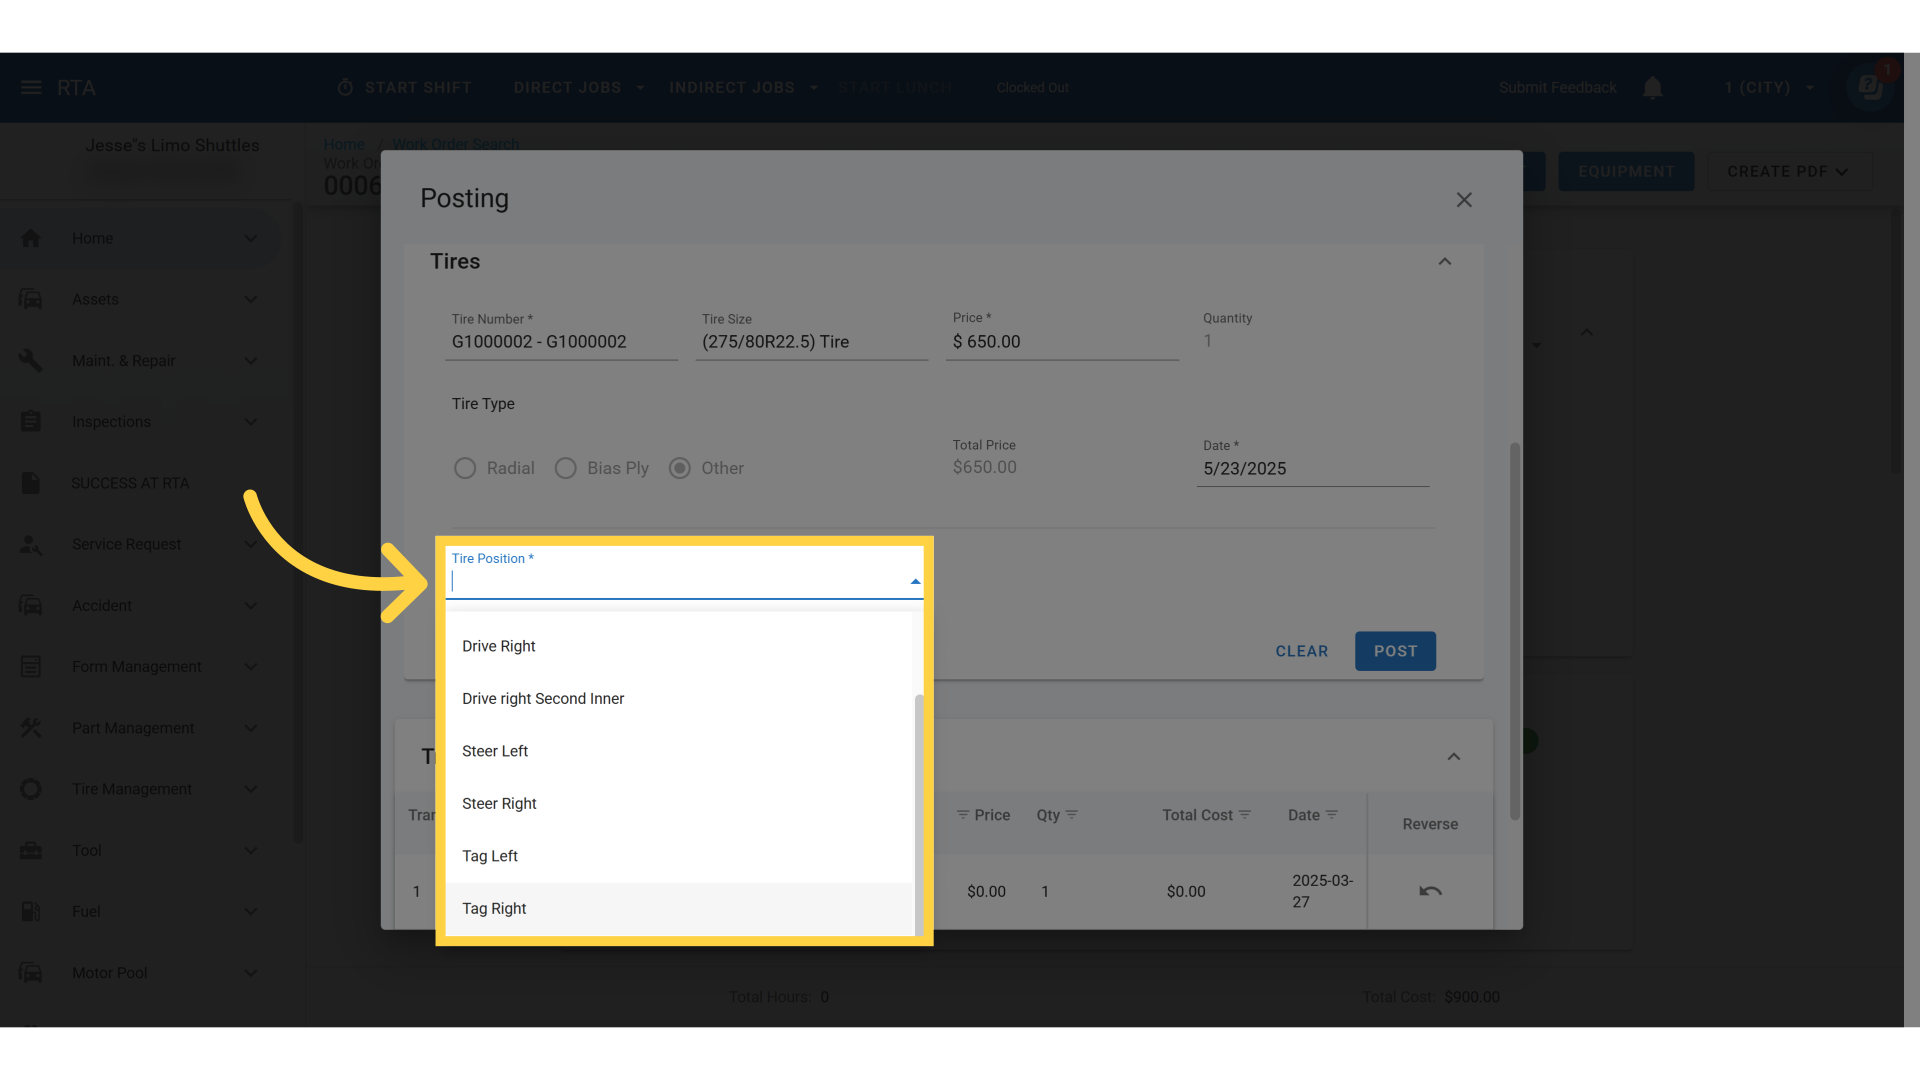
4. Click "Tire Position"
Select the tire position the tire will be mounted to
See the "Tire Positions" to create new mounting positions
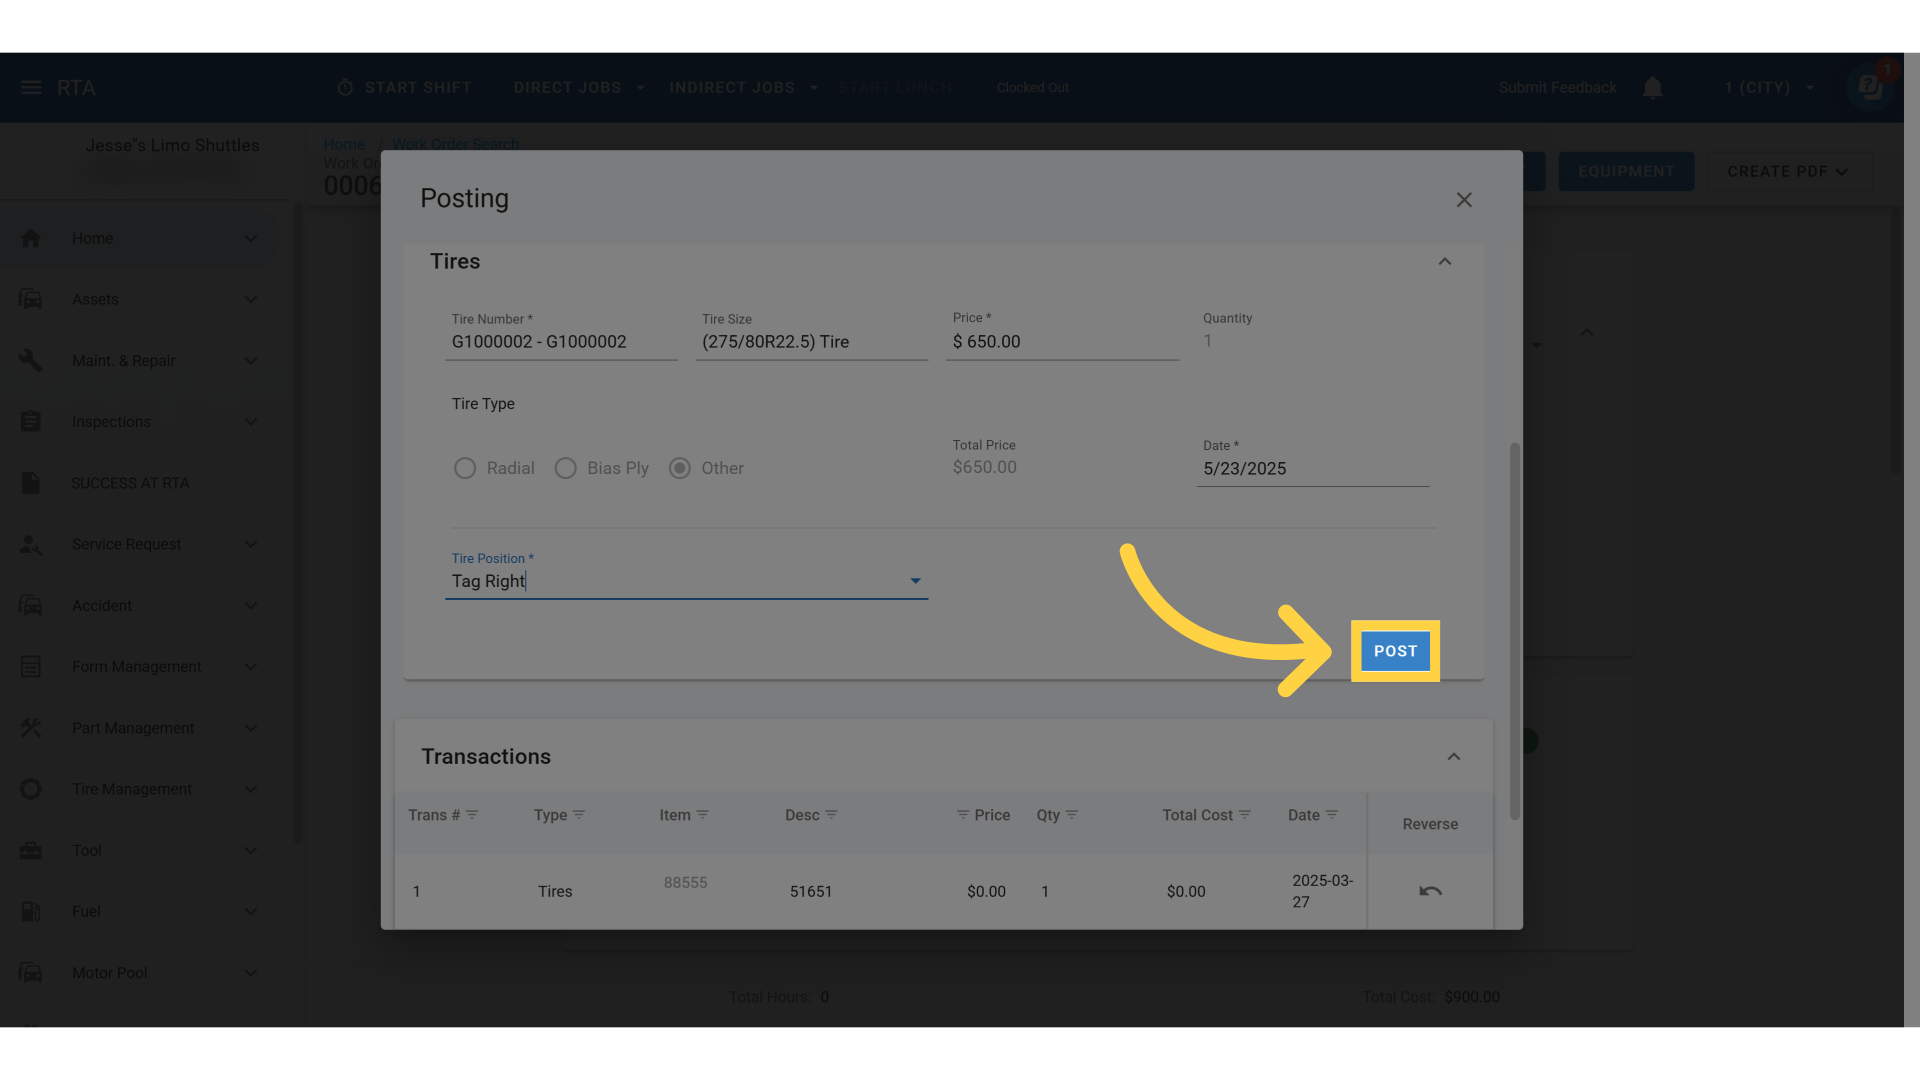
5. Click "Post"
Finalize the post action
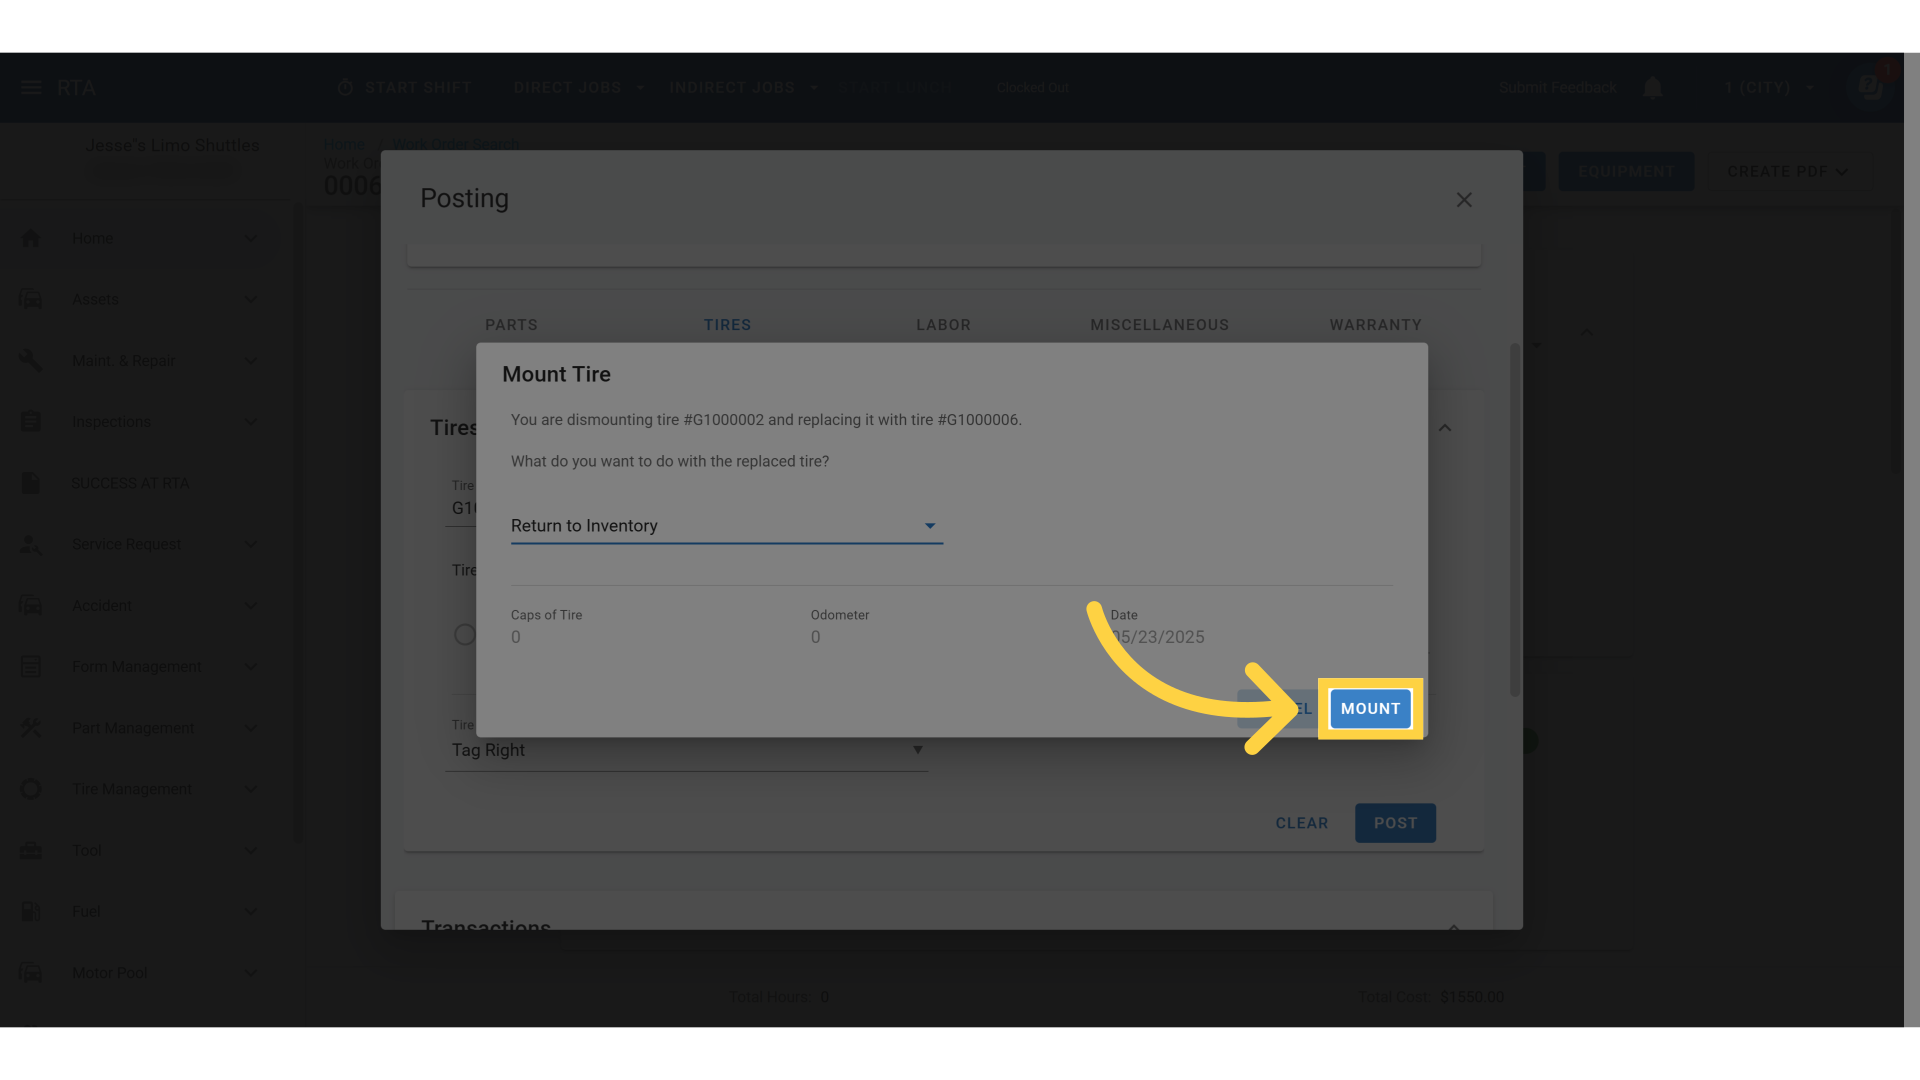
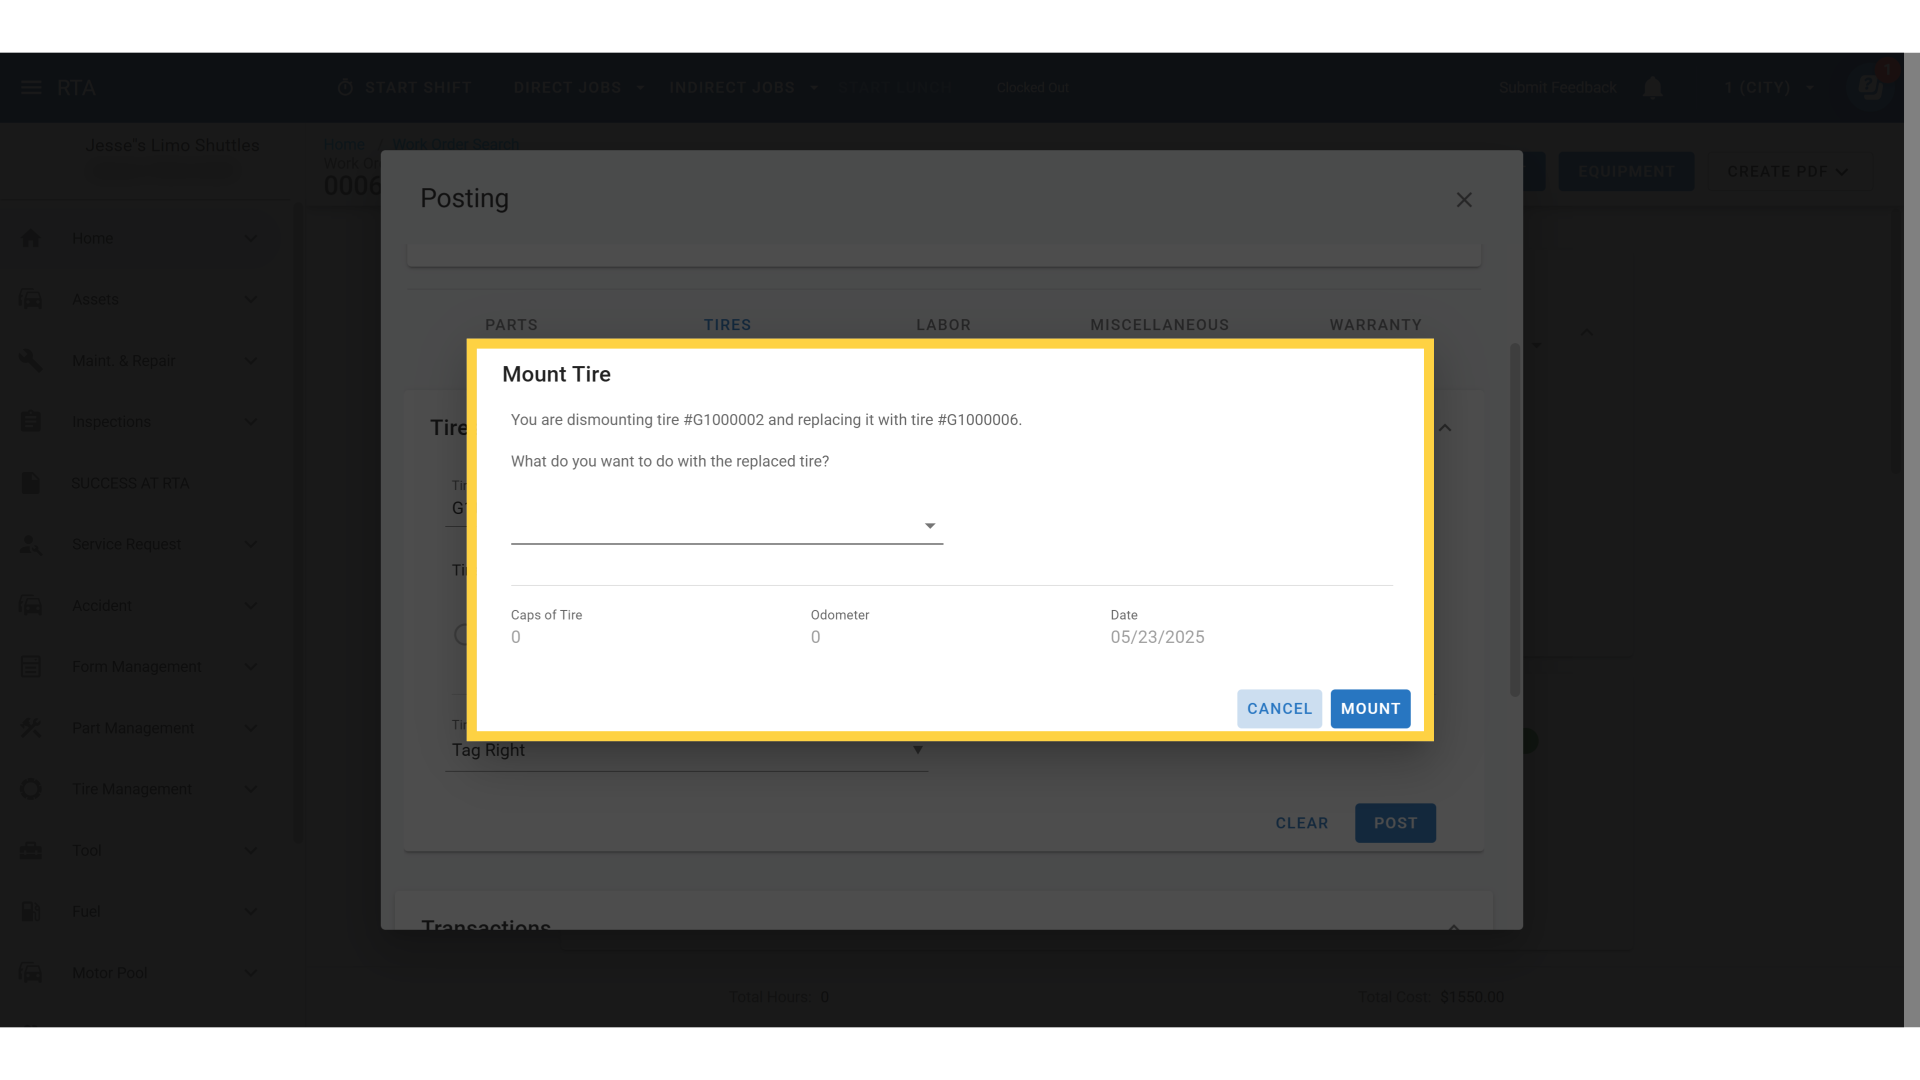
Replacing a Mounted Tire
If replacing a mounted tire, a pop up will appear asking "what do you want to do with the replaced tire?"
Click "The Drop Down Box"
7. Select The Proper Action
There will be three choices to select from:
Mark to Retread - This will send the tire to the "Retread List"
Return to Inventory - This will send the tire to the "Tires List"
Mark to Scrap - This will send the tire to the "Scrap List"
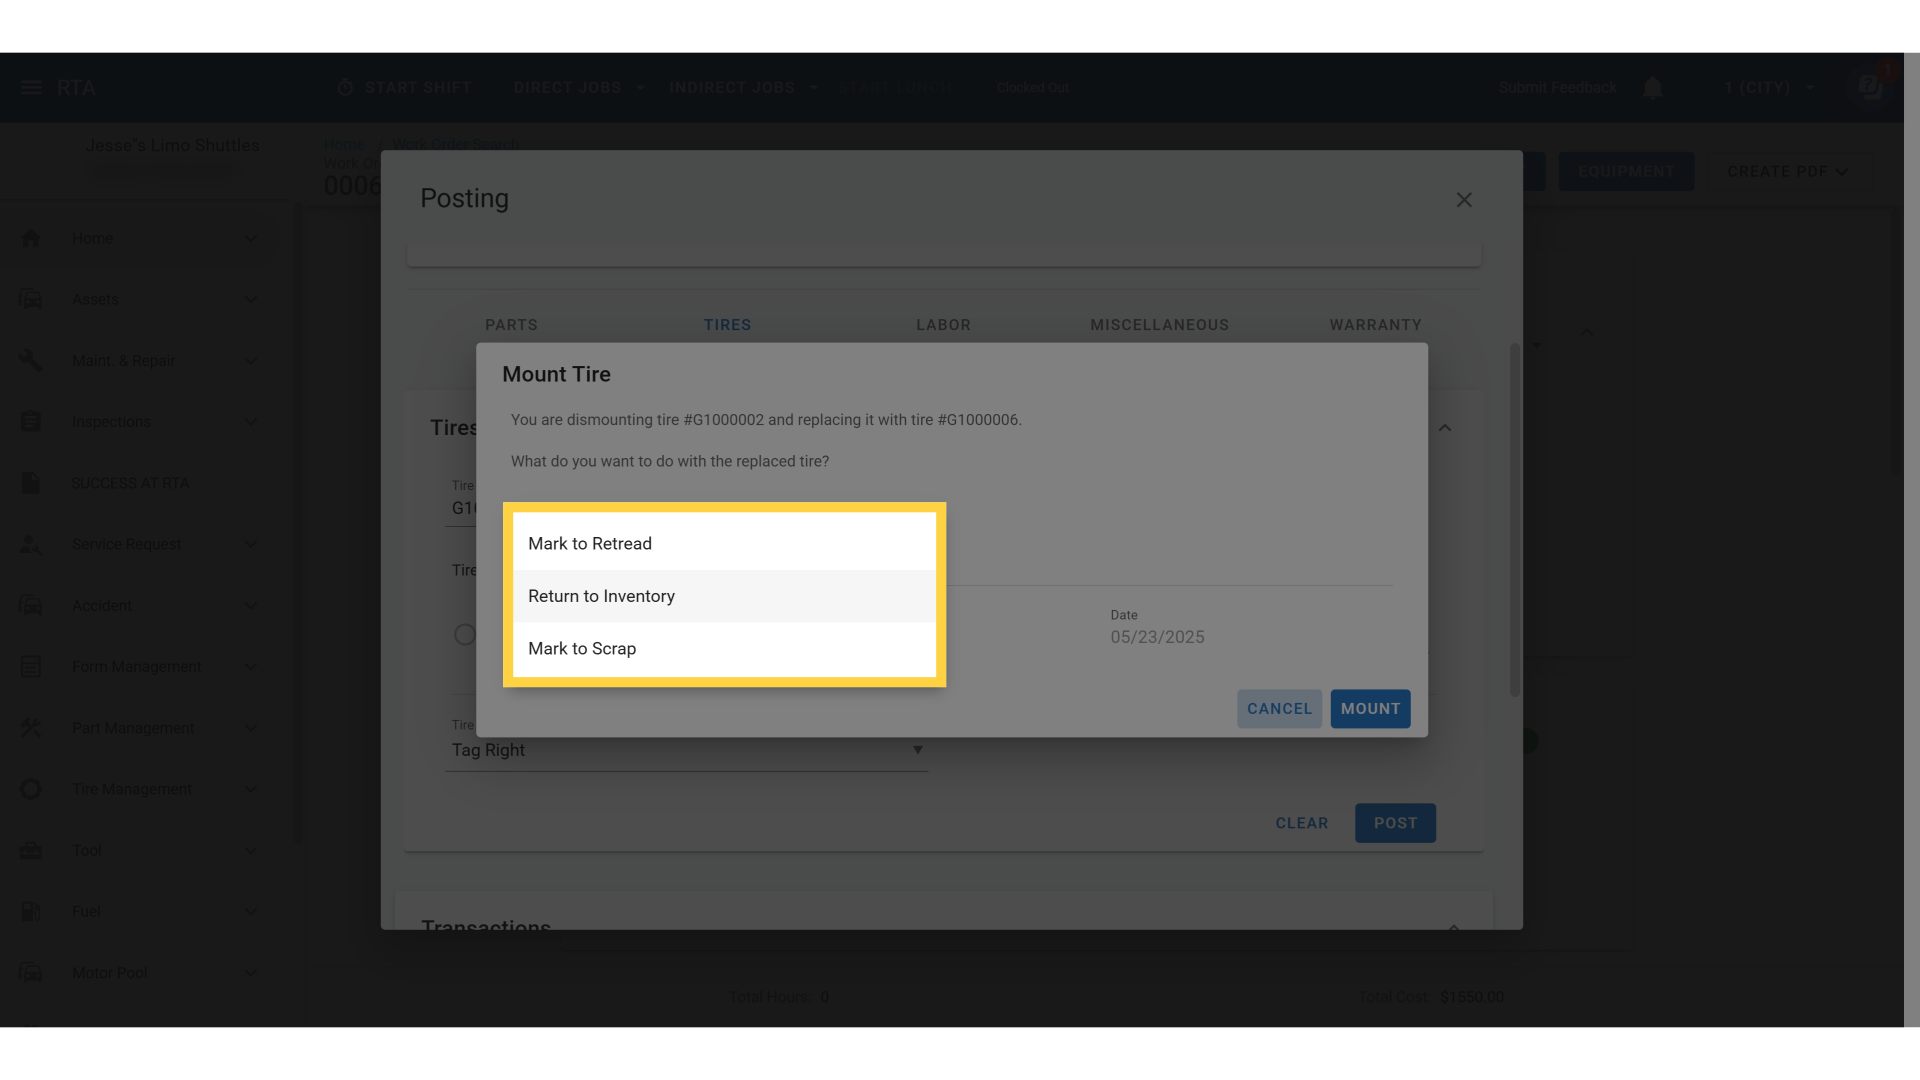
8. Click "Mount"
This will finalize the tire posting and actions