
Tool Check In Process
A tool that has been checked out for use will need to be checked back in to show as available for another user. The steps below will illustrated the check in process.
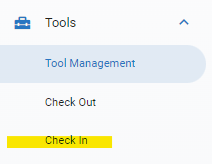
Click on the Check In path under the Tools area of the system main menu
The User field will default with the user currently signed in though clicking in this field will provide the full list of users to select from
Users can be granted permissions to check in a tool on their own or a shop may designate this authority to a show supervisor, lead tech, parts manager, etc
Select the tool to be checked in by using the tool field (users can scroll through the list or start typing the tool number or description word to find the right tool)
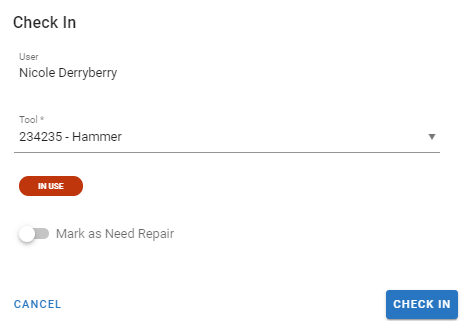
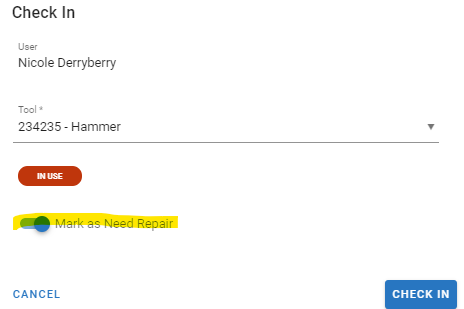
If the tool needs repaired, use the “Mark as Need Repair” toggle to ensure the status of the tool is placed as Repair to prevent it from being checked out again until after repairs are done
Click the check in button
The tool is now listed as “Available” if it was not marked as needs repair and if it was marked as needs repair, the tool is listed as “Repair” and not available for check out.