
Employee Maintenance
The employee record stores information such as address, phone number, wage, driver's license number and expiration, productivity statistics, and certifications. Employee records need to be added for all technicians that will be working on or managing assets. You can also add records for other types of employees but keep in mind the RTA Fleet Management Software is designed to track fleet maintenance and costs and has no payroll functions. The employee file is used primarily by the Work Order module and Paperless Shop to track labor hours spent on jobs. A technician timecard is also available in the Paperless Shop option.
Every technician or employee file used for work orders or Paperless Shop belongs to a Fleet360 user. Employee Maintenance is opened from a user’s profile (Admin > User, then the Facility tab), so you cannot create a standalone employee without a user. A technician who needs to be tracked on work orders or work in Paperless Shop requires a Fleet360 user and an available license; there is no employee-only path. If you cannot add the user or reach the Facility tab, verify your Users permissions and available licenses first. See Creating New Users Individually for adding the user.
To access the Employee Maintenance area to link existing employee files to facilities or create a new employee file, navigate to the user profile under Admin.
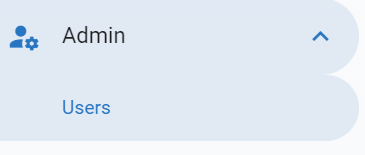
Locate and click on the user
Click on the Facility Tab

Refer to the various sections below regarding the set up and maintenance of the Employee File.
Opening an Existing Employee File
There is no separate Employees menu in Fleet360. An employee file is always reached through a user profile: go to Admin > Users, select the user, and open the Facility tab.
On the Facility tab, click the linked employee to load that employee’s detail panels. The panels open below the link and are where you review and edit the file:
- Linked Employee holds the employee’s ID, abbreviation, name, department, type, and class.
- Labor Rates holds the employee’s wage and up to five labor rates.
- Productivity holds the employee’s productivity settings and statistics.
- PO Approval Limit appears when purchase order approvals are enabled and sets the employee’s approval limit.
The Labor Rates, Productivity, and PO Approval Limit panels only appear after you select the linked employee. If you do not see them, select the employee link first.
A driver’s license, certifications, and custom fields for the same person are on the separate Certificates and Custom Fields tabs of the user profile (covered further down in this article).
To update a technician’s Paperless Shop PIN, use the Change Pin button on the user’s General panel (next to Change Password). It appears once the user has a linked employee.
Employee Number (Technician Number)
Each employee file has a numeric ID. This is the employee number (also called the technician or mechanic number) that identifies the employee at that facility and is carried on labor postings, Paperless Shop activity and Employee reports. It is separate from the user’s login, phone number and Paperless Shop PIN.
Where it is stored and shown
Employee file: Admin > Users > select the user > Facility tab. The Linked Employee list shows one row per facility with the ID column (employee number), abbreviation and name. The ID is entered when the employee is created (see Create a New Employee below) and cannot be edited afterwards; the abbreviation and name can.
Technician pick lists: wherever you choose a technician (Add Technician on a job, assigning technicians in bulk, posting labor), the list shows the employee number and abbreviation above the name, and you can type the number, abbreviation or name to find them.
Employee reports: Reports > RTA Standard Reports > Employee (for example Mechanic Efficiency and Mechanic Accountability) print the mechanic number next to the name.
Where only the name is shown
Once a technician is assigned, the Work Order screens show the technician’s name: the assigned-technician chip on each job, the Technician column in the Jobs list, the Mechanic column on the Info tab and the Tech column on posted labor. The employee number is not displayed on the Work Order itself. Labor transactions show the technician’s abbreviation as the item.
To find a technician’s number from a Work Order, open the technician’s user profile (Admin > Users) and read the ID on the Facility tab, or search the technician pick list by name - the number appears above the name. If you need the number displayed beside the technician on Work Order screens, submit a feature request with the Submit Feedback button at the top of Fleet360.
Refer to Assign technicians to a job.
Facility Linked Employee
Create a New Employee
To link an employee to a facility, they must first exist as an employee. Follow the below steps to create the employee.
Click the Add New Link
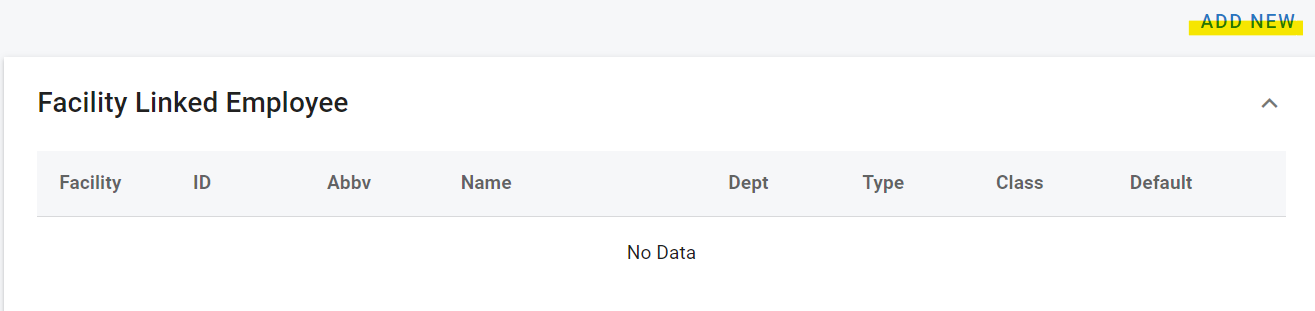
Click the Facility Field in the Add Facility Linked Employee Panel
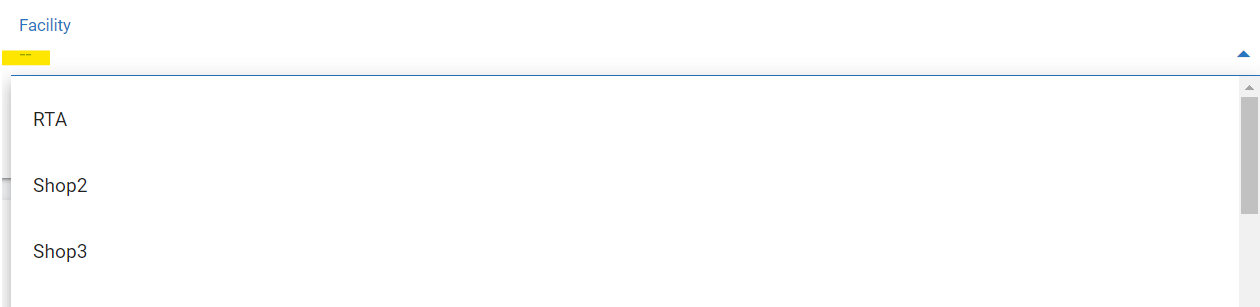
Choose the facility the employee should be linked to
Click Create Employee
Enter the following information:
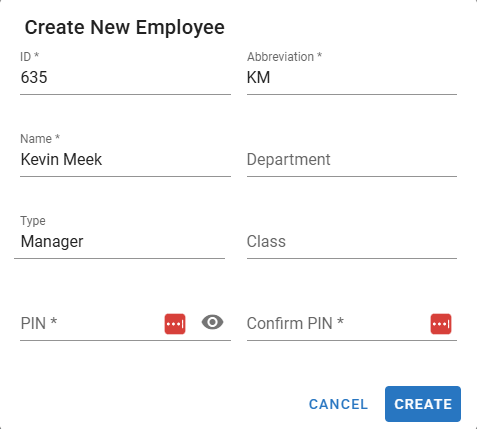
ID - This should be numeric and used like an employee ID number
Abbreviation - Initials or some other abbreviated identifier to use for the employee
Employee Name - First and Last
Department - The employee’s assigned department (limited to 10 characters)
Type - Choose between mechanic, driver, inactive, or office
Class - If using employee classifications, input the class the employee belongs to
Employee Classes can be set up via contact our support@rtafleet.com for more information on how to allow this feature.
Pin Number - The employee Pin Number is used only if technicians are required to enter a password to log into Paperless Shop. Passwords are required when the Password Prompt is set to YES in the "Paperless Shop" or for use when using PO Approvals.
Click Create
Link An Existing Employee to a Facility
Click the Add New Link
Click the Facility Field in the Add Facility Linked Employee Panel
Choose the facility the employee should be linked to
Click the Employee drop down to select the employee to link
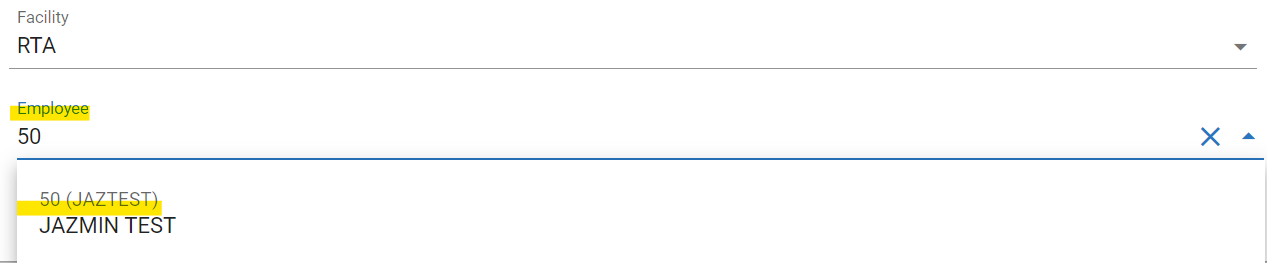
Click Save
If the employee does not yet exist, you will click Create Employee. See previous section for those instructions.
Labor Rates
Add up to 5 Labor Rates associated with the user/employee. The shop may have a flat standard rate, an overtime rate, a holiday rate, etc.
The title/type of rate can be edited by clicking Edit Description, clicking in the corresponding field, typing in the new header, clicking the check mark, and then clicking done when finished with all fields.
The rate amount can be edited by clicking in the field below the labor header, typing in the amount, and then clicking the check mark to save the changes.
How this rate reaches a work order. The rate entered here is used when posting labor only if Admin ➝ System Switches ➝ Work Orders ➝ Flat Labor/Actual Hours has Select Rate set to Employee. With System selected, one Flat Labor Rate applies to every employee instead. A new rate applies to new postings only and does not change labor that has already been posted. See Labor rate is not showing on a work order. A customer flat rate for the job, or a customer with Override Labor Rate turned on, is used ahead of this wage. See Labor rates and billed hours.
Productivity
Productivity information isn't required when adding new employees nor is it required if you aren't tracking employee productivity. However, if you wish to enter productivity history, you may do so.
Select the appropriate period radial button and enter in the historical values to get started. Productivity statistics are automatically updated as jobs are assigned to technicians, labor is posted to work orders, and end of period for mechanics is processed.
PO Approval
If using the PO Approval function in RTA, this panel is where the approval maximum amount can be entered for the specific employee/user.
Certificates Tab
The Certificate section stores the employee's driver's license information and training certifications, along with additional training certifications.
Use the Driver’s License Information panel to enter specific license information for the employee/user
Use the Certifications and Licenses panel to add additional certifications and training information
Click the add button
Enter the certification/training name, date, and expiration date if applicable
Click the +to add to the file (these can be removed by clicking the trash icon)
Custom Fields Tab
Use the custom fields tab to add any additional user-defined items to the file. Follow the process below.
Click Edit Description
Type in the header or field name for the data to be captured (For example: Mother’s Maiden Name)
Click the + button
Now you can edit the data value by click in the field below the description created
Type in the data and click the check mark to save the updates
Returning employees and “already in use” errors
When a returning employee needs a Fleet360 login again, set up the user account first, then give them their employee file on the user’s Facility tab. The user account is the login and permission profile; the employee file is the per-facility shop record (employee number, abbreviation, labor rates) that work orders and Paperless Shop use — they are two separate records joined on the Facility tab.
“Already used by employee…” is a per-facility rule. Employee number, abbreviation, and name must each be unique within a facility. If creation reports a conflict, the message names the employee holding the value — do not force a new record with a different number to work around it.
Link the existing file instead of recreating it. If the returning employee’s old file still exists at that facility, use Link An Existing Employee to a Facility (above) on the user’s Facility tab so their history stays on the same employee record.
A deleted record frees its number silently. The uniqueness check only applies to live employee files — once the original record is deleted (or its number changed), the same number can be created again with no warning. Records that reference the number can then show the new employee’s name on historical entries.
Can’t see or link the record? If the conflict names an employee you cannot find or link from the Facility tab — or a number was deleted and recreated and history now shows the wrong person — contact Support to review the employee records; there is no self-service merge or delete-and-recreate fix.