Facility Printers Tab
Facility Printers Tab:
In order to print barcodes you must Install and configure the Citizen Label Printer as a Network Printer. See the section Installing Citizen Label Printer for step-by-step instructions.
Configuring the Barcode Print Server for your Facility:
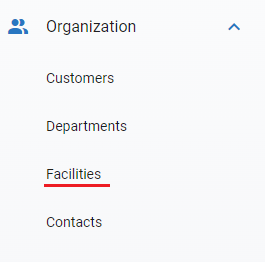
To Link a Network Barcode to your facility you would need to access from the Main Organization Menu under the Facilities sub-menu
Then from the Facility Search Screen you would select a facility you wish to link to a Barcode Printer by clicking on the facility record. For more info see Edit Facilities
Select the “Printers” tab within the “Facilities” page
Select “Add New”
Fill in the fields “Printer Name” and “Printer IP” to match how they are found on the network (example: Citizen_SL700II and 123.123.123.123).
Fill in the “Port” field of any printers set up in the facility with the same port used in the installation of the RTA Print server.
Click the Add button to add the printer.
Just Remember that printers are set up specific to a facility. To use a facility's printer, switch your "working facility" (at the top right) to your printer's facility.
Checking Printing App Connection:
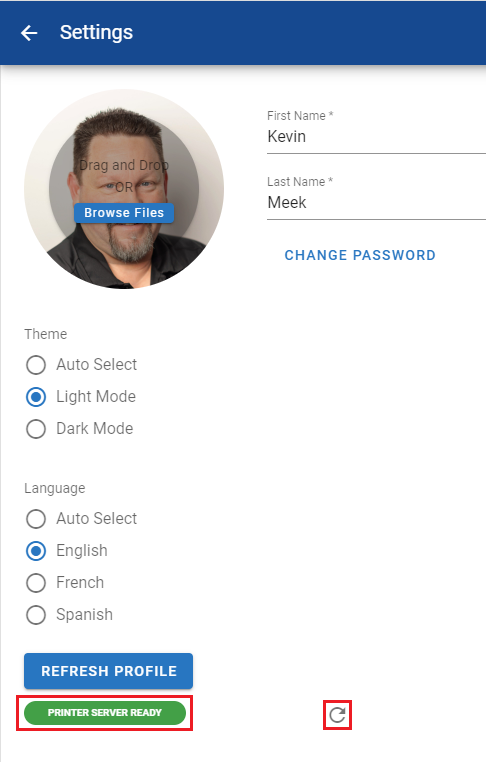
With the printing app running on your computer, navigate to your user settings by clicking your profile image in the menu at the top left
For more information see the Settings section in Getting Started
Look for the colored tag that will read either "Print Server Ready" or "Print Server Not Ready". If it reads "Print Server Not Ready," click the refresh icon
If it still isn't ready, be sure that your printing app was started with administrator privileges and that all printers in that facility use the same port configured for the printing app upon installation. Then refresh again.
Printing Barcodes:
Once you have confirmation that the Printer Server is Ready, you are now ready to print. See Printing Barcodes from a Citizen Label Printer


