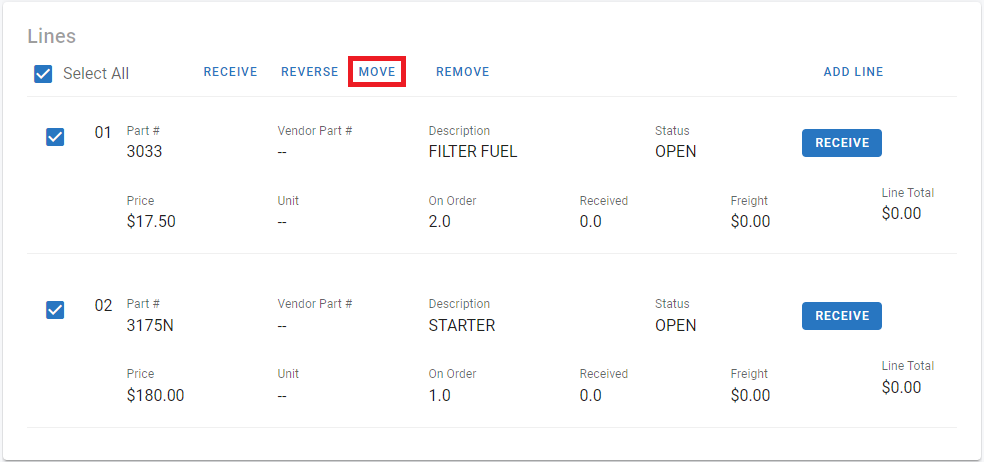
Purchase Order Lines
The Work Order and Work Order Line fields on a line are what tie a purchase order to a work order, so the part posts to the job on receipt instead of going into inventory. They can also be added to a line later on its WO Info tab. See Linking a Work Order and a Purchase Order.
If PO Approvals are in use, an approved PO that has changes made will have to be approved again before able to be processed and post received items.
Adding a Line to a PO
Lines can be added to a PO using the following process:
Click the Add Line link in the Line Info Tab

Select an available part number from the drop down or enter in a part not on file and NONFILE will display to the right of the dropdown - A part from the stock needed list can also be added to an existing PO by clicking the search icon.
A part on file will have all relevant fields from the part file pull into the details for the PO
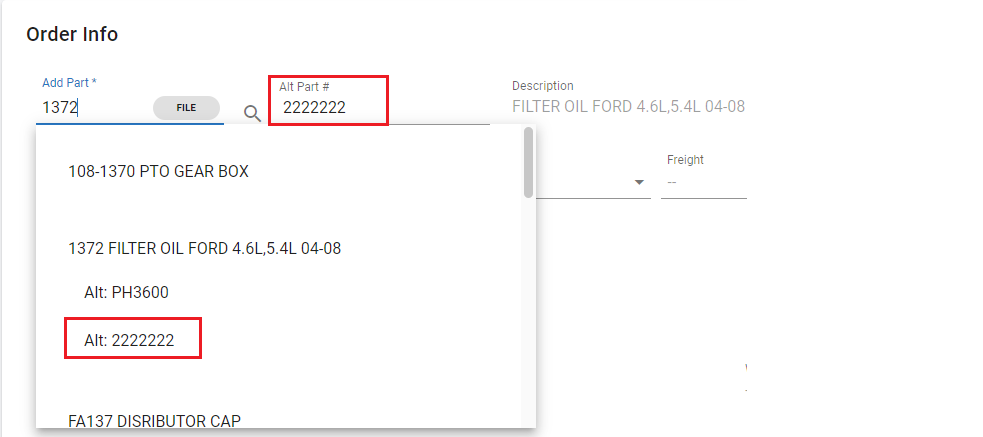
If alternate part #s have already been set up/associate with the main part file number, typing those in will reference and allow the user to pull the part number based on that alternate number
Add an alternate part # if needed and this is generally a vendor cross reference number if the vendor’s part number differs from the main file part number assigned in RTA


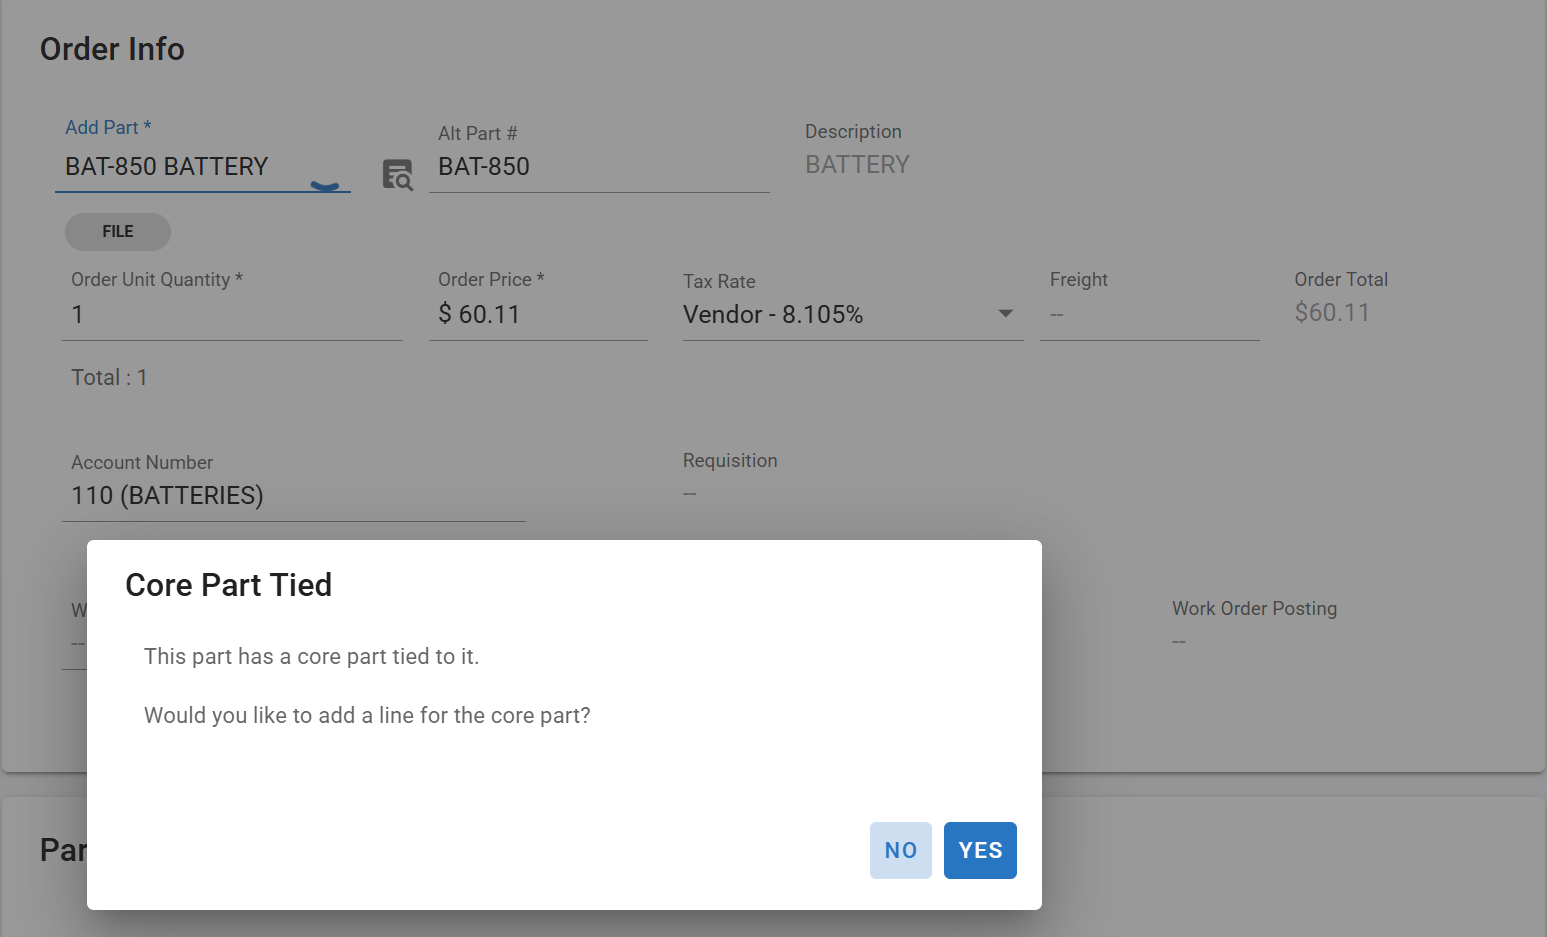
If adding a part that has a core part tied to it, there will be a prompt asking “would you like to add a line for the core part?” Select “YES” to automatically add a line for the core part. Select “NO” if no core part line is needed.
Once the part number is pulled into the line, a user can associate an Alt Part# with the main part file by clicking in the Alt Part # field, entering the alternate part number, and clicking the check mark
This number will now cross-reference the main part file number and can be used in the future to locate the main part file number when adding a line to a PO
Description: If the part in on-file then the description will pull automatically from the part record. If it is NON-FILE then you can put in a Description of the part on the PO line
Add the Order Quantity
Add or Edit the Order Price depending on what is displayed. For a part on file, the price that appears comes from the vendor cross-reference selected in Alt Part # (its Unit Price, or its Lot Price for a lot-priced vendor part); if no vendor cross-reference is selected, the part’s average cost is used. See How the Order Price is filled in below.
Add a Tax Rate if necessary (one may already be present if a tax rate has been set up in the vendor file or facility file)
Freight can be manually added here, though RTA recommends using the Bulk Add freight whenever possible. (Refer to Posting Freight to PO Lines for variations on posting freight)
If the switch to use account numbers is turned on and the part being added to the line has an account number assigned as part of it’s file, that account number will fill in automatically
If the part file does not have an account number listed, the system will use the default account number set up in the system switches
Add a Work Order Number if the part being ordered will be posted directly to an active work order upon receipt
Also add the Work Order Number and Line Number of the assigned work order where the part will post upon receipt
Add any pertinent Line Notes needed for the order

Click the Add button in the bottom footer section

Ordering a Service, Labor or Sublet on a PO (Non-File Line)
A part number is always required on a purchase order line, but it does not have to be a part that exists in your parts file. To put a service, labor charge, sublet repair or any other item you do not stock on a PO (a “PO for a service” with no part number of its own), enter the line as a non-file line:
Click Add Line on the Line Info tab.
In the Part Number field, type a number or short code for the item instead of selecting a part from the list - for example SERVICE, LABOR, SUBLET or the vendor’s quote number. Fleet360 marks the line NONFILE.
If a Part Number … is not on file message appears, click Continue to keep it as a non-file line (Add Part would create a part file instead - see below). Continue is only offered to users with the Order Non-file Parts permission.
Type the Description. On a non-file line it is free text, so describe the work (for example “Transmission rebuild”).
Enter the Order Quantity (usually 1) and the Order Price for the service, then tax, freight, account number and the Work Order / Work Order Line as for any other line, and click Add.
A non-file line is received, invoiced and closed like any other PO line. It does not create a part record in your parts file.
Do not reuse an existing part number on a non-file line. Use non-file only for items that are truly not tracked in the parts file. If a non-file line’s number matches a part that is on file, receiving the line resolves it against the parts file and posts to that part’s on-hand — and reversing the receipt backs the same quantity back out. That can look like the tracked part’s quantities moved on their own.
If a number was used this way by accident, review the part’s on-hand and bin quantities and correct them with a bin quantity adjustment — see Part Adjustments.
There is no system switch that makes the part number optional. The Purchase Order switches control numbering, approvals, account codes and receiving; none of them removes the part number from a line - the non-file line above is how a service goes on a PO. The Post Part to WO switch is unrelated: it controls whether a received line can post directly to a Work Order.
Refer to Purchase Order System Switches.
Other Ways to Order a Service
A service you order regularly - create it as a part file once (click Add Part on the not-on-file message, or use Parts > Add a Part File) so it can be selected from the list with its description and price each time. Refer to Adding Part Files On The Fly.
An outside repair on a Work Order - use an Outside Work Order line with the Outside WO/Create PO switch, which auto-creates the PO with Outside Parts, Outside Labor and Outside Tires lines for the vendor. Refer to Work Order System Switches and Creating a Purchase Order.
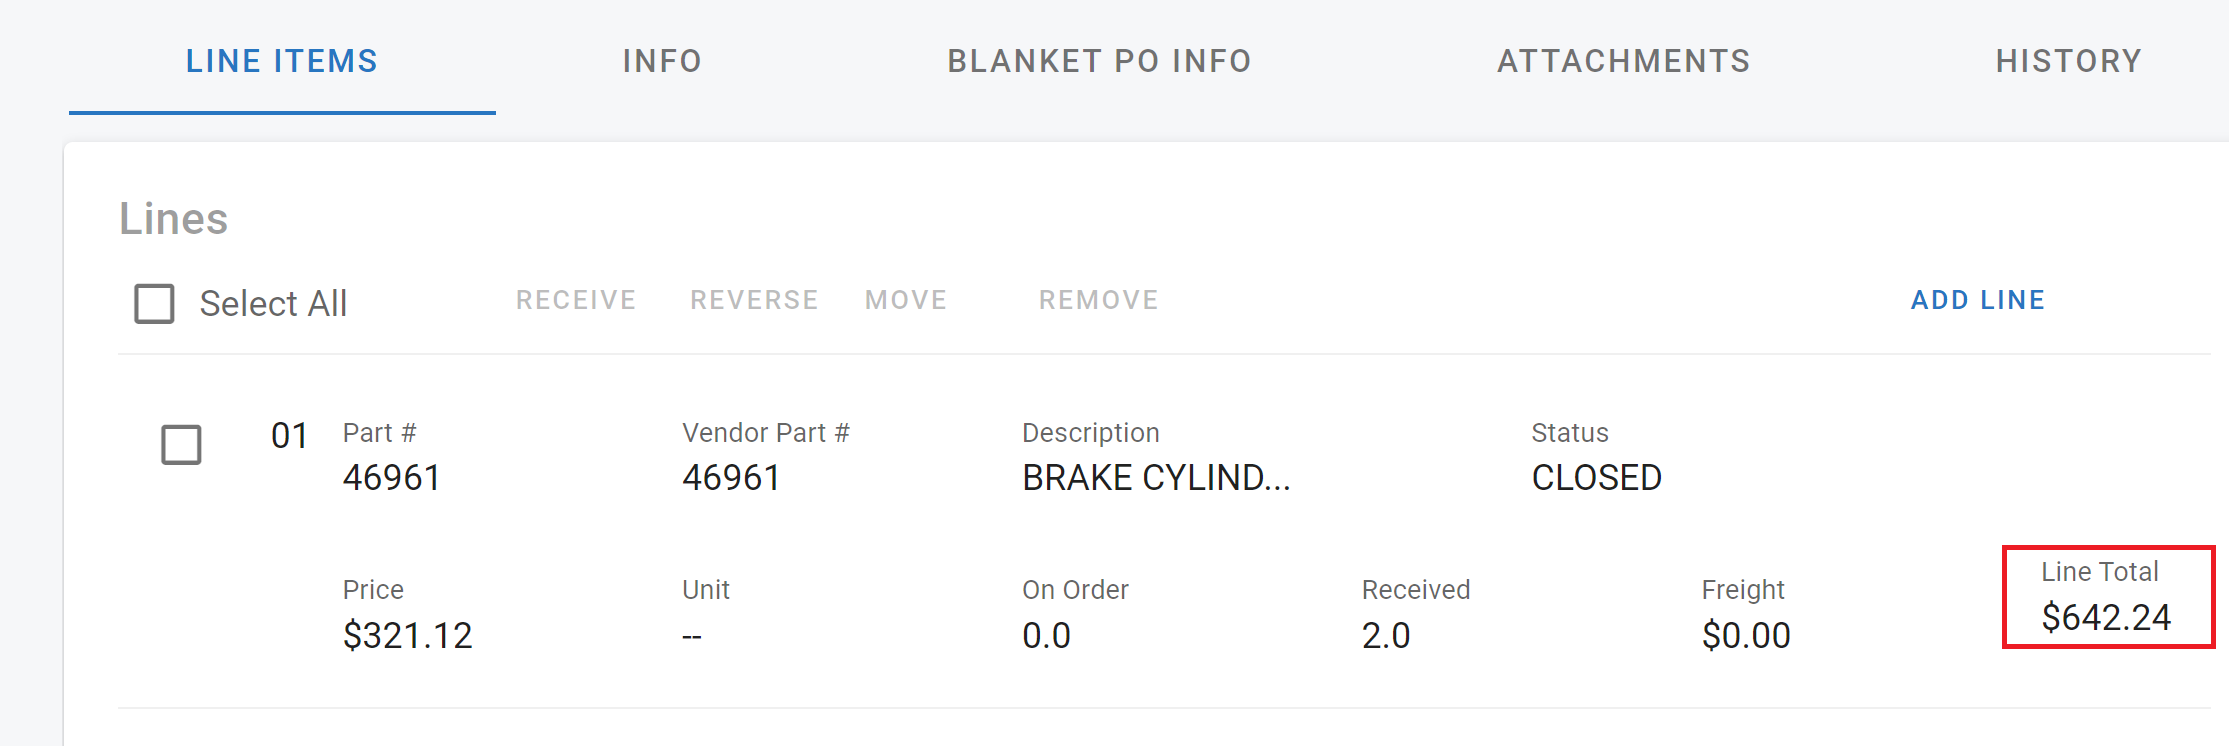
Line Total
The line total will remain 0 until the line item has been received.
Once the line has been reviewed, you may click Received and you will have the option to receive to inventory or add to Work Order.
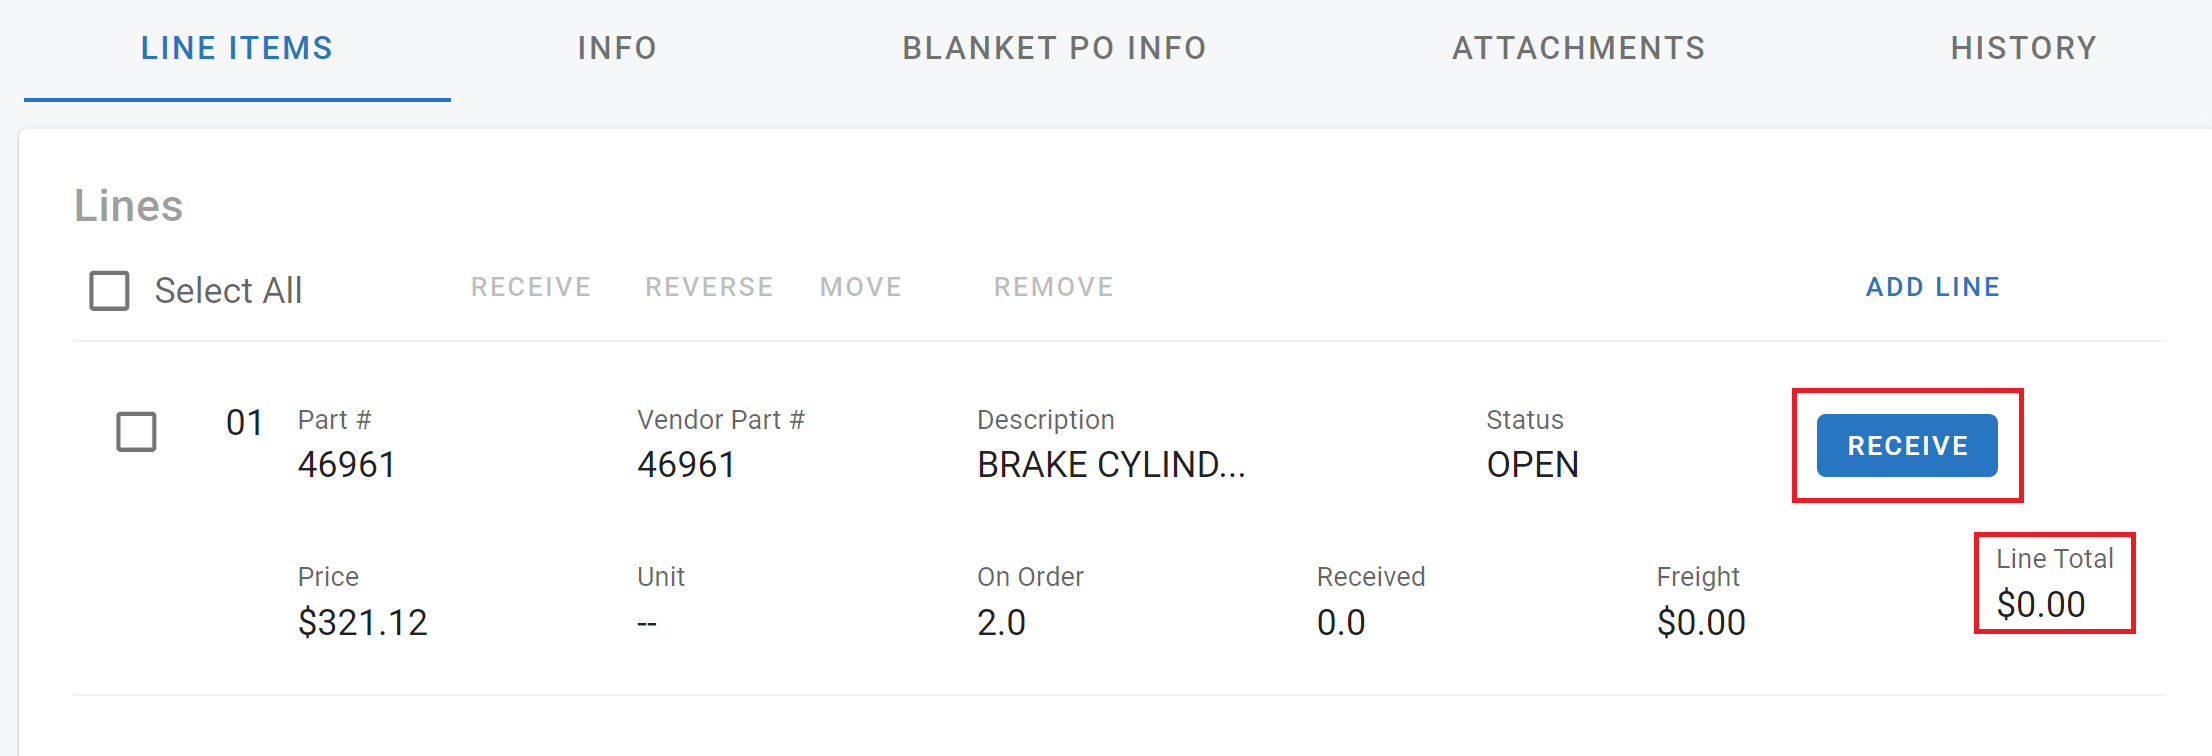
Once the line item has been received, the Line Total will display for that particular line.
Editing an Existing PO Line
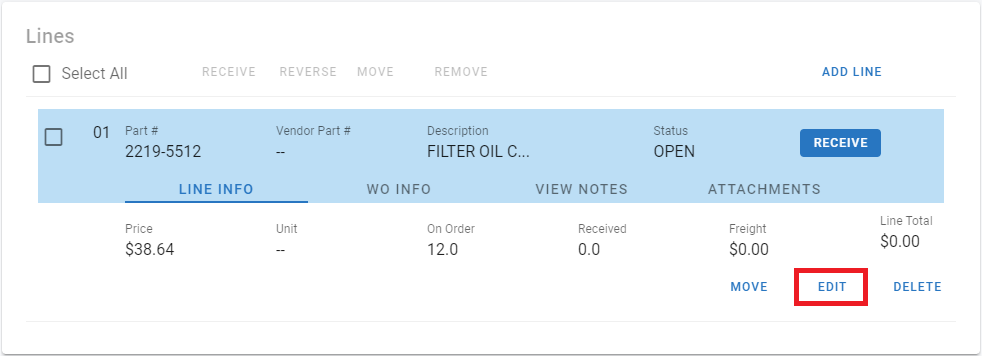
To edit a line, click on the line
Click the edit link in the Line Info Tab
Edit necessary fields that are editable
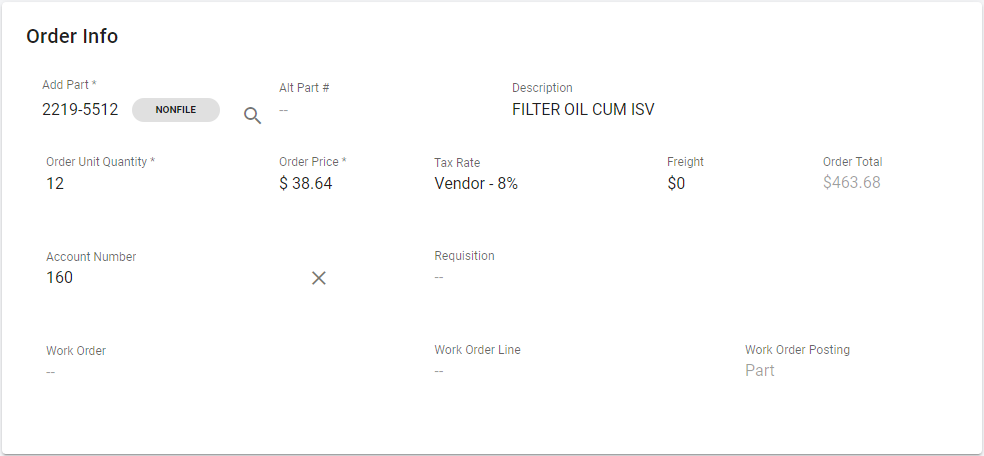
🔓 Denotes editable fields.
🔓 Part Number
🔓 Alt Part #
🔓 Description (If it is a NONFILE Part)
🔓 Order Unit Quantity
🔓 Order Price
🔓 Tax Rate
🔓 Freight
🔓 Account Number
🔓 WO Number/Line
How the Order Price is filled in
On a line for a part on file, the Alt Part # field is the vendor cross-reference: the list shows the vendor part numbers set up for this part under the PO’s vendor on the Parts File Vendor Tab. The selected cross-reference controls the default Order Price:
When a vendor cross-reference is selected, the Order Price is set to that vendor record’s Unit Price, or its Lot Price when the vendor part is lot priced (the order quantity is then in lots).
When no vendor cross-reference is selected, the Order Price is set to the part’s average cost.
On a NONFILE line, Alt Part # is free text and does not change the price.
Changing the Alt Part # replaces the Order Price. Each time you select a different vendor cross-reference, Fleet360 pulls the price from that cross-reference again and overwrites whatever is in Order Price, including a price you typed by hand. When editing an existing line, the new cross-reference and the new price are saved immediately. Select the Alt Part # first, then enter or correct the Order Price, and recheck the price before saving or receiving the line.
If the price that appears is wrong, the vendor record is the place to fix it: open the part, go to the Vendors tab, expand the vendor and correct its Unit Price or Lot Price. Lines already on purchase orders keep the price they were saved with until you edit them.
Changing the vendor price after the line is on the PO
The Order Price is copied onto the PO line when the part is added, and the line keeps that copy. Changing the Unit Price or Lot Price on the part’s Vendors tab afterwards does not change lines that are already on a purchase order, even while the line is still open — the new price is used only for lines added from then on. This is by design, so a PO continues to read the way it did when it was created and sent to the vendor.
To put the new price on an existing open line, do one of the following:
Edit the line and enter the new Order Price.
Edit the line and re-select the vendor part number in Alt Part #; selecting a cross-reference pulls that vendor record’s current price onto the line.
Delete the line and add the part again.
Deleting an Existing PO Line
Deleting a PO line will remove the lines from the PO, but still show a record of them having existed at one point. After deletion, the only action available will be to undo deletion.
To delete a line, click on the line in the PO and click Delete.
A bulk action can also be used by clicking the Bulk Actions link and selecting Bulk Remove. Then just select the lines to be removed.

Moving Existing PO Lines
This action will move lines to a new PO, delete the current OPEN lines from the current PO, or if there is partial received quantity, it will transfer the remaining on order items to a new PO. If it is a blanket PO, there are extra options available for what to do with the blanket.
Moving Lines - PO Numbers Created by RTA Automatically
Highlight the line to be moved
Click Move
Read the prompt and click Move or Enter in the PO number to be used and click Move again

Moving Lines - PO Numbers Created at Company Level
Highlight the line to be moved
Click Move
Read the prompt
Enter the new PO# the lines will be moved to
Click Move

Moving Lines for Blanket PO
Highlight the line to be moved
Click Move
Read the prompt (will display the next blanket PO extension to be used)
Click Use Blanket PO
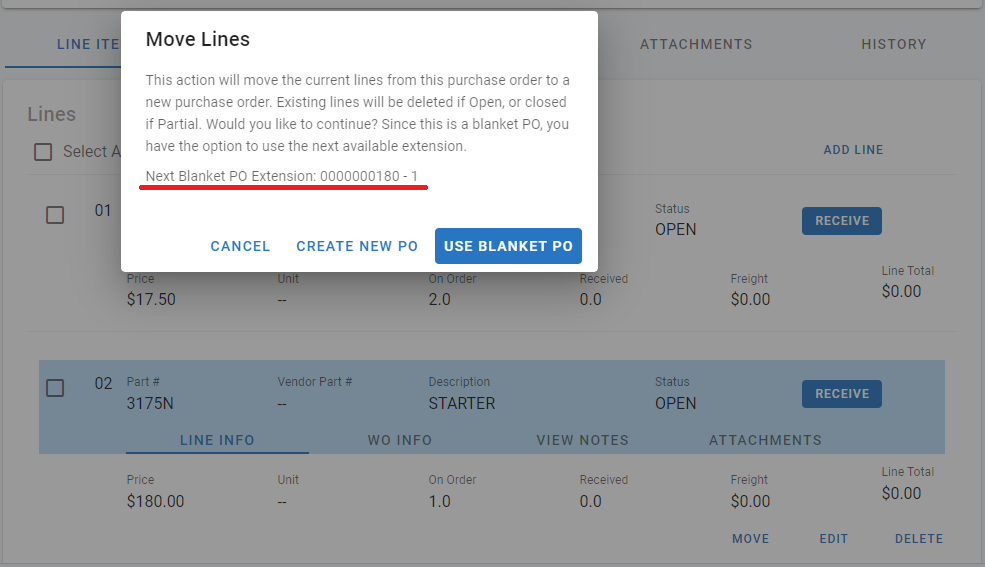
A bulk action can also be used by clicking the Bulk Actions link and selecting Bulk Move. Then just select the lines to be moved.