Preventative Maintenance Schedules
One of the many cost-saving features in the RTA Fleet Management Software is the ability to track and schedule asset preventive maintenance (PM) schedules. PMs allow the shop to inspect assets on a regular, timely basis to prevent maintenance problems.
If a PM schedule is strongly adhered to, you can expect, on average, a 15% to 40% reduction in unscheduled repairs and costly road calls.
PM Schedules in RTA software have three panels.
PM Info - Primary information for PM Schedule
Intervals - Up to 2 intervals set for PM Schedule to occur
History - Historical list of PMs performed on the asset over time
Page Contents include:
Adding PM Schedules
PM schedules and histories are set up in asset records. Up to 260 PMs can be tracked per asset, by various methods and/or a combination of methods-by meters, alternate meters, gallons, hours, days, etc.
To add a PM schedule, the asset must already exist in RTA. Refer to Adding Assets for instructions on adding assets in RTA
To set up PM schedules for an individual asset record, follow the steps listed below:
Starting at the main menu, navigate through Assets → locate and click on the desired asset → PM option from the asset menu
Click the add PM option
Users will set up the PM Information and the Intervals sections (Intervals cannot be set up prior to the PM information setup)
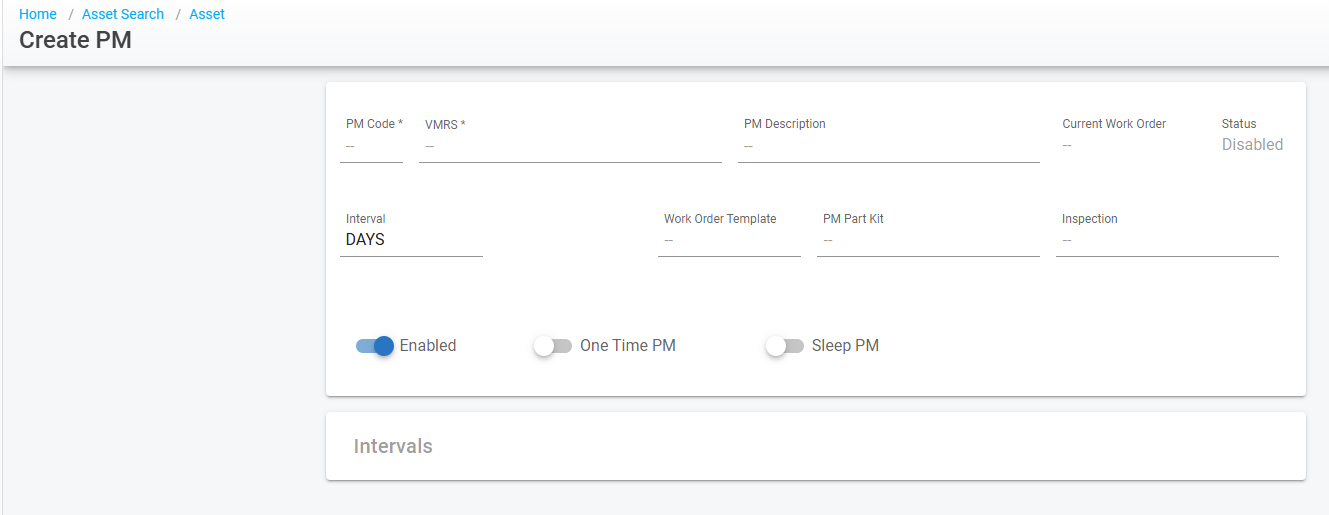
Create the PM Information
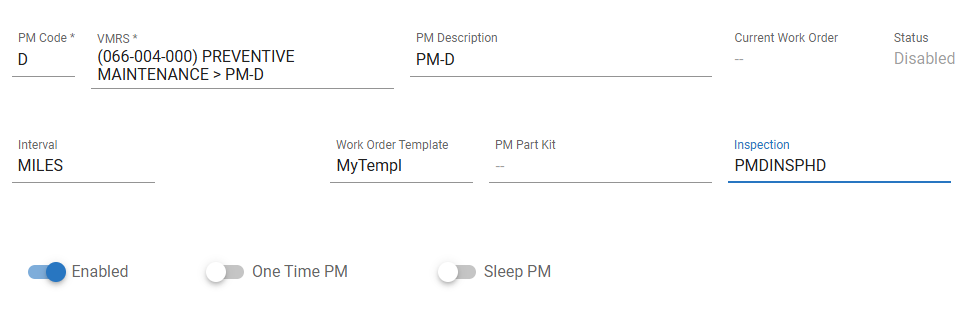
Enter the PM Code - Max of 2 characters - the first character must be a letter from A-Z and the second is optional though must be a number from 0-9
Try to come up with a coding scheme that categorizes the PMs in an orderly manner. For example, many fleets use PM A for a 3000 mile service and PM B for a 6000 mile service.
Enter the VMRS Code associated with the PM - Codes 066001000 through 066009000 are set up in the RTA system for use with PMs by default (Refer to VMRS Codes for assistance with reviewing, adding, editing, and removing VMRS Codes in your software)
Start typing into the VMRS field and the drop down will automatically navigate to codes that start to match what is being typed
When the VMRS code of a work order line matches exactly with the PM VMRS code, the system automatically updates the PM record when the job is complete
Refer to Work Order Table of Contents for more information on work orders
The PM Description will auto fill with the associated description for the VMRS code selected
Define the primary Interval for the PM to occur - will this PM need to occur routinely based on days, miles, or gallons
PMs can be set for a combination of intervals and this will be discussed further down
Identify the included PM - RTA is capable of nesting PMs - enter the PM code of the PM desired to nest with this PM
For example, PM A could be a lube, oil, and inspection and PM B could be a fuel filter and by nesting PM B to PM A, when PM B is completed, PM A will be included for completion as well
Nesting PMs makes data entry easier and faster because when a PM is completed, the RTA system updates that PM record as well as the nested PM record(s)
Select the work order template to be applied to the PM if applicable
Only templates that have already been created in RTA will appear in the drop down
Refer to Work Order Table of Contents for more information on work orders
Select the PM Part Kit to be applied to the PM if applicable
Only Part Kits that have already been created in RTA will appear in the drop down
Refer to Part Kits for instructions on creating part kits
Select a paperless inspection template if applicable to the PM
Only Inspection templates that have already been created in RTA will appear in the drop down
Refer to Creating Inspections for instructions on creating inspection templates
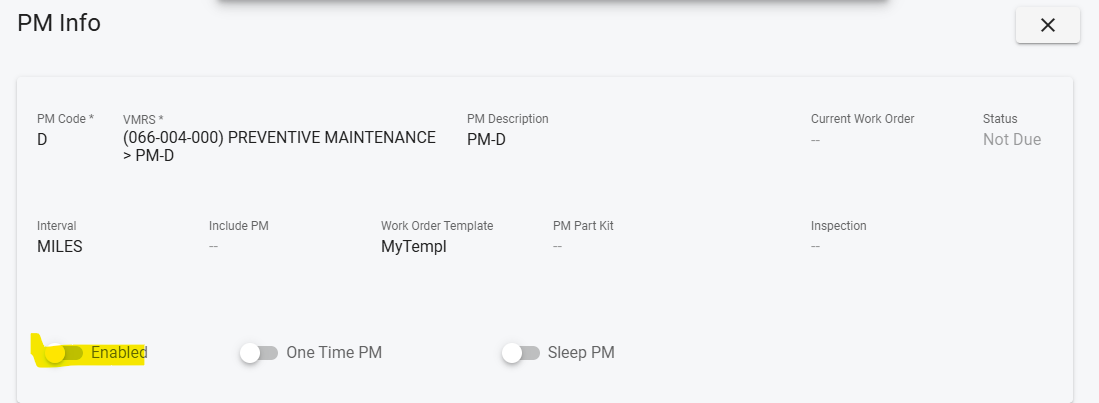
The enabled toggle should default to on and is used to disable or reenable pm schedules
If applicable, switch on the One Time PM switch if this PM will not be performed again
The Sleep PM switch is only used to pause or turn off the PM Schedule from appearing as due soon or past due
Click Save
Proceed to the next phase which is setting up intervals
Intervals Panel
When setting up new PM schedules, after saving the newly created PM information, the Intervals panel will open up to establish the parameters for the PM
On the Intervals tab, Click the “add new” button

Fill in the appropriate fields

Type - Primary interval type (ie. miles, days, gallons, etc)
Interval - Primary interval for interval type
If the primary interval type is miles, then the interval may read 3000 to ensure that the PM is performed every 3000 miles
Tolerance - Enter the size of the acceptable window for this interval, then set Tolerance Type beside it
Percent (%) is a share of the interval, so the window is the interval multiplied by the percent. On a 3,000 mile interval, 10% is a 300 mile window
Number (#) is the value itself, in the units of that interval. On a 3,000 mile interval, 500 with # is a 500 mile window, so finishing the PM at 3,500 miles is still on time
The two types are easy to mix up on large values. 500 with % on a 20,000 mile interval is not a 500 mile window, it is 100,000 miles. If you want a fixed buffer, the type has to be #
Tolerance widens the window in both directions. The PM reads Due Now as soon as the meter or date reaches the next due value minus the tolerance, and it is not counted as past due until the meter or date passes the next due value plus the tolerance
On a days interval that is locked to months, the tolerance is counted in months as well, so 1 with # is one month rather than one day
A PM that was just completed still reads Due Now
Check Tolerance Type on the interval first. A value that was meant as a fixed buffer but saved with % becomes a percentage of the interval, which can be several times the interval itself. The next due value minus that window is then already behind the current meter or date, so the PM keeps showing Due Now even though the next due value is correct.
Set Tolerance Type to #, or lower the percent, and save the interval. To correct several assets at once, use Assets > Actions > Set PM. Set PM handles one PM code per run, so repeat it for each PM code you need to fix. Refer to Set PM (Bulk PM Edits).
A PM that was just completed still reads Due Soon
That is a different setting. Due Soon comes from the Due Soon field on the interval, or from the company PM default for that interval type when the field is left at 0, and it is measured in the units of the interval. If the value is wide compared with the interval, the next service is inside the warning range as soon as the PM is completed, so it goes straight back to Due Soon. Lower the Due Soon value on the interval to move the warning closer to the next due value.
The two fields do not overlap. Tolerance is the only value that moves the Due Now and past due points, and Due Soon is the only value that moves the Due Soon warning.
A PM still shows due, or Last Done did not change, after the work order was closed. That is a linking or posting question rather than a tolerance question. Refer to PM still shows due after the work order was closed for the checks to run before editing the PM.
Due Soon - How far ahead of the next due value this interval starts showing Due Soon on the PM due list, in the units of the interval. Left at 0, the company PM default for that interval type is used instead. This field only controls the Due Soon warning. It does not change when the PM reads Due Now, which is driven by the tolerance above
Last Done - If known, enter the meter reading that matches the interval type that this vehicle last received this PM
the next due PM will be calculated and displayed from this date
Lock Icon can be selected to lock the PM if desired
Locking an interval means that a PM that is set for specific interval will always show due regardless of when it was last performed
For example, if the PM interval is set for every 3000 miles will come due at 6000, 9000, and 12000 miles, etc even if the previous PMs were completed at 3100, 6200, or 8800
Click Save
If a secondary interval is desired, click the on the “add new” button again and enter the secondary interval using the same fields as just completed for the first interval
For example, the PM may be desired every 3000 miles or every 90 days (whichever occurs first)
Viewing PM Schedules
After PMs are set, primary, interval, and historical information can be viewed and edited when needed.
Refer to Asset PM Tab for more information.
PM schedule information can be viewed and edited in the PM Info and Intervals panels.
The History panel will display the historical PM information for the asset.
Removing or Pausing PM Schedules
Disabling a PM Schedule
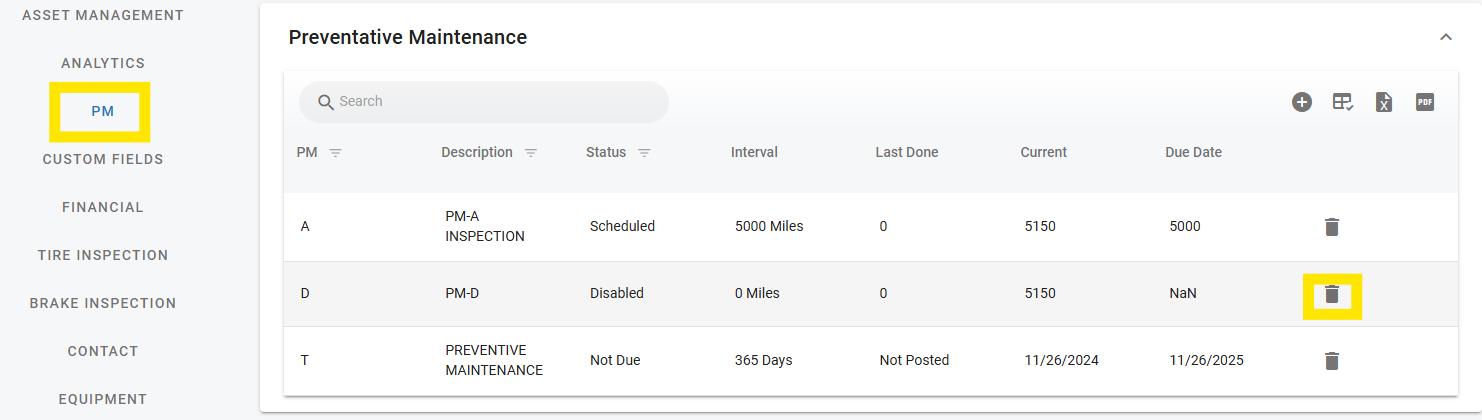
Deleting a PM is not a preferred tactic.
To preserve data associated with the PM, it is recommend that the PM be Disabled if no longer needed.
Open the Asset File by selecting the asset from the asset search screen after clicking on assets from the main menu
Click on the PM section of the asset menu
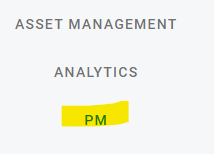
Locate and click on the PM Schedule needing to be disabled
From the PM Info panel, click the “Enabled” toggle to off
If completely deleting the pm schedule is absolutely necessary, click the trash can icon next to the pm schedule after clicking on the PM menu option within the asset file.
Pausing and Reactivating a PM Schedule
The RTA system has the ability to put PMs in "sleep" mode. A PM that is "asleep" is inactive and will be flagged as "Sleeping" on PM reports. This is a great feature for seasonal PMs or seasonal assets. PMs can be put to sleep and awakened.
Open the Asset File by selecting the asset from the asset search screen after clicking on assets from the main menu
Click on the PM section of the asset menu
Locate and click on the PM Schedule needing to be put to sleep or awakened
From the PM Info panel, use the “Sleep PM” toggle to activate or deactivate sleep mode
When putting a PM to sleep, click the toggle into the on position (blue) and enter the date range for the sleep mode
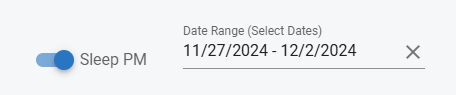
To awaken or cancel sleep mode, click the toggle into the off position (gray)
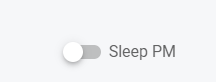
A PM that is set to sleep will re-awaken/reactivate on its own based on the date range selected and manually reactivating it is not necessary
PM Service Notes
PM Service Notes is a short, free-text block on an asset's preventive maintenance record. Use it for standing notes a technician should see when servicing the asset — a torque spec, a filter part number, an access quirk.
It is deliberately small: three lines of up to 40 characters each. It is not a job-notes or work-order-notes replacement.
Where to find it
Open the asset and go to its preventive maintenance area. PM Service Notes is an expandable panel below the preventive maintenance schedule grid.
Fields
Field | Notes |
|---|---|
Line 1 | Up to 40 characters |
Line 2 | Up to 40 characters |
Line 3 | Up to 40 characters |
Each line is its own single-line field. Text does not wrap from one line to the next — decide what goes on which line yourself.
Edit the notes
Expand PM Service Notes.
Type into Line 1, Line 2, or Line 3.
Click or tab out of the field.
A "PM service notes saved" confirmation appears. There is no Save button — each line saves when you leave it.
Clearing a line and leaving it saves the line as empty. Leaving a field you did not change does not trigger a save.
How saving works
Notes save per field, on exit, rather than as a form you submit. That keeps the block out of the way of the PM schedule work around it, but it does mean a note is only stored once you leave the field — navigating away mid-typing without blurring can lose the last edit.
Editing requires the asset update permission. Without it the three lines are visible but read-only, so notes can be read by anyone who can open the asset.
If it doesn't work
The lines are greyed out and I can't type. You have read-only access. Editing requires the asset update permission — ask an administrator to add it to your role.
Typing stops at 40 characters. That is the per-line cap. There is no error message; the field simply stops accepting input. Move to the next line.
The panel is empty when I know notes exist. The notes failed to load and the panel fell back to empty rather than showing an error. Reopen the asset. If they are still missing, report it — an empty panel and a failed load look identical.