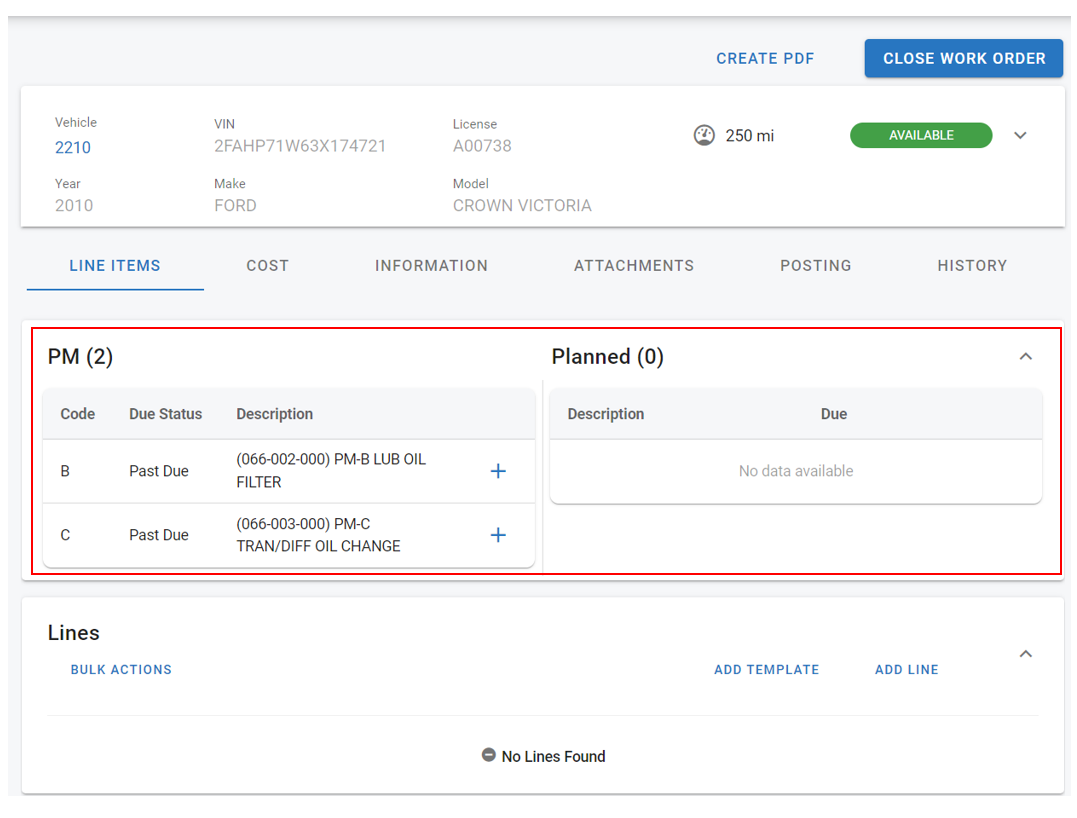
PM and Planned Boxes
Creating Work Orders is simple with the tools at hand. One of those tools is a combination of the PM and Planned boxes within the work order page.
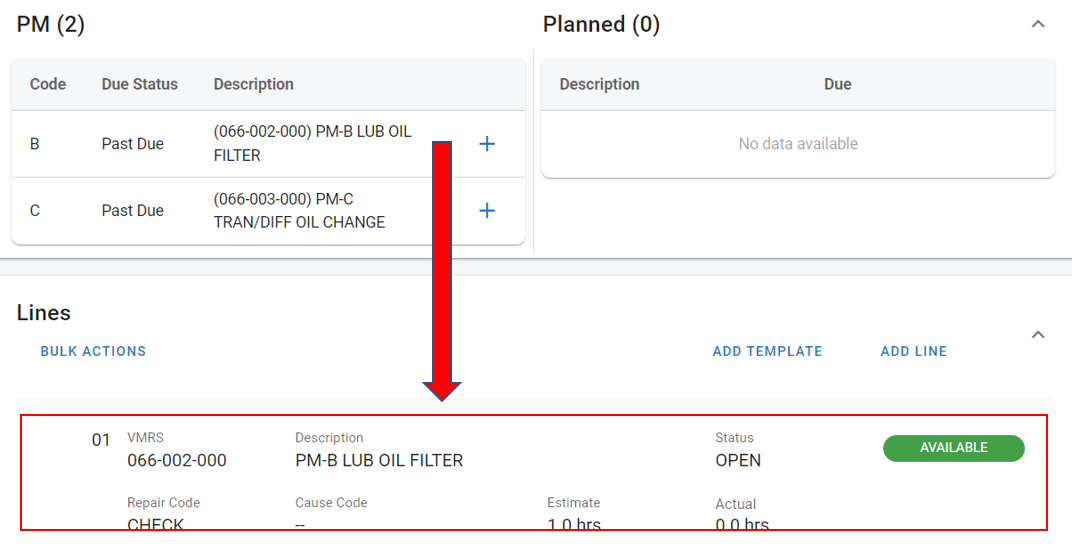
A Work Order will show if the asset in question has PMs or Planned work due. If the user chooses, they can simply double-click the PM or Planned line in order to add it to the Work Order as a new Line.
If there are no PMs or Planned Work to display, the PM and Planned box will not display on the work order.
PM Procedure
When a PM is due on the asset, that Code, Status and Description will show when creating an asset’s work order. If a job is being performed and a PM line needs to be added, from the Work Order page click on the + button and a new line will be added. Job details (assign technician, add notes, etc.) can then be added to the newly created line.

Planned Procedure
Following the ‘Planned Jobs’ rules, a work order line can be rescheduled either by a particular Date, PM or Odometer trigger, thus removing it from the work order it’s on and placing that line in a ‘Planned’ status. Similar to PM lines, these Planned-Work jobs can be applied to an open work order by clicking the + button on the Work Order screen and updating job details.
For example, the PM we added above needs to be rescheduled.
Click on the job line
Click on Reschedule

Select either by date, by meter, or by PM and enter the appropriate matching criteria

Click Save
The next time this vehicle is brought in to be worked on, the Planned job on the Work Order page can be added quickly by clicking + to add:

Planned work can also be accessed via the Planned Work Maintenance List where it can be reviewed and sent to a work order automatically. Refer to Planned Work Maintenance for full details on the Planned Work section and actions.