
Brake Inspection Setup
One of the many time-saving features in the RTA Fleet Management Software is the ability electronically track brake pad/shoe readings and be able to store the data historically in the asset files for later review. Traditionally this data would have just been entered in as a note within a work order which does document the information. However this method did not lend itself to the ease of looking up the previous data in a single area of the asset record.
We suggest you contact our Tech Support to initially turn on the Brake Inspections and General Configuration
Page Contents include:
Brake Settings Asset Override
To add Brake Inspection Readings, the asset must already exist in RTA. Refer to Adding Assets for instructions on adding assets in RTA.
You can individually override an asset from the Global Brake Inspection Settings. To override the brake measurements for an individual asset record, follow the steps listed below:
Search and open the asset file in RTA
Access the Brake Inspection Section from the asset file
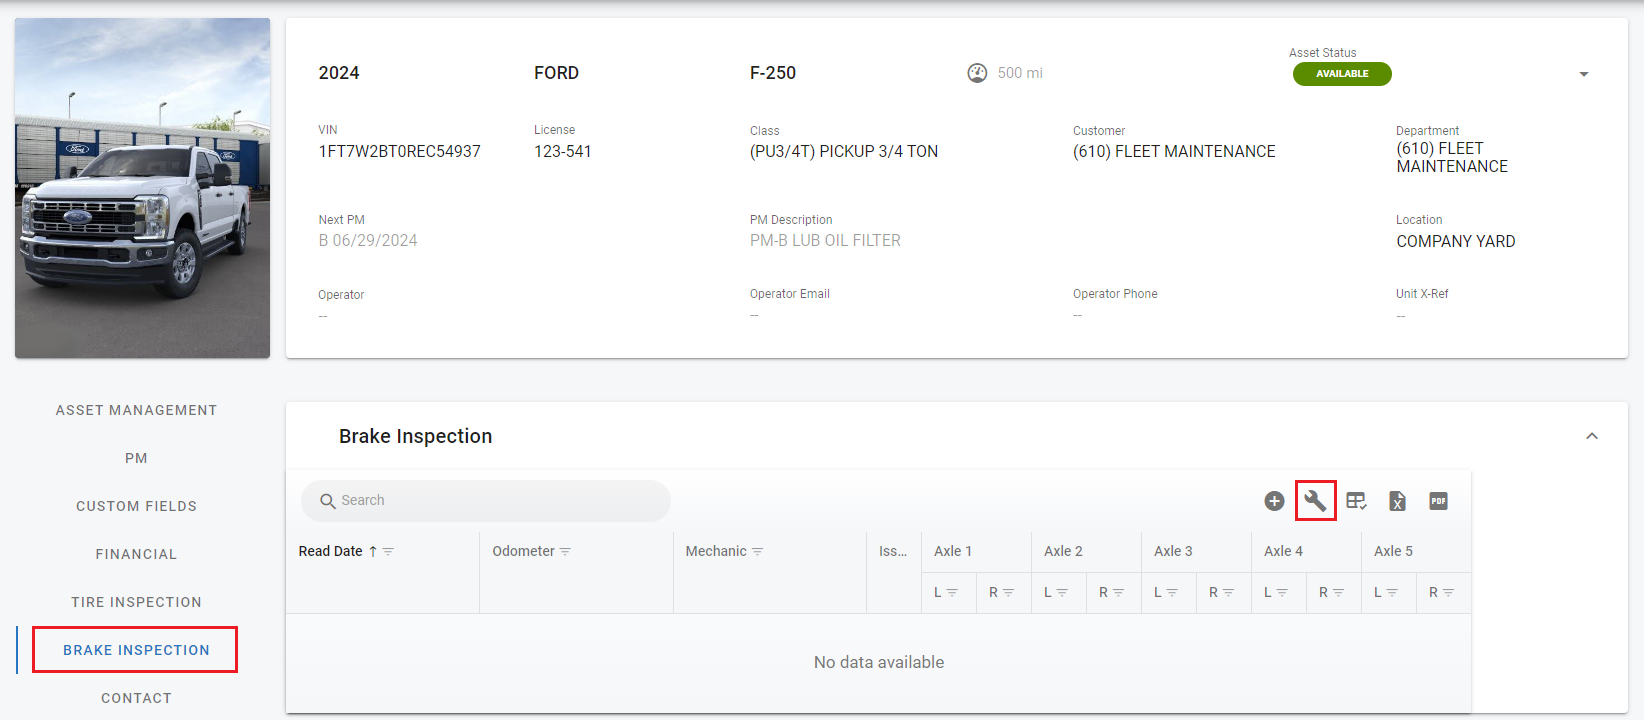
Click the Wrench option to add a new axle tire combination

🔓 Denotes fields that are editable within RTA software
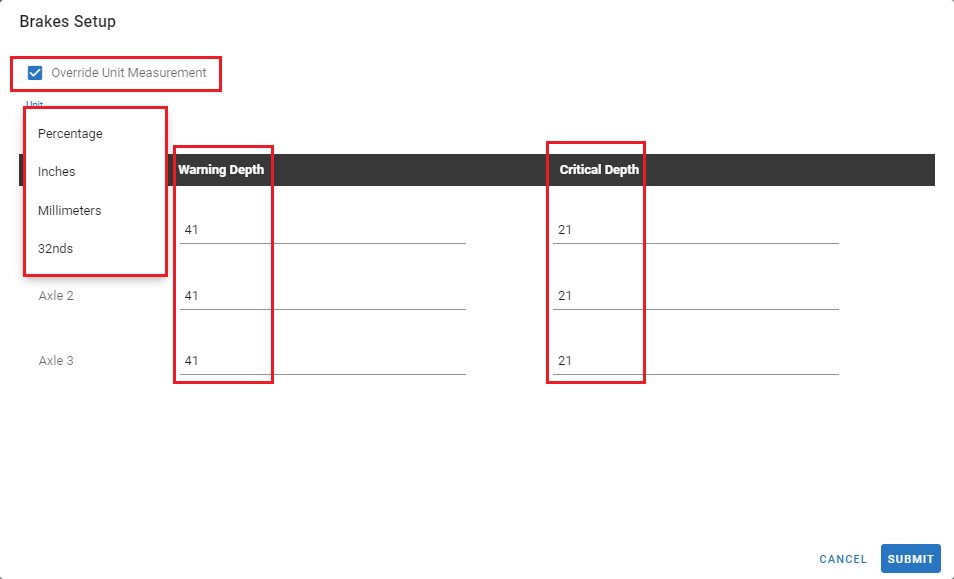
🔓 Override Unit Measurement – This check mark allows you to override the default Brake Inspection Settings
🔓 Unit – This pulldown list allows you to select the Brake Measurement Units you wish to use to register the brake pad/shoe thicknesses for this Asset
(See Below):Unit Options are:
Percentage
Inches
Millimeters
32nds
🔓 Warning Depth – This is the threshold for which a Yellow Warning will be flagged once it falls below the number that is set. For Example: This Asset is set to Percentage and the Warning Number is set to 41. If a reading is 41 or above, then No flagging will take place. However, if a reading of 40 is entered then the reading will flag as Yellow or “Warning”
🔓 Critical Depth – This is the threshold for which a Red Warning will be flagged once it falls below the number that is set. For Example: This Asset is set to Percentage and the Warning Number is set to 21. If a reading is 21 or above, then you would get a Yellow Warning since it is below the Warning Depth of 41 but not below the critical number of 21. However, if a reading of 20 is entered then the reading will flag as Red or “Critical Warning”
Note: It is important to make the “Critical” Warning threshold an appropriate number. It is recommended making the number high enough to give you adequate time to prepare for a Brake job within your Preventive Maintenance Cycles for your individual Assets.

Once any Override information is set then select the Submit Button to save the settings.
Repeat for as many Assets that you wish to set specific Brake settings for.
Brake Inspections
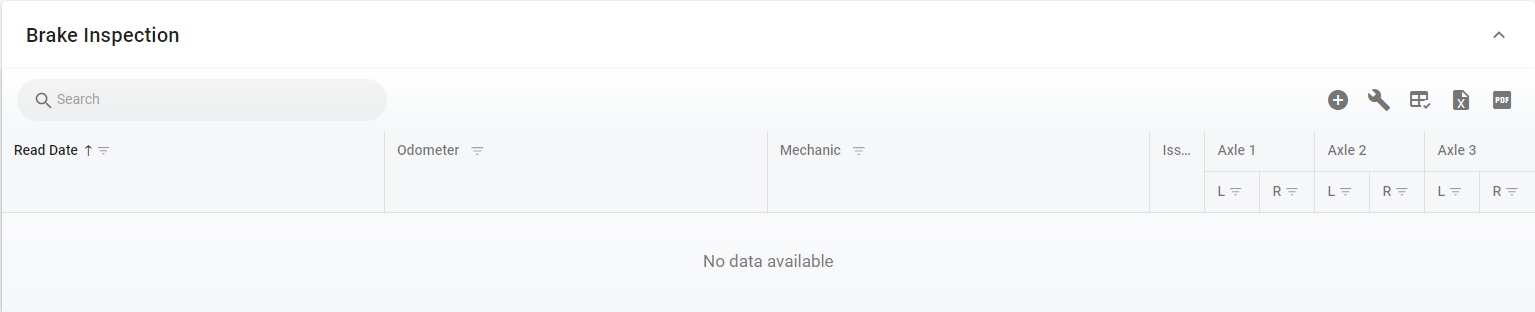
Once you done with any initial Brake Inspection settings and back out to the Brake Inspection Main Window it should now look like this and ready to start putting inspections in.
Once the Brake Inspection Setup is complete you can enter the Brake inspections electronically in the system. See Adding a Brake Inspection for more information on how to.