
Paperless Shop Procedure
If you are a Technician, this page will list your procedures for:
Login and Start Shift
Access your profile at RTA using your @rta-host.com username and password
Once logged in, your user will have the option to “Start Shift” in the top-left corner of the menu screen

The timeclock will begin to tick, and productivity will begin calculating. Next steps will be to clock into a Direct/Indirect job and begin working.
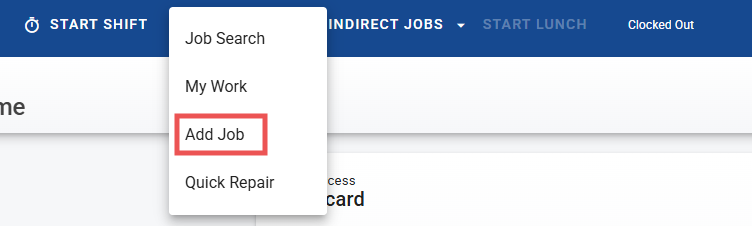
Create a New Work Order using Add Job from the Banner
Technicians can create a work order using only the necessary information quickly from their banner without having to navigate to the main menu.
Click on the drop down arrow next to “Direct Jobs” in the paperless shop banner

Click on “Add Job”
Filter or search for the asset on which the job will be performed
Select the proper asset by clicking the chooser next to appropriate asset
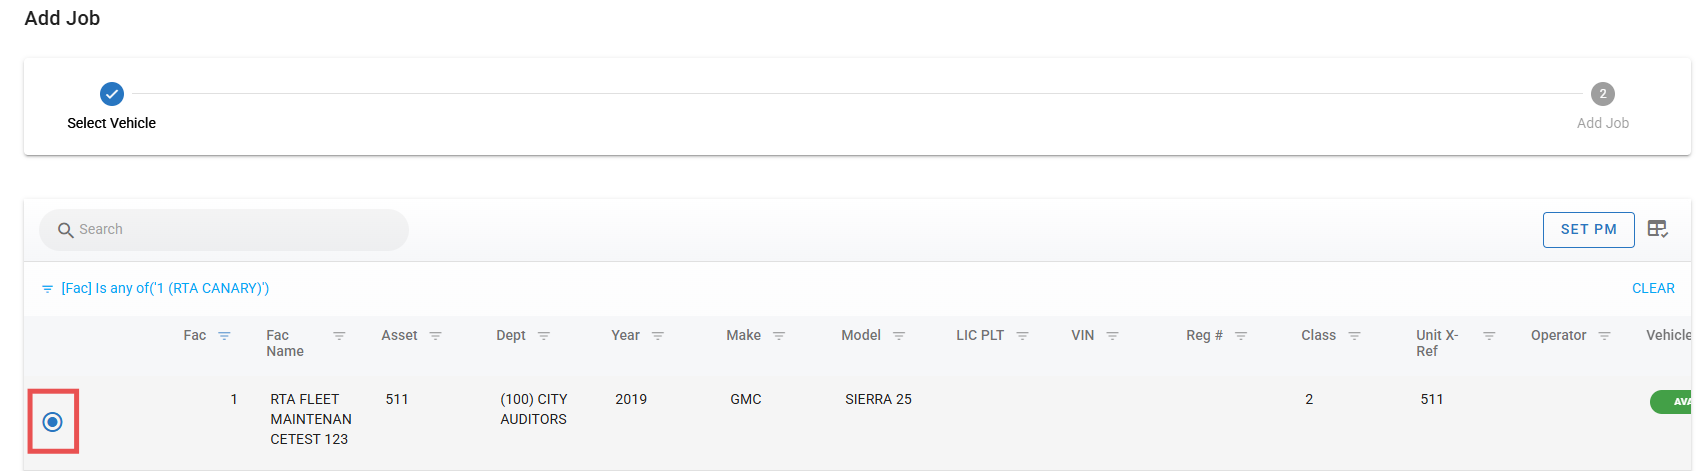
Click Next
Update the Meter if prompted
Select the proper Work Order VMRS to use for the job being created
Select the appropriate reason code
Select the appropriate cause code if using
If the job should be assigned to the technician creating the job, click the “Assign to Me” box
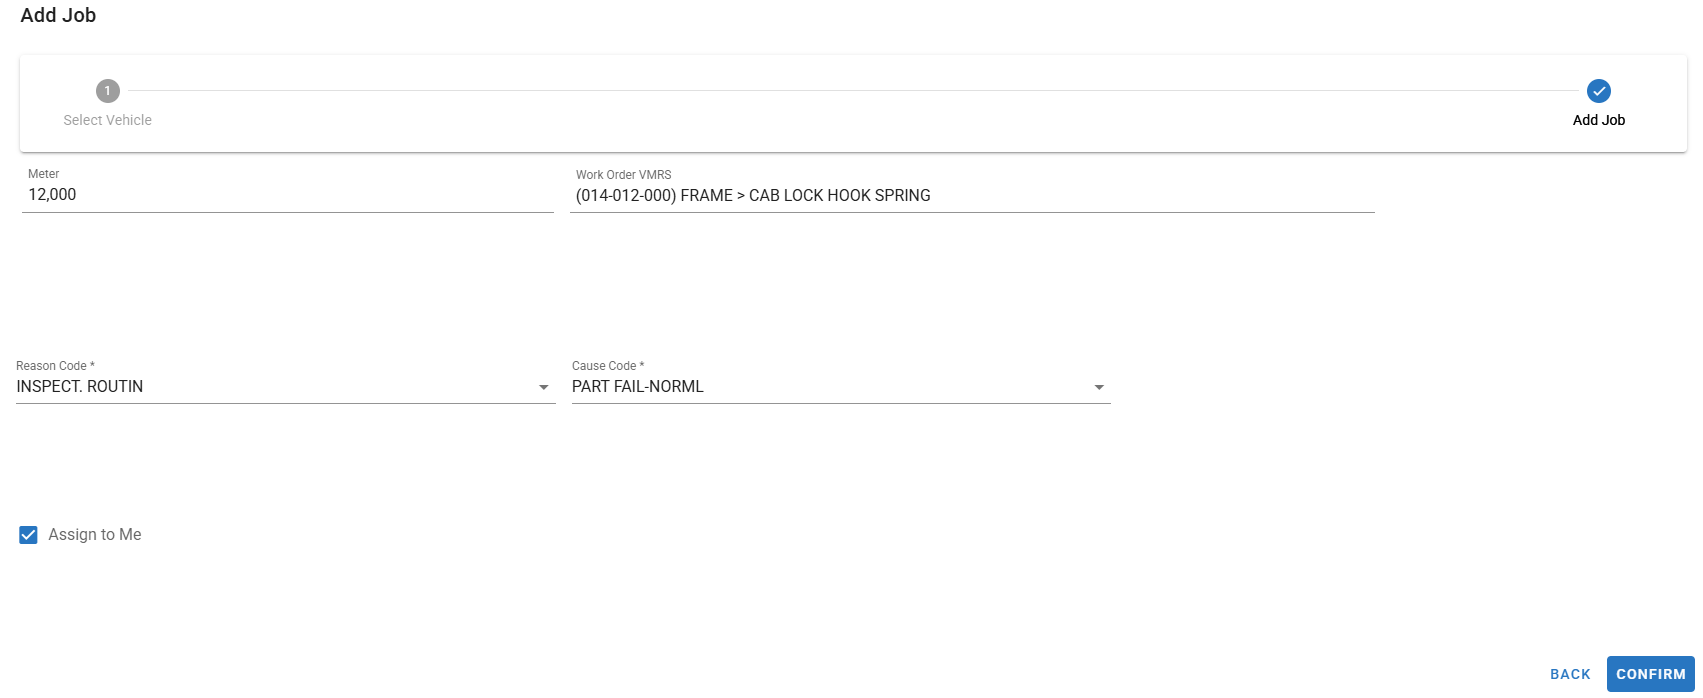
Click Confirm
If the “Assign To Me” box was selected, the technician is clocked into the newly created job
If the “Assign To Me” box was not selected, the job can be assigned to another technician using the “Assign Jobs” section
The Add Job screen will reload and ready for the technician to create another work order
If the technician needs to add another job line to the current work order they just created, they can use the Add Job button within the job to avoid creating multiple work orders for the same asset.
Clock into a Direct/Indirect Job
A “Direct Job” is any work order line that has been assigned to this Technician, or an unassigned work order that is found through a job search.
Indirect Jobs are essentially jobs such as Training, Shop Cleaning and Supervisory. Areas in which a tech can detail their labor without billing time towards a work order. Indirect jobs can be configured. Refer to System Codes for instructions.
If the work order has been created using the ADD JOB option in the banner AND the box to “Assign to Me” was selected, the technician is automatically clocked into the job.
From the screen, either use the Direct/Indirect dropdown lists at the top:

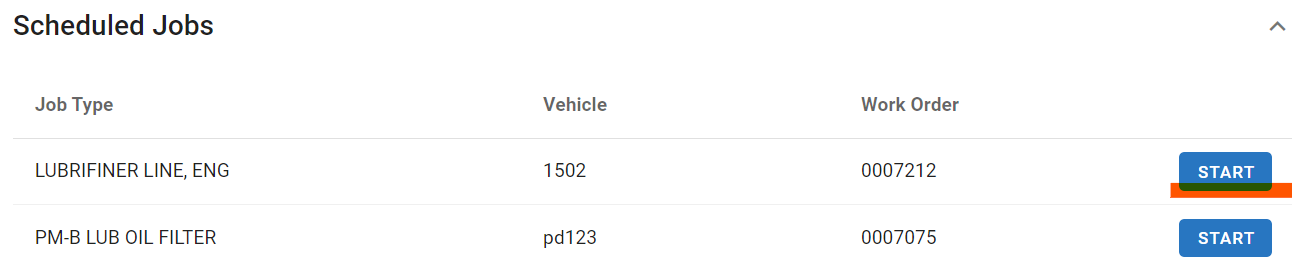
Or use the Shop > My Work options in the left-menu to view all currently assigned Incomplete, Recent and Scheduled Jobs
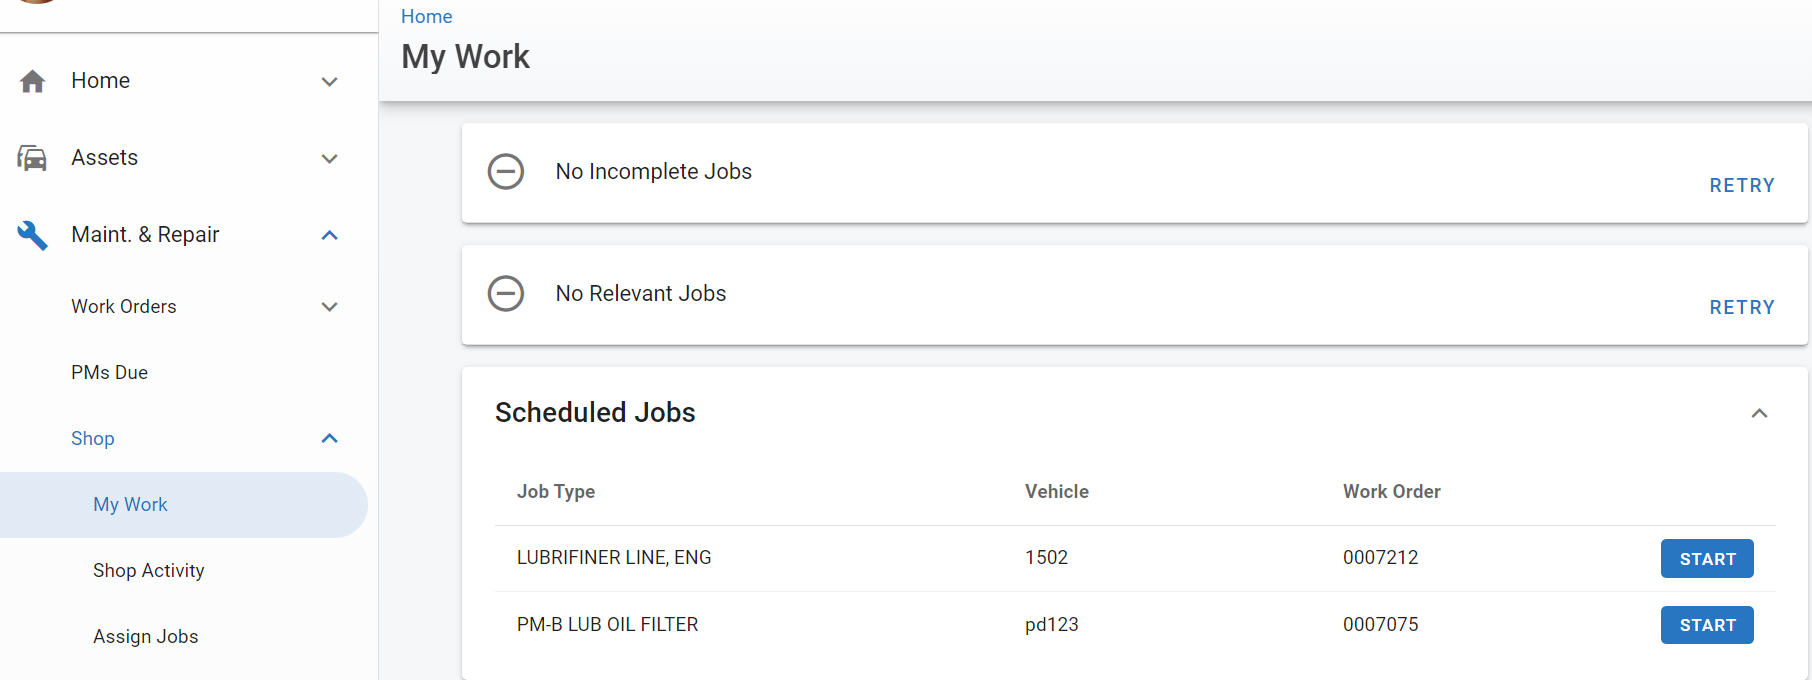
Click “Start” to clock into the job and begin setting labor towards it.
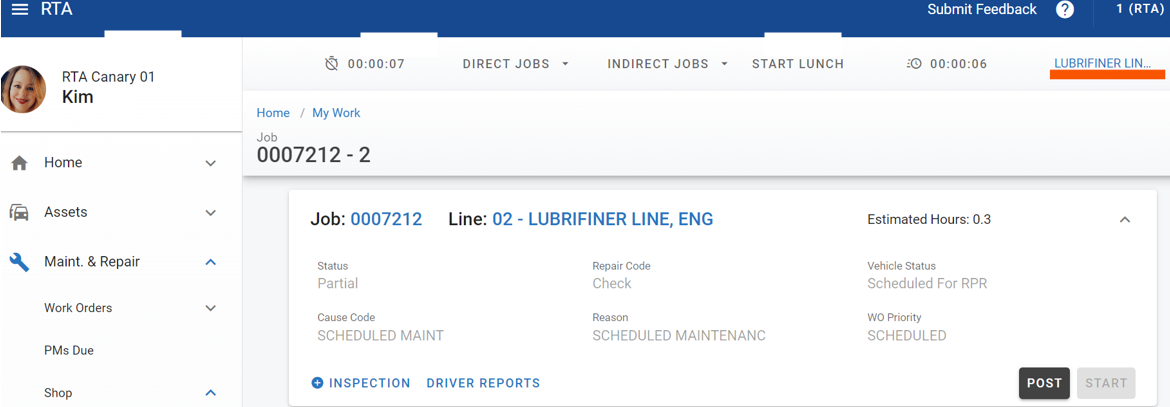
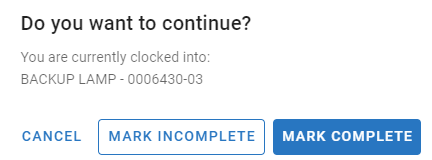
The job that’s been started will appear at the top of the screen by your labor options. Job details are in the body of the screen. Before clocking into a different Direct/Indirect Job or out for Lunch/Day, you’ll be prompted to clock out of the current job you’re on.
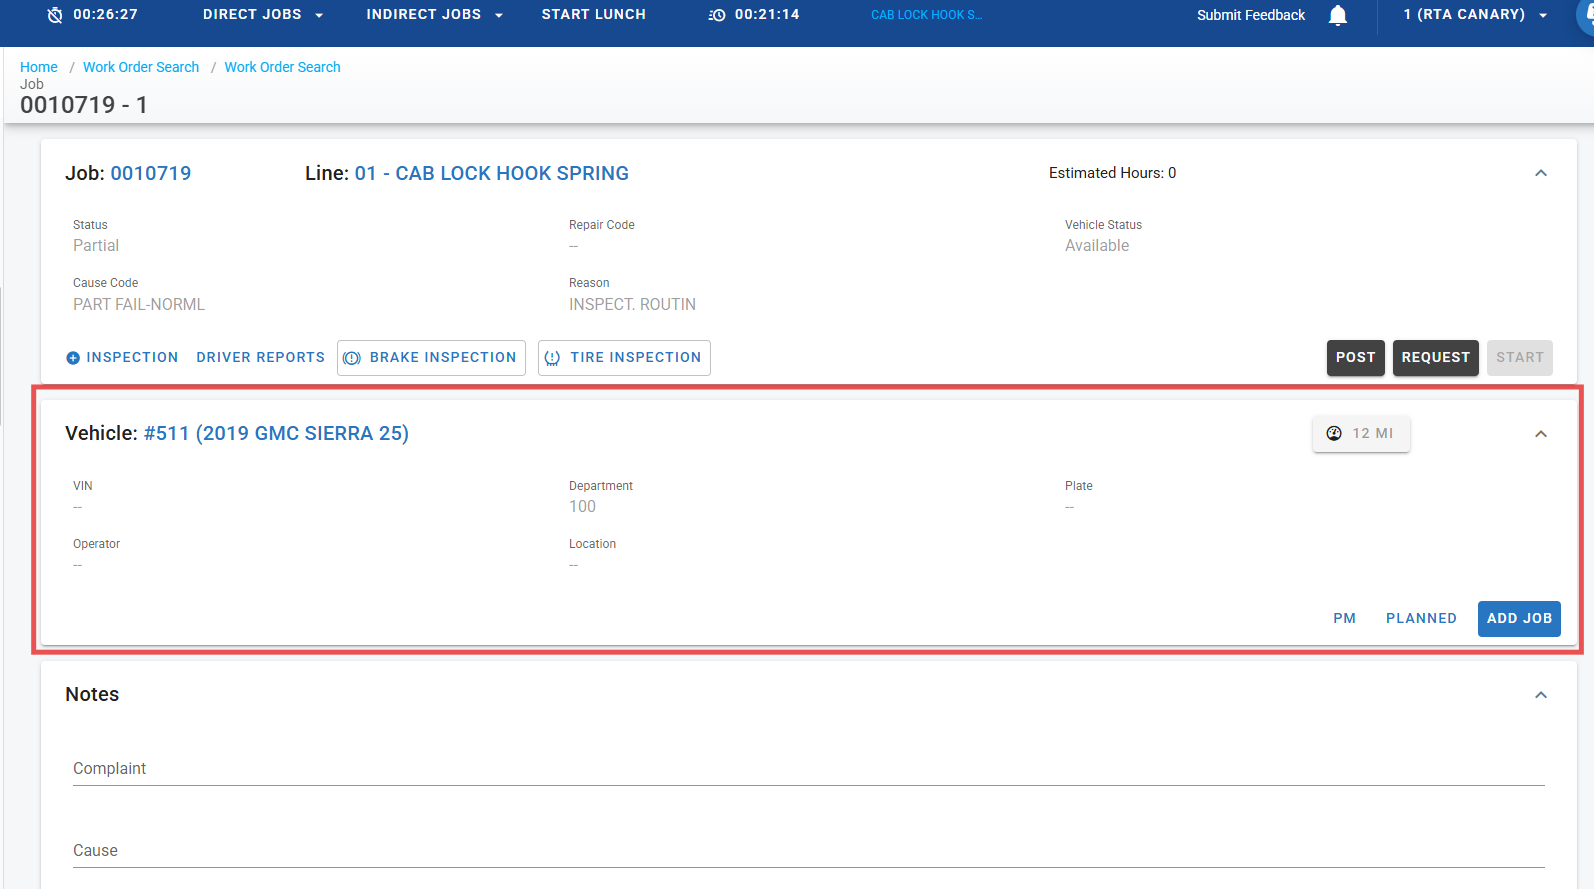
View Job Details
From the screen above, use the maximize arrows to view details on the Job, Vehicle, Notes and assigned Technicians

From the Job box, perform an Inspection (if one is assigned) or “Post” to include parts from the parts listing.
The Vehicle box provides details on the vehicle or the Tech can “Add Job”, check the status of a “PM” or view any “Planned” work Planned Work
Notes allow for the 3-C notes to be added to the WO details: Cause, Complaint and Correction as well as any Line Notes from the work order creation/completion.
Technicians are not editable from this screen, but technician details can be viewed
When all work and notes are updated or completed, the tech can clock off of this job as “Complete or Incomplete”. You will select either the next Direct/Indirect job from “My Work” or the top-menu dropdown options. When the next job is selected, you’ll be prompted to finish the one you’re on.
Update the meter (if prompted) and apply a wage/downtime status. Then “End Job”
Posting to a Work Order
When you select “Post” from the Job Details screen, the transaction options will show. Use the “Part*” line to scan/enter a part number or description. When you begin typing, a list of options will appear. Select from the list. Enter the quantity and “Save” to post.
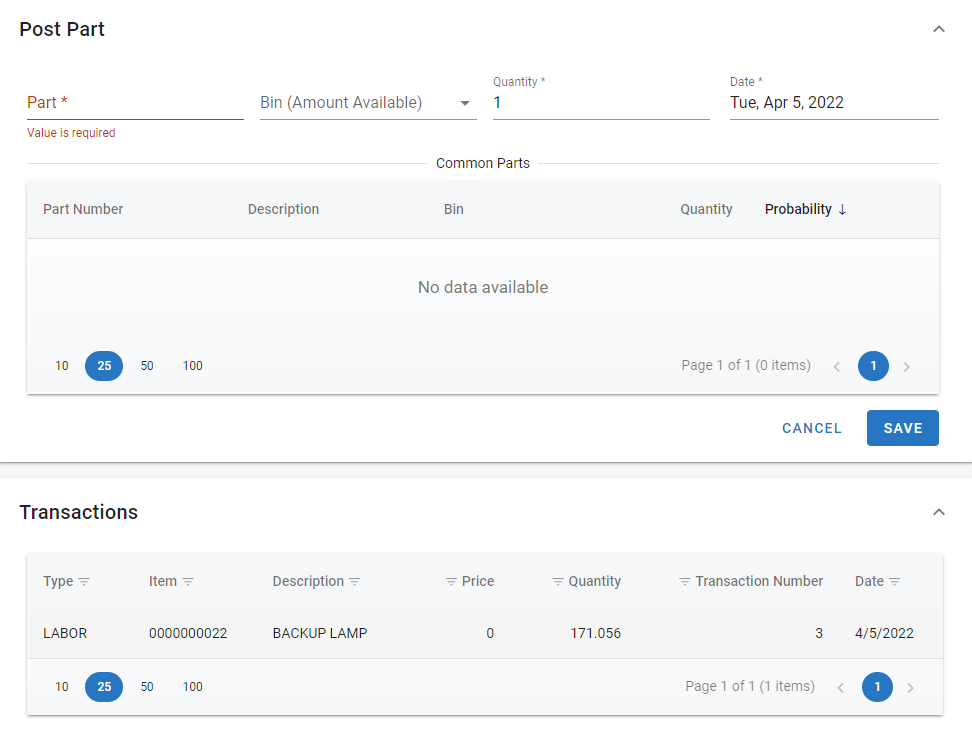
RTA will make certain assumptions in the future when this type of job is done again, such as “Common Parts” recommendations and the probability this is the part you’ll need. You’ll also see any existing Transactions in the lower box if they exist.
Adding a Job Line to the Work Order from the Job View
While the technician is clocked into an active job, they can add a new job line to that work order should they need to do so.
While in the job view, locate the Vehicle panel
Click the Add Job button
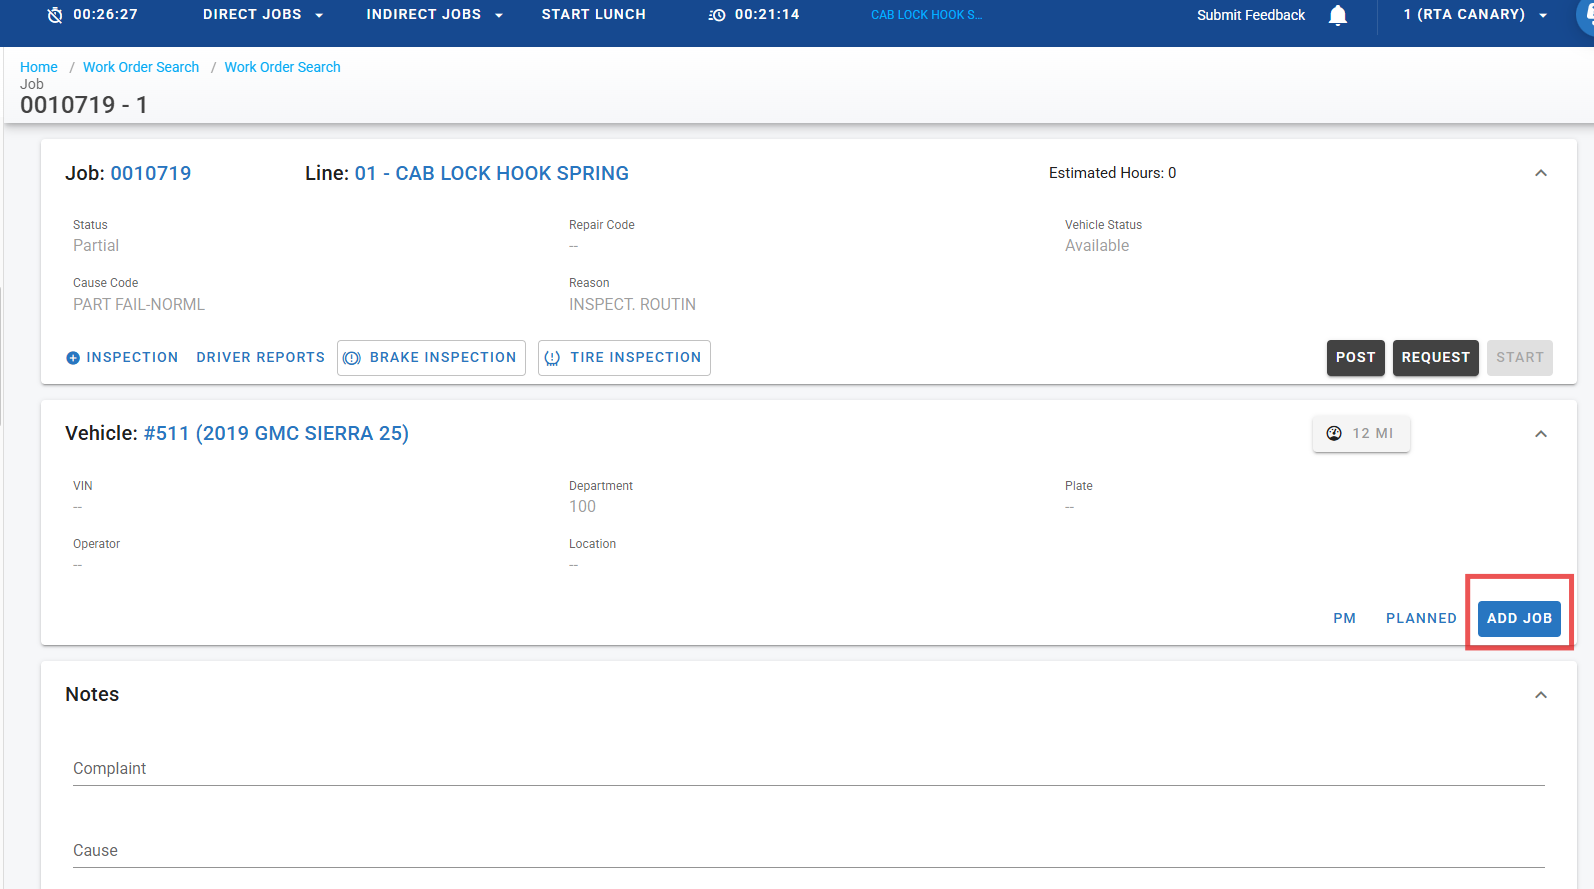
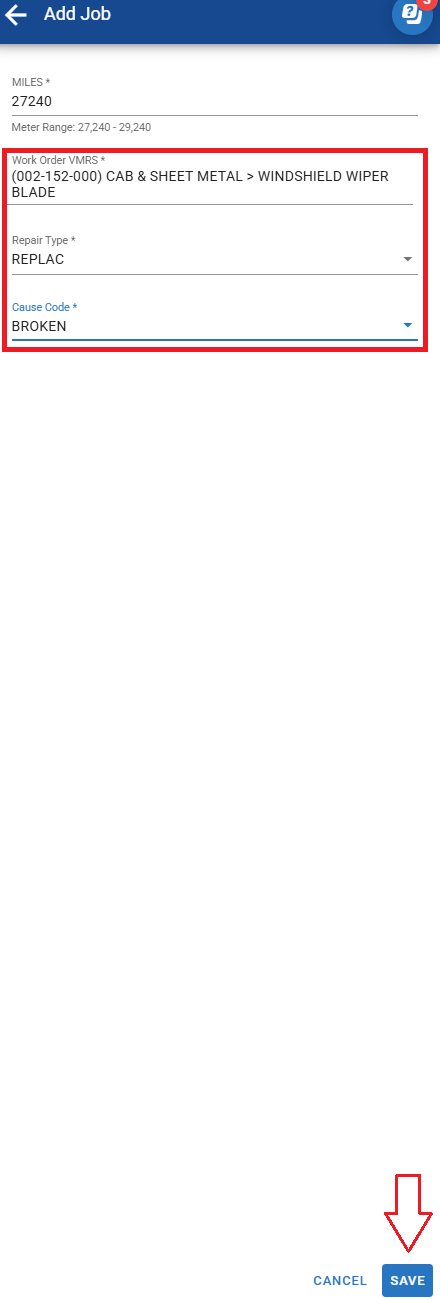
In the Add Job Panel, select the Work Order VMRS, Repair Type, and Cause Code for the job line being added. Click Save.
This job line is NOT automatically assigned to the technician that added it. The job can either be assigned to the technician using the “Assign Jobs” section by folks with access to this area.
Clocking Out for Lunch/ End Job
Whether the user is currently clocked into a Direct or an Indirect job, use the menu at the top of the screen to “Start Lunch”, or hover over the Stop-Watch icon (Job Clock) in the top-right corner and click End Job

End Shift

Use the menu at the top of the screen and hover over the Stop-Watch icon (Shift Clock) in the top-left corner and click End Shift