Adding a Tool
Prior to adding a tool file, be sure to have visited Tool Management Settings for guidance on setting up your Tool Types and Tool Statuses to be used in managing your tools.
To create a tool in the software, follow the below steps:
Ensure that Tool Management Settings have been completed
Access the Tools Master List by clicking on Tool Management under Tools in the system’s main menu
Click the
 button in the upper right corner to create a new tool
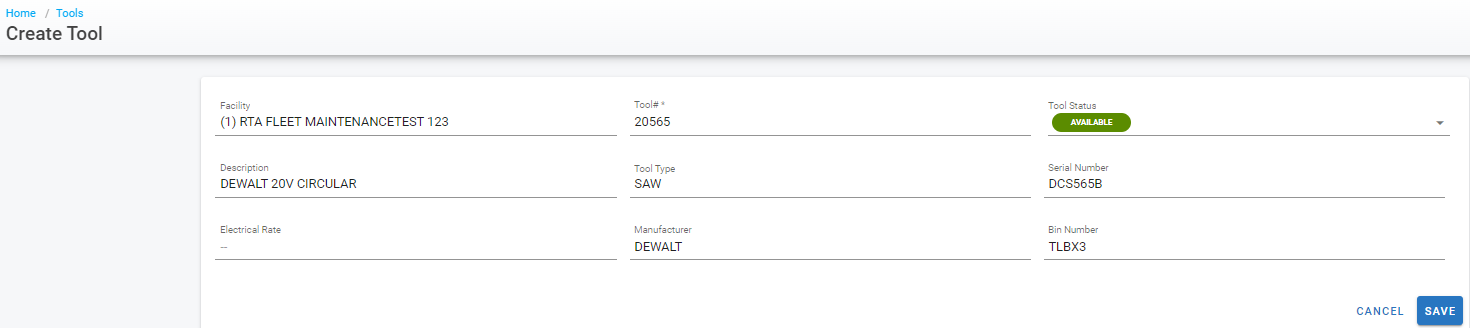
The facility will default with the working facility - If the master file needs to reside in a different facility and the user has access to other facilities, click in the facility field and select the appropriate facility
Enter/Provide a tool number for the tool - this must be a unique identifier (This becomes the master file number and how RTA recognizes the tool).
The system will default to a tool status of “Available” since RTA is assuming the tool is new as it is just being created. However, if the tool has a different status at the time of creation, select the applicable status for the tool. (This is why step number 1 is important to do first)
The tool’s description should then be entered - be sure it truly describes the tool and would make sense to anyone looking at it
Tool Type should be selected from the available drop down to designate the type or category of tool this is. (This is why step number 1 is important to do first)
Enter the tool’s serial number if applicable
Enter the electrical rate for the tool if applicable
Enter the tool’s manufacturer
Provide the tool’s bin number (where it is located)
Click Save
The tool file has been created. Be sure to visit the purchase, notes, and attachments tabs to complete any additional essential areas of the tool file to get the most out of its use. Refer to Navigating the Tool File for more information on what to enter in the purchase, notes, and attachments tabs.