
Navigating the Tool File
The tool file must be created before it will show in the software. Refer to Adding a Tool for instructions to create a tool in the software.
Accessing the Tool File
Expand the Tools Main Menu section
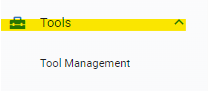
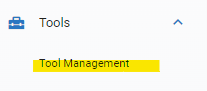
Click on Tool Management
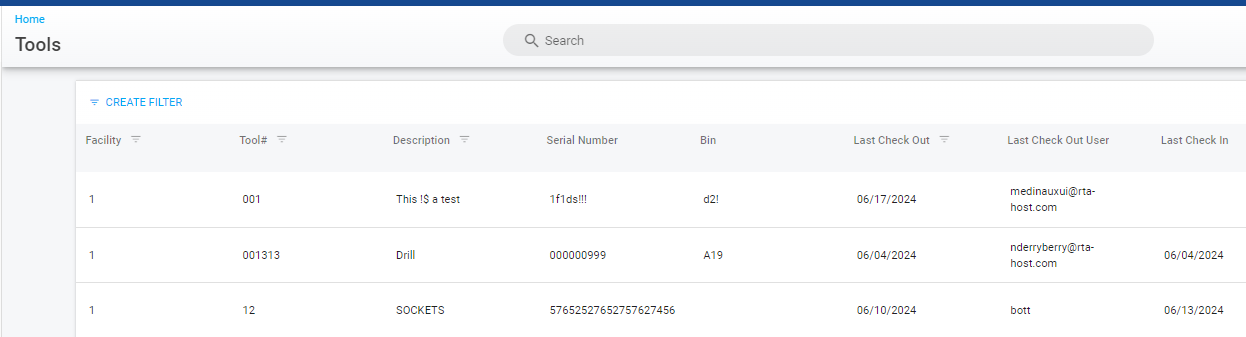
Locate the desired tool file via the search list by searching, sorting, filtering, and/or scrolling
Click on the tool line from the search list to open the tool file
Navigating the Tool File
Once the file is accessed, there are multiple areas of information within the file.
Primary Info Panel
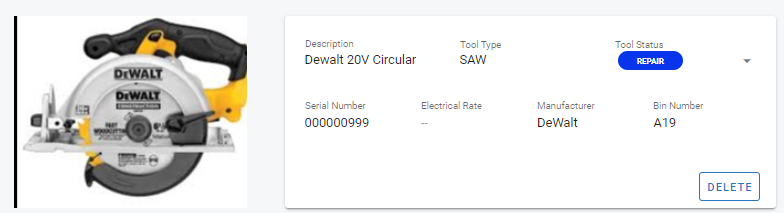
The primary info panel houses all of the main information for the tool itself such as:
Profile Picture = Optional and can be added at any time
Description = description of the tool
Tool Type = selected from the option available and dependent on tool types set up via Tool Type Settings
Tool Status = Current status of the tool and options available are dependent on statuses that are set up via Tool Status Settings
Serial Number = Serial Number for the tool if applicable
Electrical Rate = The rate of electricity used by the tool if known and wanting to document it in the file
Manufacturer = Tool’s manufacturer
Bin Number = Where the tool is stored or located
Delete Button = Allows the deletion of the tool file (CANNOT BE UNDONE)
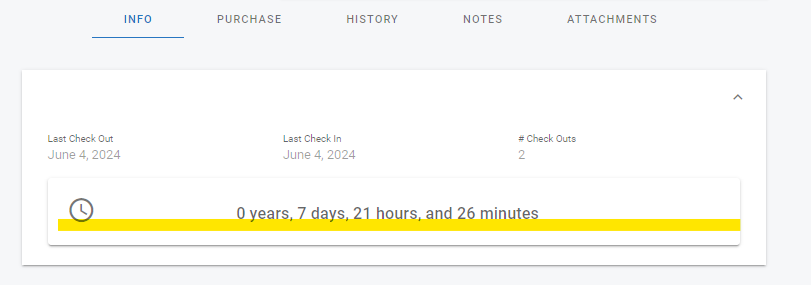
Info Tab Panel
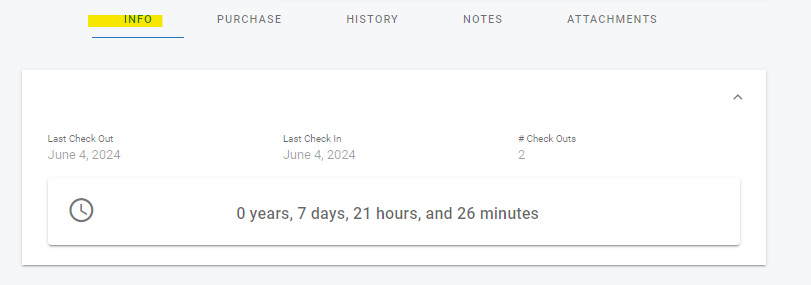
Last Checked Out = The date the tool was last checked out to an individual (value comes from the check out action)
Last Check In = The date the tool was last checked back in (value comes from the check in action)
# Check Outs = The total number of times the tool has been checked out since the file was created (value comes from the check out actions over time)
Tool Usage Calculation = The sum of all check ins and check outs (How much time the tool was in use/checked out accumulatively)
Purchase Tab Panel
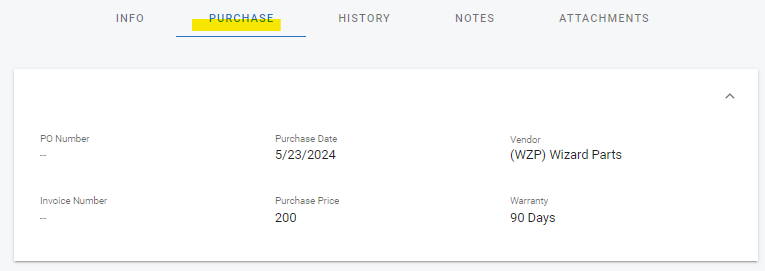
PO Number = If applicable, the purchase order number associated with the purchase of the tool
Purchase Date = The date the tool was purchased
Vendor = The vendor where the tool is purchased from (not freeform, vendor must exist in the software as a vendor file) refer to Vendor TOC for more information
Invoice Number = Invoice number associated with the purchase or the last invoice for the latest repair of the tool
Purchase Price = Price paid when the tool was purchased
Warranty = If applicable, the warranty time frame (ex: 90 days)
History Tab Panel
The history tab is a filterable and sortable list that details the dates of check out and check in, the user that checked out the tool, and the total time that user had the tool checked out.

Notes Tab Panel
The notes tab contains a panel where free form notes related to the tool can be entered for documentation purposes

Attachments Tab
Attachments such as pictures, operation manuals, or other docs that are relevant can be attached to the tool file.
Refer to Attachments for instructions on using attachments if needed.