
Imports - History Overview
Imports History will display the list of imports done within the software. This list can be searched, sorted, and exported.
Below are the details of the columns that will display in the Imports History list.
Import History Overview
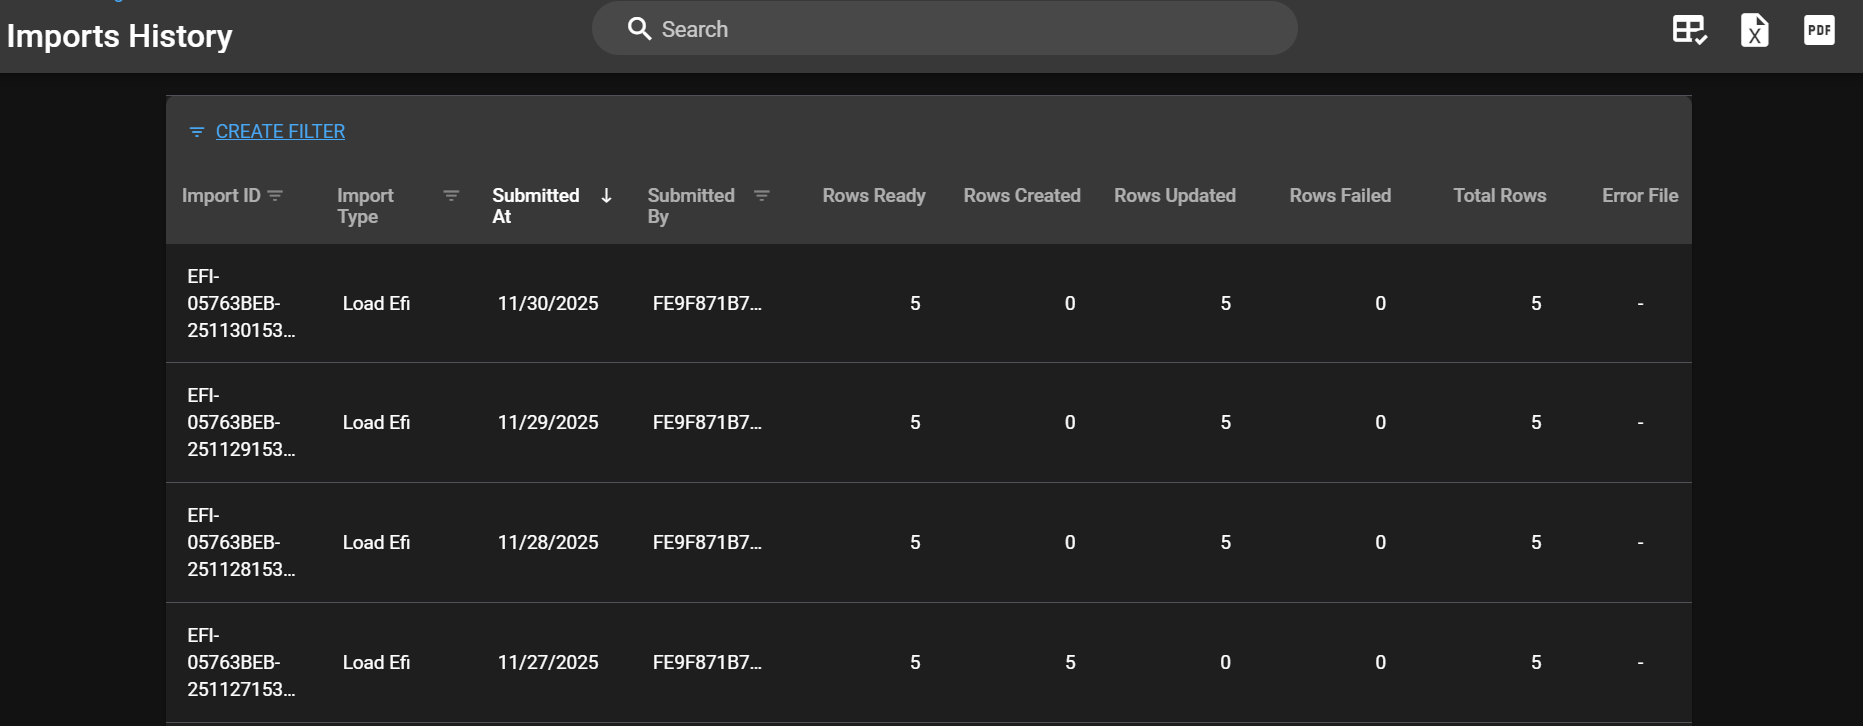
Import ID = A unique identifier for the import itself (generated by RTA at the time of the import)
Import Type = Lists the type of import done (asset, vendor, part, part kit, etc)
Submitted At = Date the import was submitted
Submitted By = User that submitted the import
Status = Current status of the import (pending or complete)
Resume = Should the import get interrupted or paused for some reason, a user can resume the process from this column.
Rows Created = The number of rows created with the import which is generally indicative of the number of items created
Rows Updated = The number of rows of data that were updated based on the import file data.
Rows Failed = The number of rows of data that failed during the import due to a type of error.
Total Rows = Total number of rows listed on the import file.
Error File = The link to the error file for the upload - while a link may appear, the file could be blank if there were no errors to report
Import Error Log Overview
Purpose of Import Error Log
While there is a pre-check feature for imports that alerts to elements that are potentially problematic and should be corrected prior to import completion, Fleet360 also offers an Error File that can be downloaded from the history which gives an overview for import data rows not updated/completed and why they were declined.
How to Use the Import Error Log
Downloading the error file is contingent on the user having the proper permissions under the Import/Export Utilities section of User Groups
After an import is completed, locate and expand the <Imports/Exports> section under the <Admin> section
Click on <Imports History>
From the Import History List, locate the <Error File Column>
If the column is not visible, use the <Customize Columns> icon to add it to the list
Click the <Download> link next to the completed import to view errors
Open the downloaded error file from your main computer downloads file
When you download the file, it should have the following:
Column headers for what data was imported.
The data of only the failed rows as it was in the file that was imported.
A column that has the error message - Why the error occurred
An additional column that has the error.token - References the error code
If there are 0 errors, there will be a blank file that is populated
Once the errors are reviewed, those data lines can be fixed on the import file and re-imported, or corrections can be made in the system singularly