Adding and Deleting Shift Lines via Shift Management
These actions require specific permissions. If these options are not available, please contact your internal administrator
Adding a New Shift Line
This may be necessary when a technician has not clocked into a job and needing to adjust the shift to reflect either that direct or indirect transaction.
Access Shift Management by navigating to the Maintenance and Repair and then Settings items through the system main menu
Using the Date Range Item, select the date range that includes the date in which the shift needs to be added
Locate the technician name from the list that needs the shift added
Click on the technician line item from the list
Click the
 icon in the upper right corner of the screen
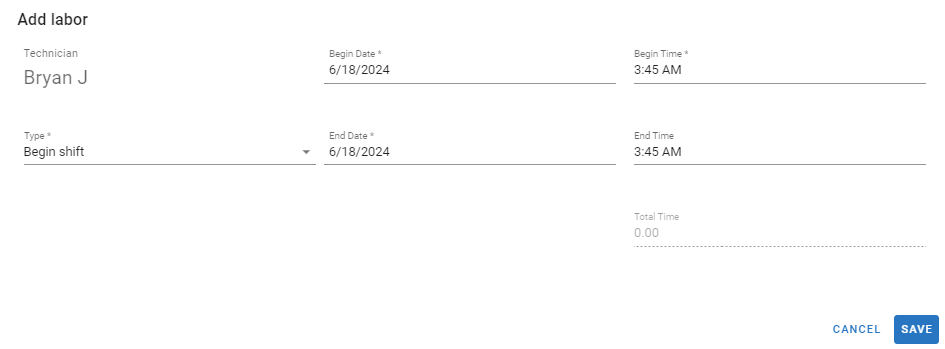
Click in the Begin Date Line to launch the calendar to select the begin date (Typing the date is not an option)
Click in the Begin Time line to launch the clock to select the begin time for the shift (Typing the time is not an option)
Use the Type dropdown to select the type of shift line being added
The End Date and End Time will prefill with the exact same values as the begin time
Change the end date and time by clicking into the lines and selecting from the calendar for the date and the clock for the time
A begin and end shift should not have the date and times adjusted as this are typically a single stamp in time and don’t carry on for any amount of time
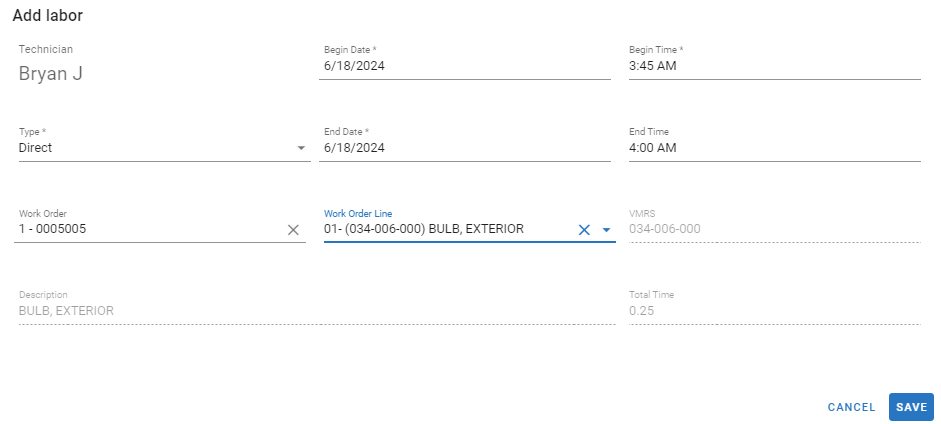
If the type in step 8 was Direct, enter the Work Order number and line on which the direct job was conducted
IF the type in step 8 was Indirect, use the Indirect Job drop down to select the appropriate indirect job code associated with the new line
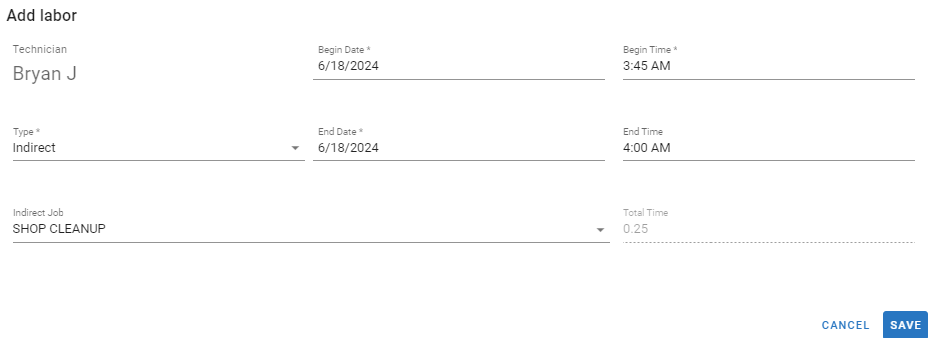
Total Time will fill in automatically based on start and end dates and times entered
Click Save
Deleting a Shift Line in Shop Management
Access Shift Management by navigating to the Maintenance and Repair and then Settings items through the system main menu
Using the Date Range Item, select the date range that includes the date in which the shift needs to be added
Locate the technician name from the list that needs the shift added
Click on the technician line item from the list
Use the box selectors to select one or multiple shift lines needing to be deleted
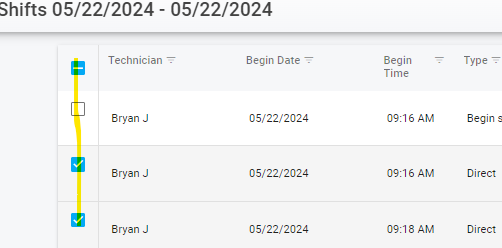
Click the trash can icon in the upper right corner of the screen

Adding PTO Block
The PTO Block feature in Shift Management allows supervisors and administrators to mark a technician’s schedule as Paid Time Off (PTO) or unavailable for work directly within Paperless Shop. This helps maintain accurate labor reporting and ensures PTO or other non-working periods are reflected in mechanic reports.
Select Maint. & Repair → Settings → Shift Management
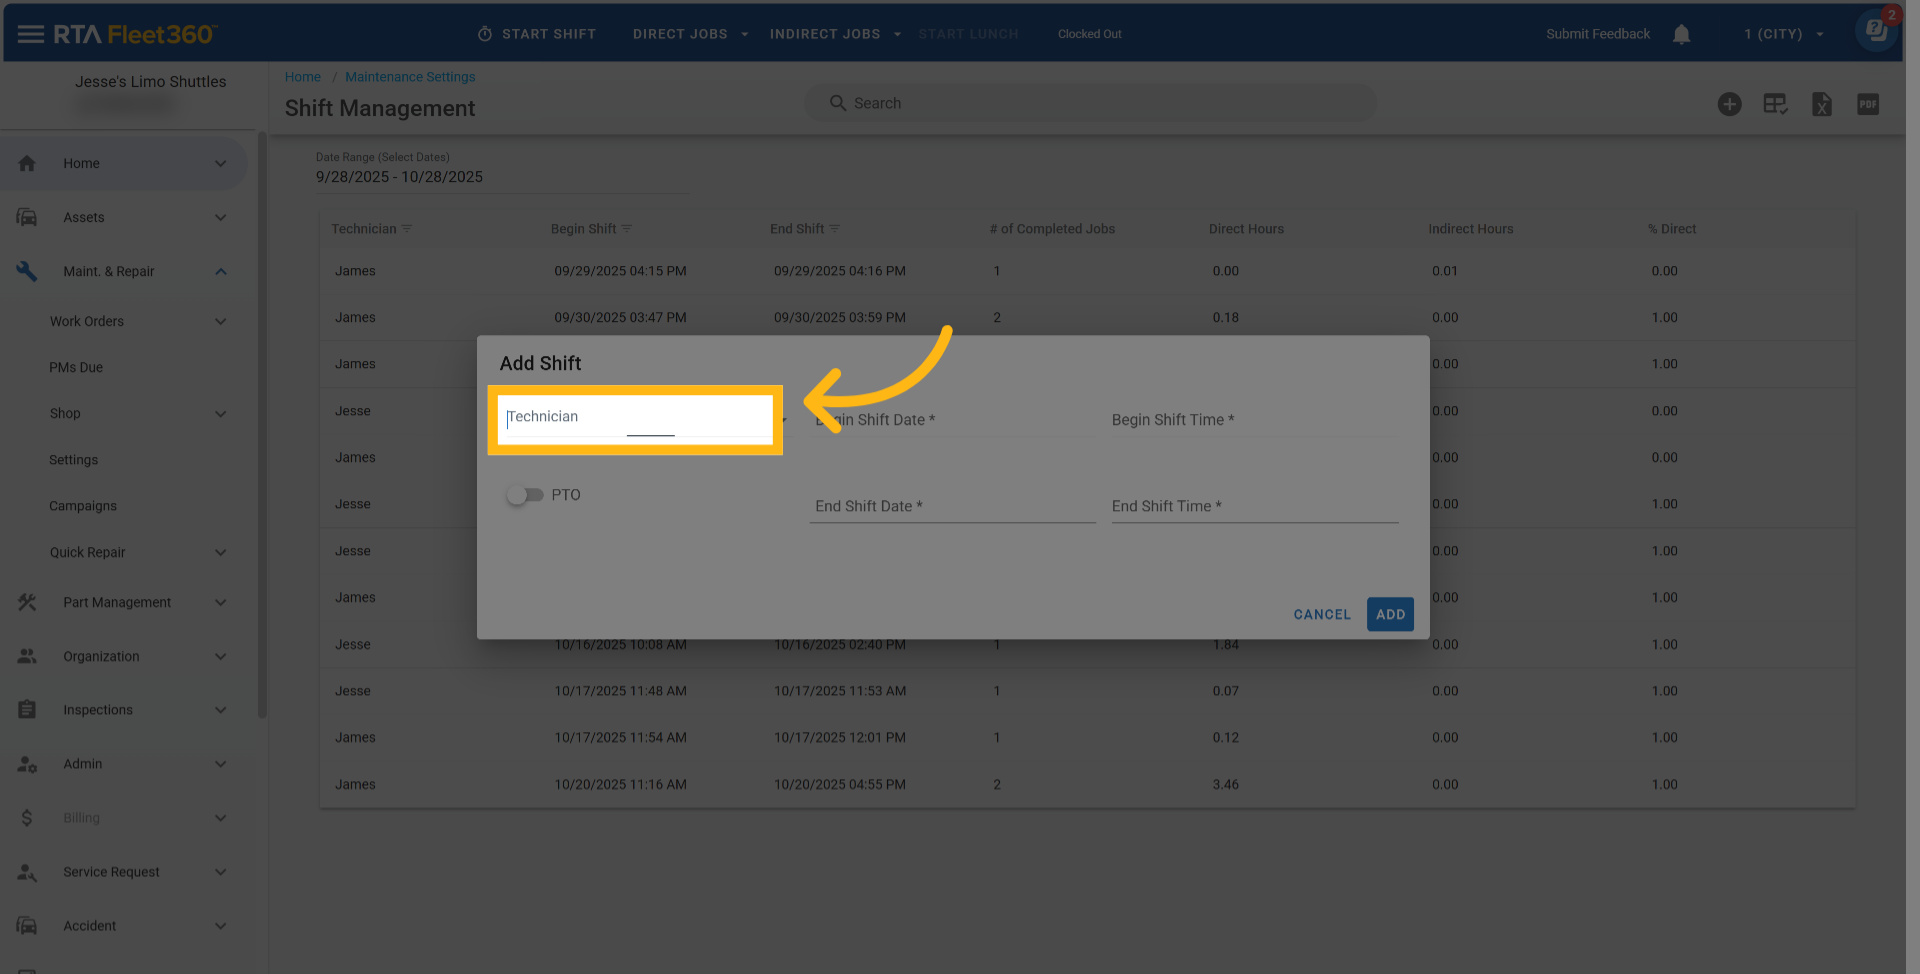
Click the
icon in the upper right corner of the screen

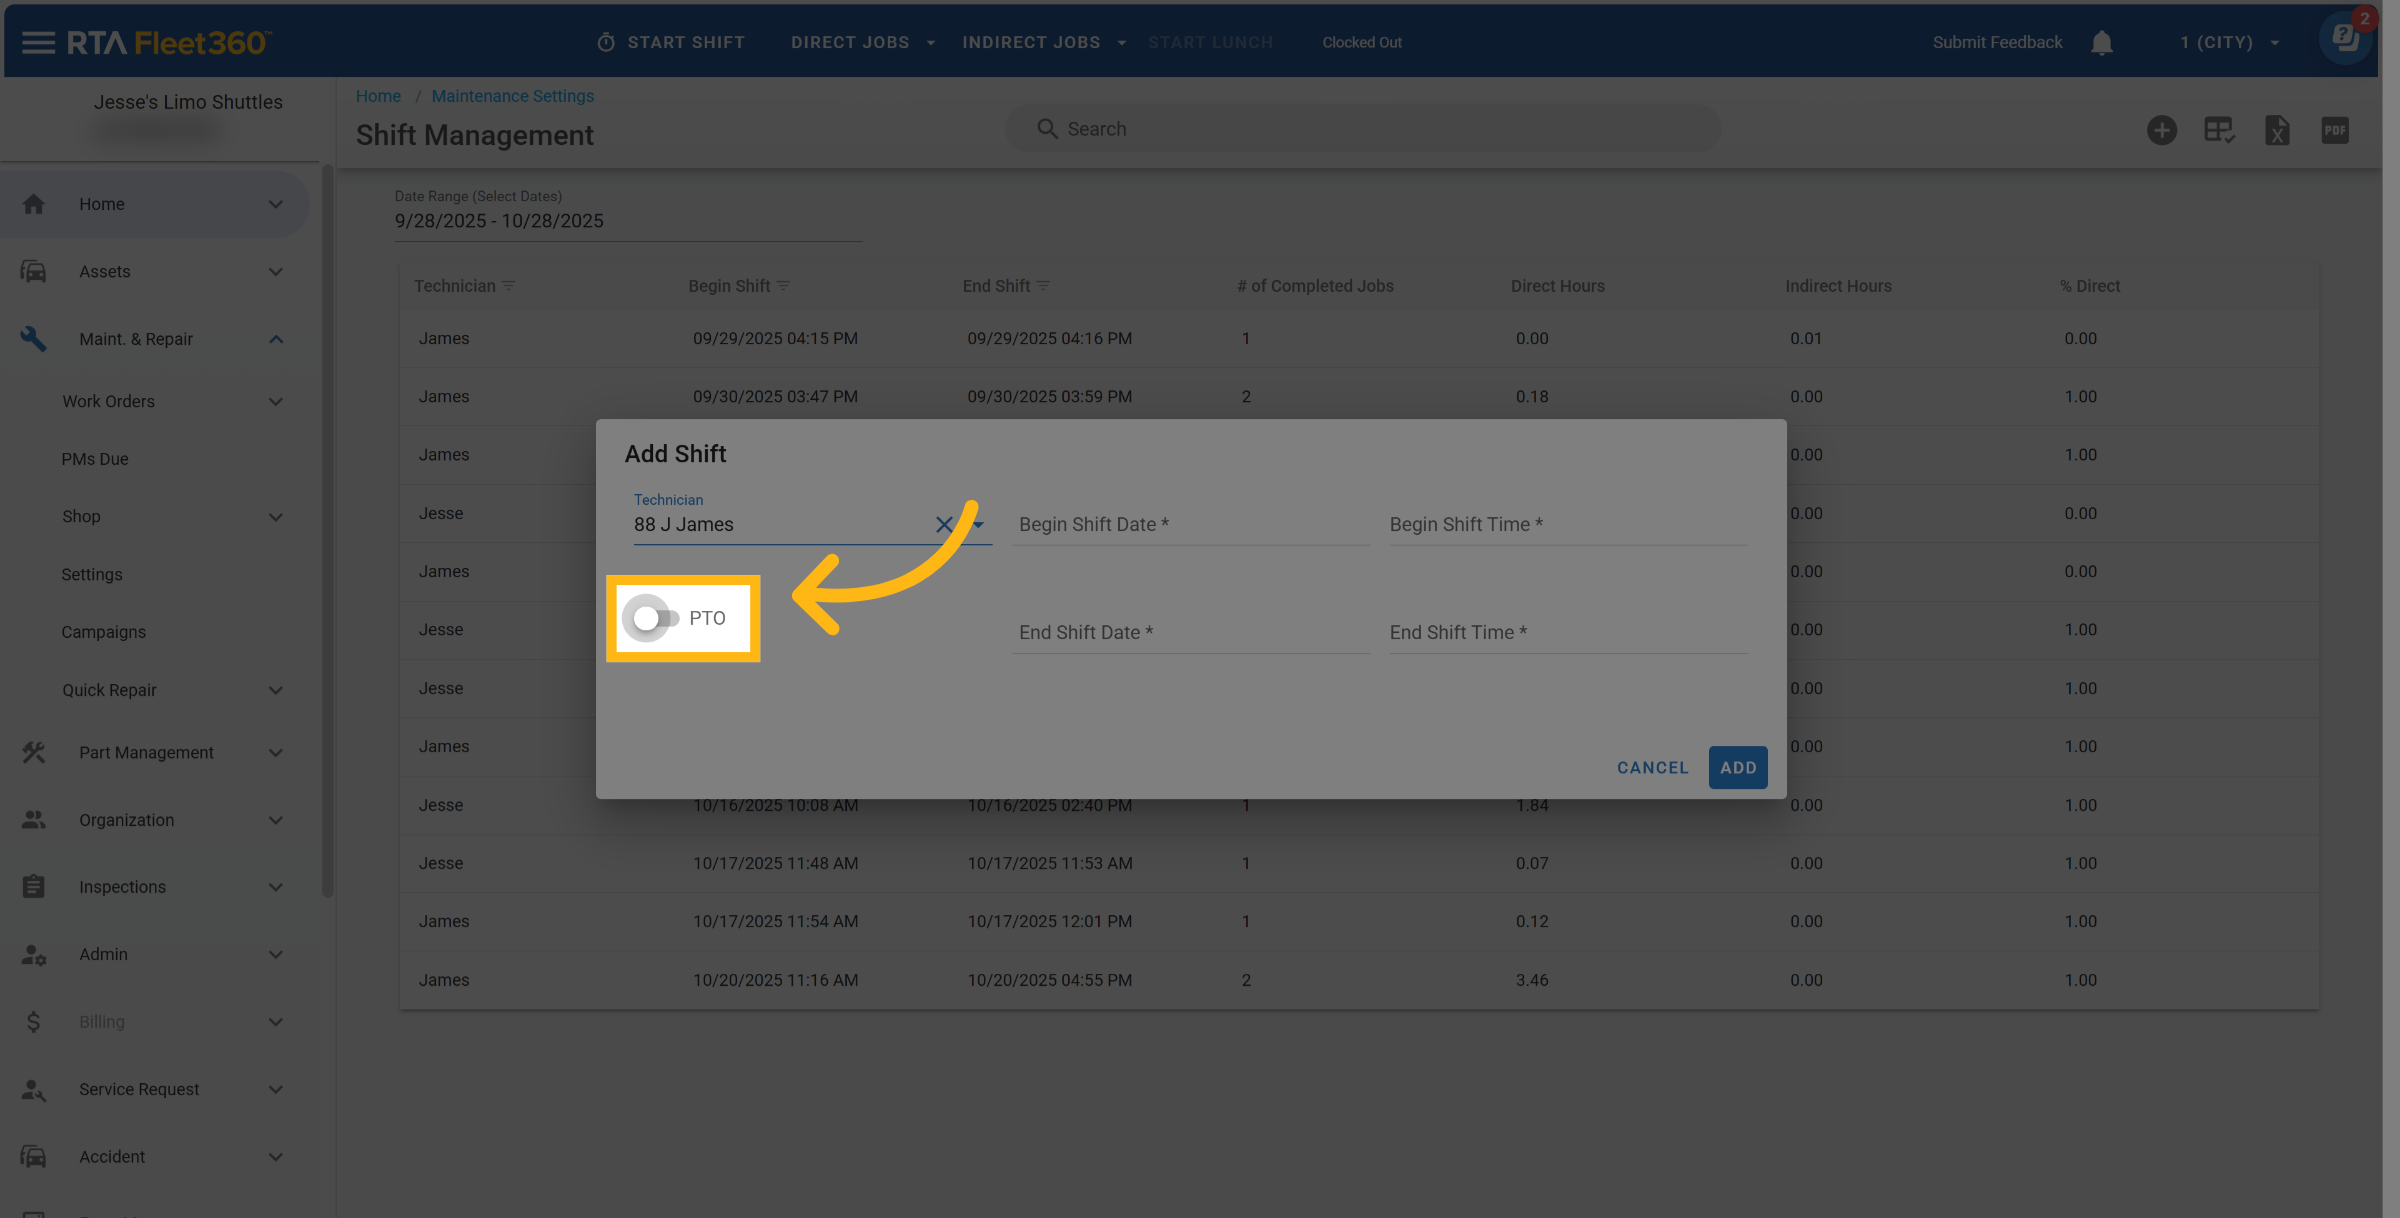
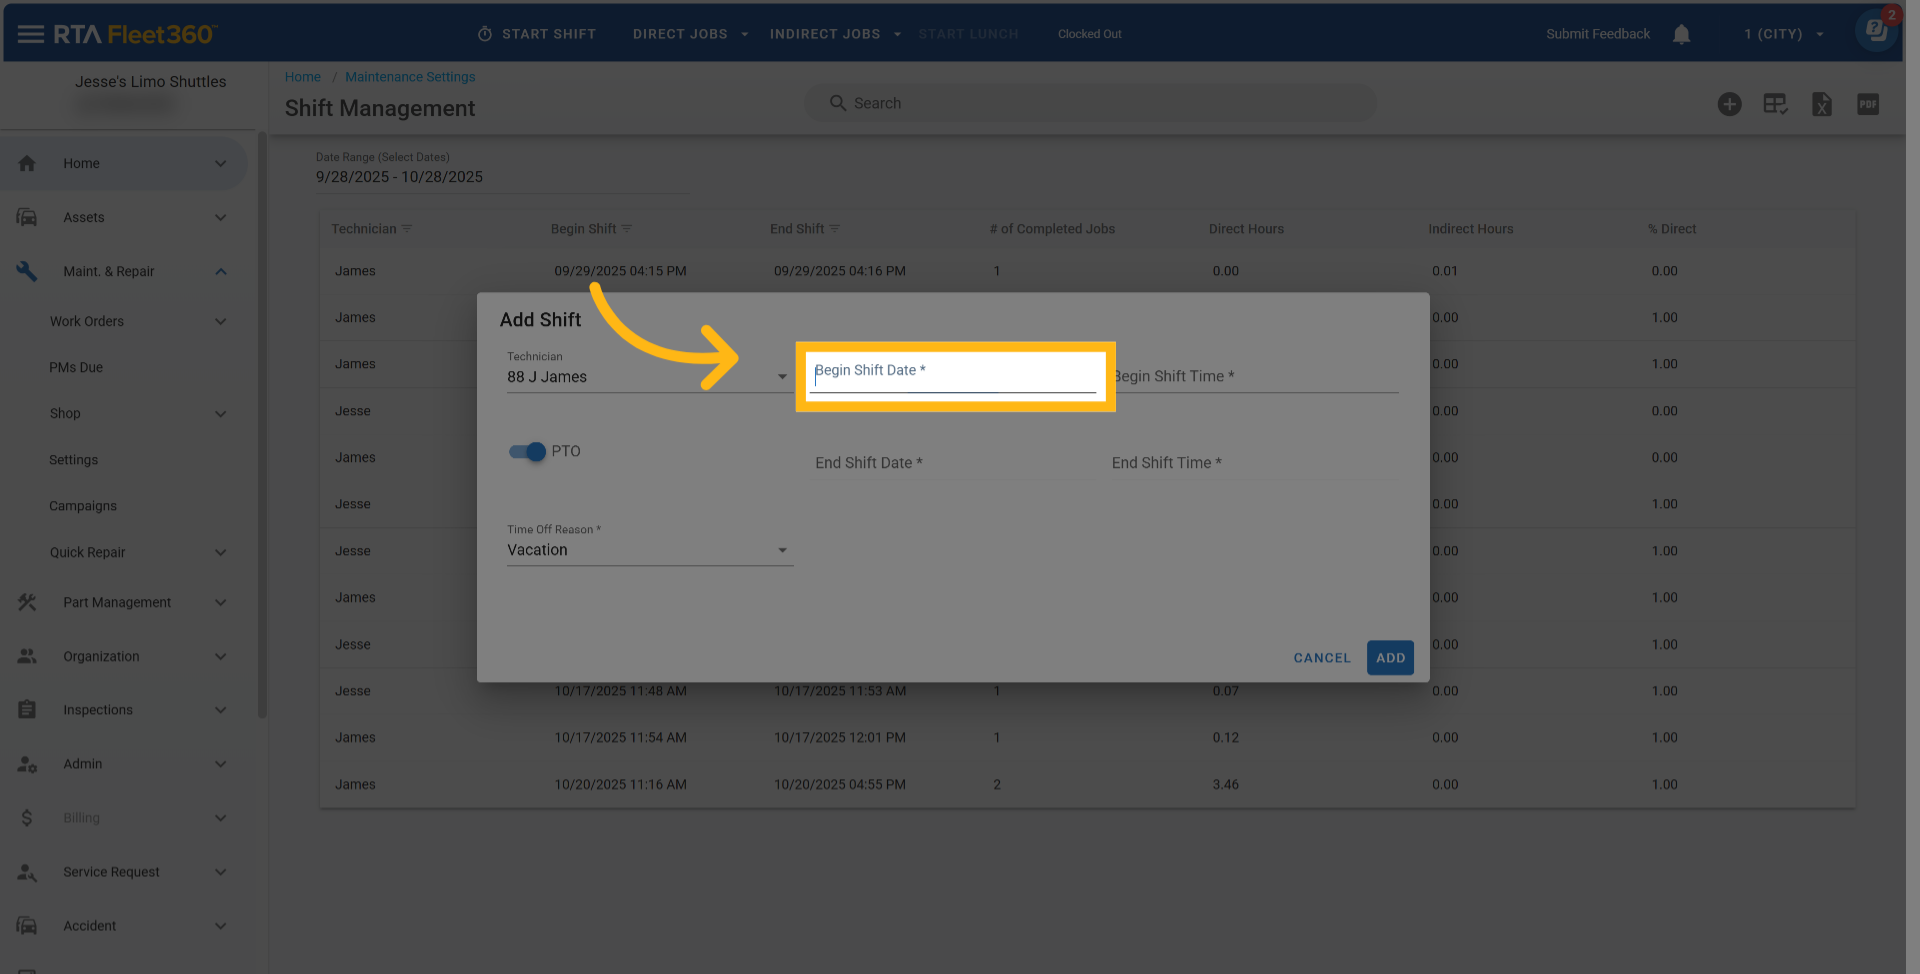
Enter Technician name to add PTO for
Click on the toggle for PTO
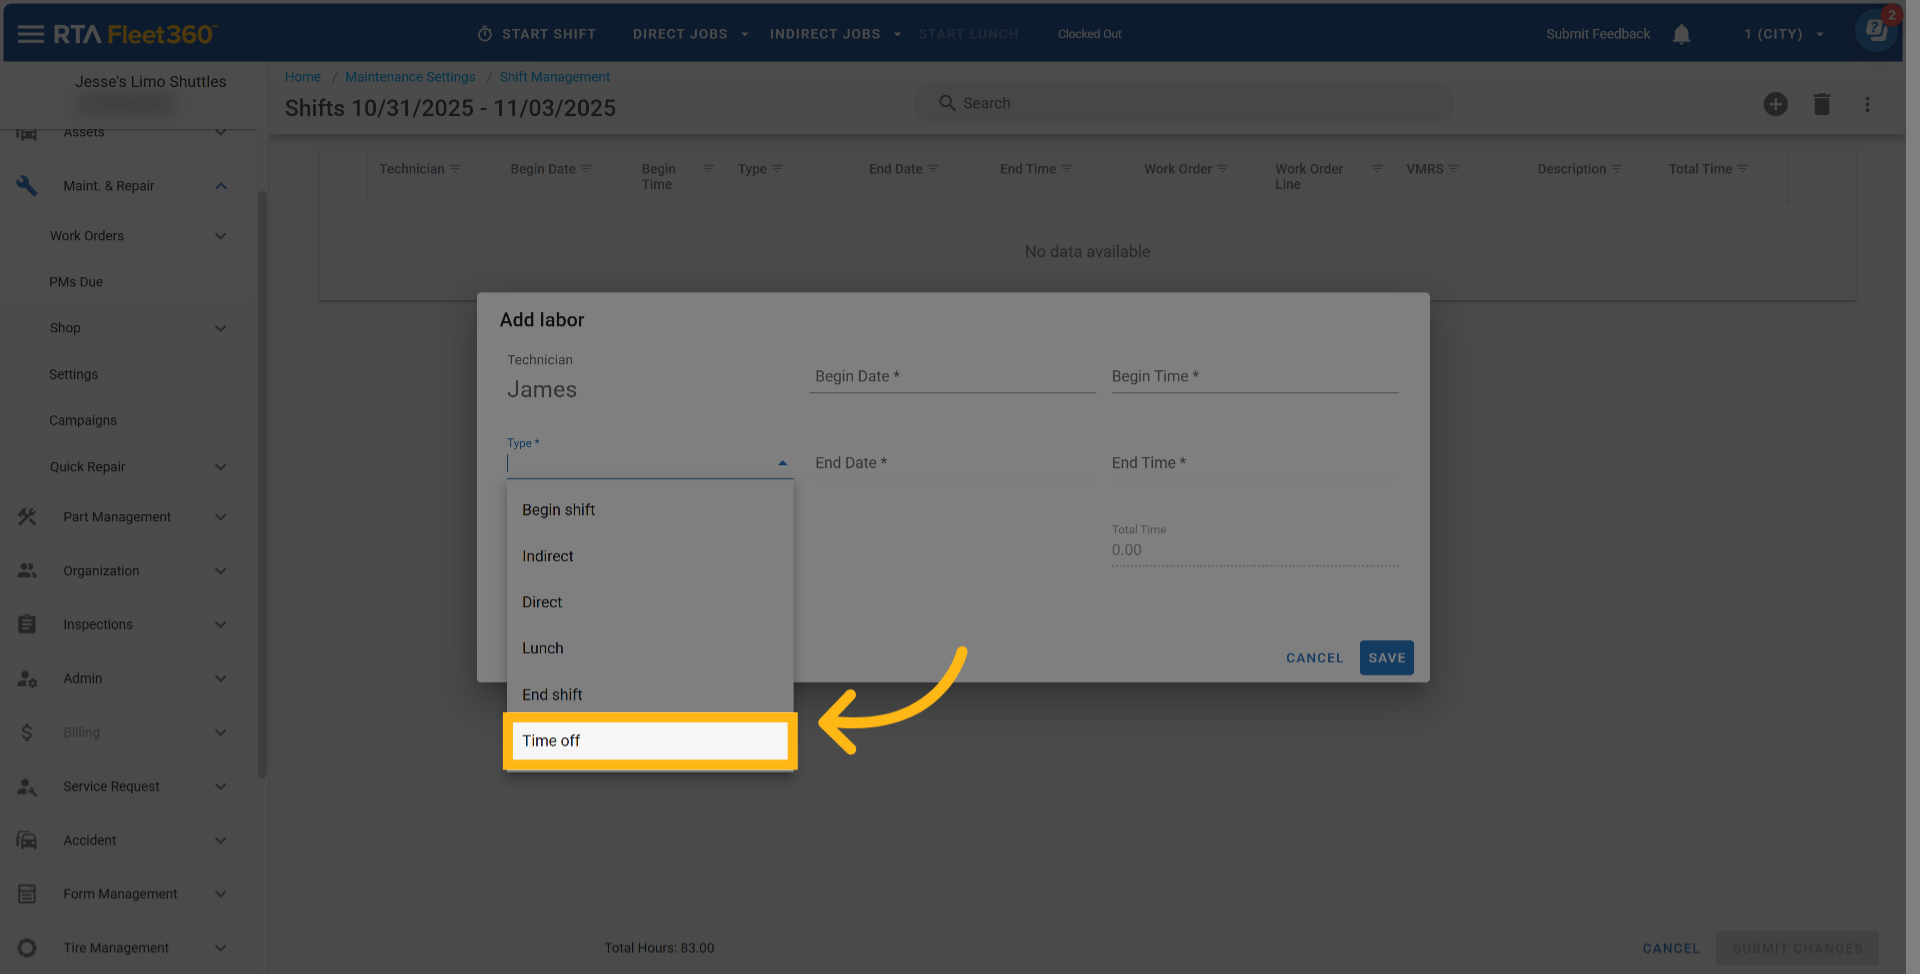
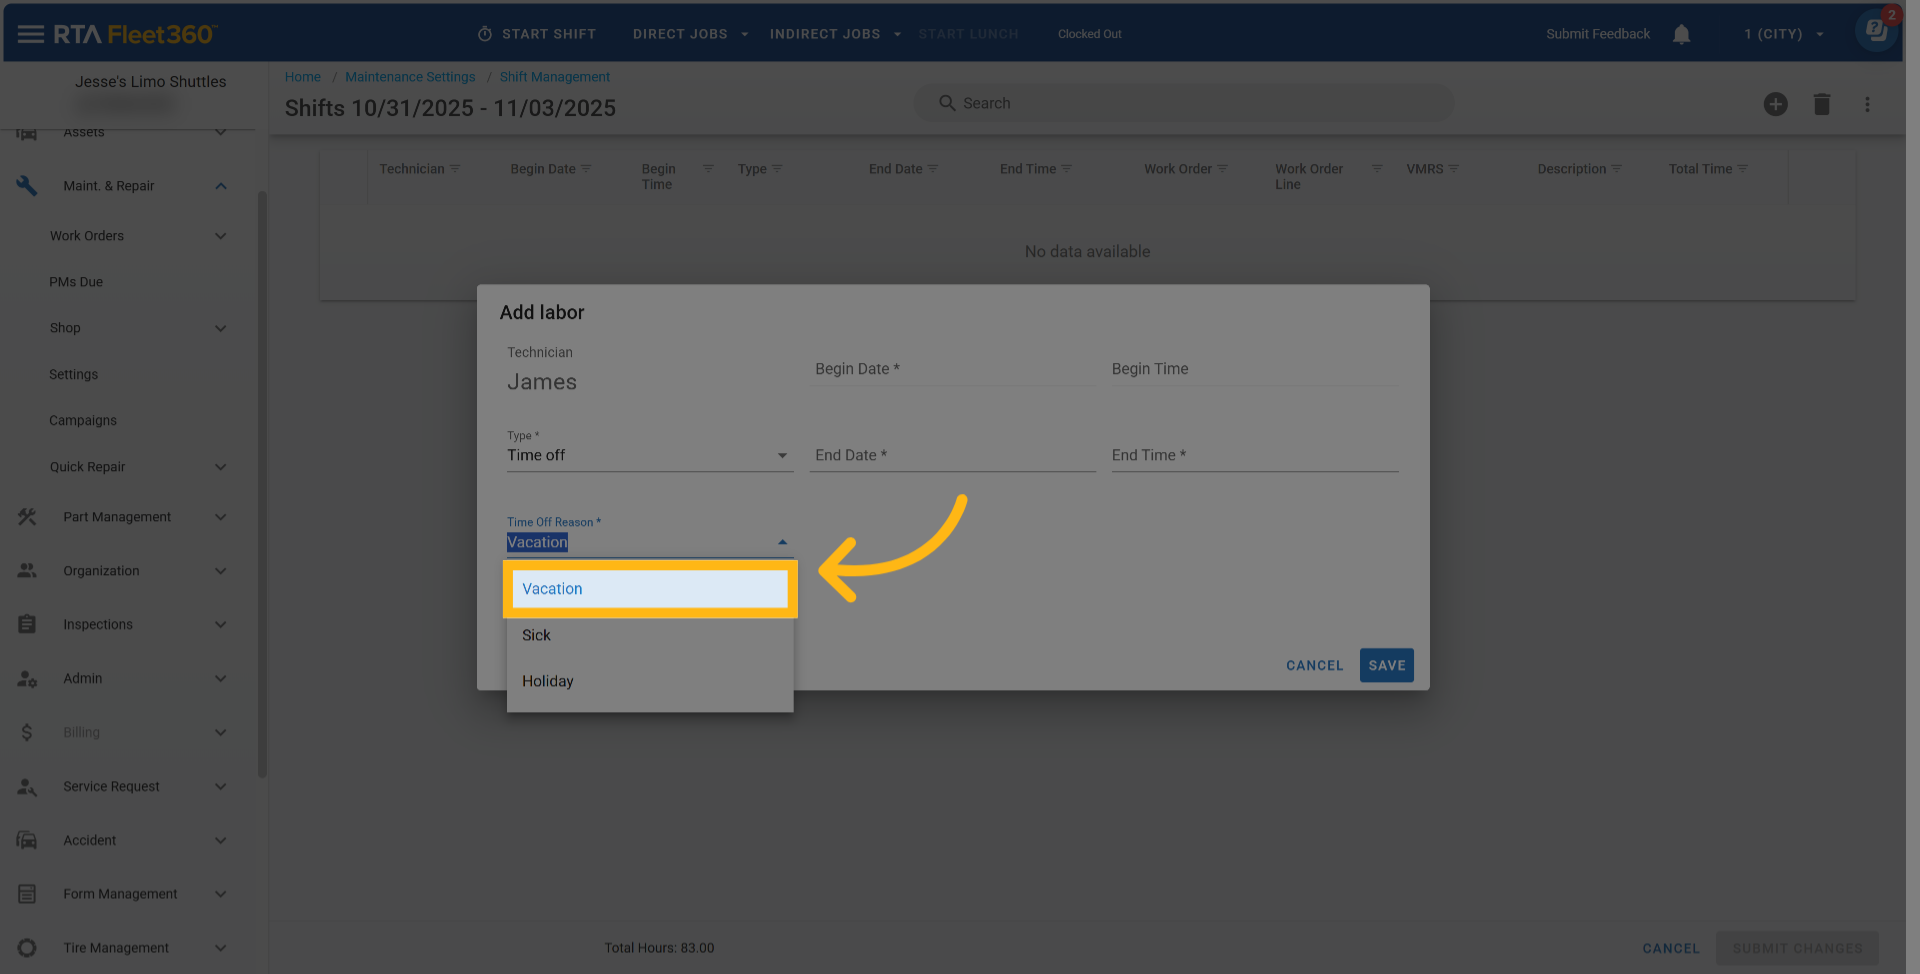
Click on the “Type” box and then select “Time Off”
Click on the “Time Off Reason” box and then select one of the following reasons:
Vacation
Sick
Holiday
Click in the Begin Date Line to launch the calendar to select the begin date (Typing the date is not an option)
Click in the Begin Time line to launch the clock to select the begin time for the shift (Typing the time is not an option)

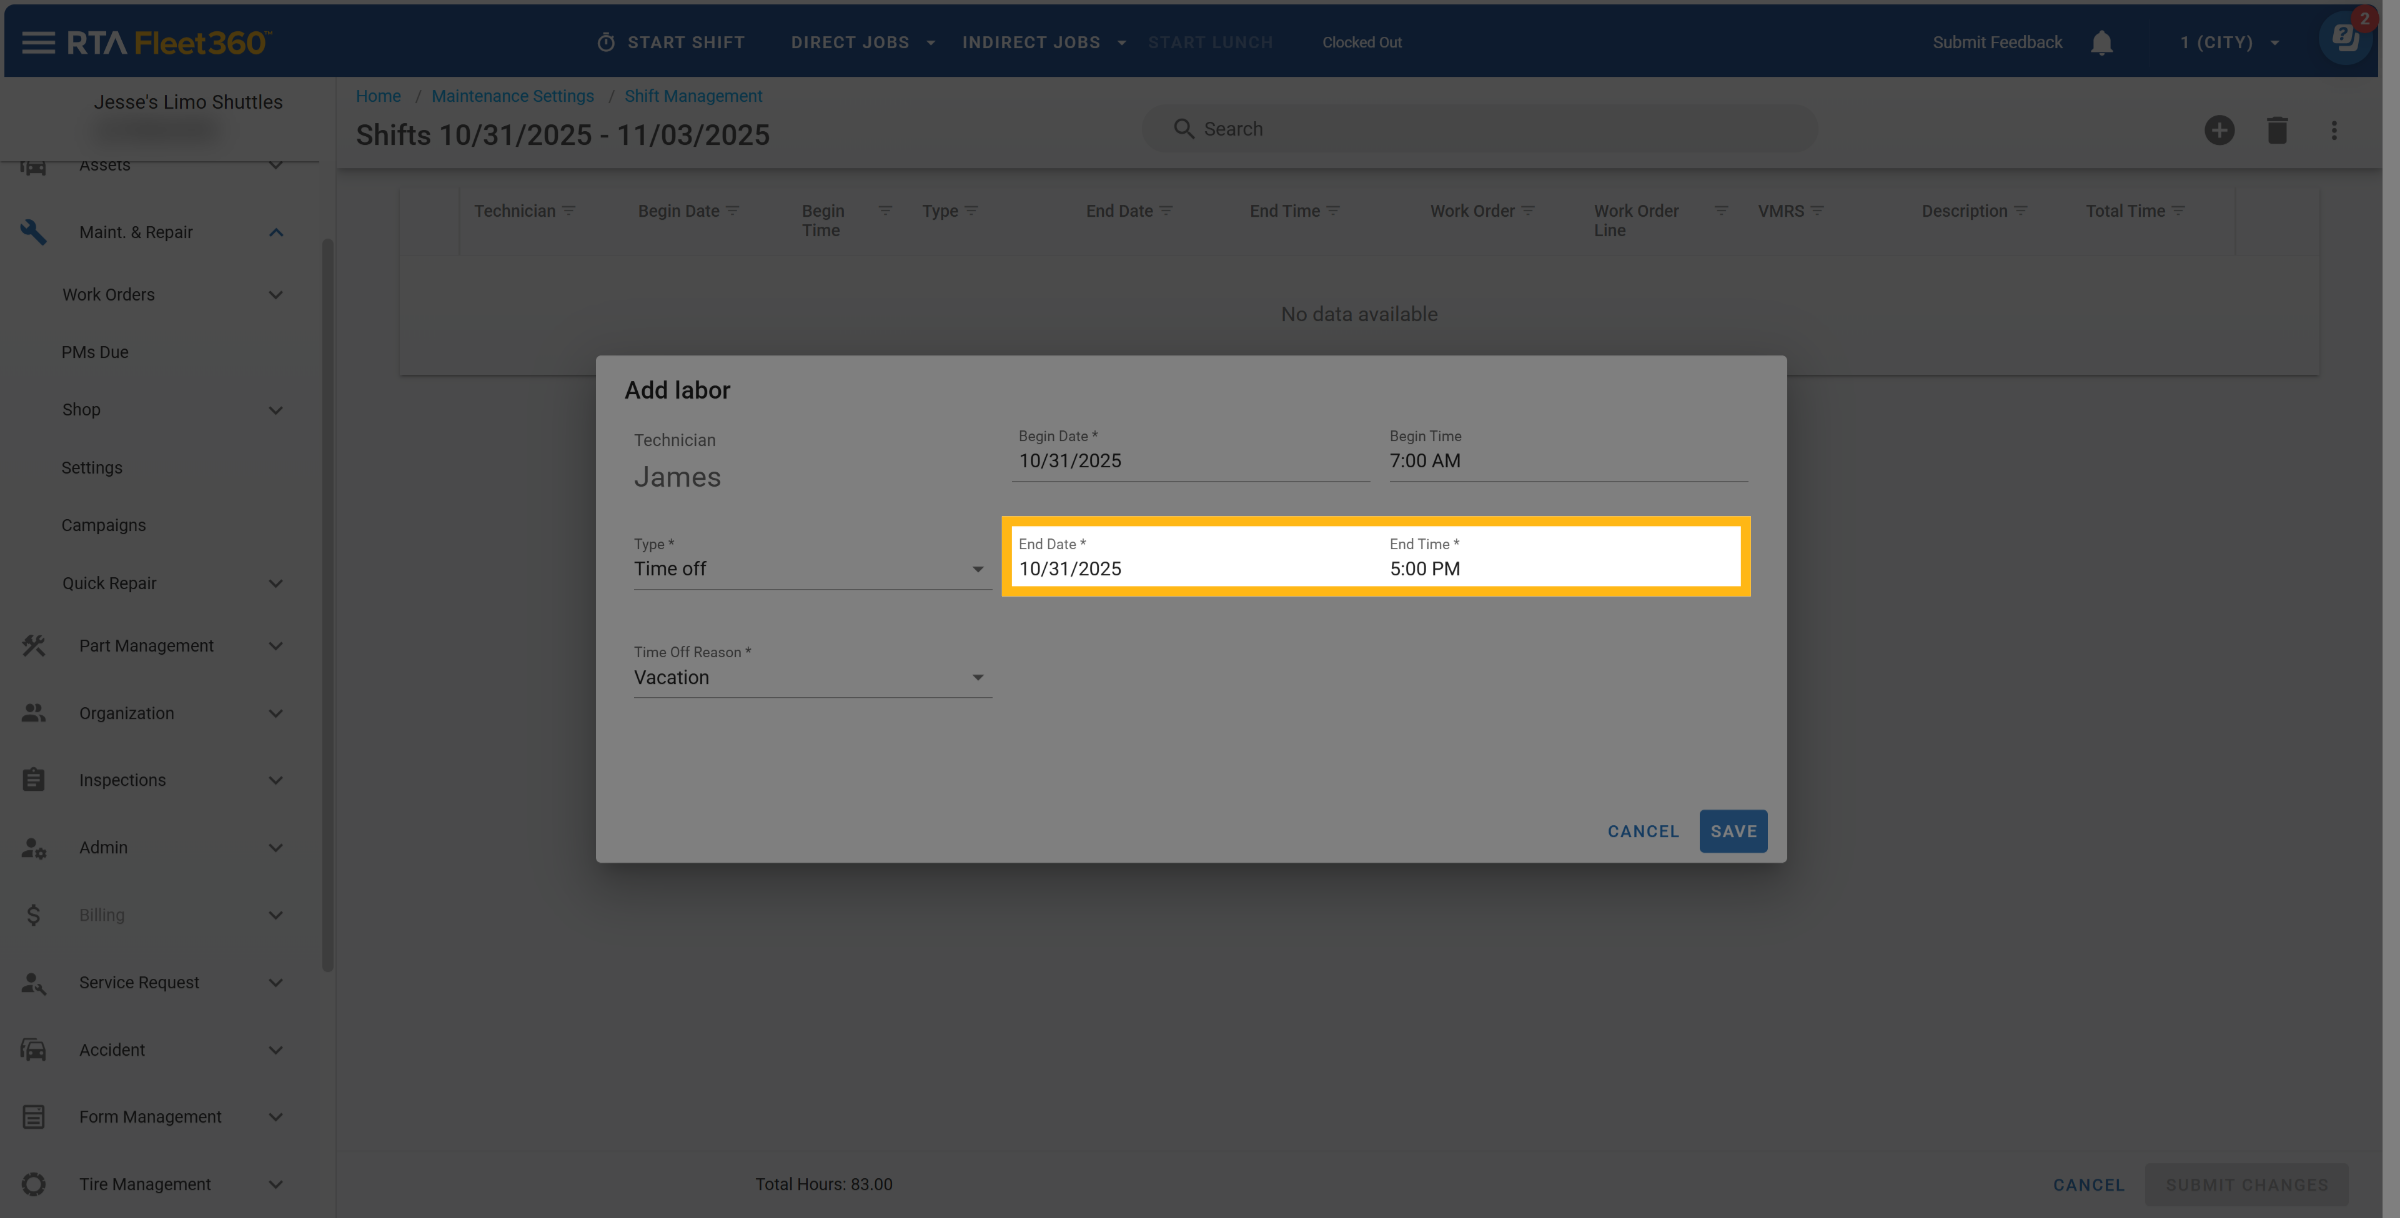
The End Date and End Time will prefill with the exact same values as the begin time
Change the end date and time by clicking into the lines and selecting from the calendar for the date and the clock for the time
A begin and end shift should not have the date and times adjusted as they are typically a single stamp in time and don’t carry on for any amount of time
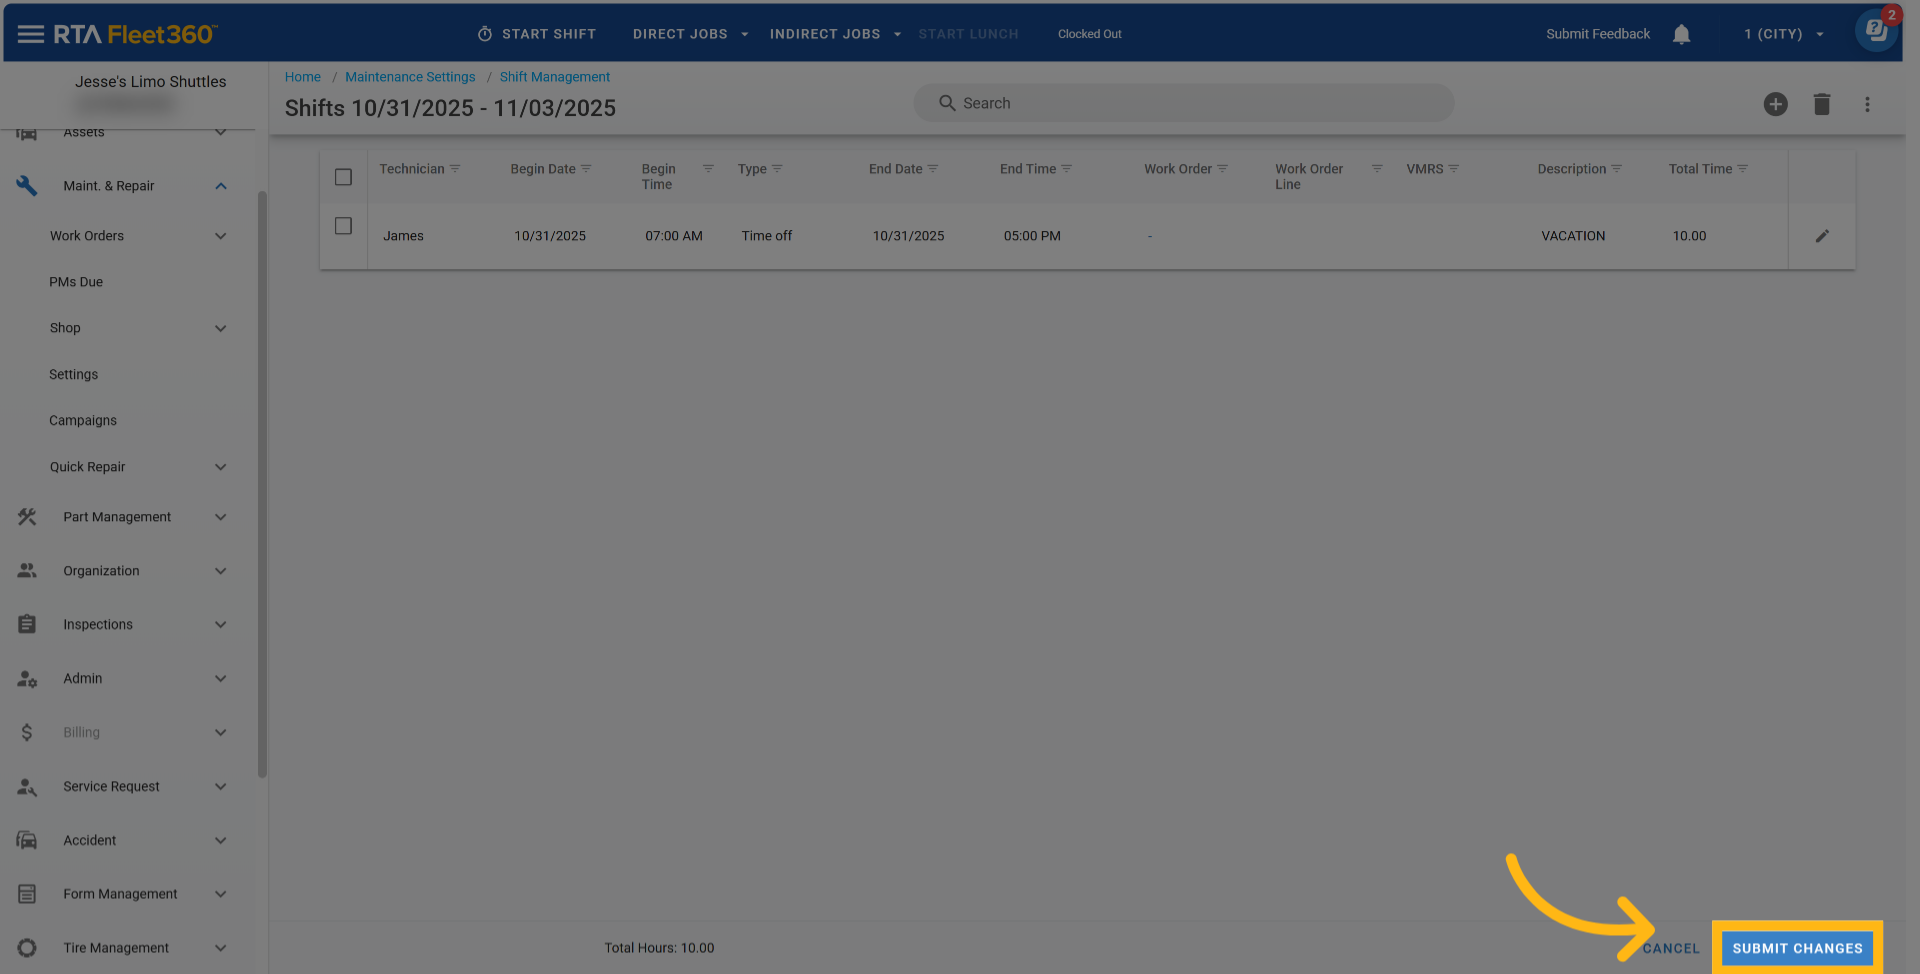
Click Save
Click Submit Changes to confirm