User Group Maintenance
User Groups allow administrators to see what areas and levels of access are available with each defined user group and also allows for the creation of custom user groups to fit any organization's needs.
This document will explain the structure of user groups as well as how to create user groups for use in your organization.
Refer to Creating a New User and/or Editing Users for information on how user groups are added to individual users.
User Group Overview
RTA comes with 13 pre-defined user groups based on industry standard roles within the organization. The groups are assigned to users and determine their level of access and visibility into all areas of the software.
Refer to User Groups Access Charts for a breakdown of the functions/access available within the groups.
Custom groups can also be created to expand the selection and create hybrids that may be needed for various facilities where applicable.
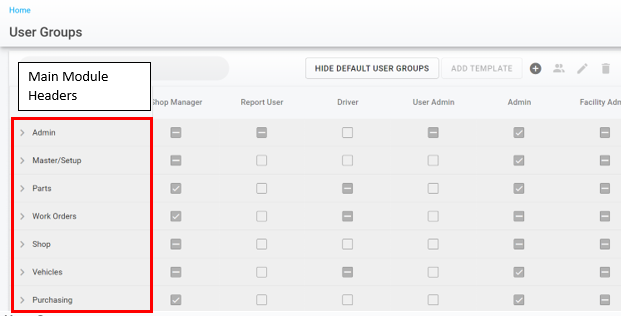
To view the User Groups, click on User Groups under the Admin section of the main menu. Here you will see the User Group title across the top and can expand the regions on the left to view the various aspects of each section.
The User Group main page shows access at the module level as well as the individual sections/actions within that module. Expanding the module header items will display the individual access actions/functions that pertain to that area.
An empty box on the module header line item indicates no access to that module at all
An empty box on an individual area of a module indicates no access to that particular function item
A dash on the module header line item indicates partial access to a module area and expanding the main area will detail which sub-sections the user would have access to
A check indicates full access to an area or particular line item
Viewing List of Users Assigned to a User Group
To see all the users assigned to a particular user group, do the following:
Click on the column header for the user group in question
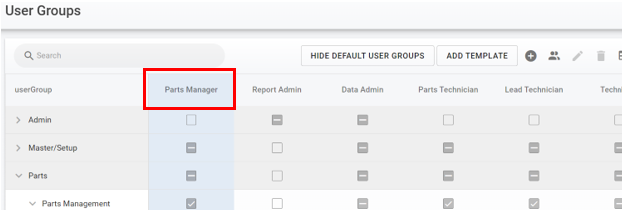
Click the Users Icon in the upper right

The list of users assigned to that group will display and can be removed if necessary
Creating a Custom User Group
It may be necessary to create a custom user group based on shop needs.
Access the User Groups by clicking on User Group from the Admin main menu
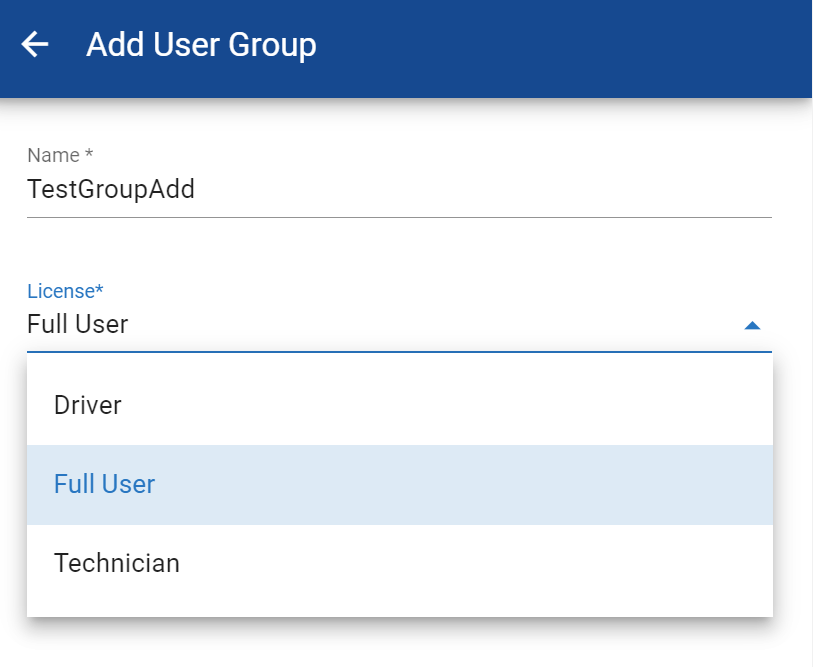
Click the + icon to add a new user group
Give the User Group a name/title that makes sense for its intended use
Select the type of User License that it is associate with
Click Add
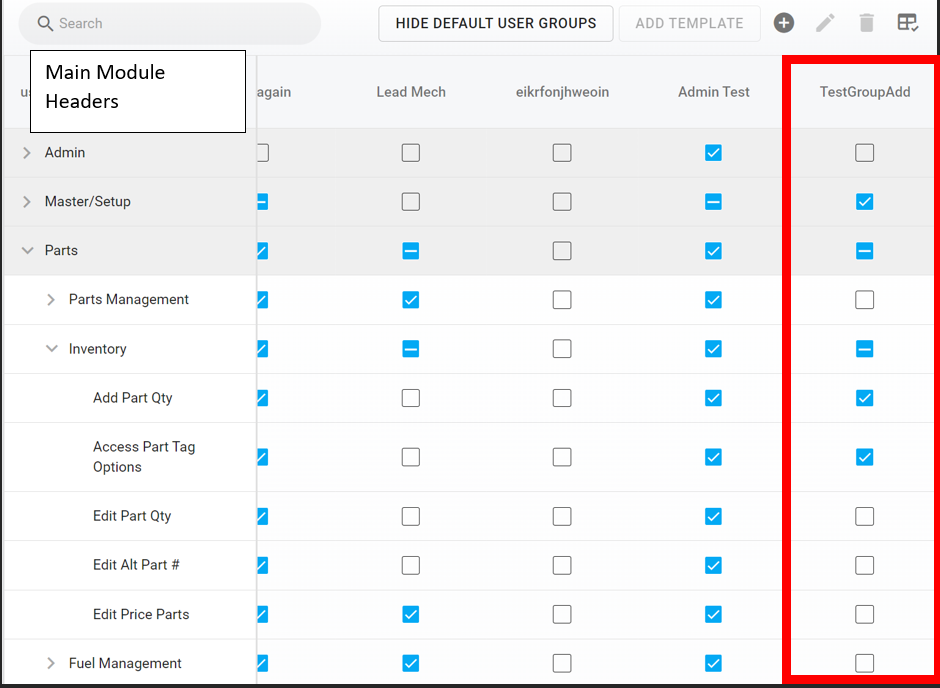
Expand necessary main module areas on the left to see all actions/functions within those modules (you will need to do this to make it easier to select what areas the user group would have access to)
Placing a checkmark in the main module header line item gives the user group access to all subsections of that module
The option also exists to select sub section line items from as many main module areas as necessary
The system will automatically place a dash in the main module header line item if only a portion of the sub sections are selected which indicates that partial access to that module area exists
For Example: In the image below, the newly created custom user group would have access/rights to the following:
No access to Admin Functions
Full access to all items under the Master/Setup area
Partial access to the Parts Module which includes partial access to the Inventory area
Add Part Qty
Access Part Tag Options
No other sections of Parts will have access
Creating a Custom Group Using a Template
Using a template to create a custom user group can save time. The template feature copies the access of an existing user group (pre-defined or custom) into a new custom group that you can then edit. This is extremely handy if you have a user group that needs a lot of access but only needs exempted from a few of them. You can also select more than one group to build a new group that combines their access.
Access the User Groups by clicking on User Group from the Admin main menu
Click on the column header (title) of the existing user group that you’d like to use as the template. The column highlights and the Add Template button becomes available. To combine groups, click the column header of each group you want to include; the new group receives the combined access of all selected groups.
Click Add Template at the top

Give the new user group a name. The name must be unique, no more than 40 characters, and use only letters, numbers, spaces, hyphens and apostrophes. A license is not selected here; the new group is assigned the highest User License level required by the access being copied.
Click Add
Make adjustments in the new group’s column by checking or unchecking module headers or individual actions. Each change is saved as soon as you click it; there is no Save button for the access grid.
A template copies access only. Users assigned to the original group are not copied to the new group; assign them from the user profile. Pre-defined user groups can be used as a template but cannot be edited or deleted themselves. If the message “insufficient licenses to perform this action” appears, your company has no available custom user group license for another group.
Editing A Custom User Group
Edits can be made to the access/function areas at any time by checking and unchecking corresponding boxes under the appropriate user group column that is needing access edits. Each check or uncheck is saved immediately; there is no separate Save step for access changes.
A user group can also have a title change by clicking on the title in the header, clicking the edit pencil icon, updating the name, and clicking save.
Deleting A Custom User Group
When deleting a user group, be sure that you know what users are assigned to that group and make adjustments to their user profile as necessary.
Refer to Editing Users for instructions on making edits to user profiles.
To delete a user group:
Click on the title header for the appropriate column
Click on the delete icon at the top