Creating New Tire
Tires can be added/created in Fleet360 by creating the tire through the tire master list. This document will discuss how to build a new tire file from the Tires list.
See “Creating a New Tire Using a Template” to learn how to create a new tire file using a template.
Creating a New Tire
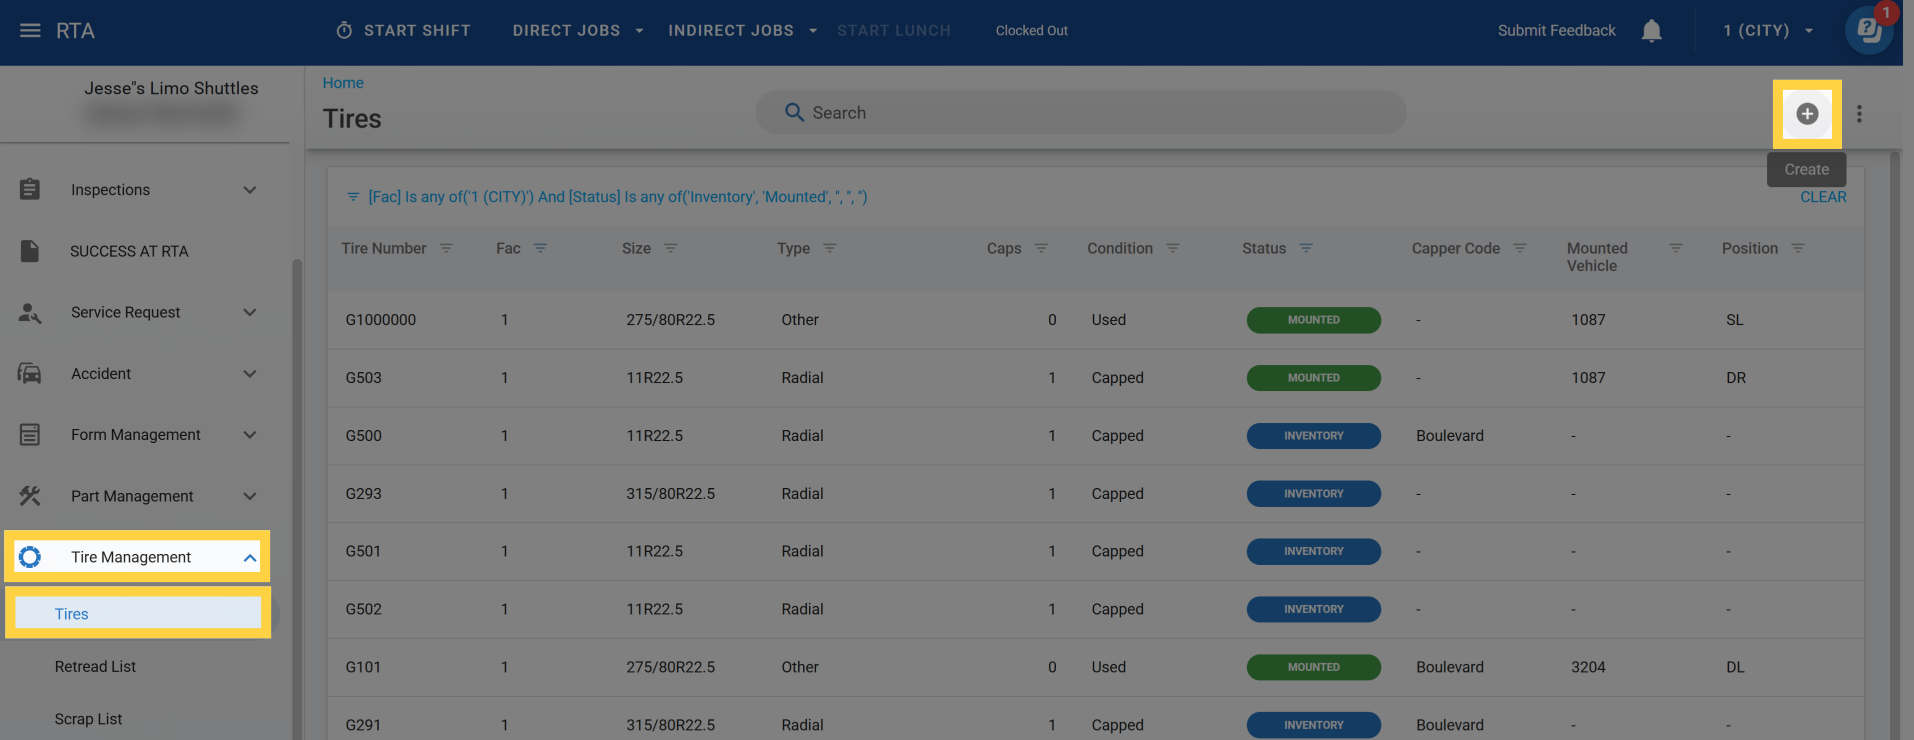
1. Click on Tire Management → Tires → Plus icon top right corner
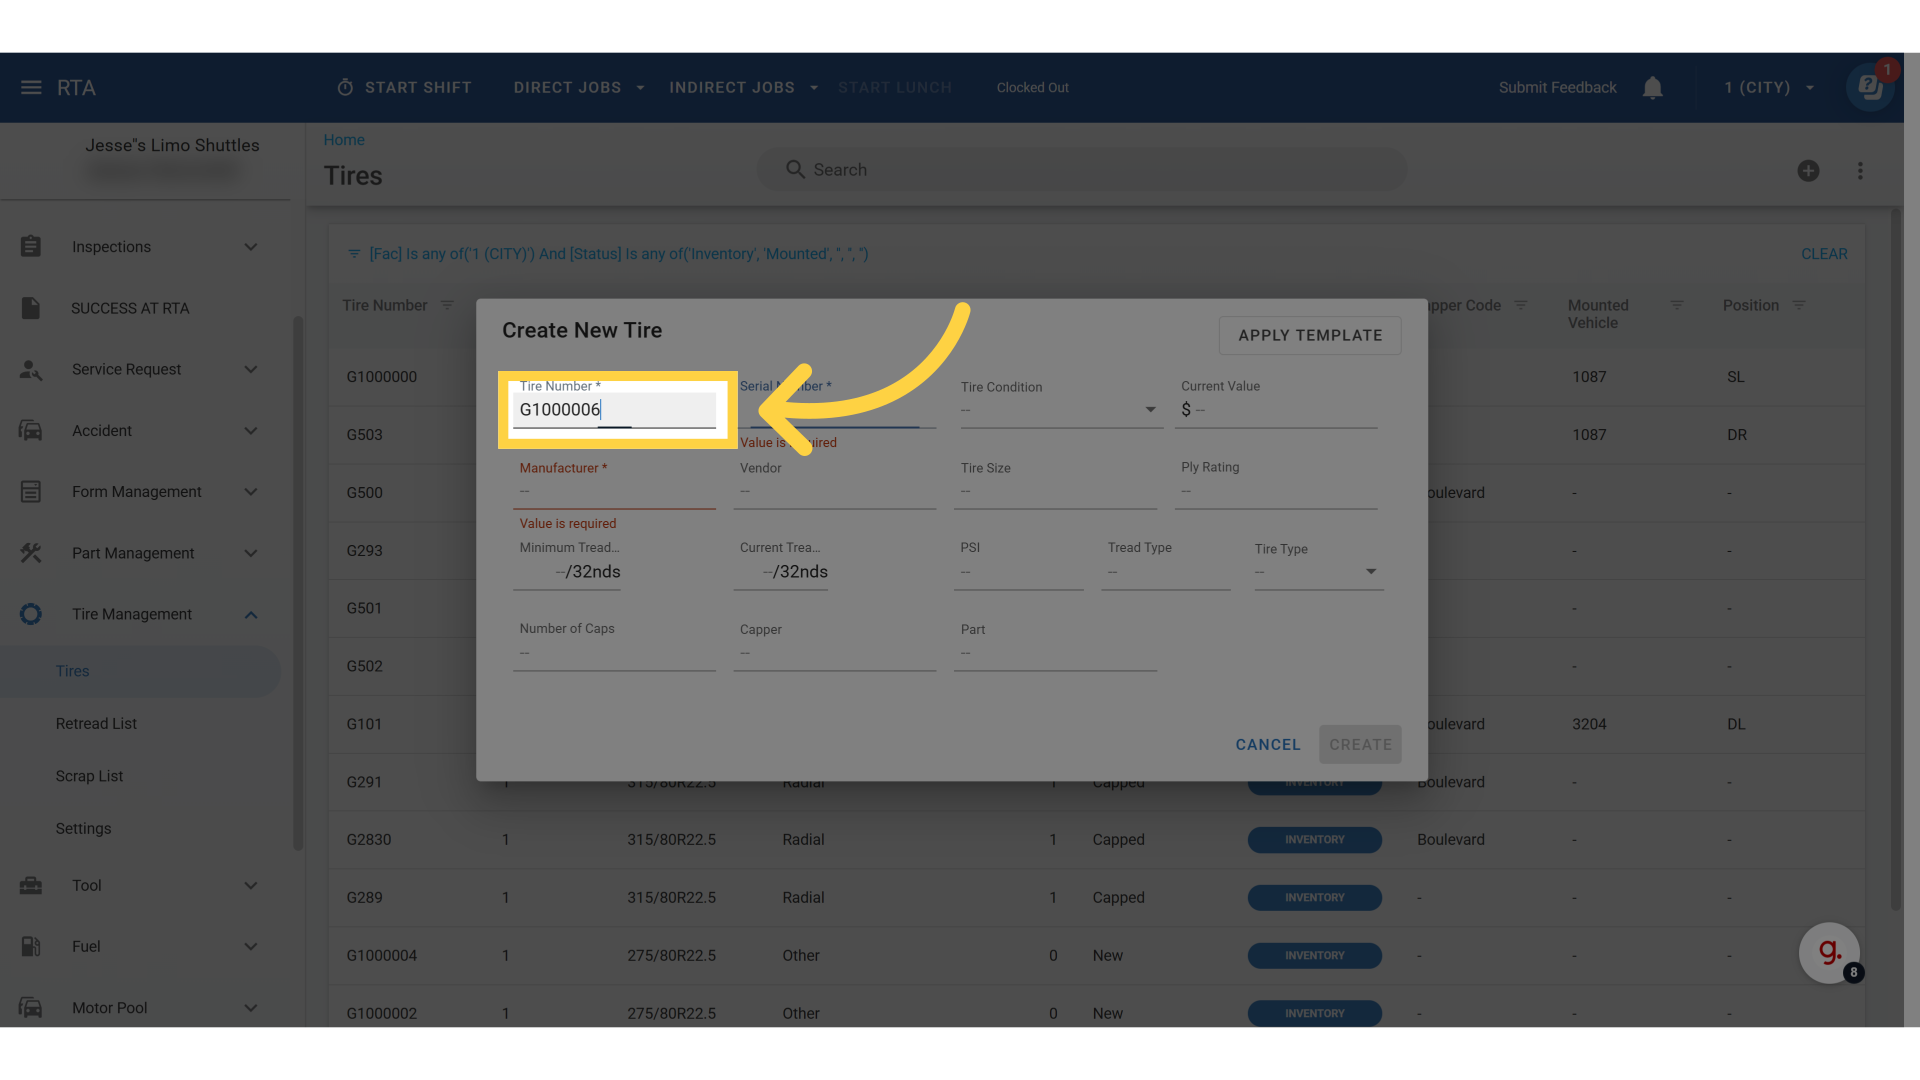
2. Click "Tire Number "
Input the desired tire number
This is a system-generated or user-assigned unique identifier used internally within Fleet360
It allows the fleet to track and manage the tire as an individual asset throughout its lifecycle including installations, capping, and scrapping
3. Click "Serial Number *"
Input the serial number
This is the manufacturer's unique identifier stamped or molded onto the tire

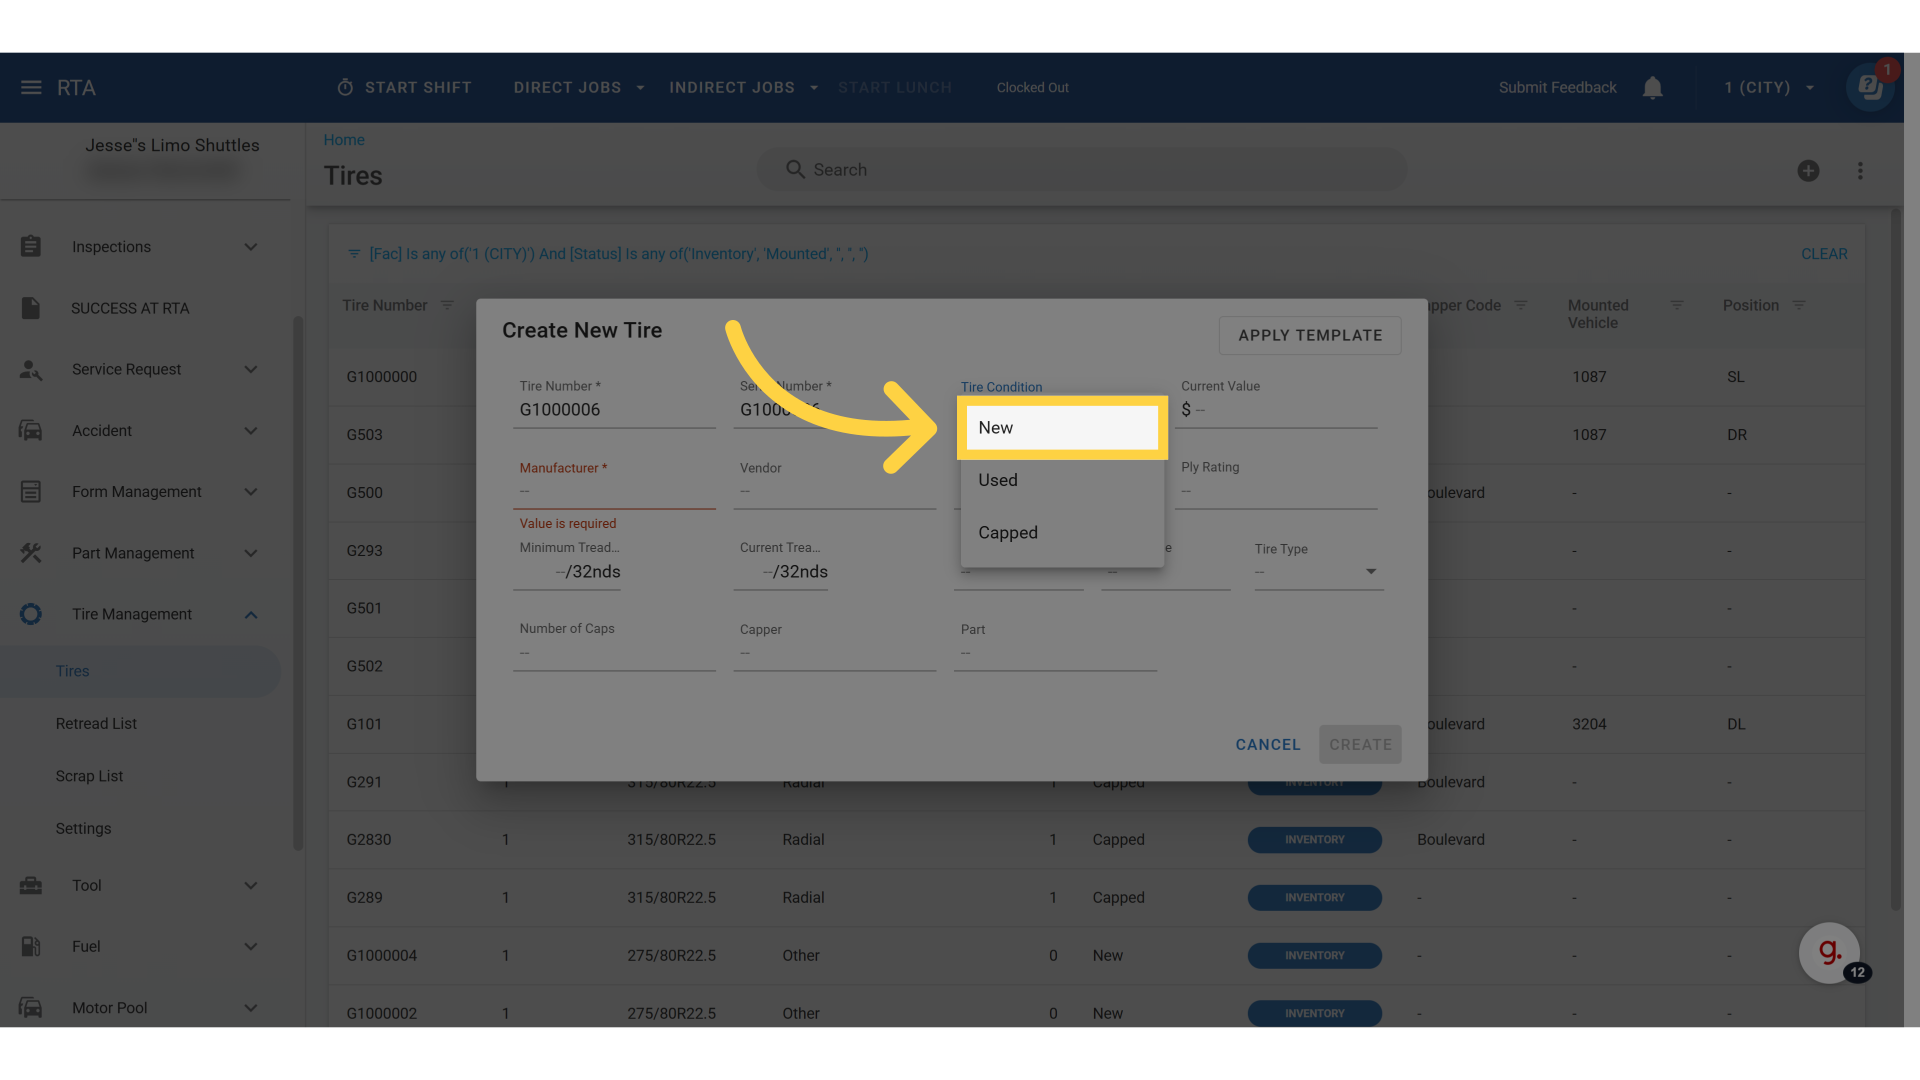
4. Click "Tire Condition"
Select "New, Used, or Capped" depending on what the tire condition is
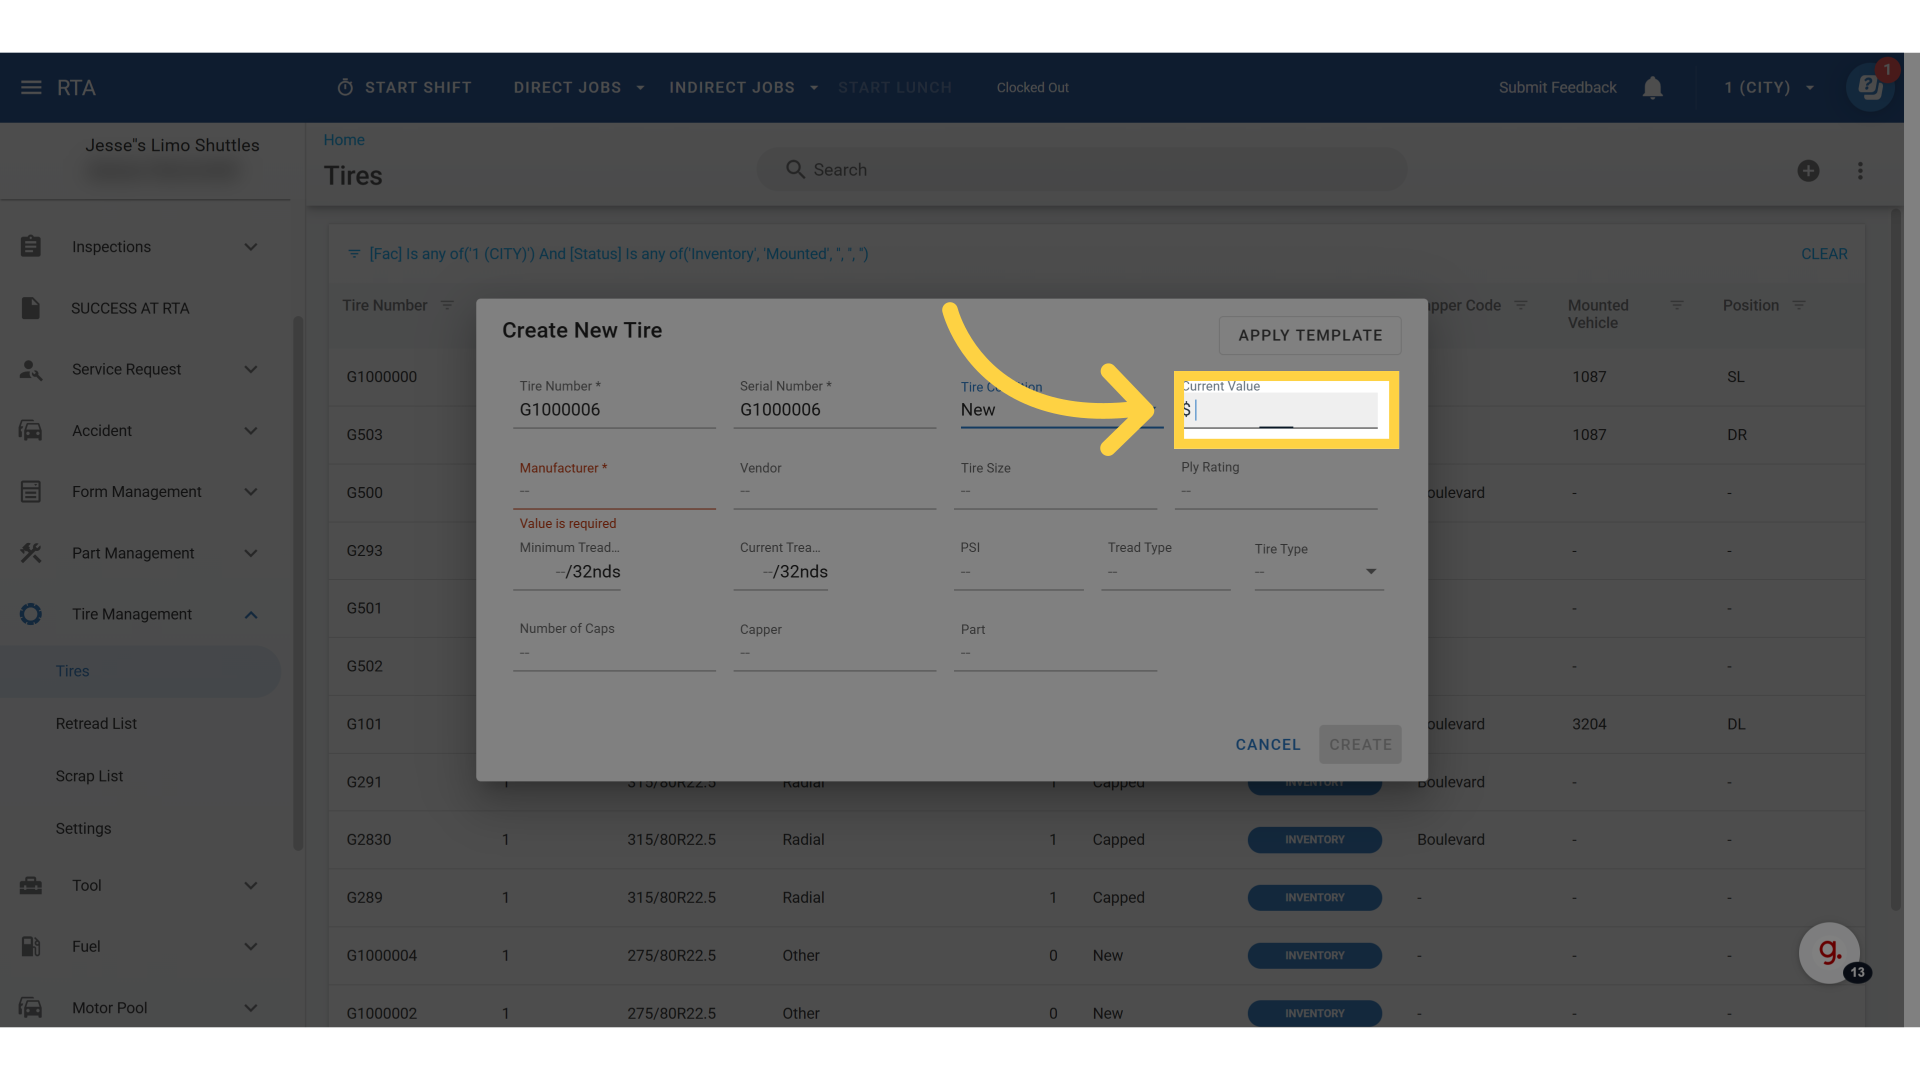
5. Click "Current Value"
Input the current value of the tire
This will capture the starting price for the life of the tire
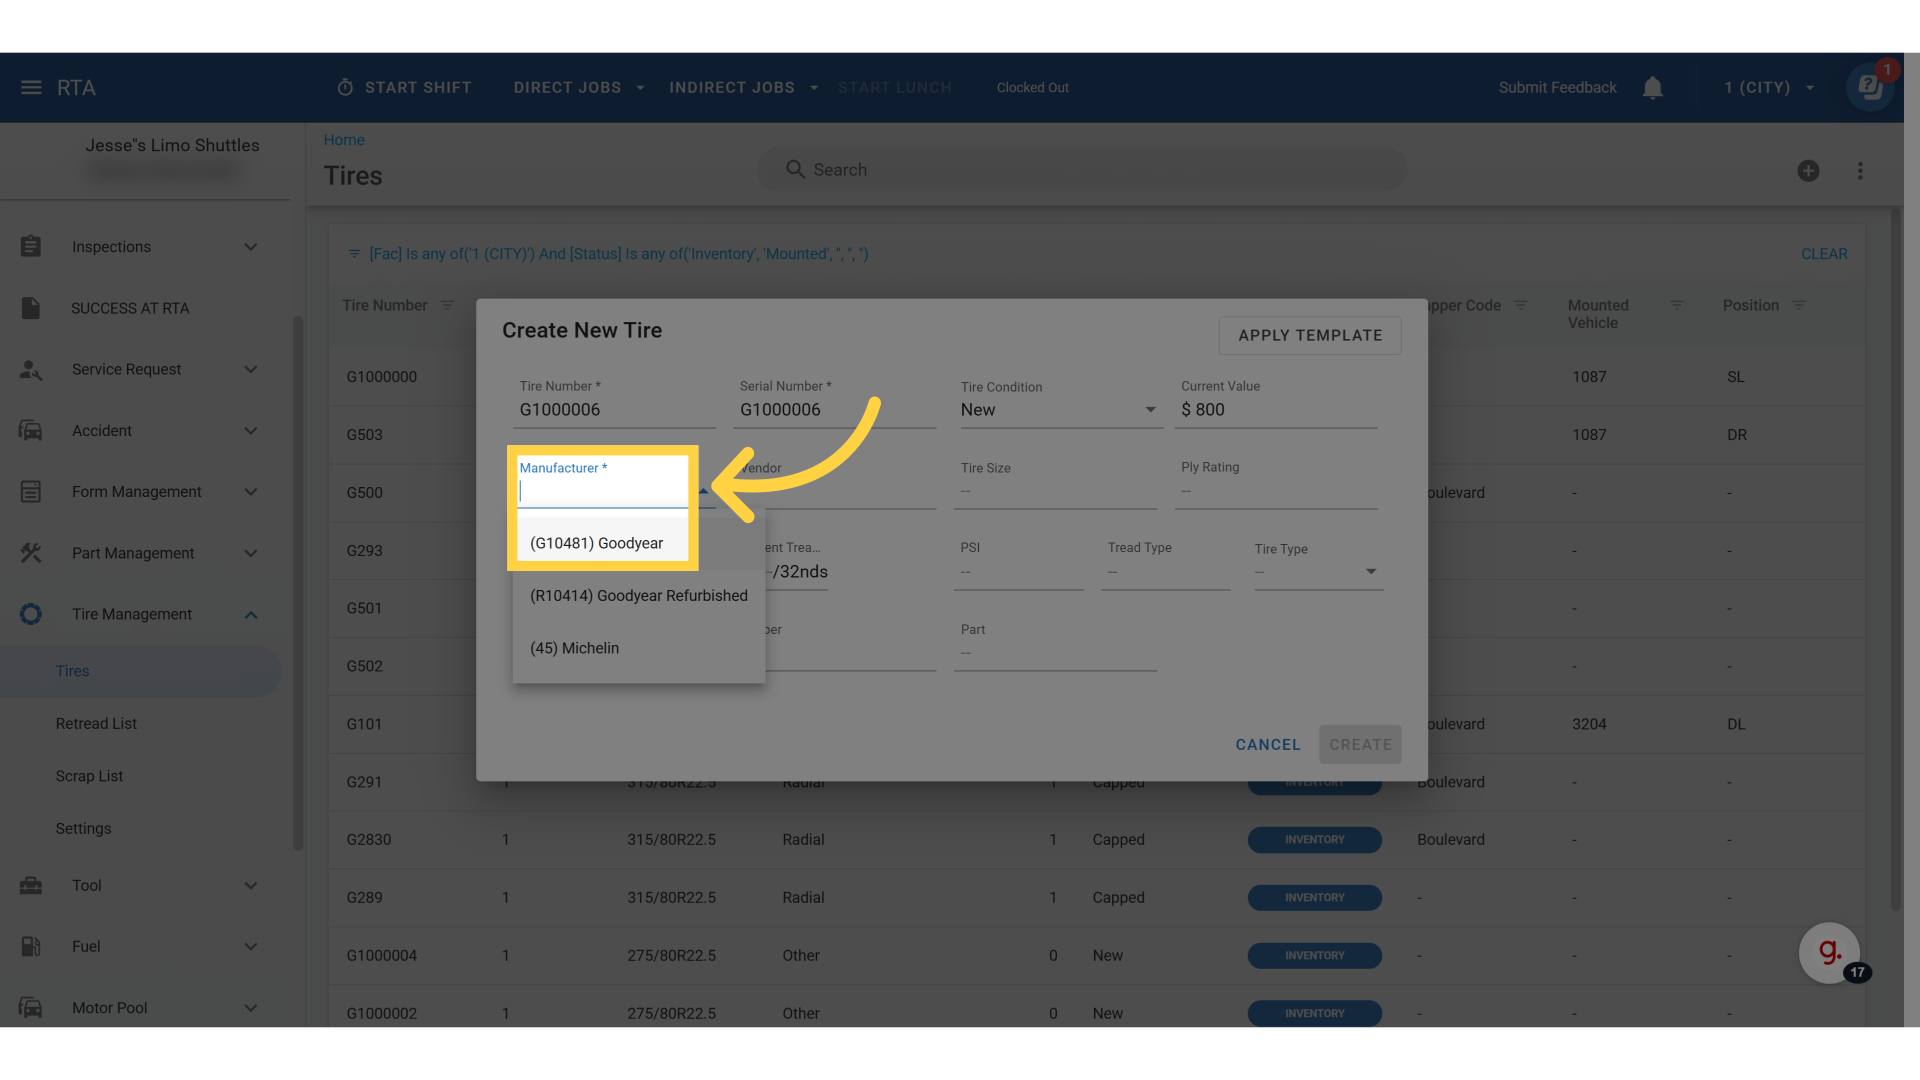
6. Click "Manufacturer"
Choose the appropriate manufacturer. To create a new manufacture see the "Manufacturer Codes" article
Manufacturer Codes are used to create and manage entries that represent tire manufacturers
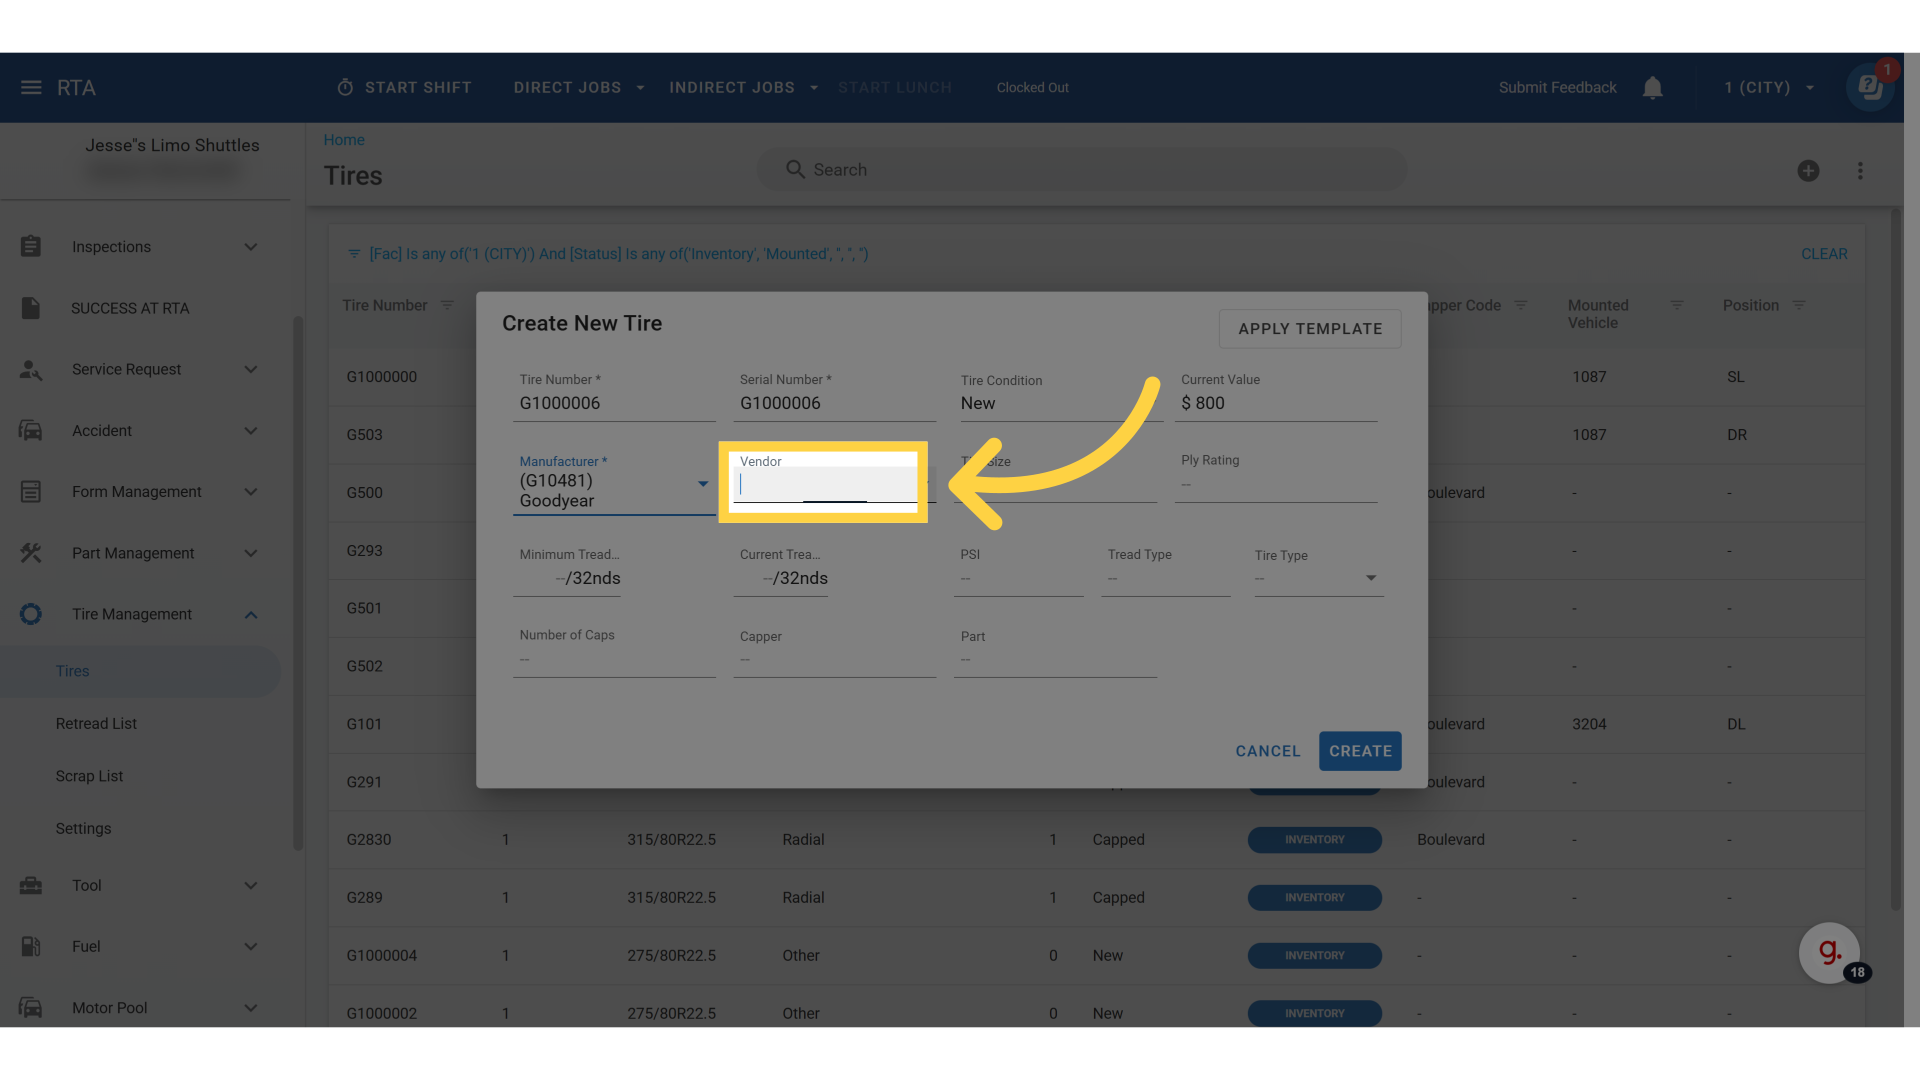
7. Click "Vendor"
Select the appropriate vendor. The vendor selection comes from the "Vendor files" found under the "Part Management" tab. See the "Vendor Table of Contents" to learn more about Vendor Files.
Linking a vendor file will associate who the tires are purchased from
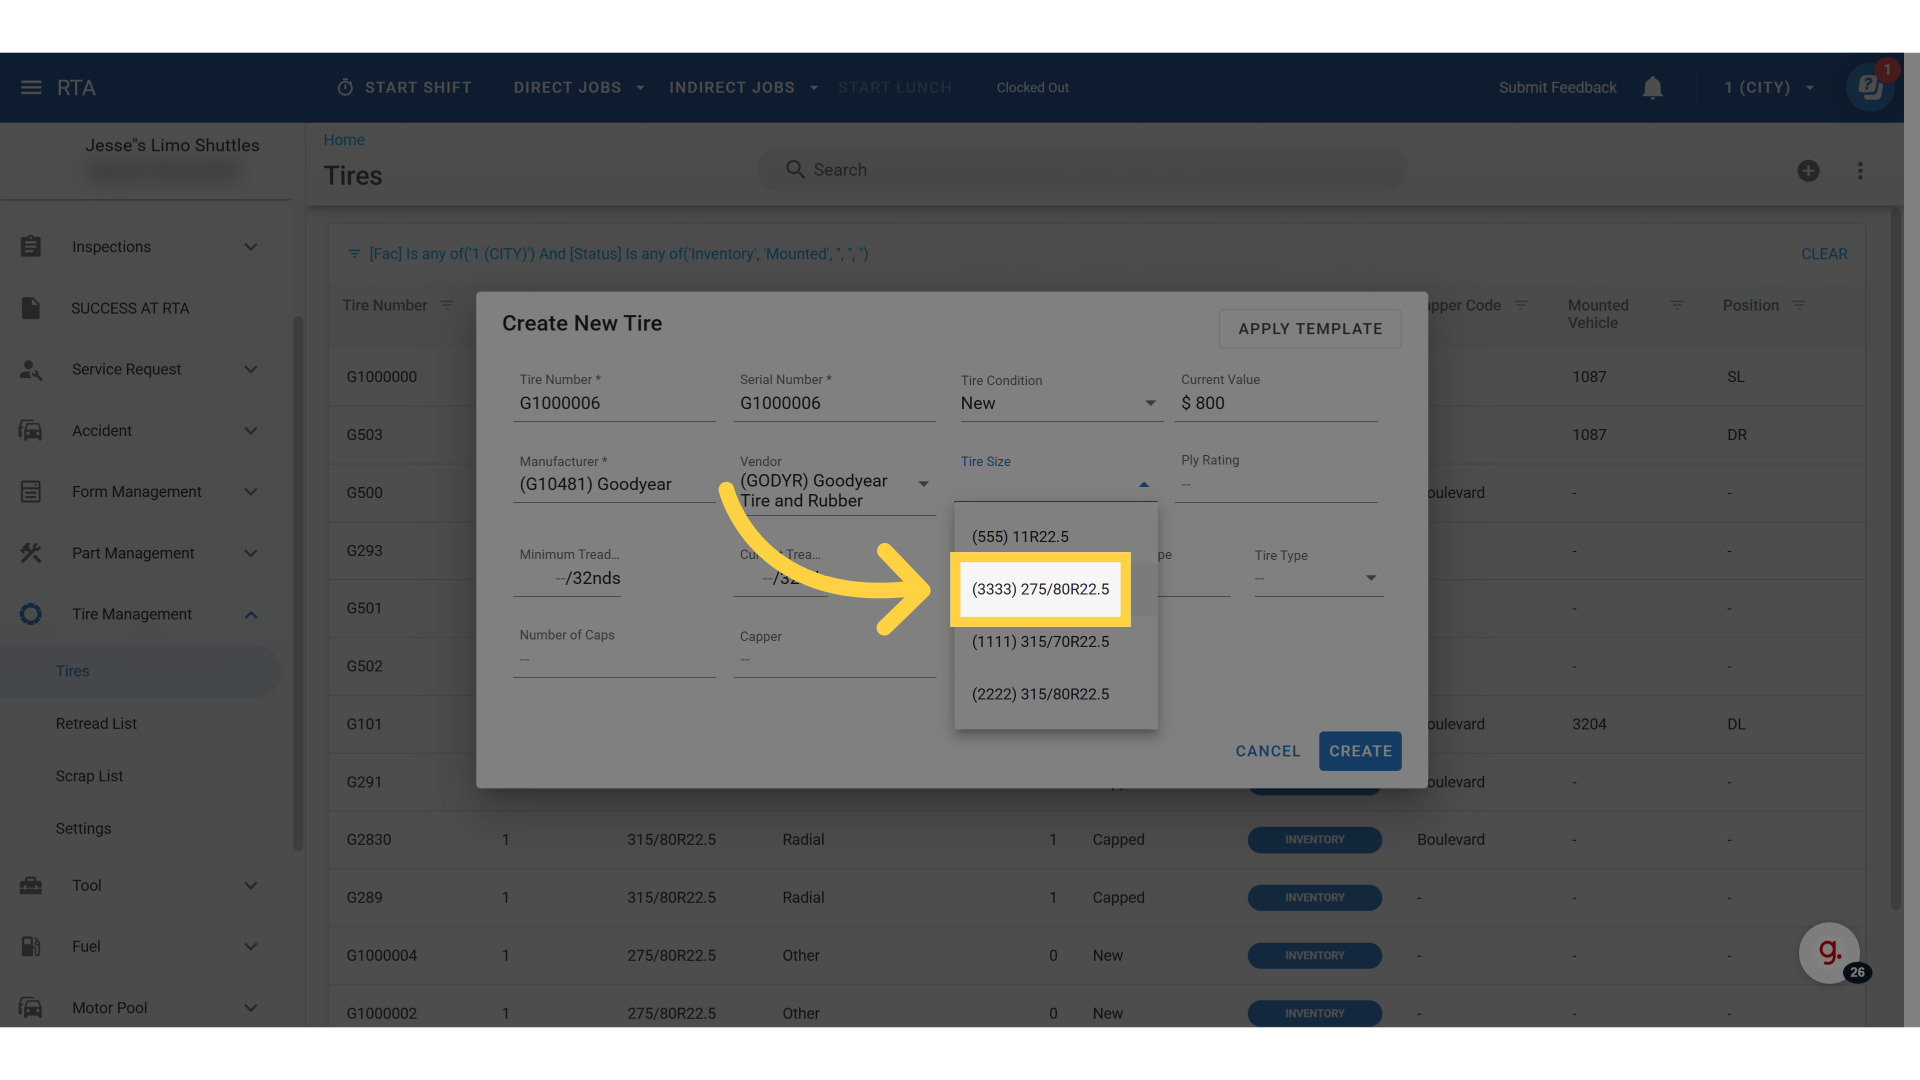
8. Click "Tire Size"
Choose the specific tire size. See the "Tire Size" article under Tire Management Settings to learn how to create new Tire Sizes
9. Click "Ply Rating"
Enter a Ply Rating (Optional)
A tire's ply rating is a standardized way to indicate its strength and load-carrying capacity

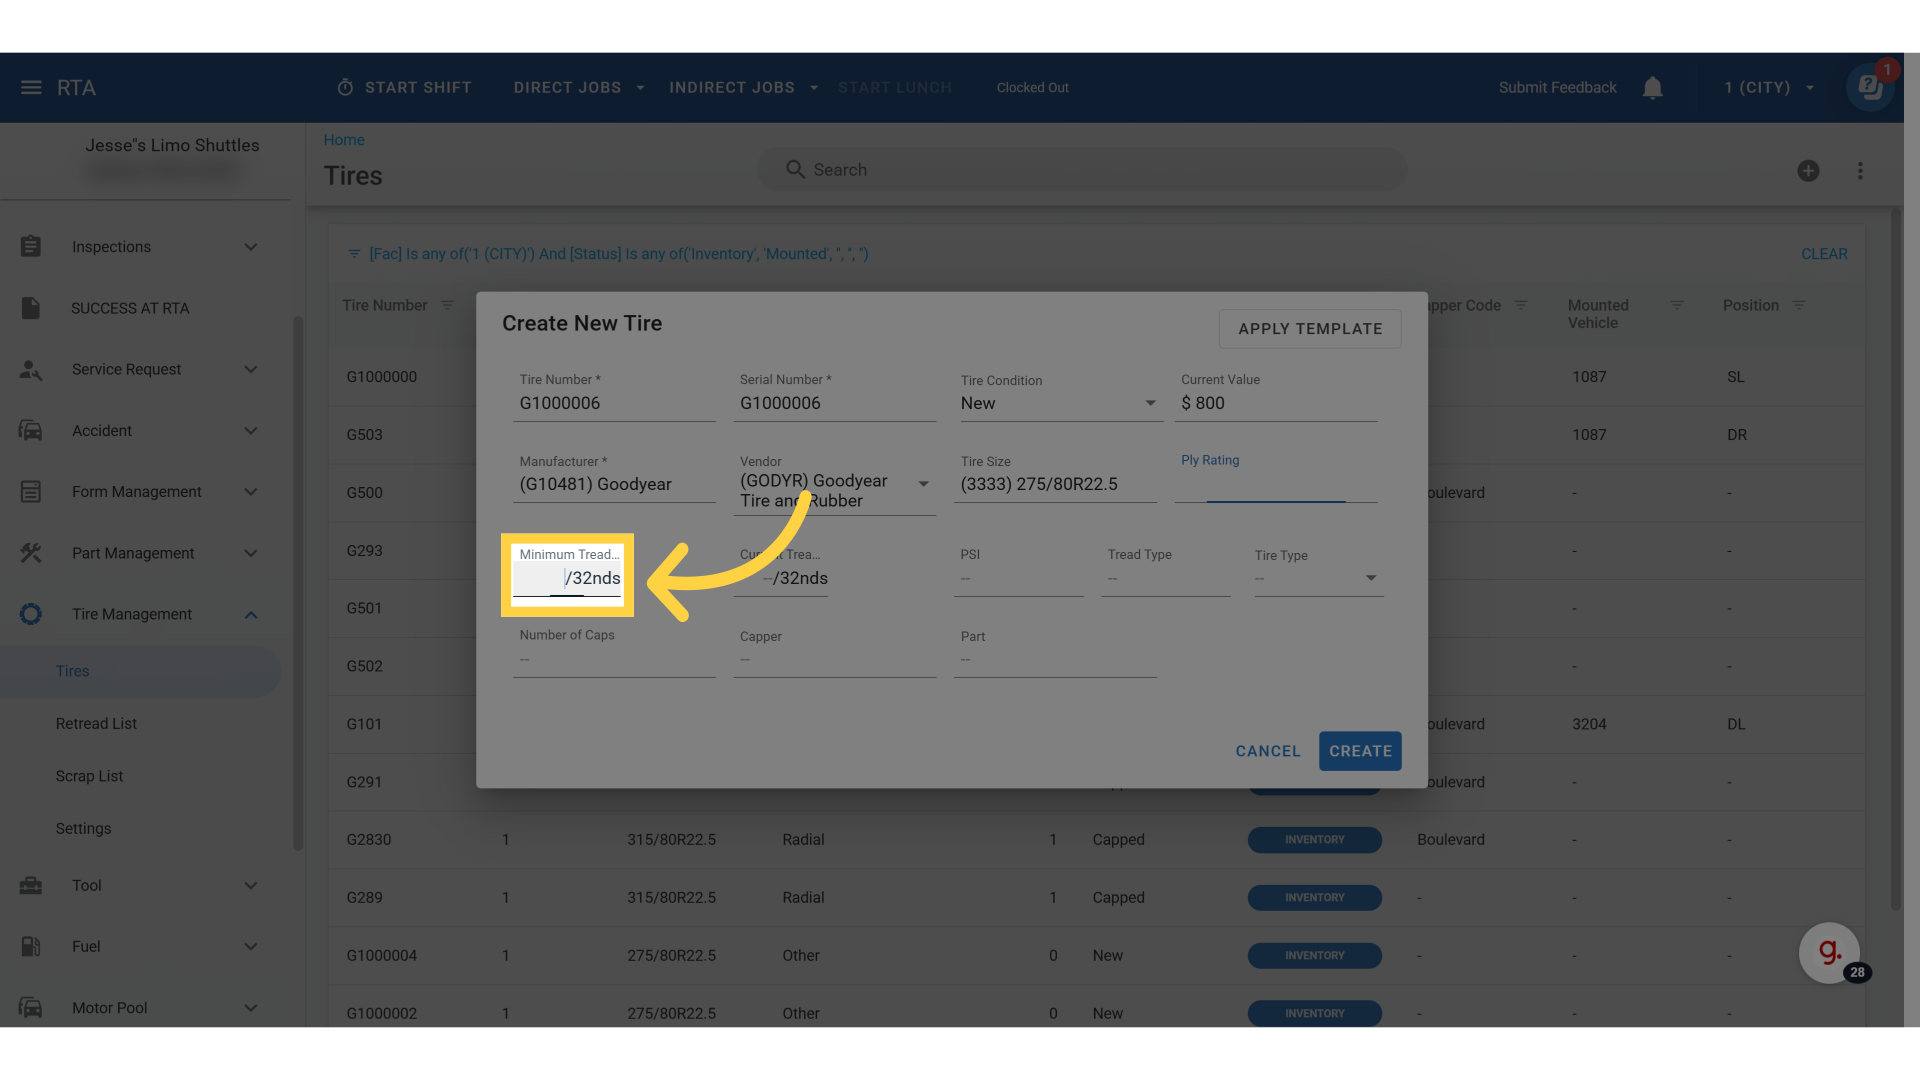
10. Click "Minimum Tread Depth"
Specify the minimum tread depth
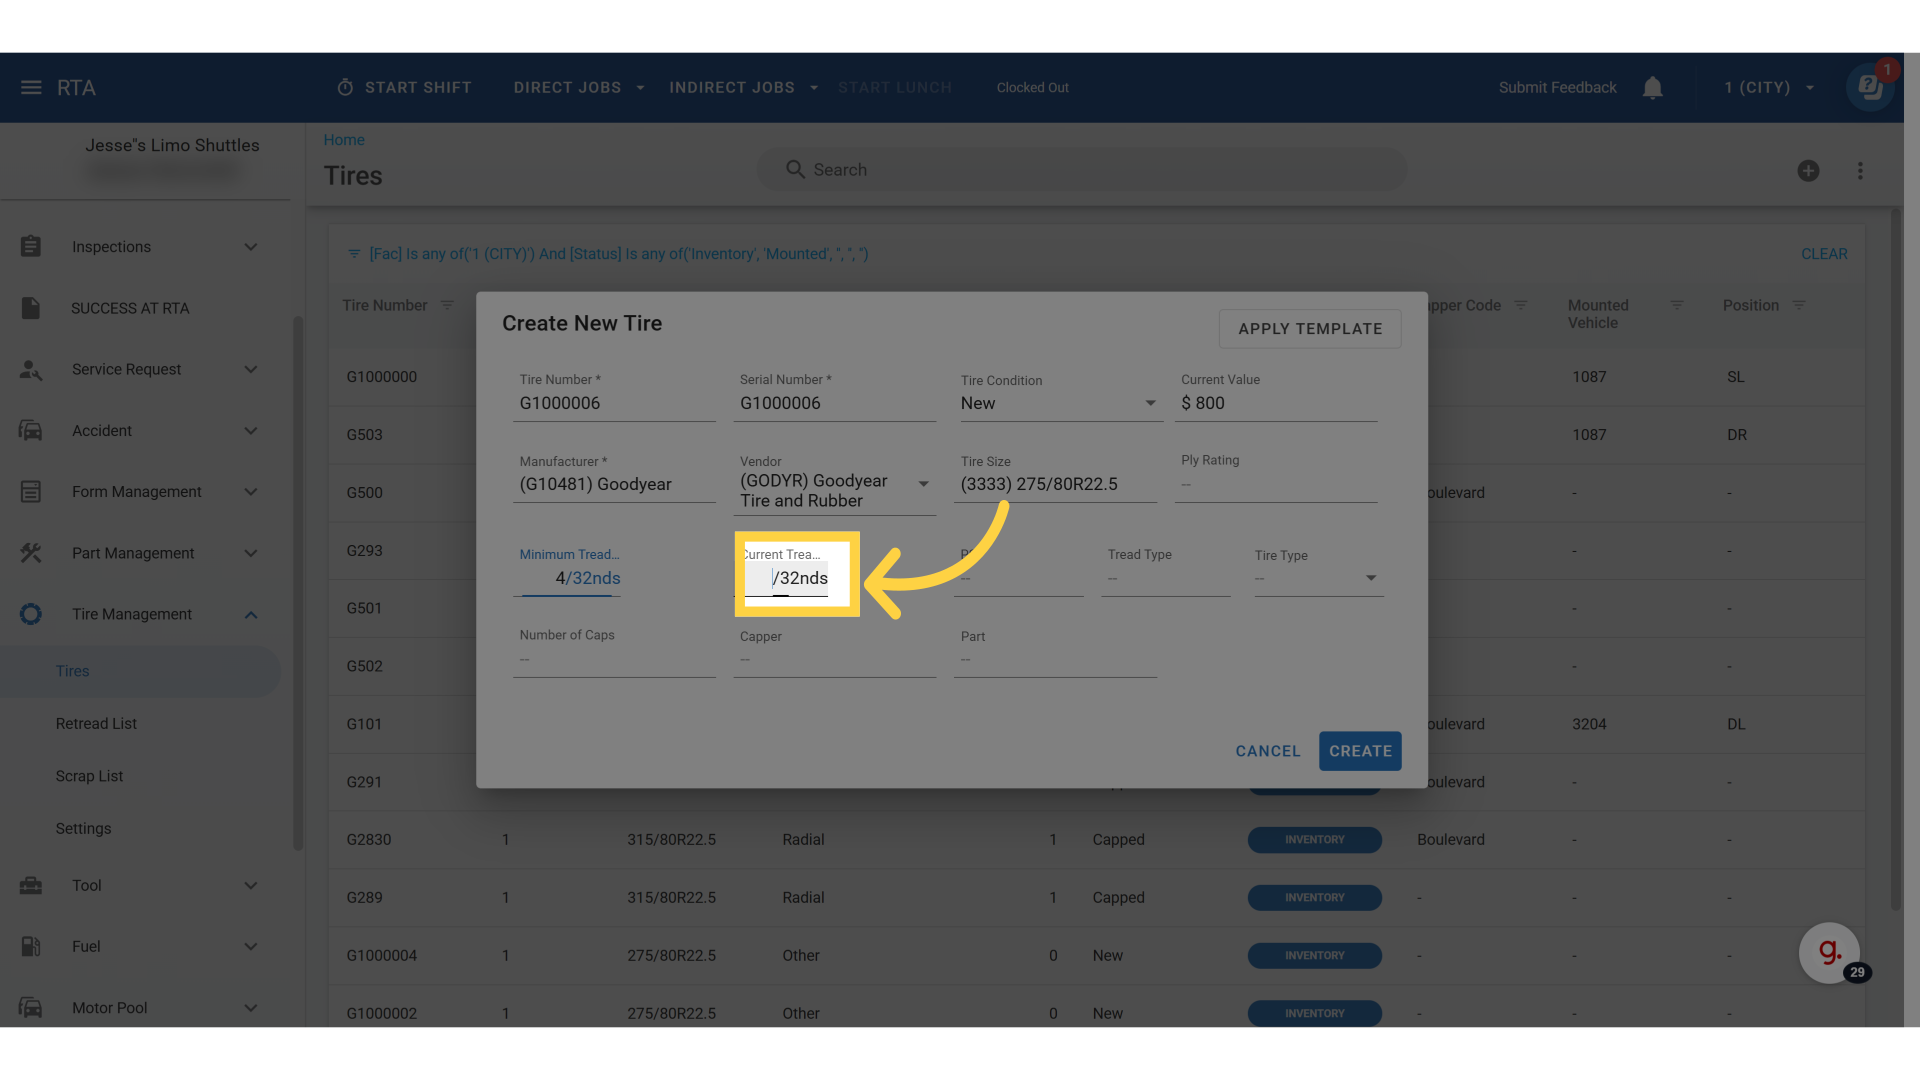
11. Click "Current Tread Depth"
Input the current tread depth of the tire
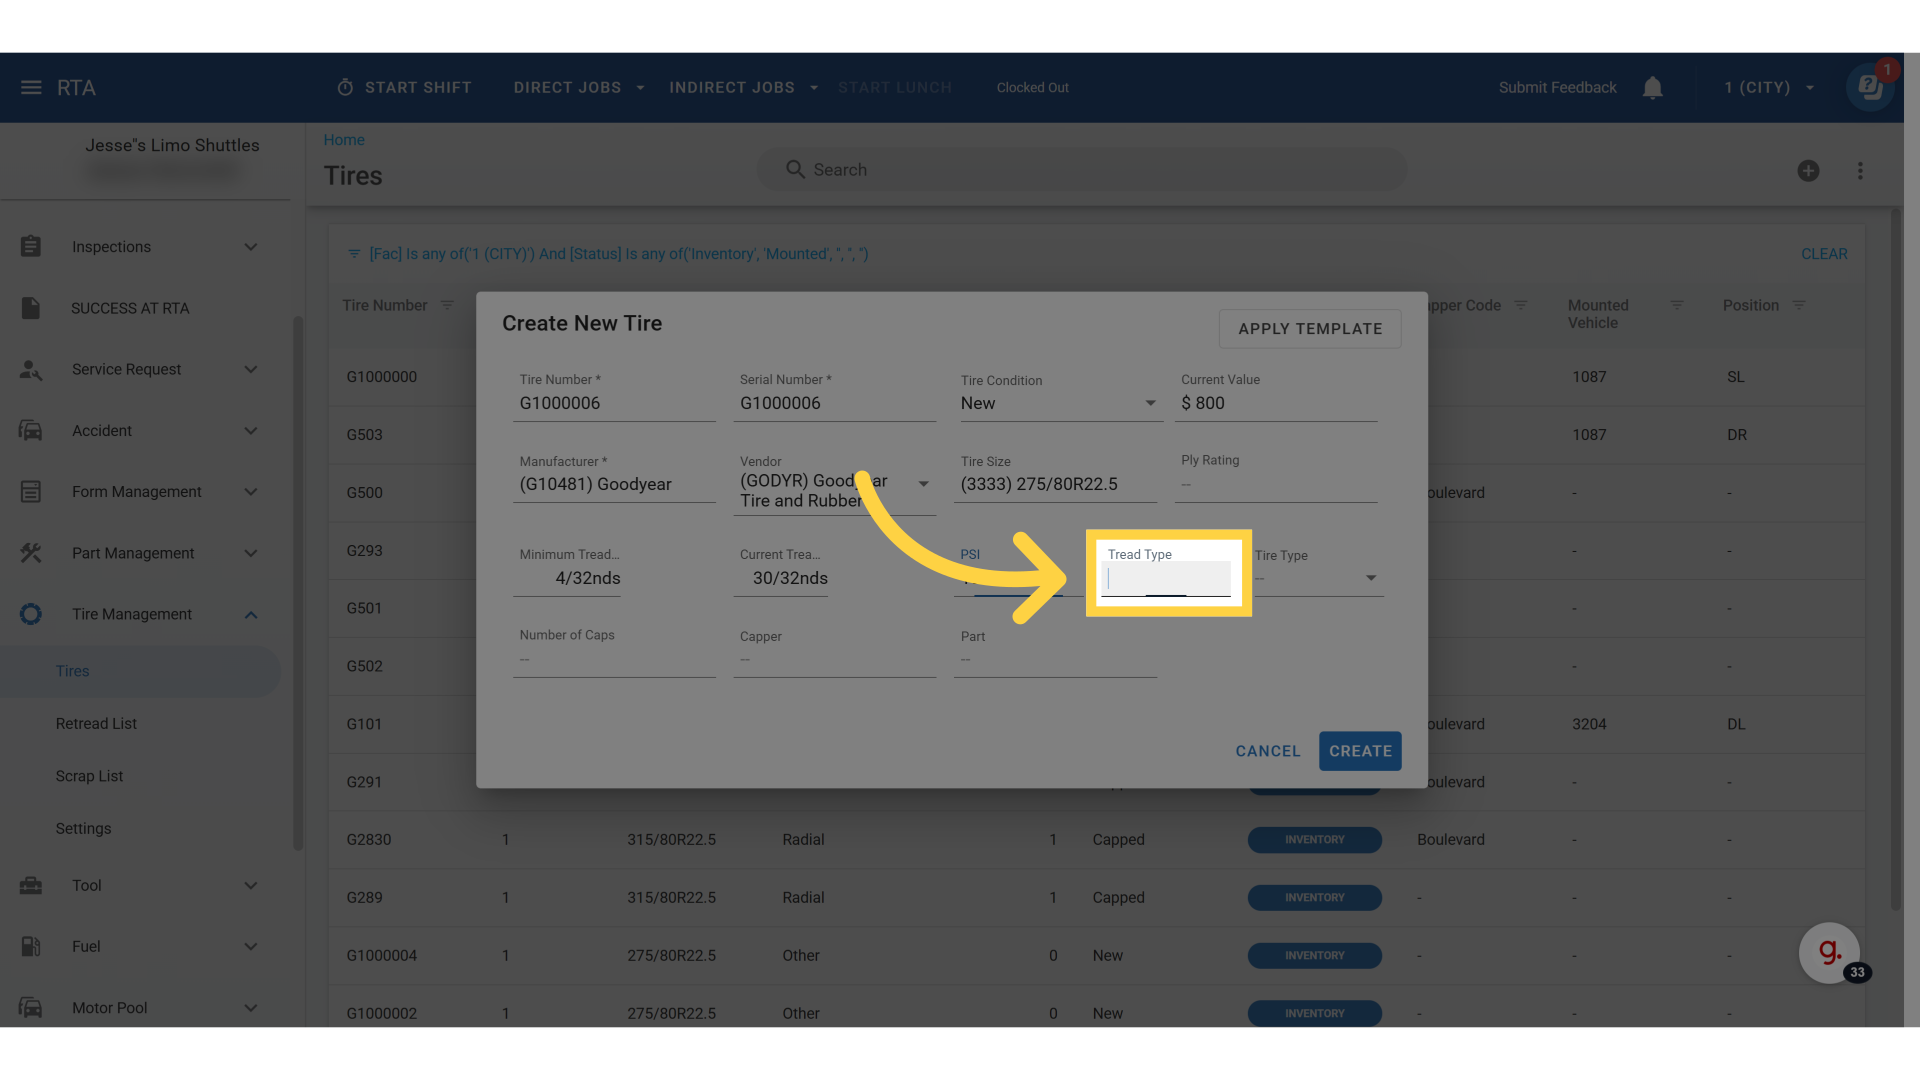
11. Click "PSI"
Input the recommended tire pressure

12. Click "Tread Type"
Input a tread type (Optional)
Tire tread types are designed to optimize grip, handling, and performance in various driving conditions. The three main types are symmetrical, asymmetrical, and directional
13. Click "Tire Type"
Choose one of the three Tire Types (Radial, Bias, or Other)
Radial tires, the most widely used, feature plies that run from sidewall to sidewall across the tread. This design provides a smoother ride and improved fuel efficiency.
Bias ply tires have plies arranged diagonally across the tire, making them more durable and puncture-resistant, though they may deliver a firmer, less comfortable ride.

14. Click "Number of Caps"
Indicate the number of caps, if any

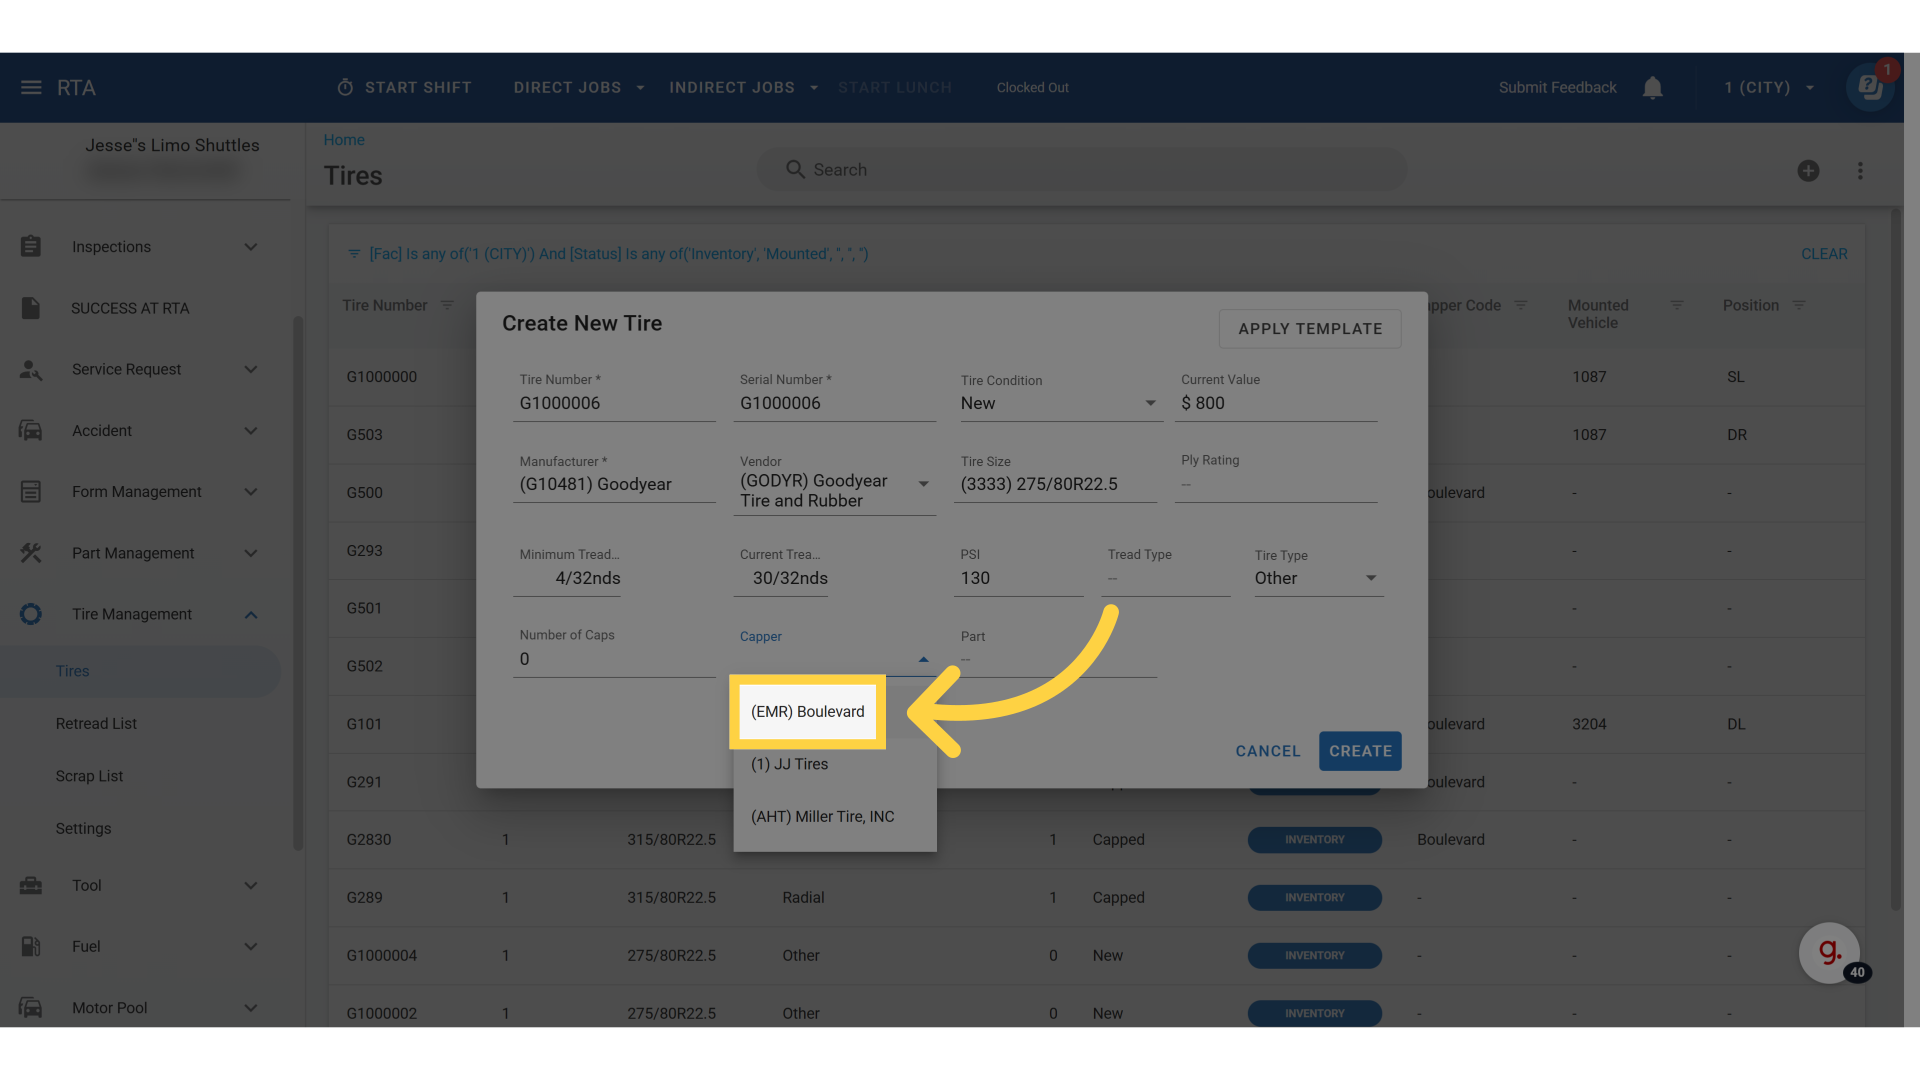
15. Click "Capper"
Choose the designated Capper. See "Capper Codes" to learn how to create new cappers
Capper Codes represent the Capper vendor who provides retread or capping services
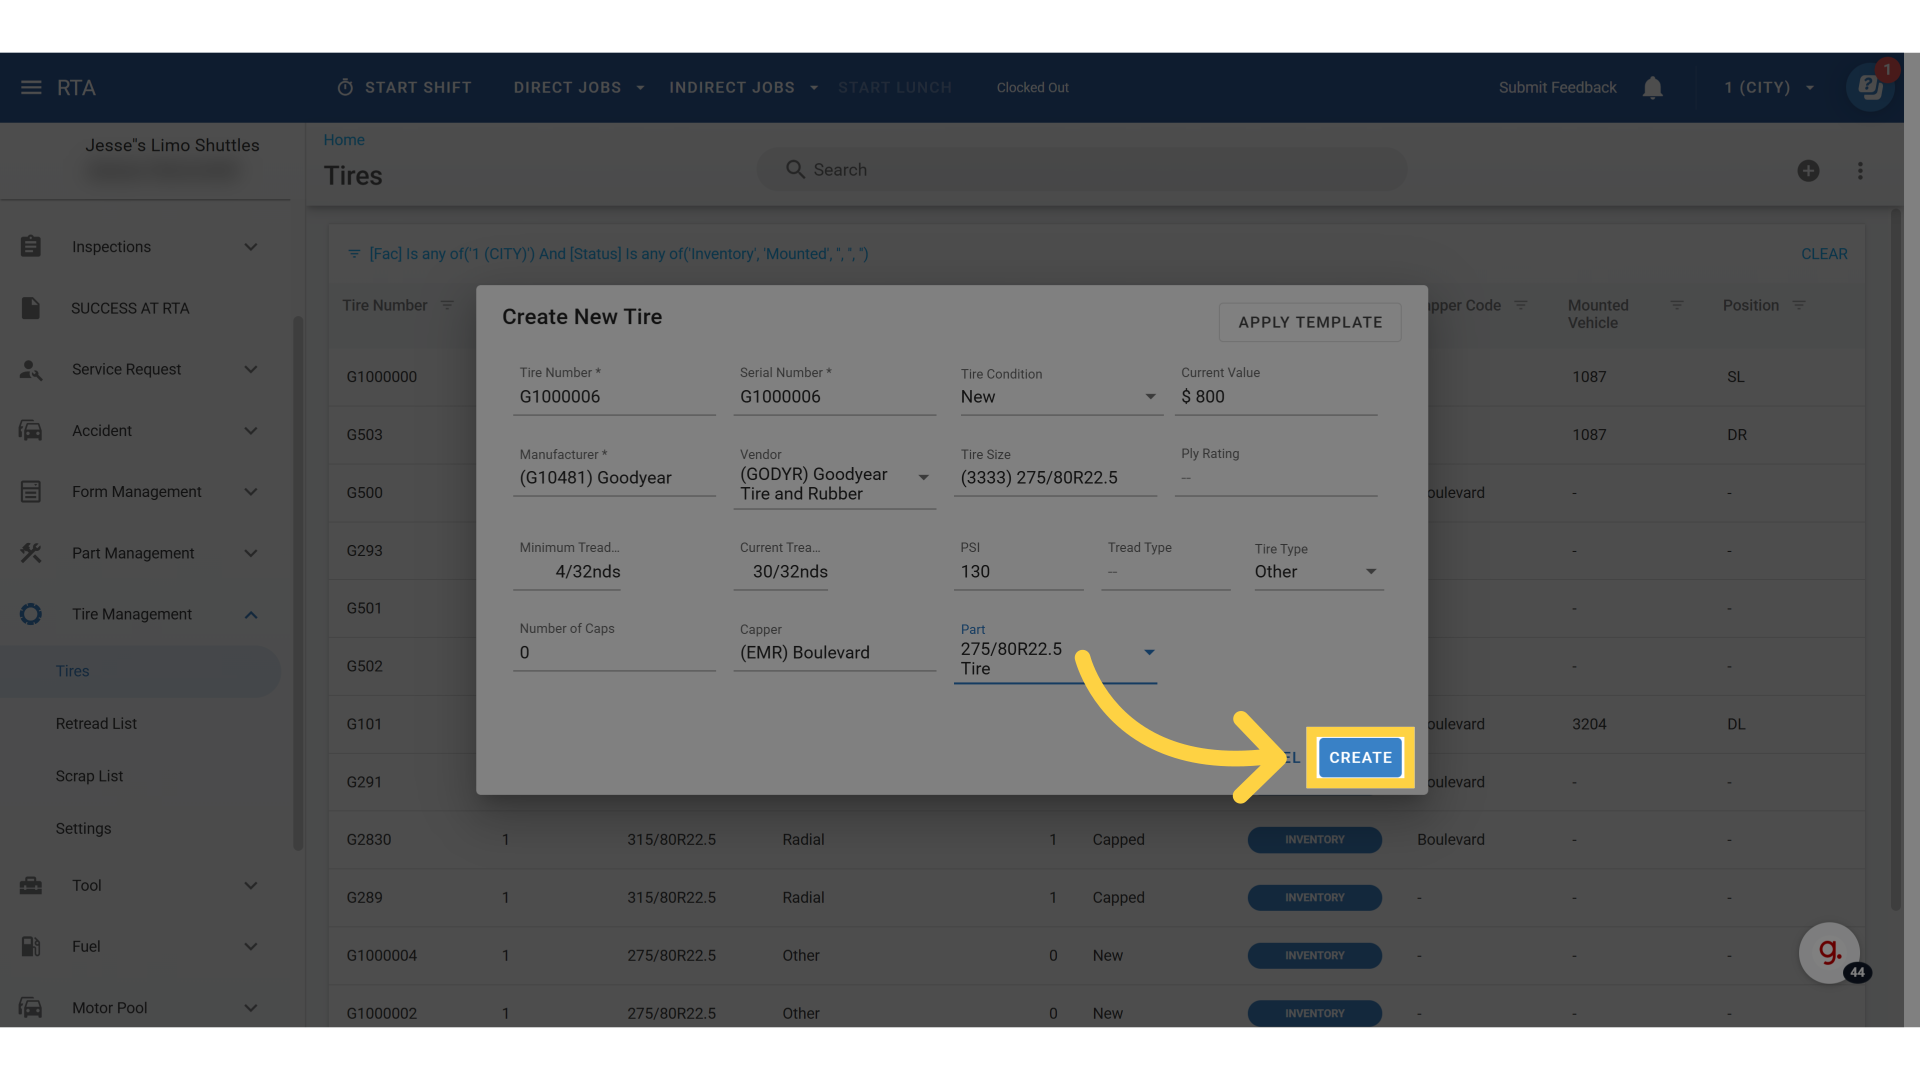
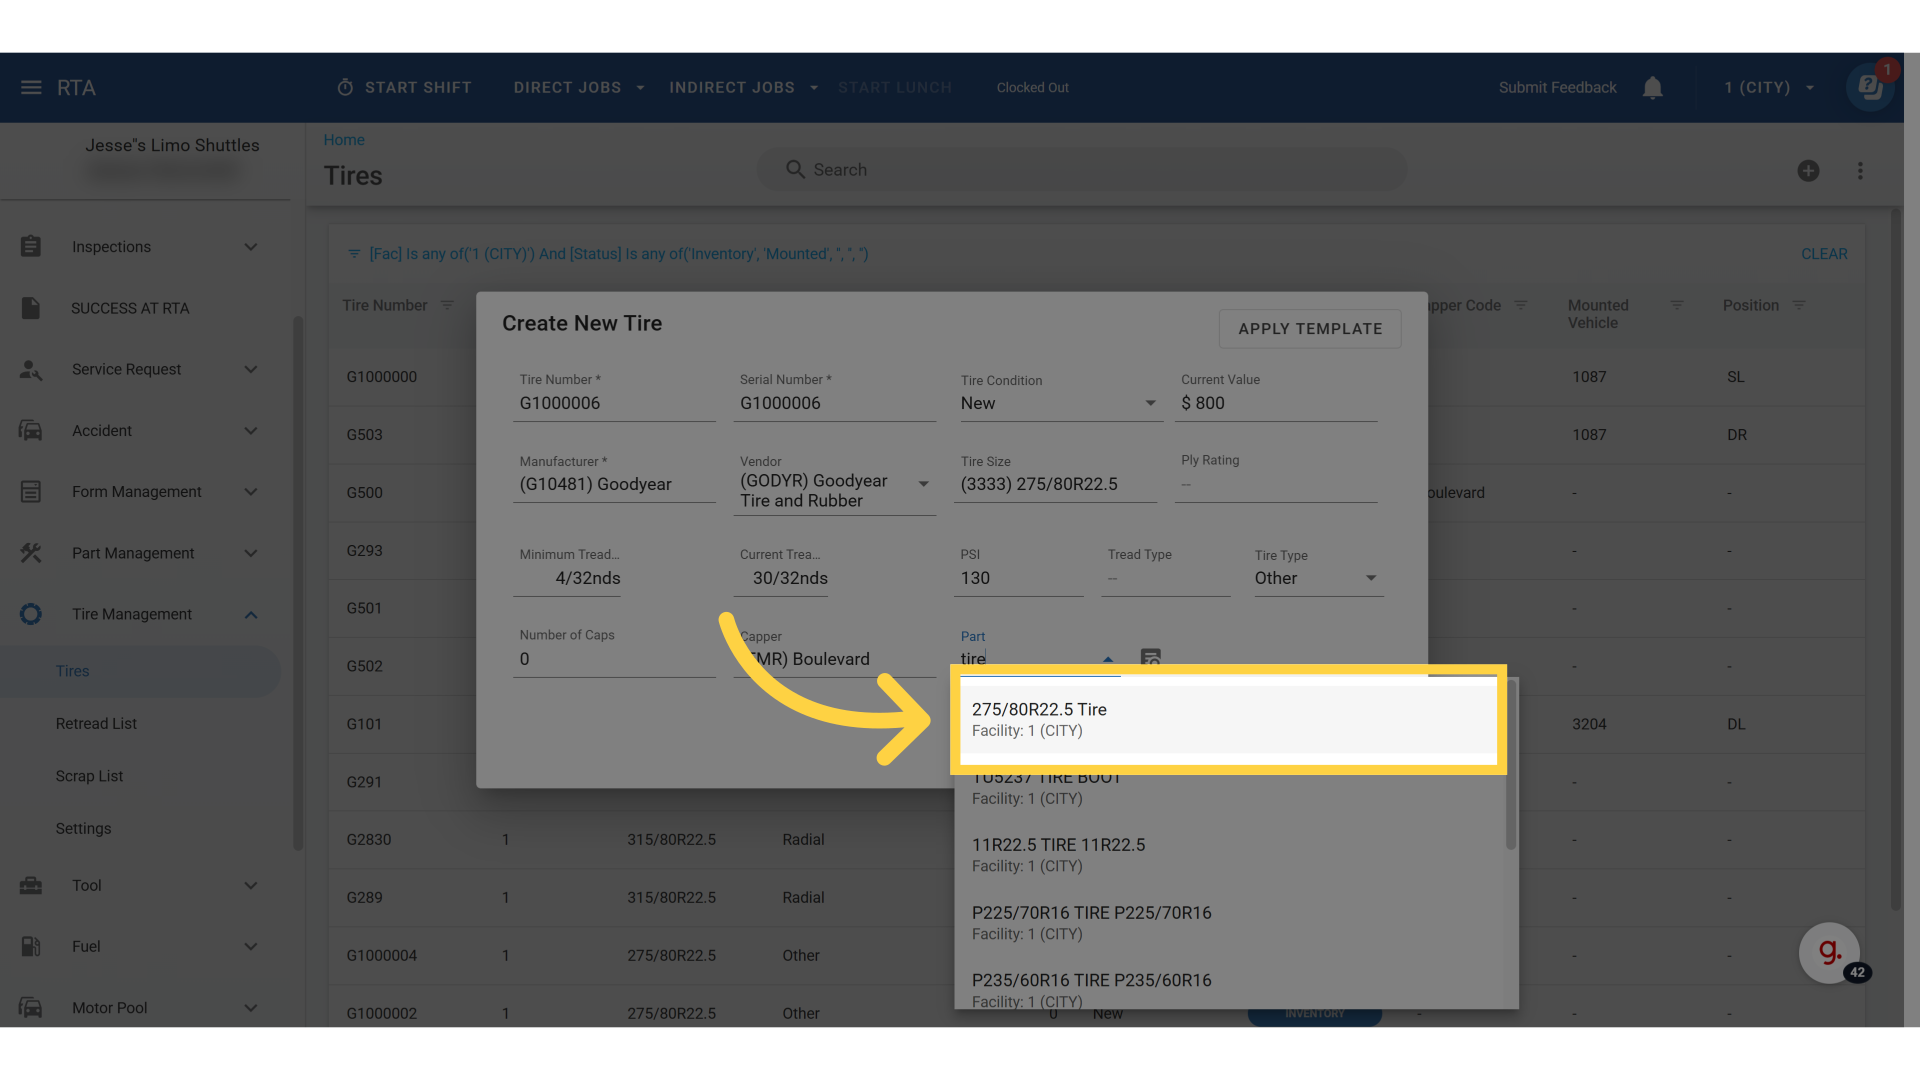
16. Click "Part"
Associate the tire to a Part File. See "Adding a Part File" to learn how to create a new part file if needed. When connecting a Part File to a Tire File the system will allow you to purchase the tires through the associated part file.
17. Click "Create"
Finalize and create the new tire.