
Work Order Templates
Every shop has repetitive work that is performed, so why not use template work orders to expedite the creation of work orders?
Rather than adding work order lines one by one, use a template and all the work order lines will be added to the work order automatically.
Repetitive or multi-line jobs such as PM services, inspections, brake jobs, engine tune-ups, engine rebuilds, tire repairs, putting a vehicle in-service, component rebuilding, and vehicle washes are ideal for templating. If you plan on using the Service Bulletins or the Auto-Create PM Work Orders feature, you'll need to create template work orders. Notes and inspections can be established in templates and brought forward to the work order when the template is applied.
This is a great way to standardize jobs and make sure all steps are performed, without having to reenter the information every time a work order is created!
Creating a WO Template
From the menu, click Maint. & Repair
Expand the Work Orders Menu Item
Click on Work Order Templates
Click the + icon in the upper right corner
Give the template a name - Use a naming scheme that easily identifies what the job(s) this template should be used with, such as PMA, PMB, RC12345 (recall campaign 12345) or call out specific classes such as PMACAR or PMATRK for some examples
Give a description of the template. This information will be displayed in the lookup lists and should be used to help quickly locate the needed template
Select the Priority Code to help the work be prioritized in the shop - contact our support@rtafleet.com for instructions on setting up Priority Code options.
Select the Reason Code to help identify the cause for the work order line - This is dependent on system switch settings contact our support@rtafleet.com for instructions on setting up Priority Code options.

Click Save at the bottom
Once template is saved you then have the ability to enter Master Notes. The Master Notes will follow the template whenever the template is utilized.
Add Lines to the Work Order template to identify the job codes (VMRS Codes) that should be included.
Click Add Line


Select appropriate VMRS and Description
Turn on Outside toggle if the work will be an outside job - leave off if the work is being performed in-house
If the Outside toggle is turned on, enter the appropriate vendor number (must exist in RTA already) where the work will be performed (If the vendor has not been added to the RTA system yet, refer to How to Add a Vendor for instructions on how to add additional vendors.
Select the appropriate Repair Type for the job - These identify the type of repair performed by the technician and are user definable. Refer to Maint. & Repair System Settings for instructions on setting up Repair Type options.
Select the appropriate Cause Code - Cause codes allow you to track the cause for the repairs and are user-definable Refer to Maint. & Repair System Settings for instructions on setting up Cause Code options.
Select the appropriate Vehicle Status (Refer to Asset Status for more information on vehicle status and how to set up if not done already)
Enter the quantity of jobs of this type to be performed when this job occurs
Select a Inspection Template
Add Line Notes
When adding line notes, the notes will stay with the job line when the work order template with job line is utilized.
Click Save
20. The template can now be applied to PMs in the vehicle file or pulled into work orders.
Applying a WO Template to a WO
To use a WO template, select Add Template from the Work Order screen
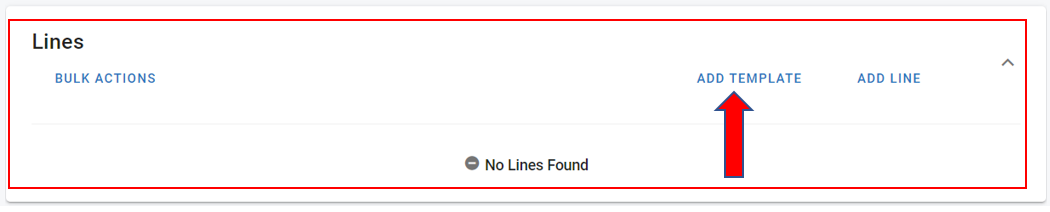
The lookup screen will show a listing all available Work Order Templates.
Click the desired template, and Confirm to use this template to add the line to the Work Order

The new line, along with any details, notes, inspections, attachments and line parameters will be added to the Work Order.
Assigning a WO Template to a PM
Each PM on an asset can point to its own Work Order Template. When that PM is added to a work order, the template’s job lines are pulled in along with the PM.
From the menu, click Assets
Locate and click the asset
Click PM from the asset menu
Open the PM code you want to change and edit the Work Order Template field
Select the template to use for that PM and save
The template is assigned per asset and per PM code, so two assets can use different templates for the same PM letter. See Asset PM Tab (Preventative Maintenance) for the rest of the PM fields.
Changing the Work Order Template on a PM affects work orders created after the change. A work order that was already created from the previous assignment keeps the lines it was given, so adjust the lines on that work order or create it again.
Copying templates across facilities
Work Order Templates are facility specific in Fleet360. Each template belongs to the facility it was created in, and the Work Order Templates list and the Add Template lookup only show the templates of your working facility.
Fleet360 does not currently have a copy, duplicate or import option that copies a Work Order Template from one facility to another. If the same template is needed in several facilities, create it in each facility:
Switch your working facility to the facility that needs the template.
Go to Maint. & Repair ➝ Work Orders ➝ Work Order Templates and create the template with the same name, lines and notes as described above.
Repeat for each facility. Assign the template to PMs in that facility separately; the PM assignment is also per asset.
About the Classic utility. The RTA Classic Copy Work Order Templates utility copies the templates of one facility to another, one facility at a time. It is a Classic program, not a Fleet360 feature: it is only available while you still have access to Classic, and it is not the long-term Fleet360 workflow. Templates it copies do appear in Fleet360, because both products use the same template records.
Estimated labor hours did not fill in on a work order job
When a job line is added to a work order - from a Work Order Template or a PM-generated work order - the estimated hours are pulled from the VMRS code. Which VMRS estimate is used is decided by the Repair Type on the job:
CHECK uses the VMRS Check estimate.
REPAIR uses the VMRS Repair estimate.
REPLACE, DAMAGE, PM and OUT use the size-based Replacement estimate for the asset (the Light / Medium / Heavy / Trailer estimate that matches the vehicle, shown as RPLC 1–5 in the chart above).
If the Repair Type points to an estimate field that is 0.00 or blank, the job will not prefill hours even when another VMRS estimate field has a value. To fix:
Open the job line on the work order (or the line on the Work Order Template) and check the Repair Type.
Open the VMRS code and confirm the estimate field that Repair Type uses has a value - for example a PM Repair Type needs the size-based Replacement estimate, not the Check estimate. See VMRS Codes.
Either change the Repair Type to the one whose estimate you want, or enter the hours in the estimate field the Repair Type uses, then re-add the job.
If a Job Class estimate exists for the asset’s class and that VMRS job, it is used instead of the VMRS estimate. Estimated hours only prefill when the job line is created - they do not re-fill on a work order that already has the line.
Troubleshooting: a PM pulls the wrong template or no template
If one asset pulls a different template than similar assets, or a template will not come in at all, work through these checks.
Compare the PM assignment on each asset. Open the asset that behaves correctly and the asset that does not, go to PM on each, and compare the Work Order Template field on the same PM code. A PM pointed at a different template is the most common cause. Change it to the intended template and save.
Check that the template exists in the facility you are working in. Work Order Templates belong to a facility. The template lookup lists only the templates in your current working facility, so a template built in another facility is not available to select or to pull onto a work order there. Confirm your working facility, then go to Maint. & Repair ➝ Work Orders ➝ Work Order Templates and confirm the template is listed. If it is not, create it in that facility.
Check the template’s line count. In the Work Order Templates list, look at the Ln Qty column. A template with 0 lines can still be selected, but it has no job lines to add, so nothing appears on the work order. Open the template and add the job lines before using it.
Check your permissions. Adding template lines to a work order requires permission to add work order lines, and editing a template requires the work order template permission.
If the checks above do not explain it, collect the asset number, the PM code, the template name, the facility, and the work order number, then contact support@rtafleet.com.