Imports - Tricoder Inventory
TriCoder Upload Process in Fleet360
The Tricoder we will be referencing in this Document is the Worth Data LT5102. These are specifically setup from RTA to track inventory counts
The TriCoder is a handheld barcode scanner used to efficiently record and update inventory counts in Fleet360. It allows users to collect part data offline and upload it into the system, ensuring accurate inventory tracking even in areas with no internet connectivity.
For detailed instructions on How to Use the TriCoder, refer to the Parts Inventory Program found in the Tricoders Section in the RTA Knowledgebase.
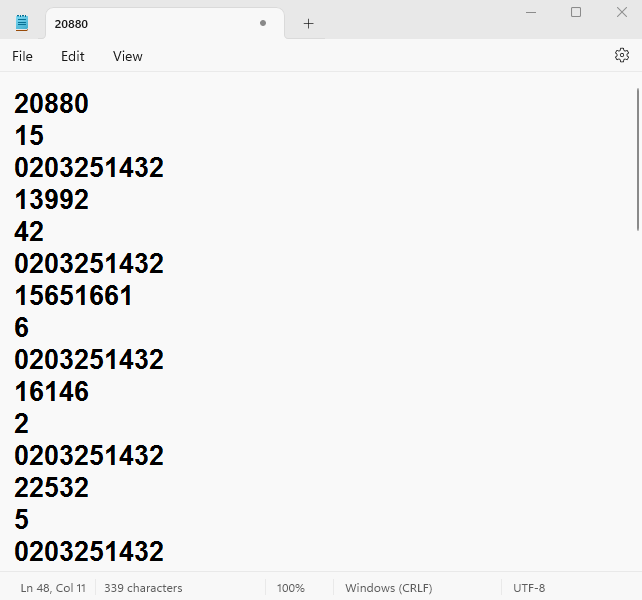
The TriCoder file is transmitted as a data stream via a USB connection, containing the Part Number, Quantity, and Date/Time, with carriage returns as data delimiters. However, it cannot be used directly—it must first be saved as a fixed text file, then converted into a CSV file before it can be imported into Fleet360. This document will guide you through the entire process step by step.
Step-by-Step Instructions for Importing Tricoder Inventory into Fleet 360
Creating a Text File from the TriCoder
To successfully extract and save TriCoder data, follow these steps:
Open a Text Editor – Launch Notepad or your preferred text editor and ensure your cursor is placed in a blank document.
Connect the TriCoder – Power on the TriCoder and connect it to your computer using a USB cable.
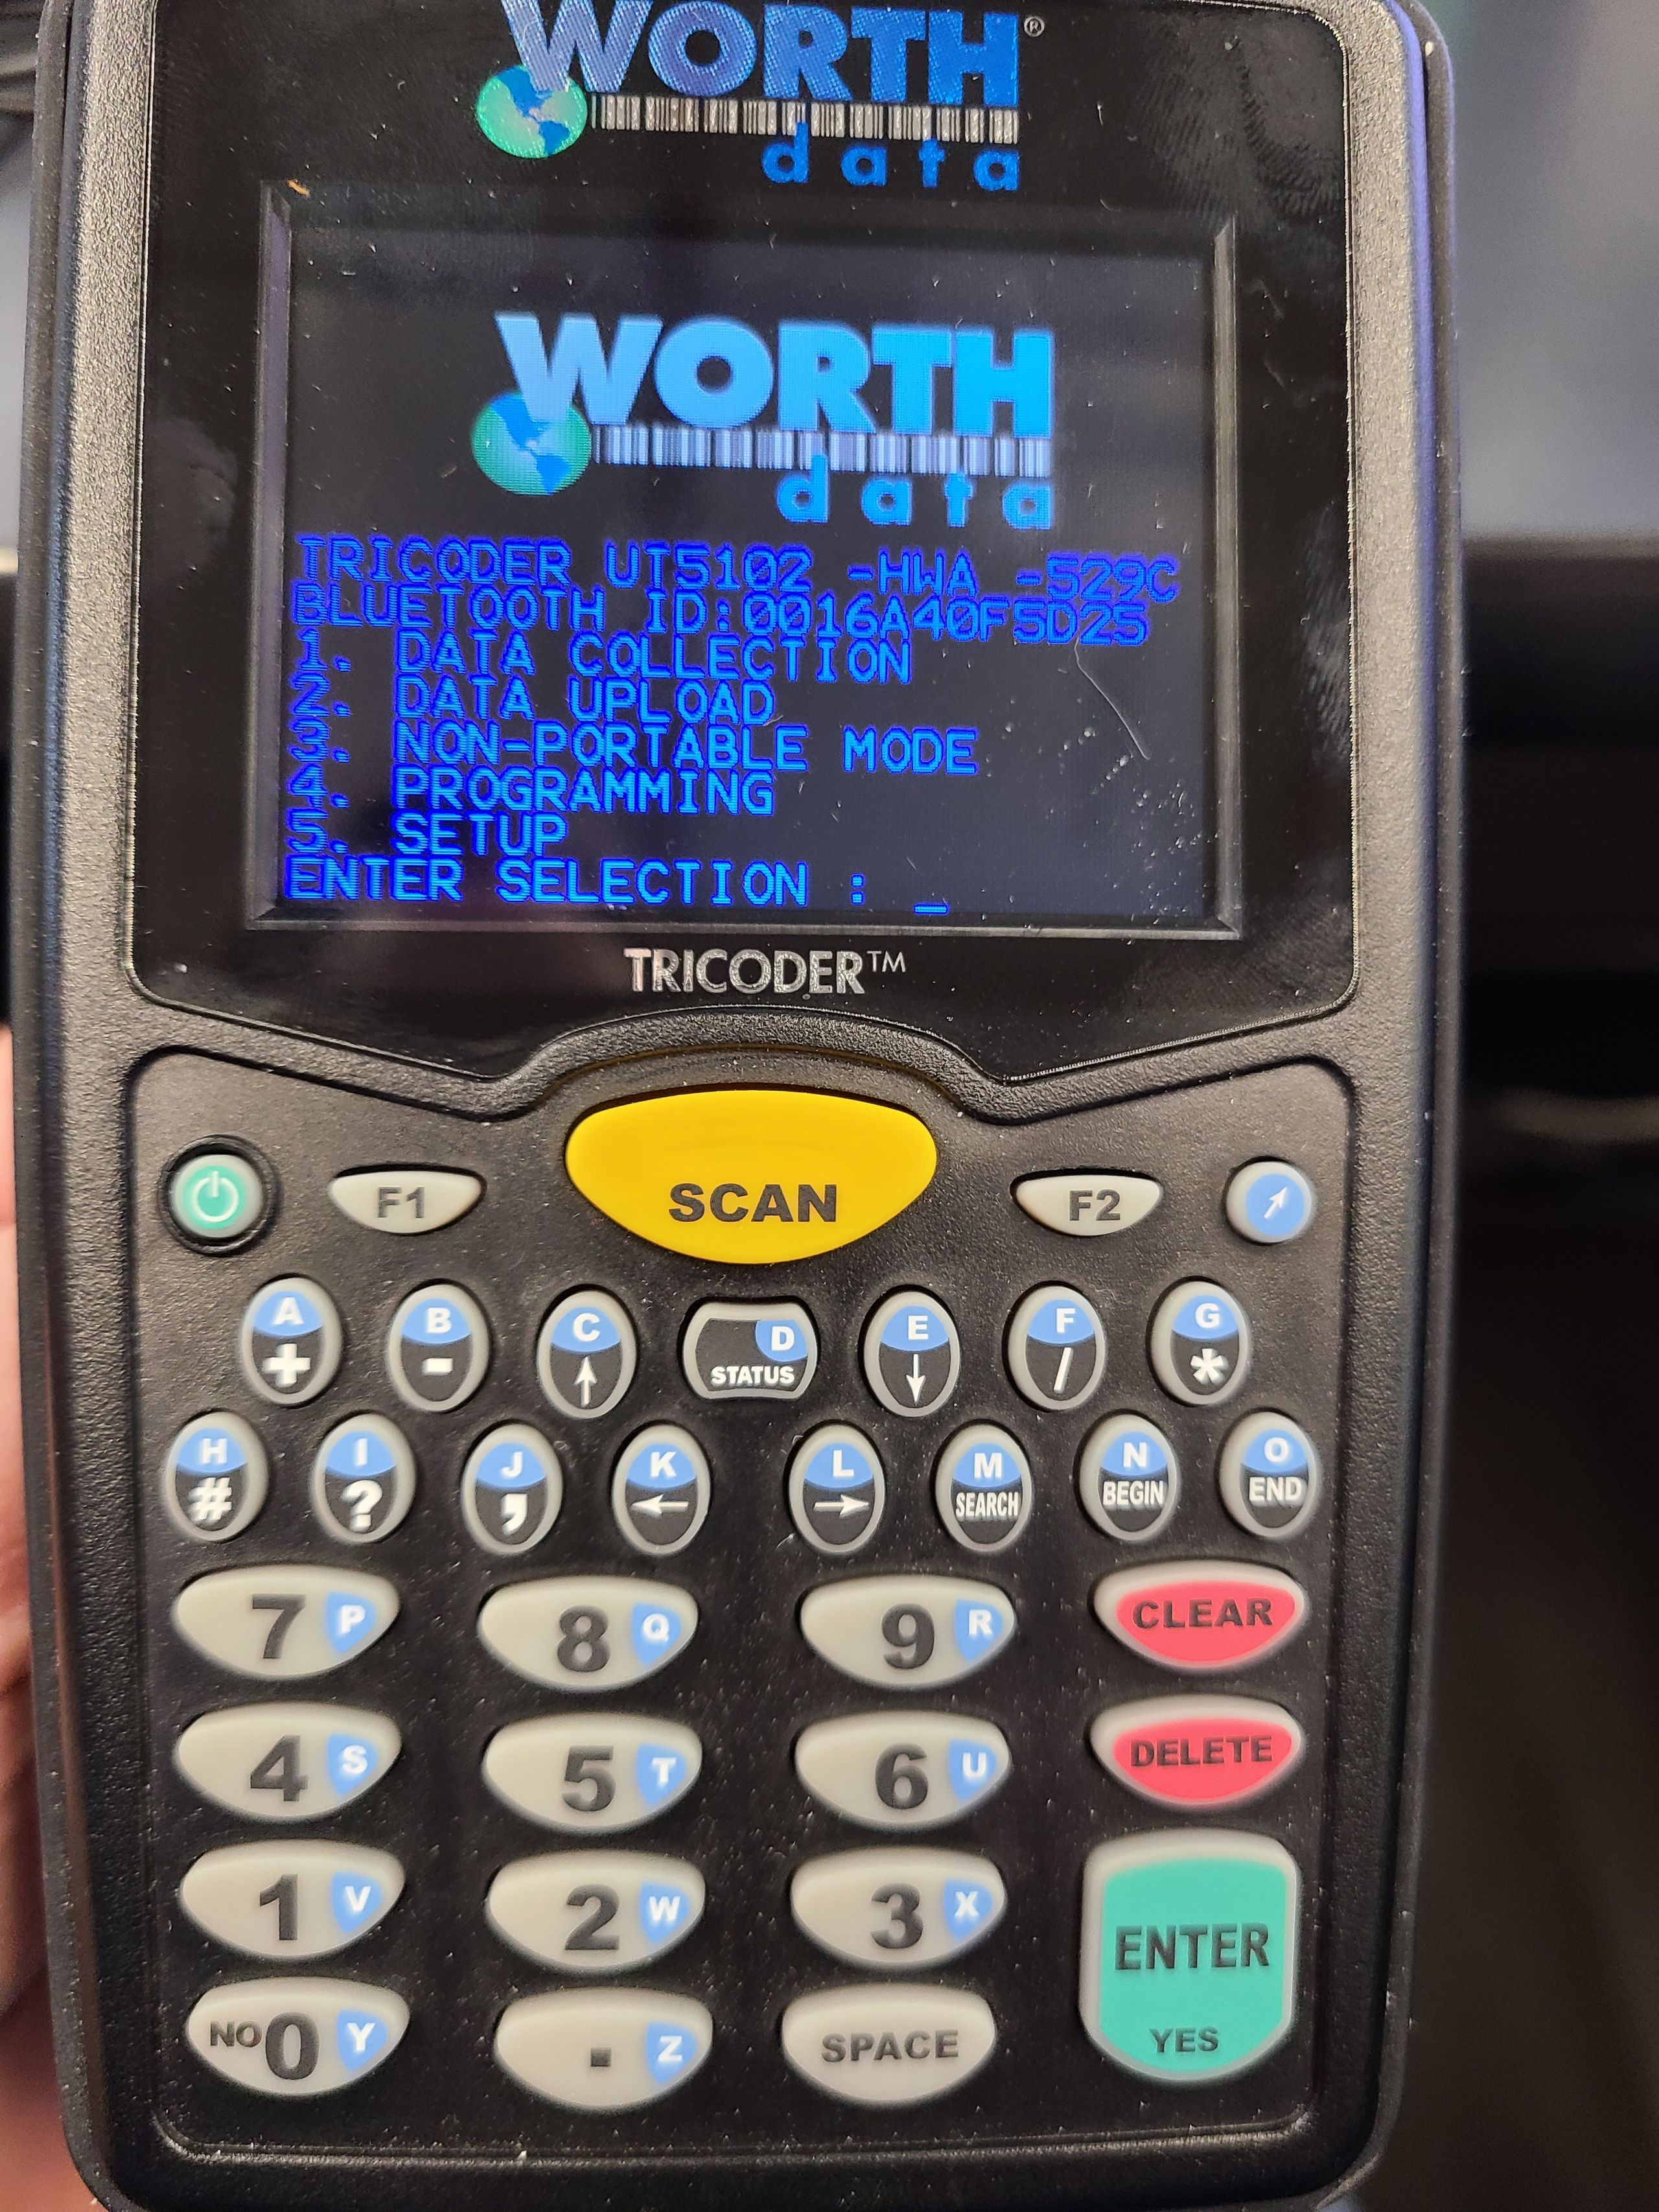
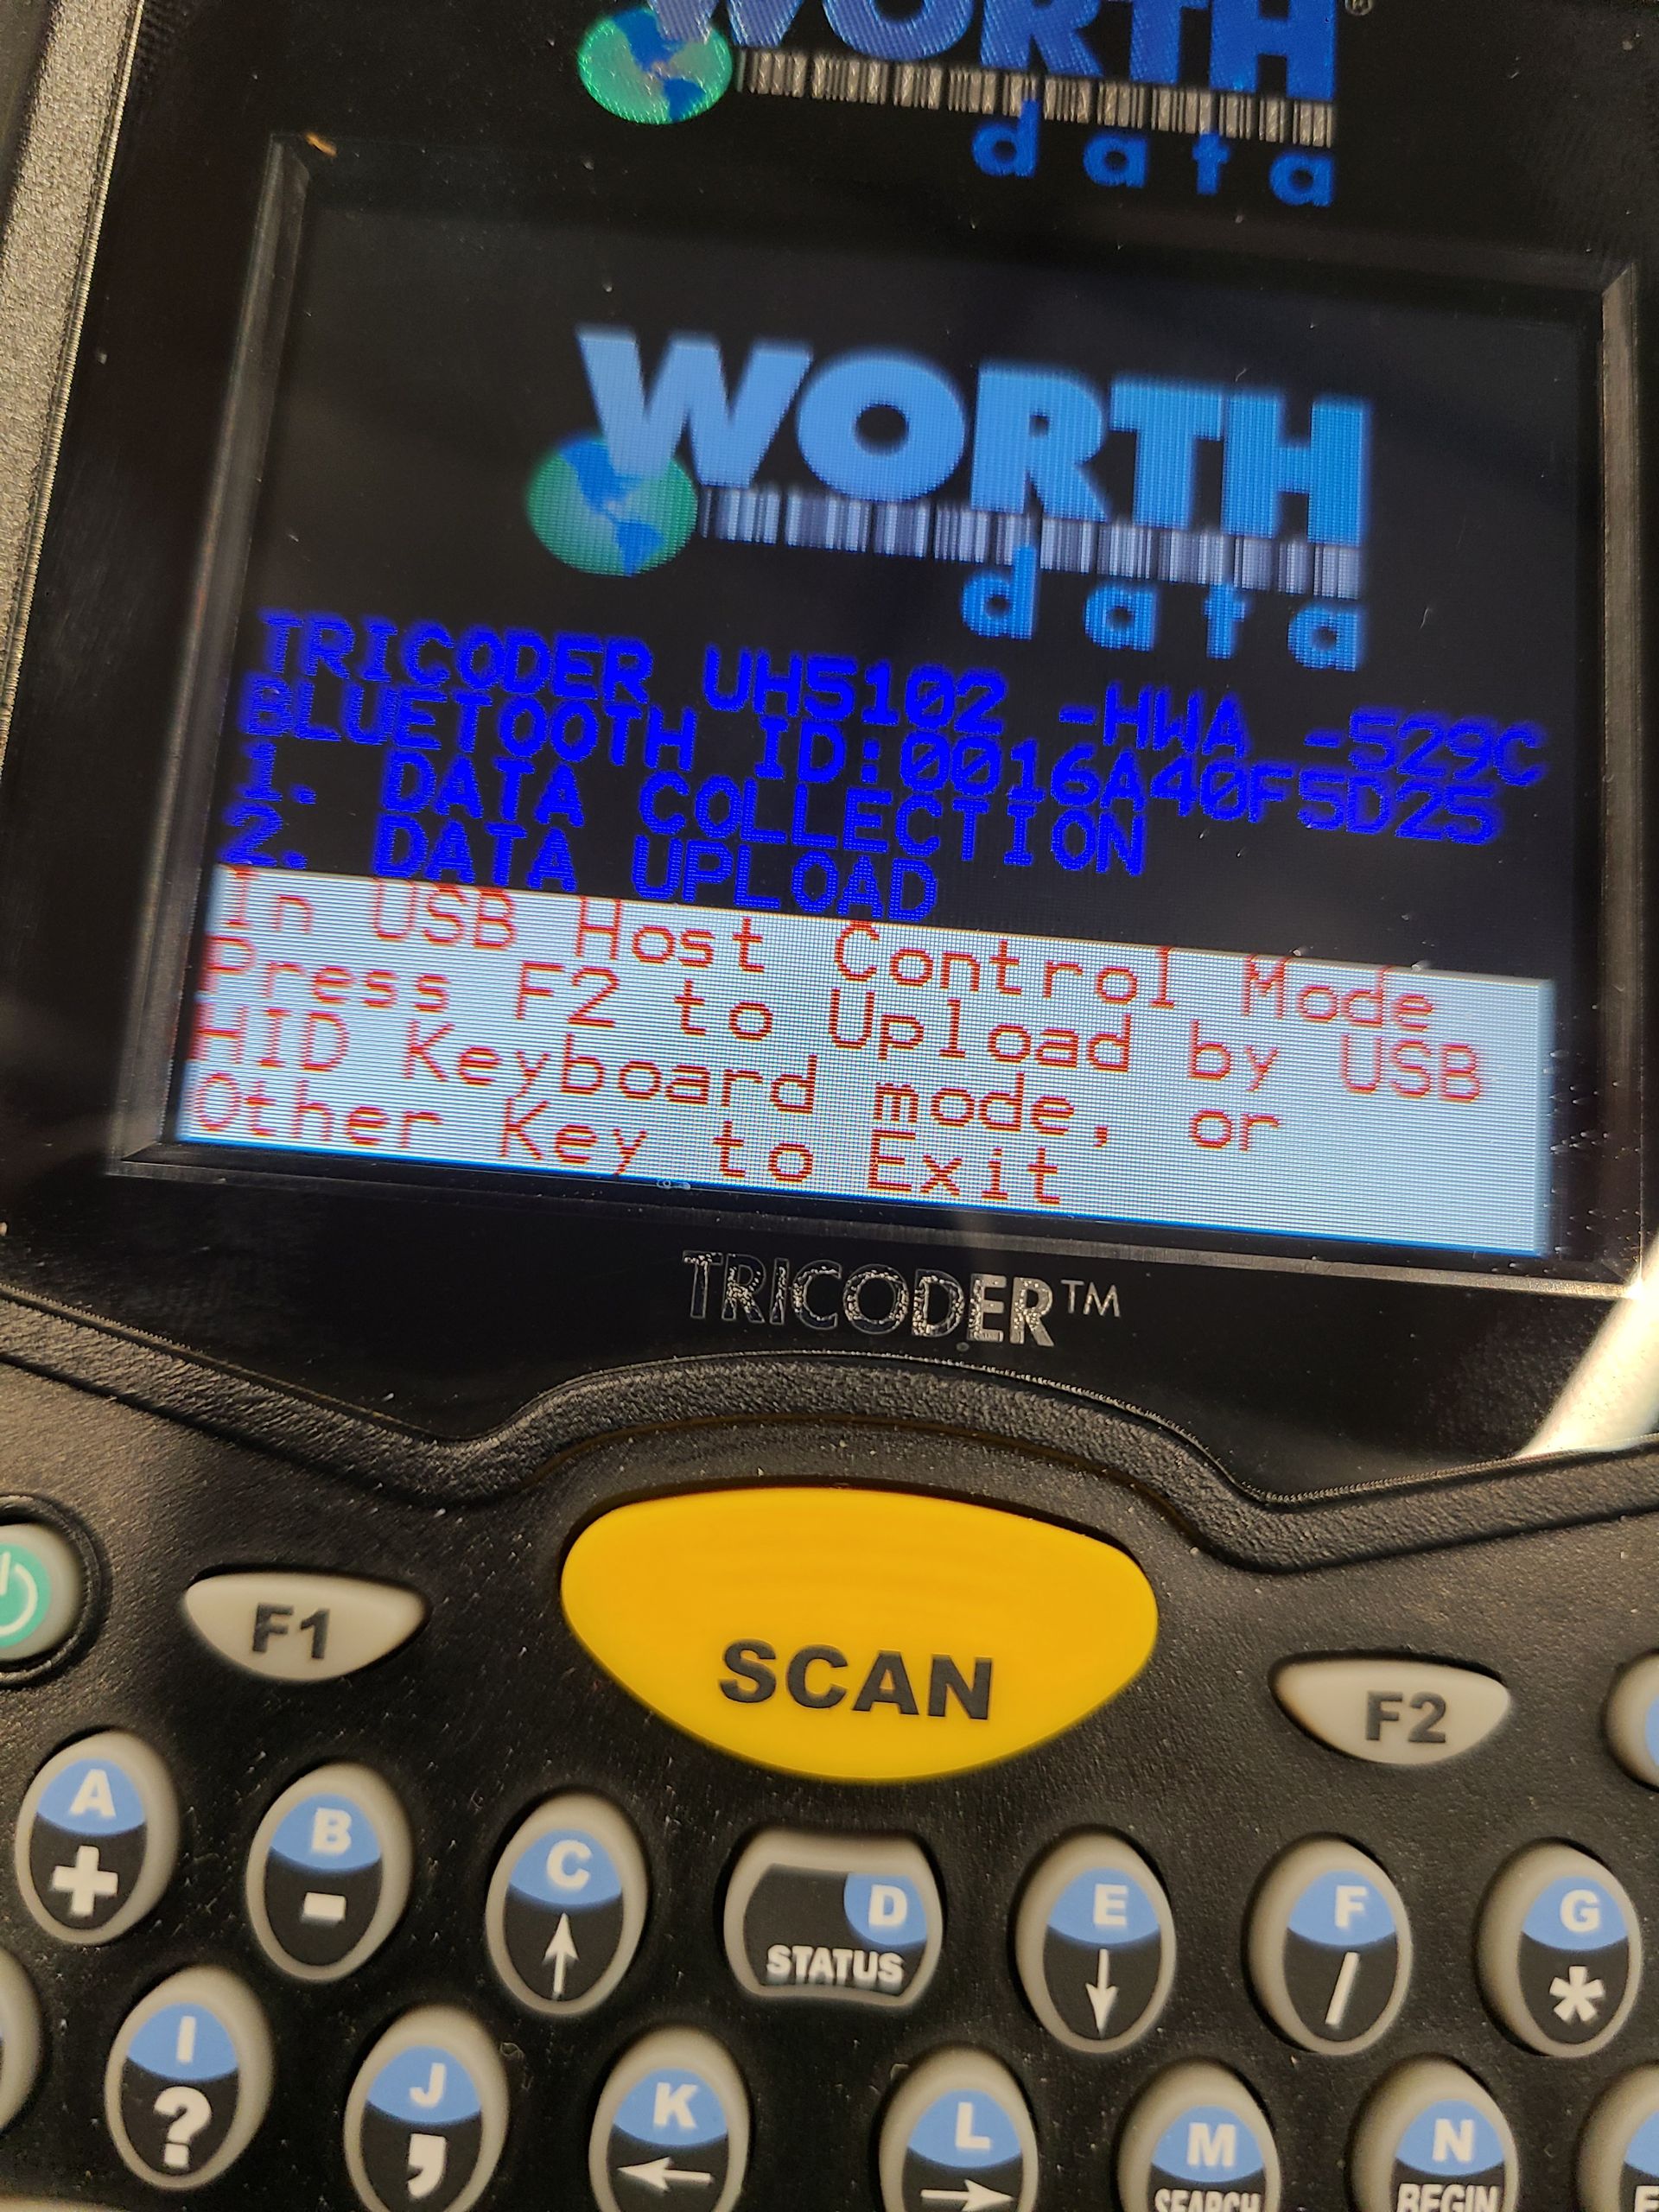
Initiate Data Upload – On the TriCoder's Main Menu, select Option #2: "Data Upload" . When it prompts (See Below), select the F2 to Upload by USB HID.
The data will begin transferring and populating the open text document.
Handle the Delete Prompt Carefully – Once the upload is complete, the TriCoder will prompt you to delete the data file. It is recommended to select "NO" until the entire process is complete. Deleting prematurely will permanently erase the data, requiring you to recount any affected sections.
Save the Text File – Once data transfer stops, save the text file in a preferred location. You can name it anything, such as "rawparts.txt", for easy identification.
With the text file successfully saved, proceed to the next step: converting the raw file into a CSV format for import into Fleet360.
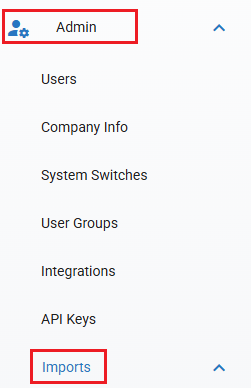
Navigate to Import Section
Go to Admin > Imports and select Tricoder Inventory.

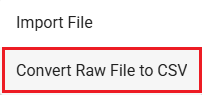
Convert Raw File to CSV (Using the Circular Menu)

Using the Circular Menu Select Convert Raw File to CSV
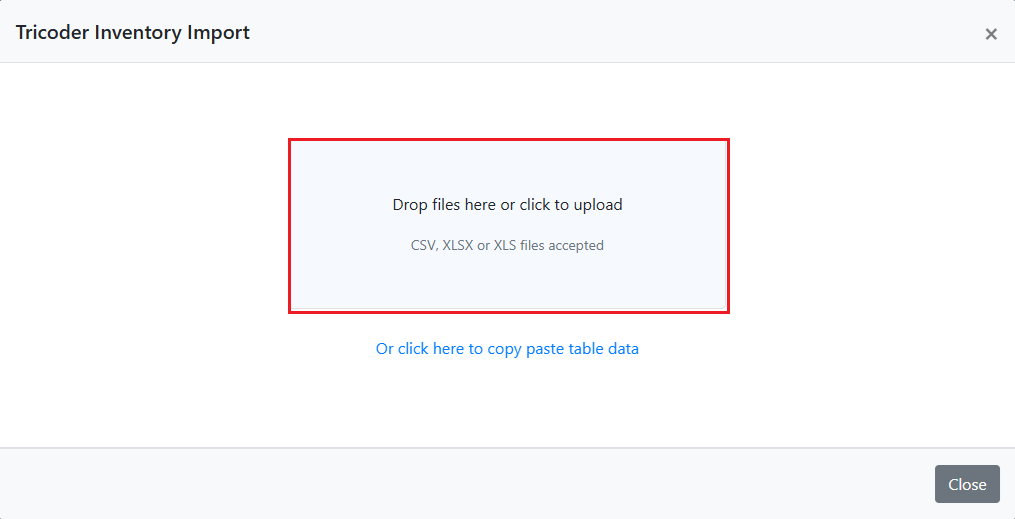
From the Convert Raw File to CSV screen. Browse to your Raw.txt file or simply Drag and Drop it to the Upload box.
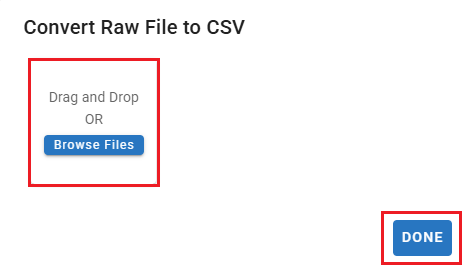
Fleet 360 (RTA) will convert it into a CSV file.
You should get a Message like this:

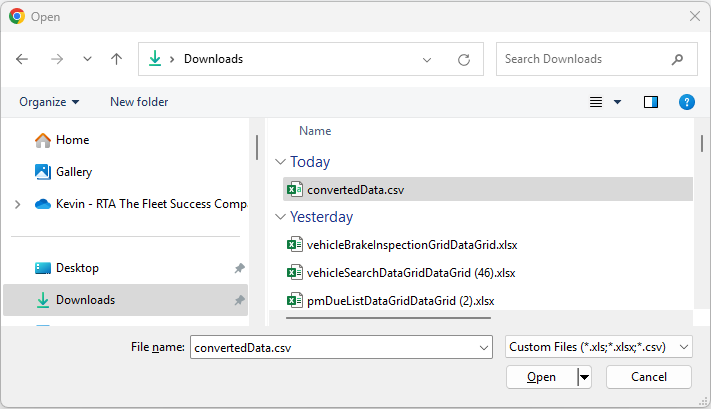
Note: the Converted file should be saved automatically to your Downloads Folder on your local machine named convertedData.csv
Import the CSV File
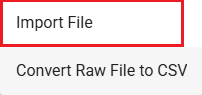
Now From the Import File Options:
Select the Import File Option
You will be prompted to enter the:
Tricoder Number - This is just a Reference Number. It can be either a Number that you assign if you have several Tricoders or it could be the Initials of the person doing the Count in that section of the Parts
Stocking Area - you can use the pull down to select one of five Stocking Areas
Facility - From the pull down list you can select which Facility Number you which to upload the count data into
Then Click the Import Button

Upload the CSV file via drag and drop to the box or Click in the box to browse to select from the Downloads Folder.
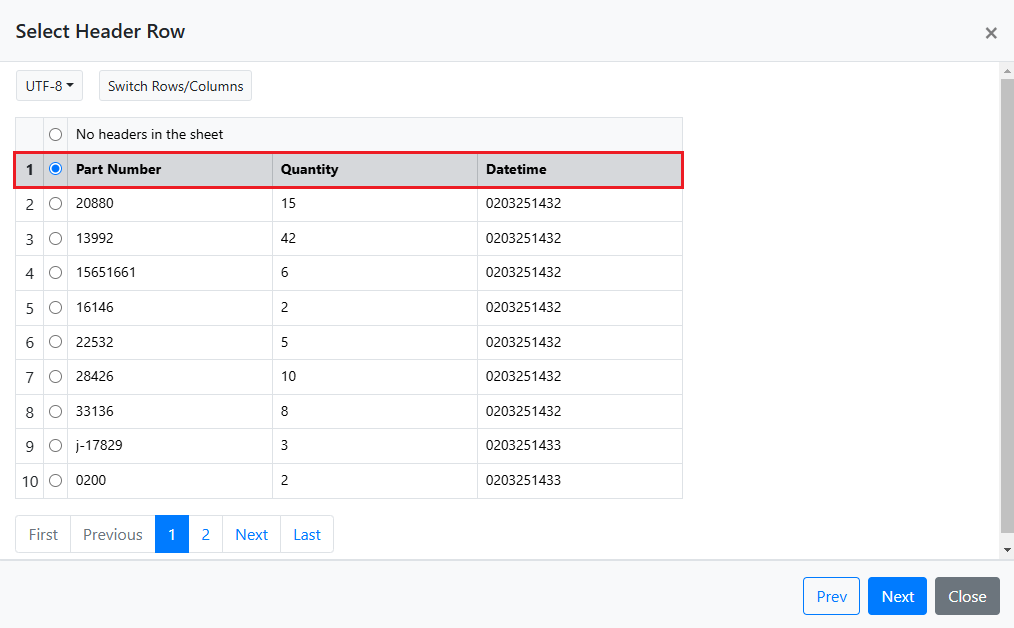
Select Header Row
Ensure that your Header Row is Selected. This is the Row with the Column Names: Part Number, Quantity, and Date/Time.
Once Selected hit the Next at the bottom of the screen.
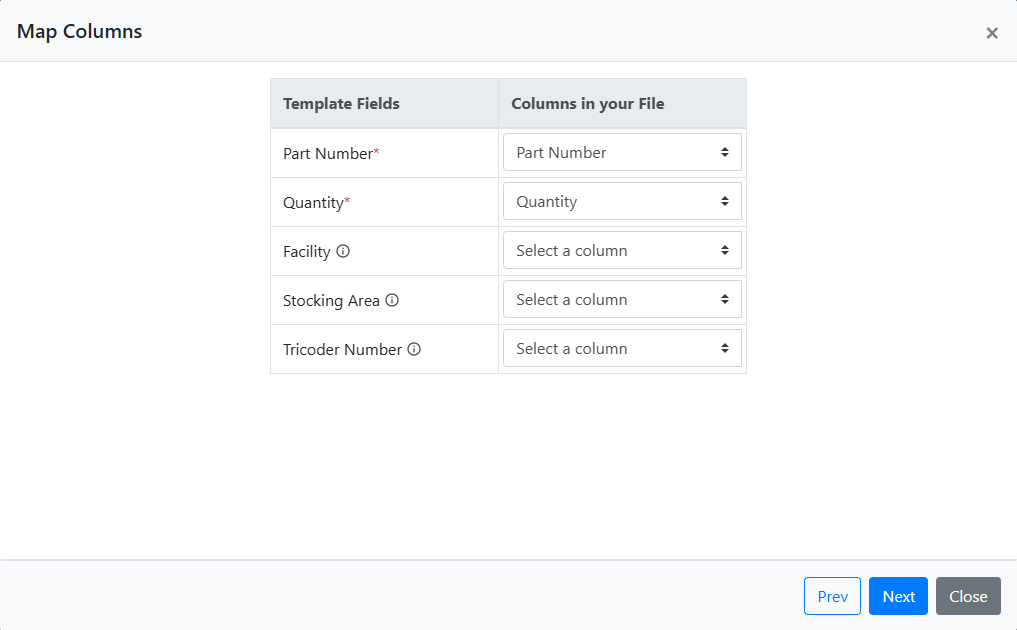
Map Column Screen
Note: You only need to worry about the Map Columns screen if you are pulling a 3rd party CSV file.
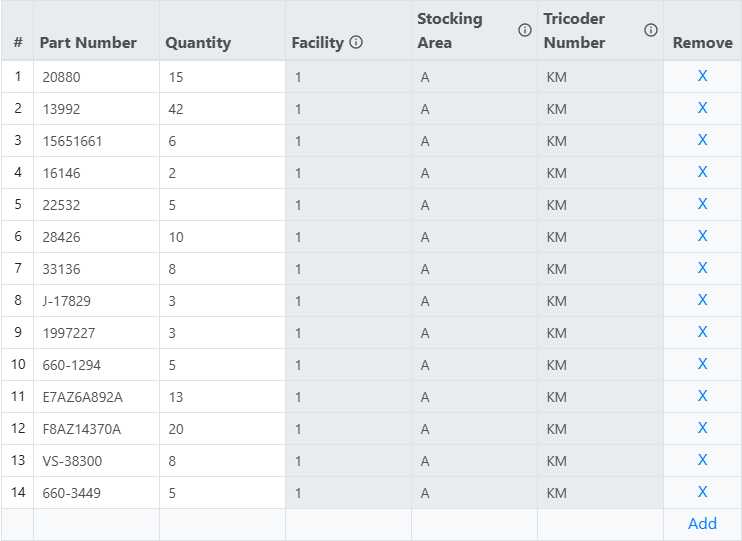
Verify and Process Data
Ensure data includes Part Number and Quantity
Review any incorrect or unrecognized data before submission.
Make Adjustments (if needed)
Update Part Numbers, Quantities or Remove Duplicates if necessary.
You can Also Manually Add new transaction lines in by using the Add Button

Once done with Reviewing and Changes: Select the Submit Button

Submit and Review Errors
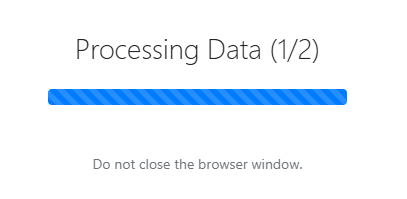
Once you hit Submit you will get a Processing Data progress screen:
With a Data Summary. From Here you can View the errors fix and re-submit
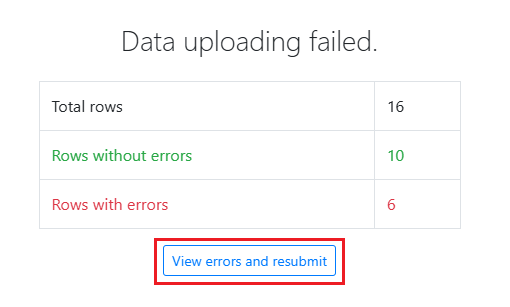
Any errors will be highlighted in dark red.

Click on errors to identify issues (e.g., invalid part numbers).
Correct errors before finalizing the import.
Once done making corrections hit the Submit button one last time to finalize the import
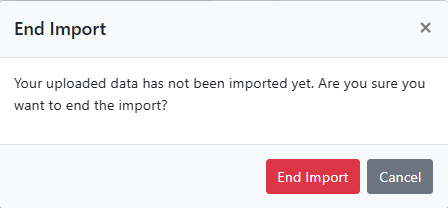
Note: If parts are not found because they have not been added to the system it is recommended opening a second tab in Fleet360 to the part records and add any new part that is flagged as needed. Then you would need to Close the current load end end the import and then reload the file.
Final Load with added and corrected Data:
Successful Import Message:

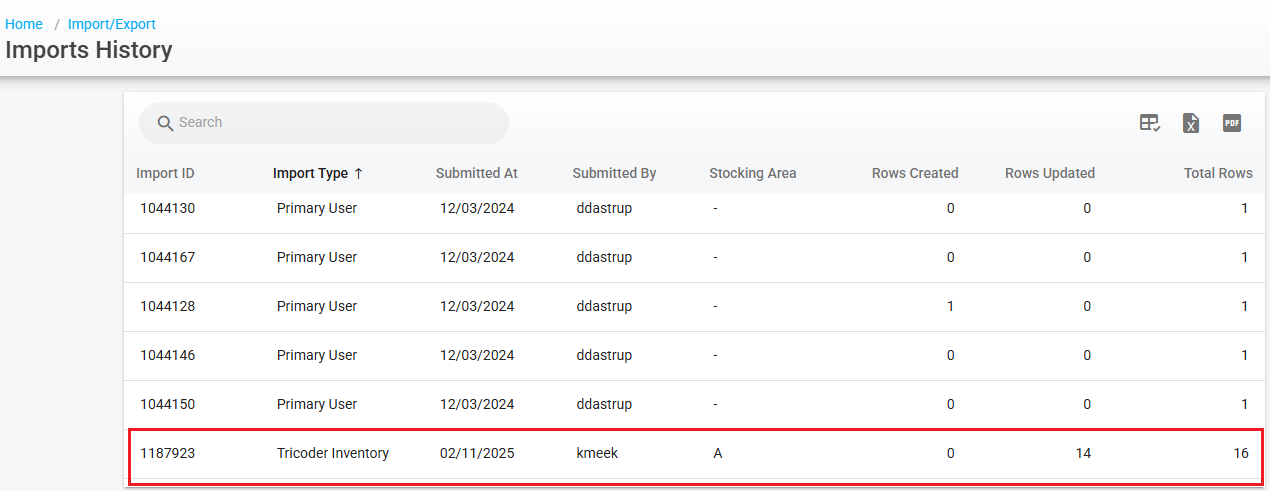
Viewing Import History in Fleet360
To review the history of imported data and see a summary of past imports, follow these steps:
Navigate to the Import History Screen
Go to Admin from the main menu.
Select Imports from the dropdown menu.
Click on Import History.
Review Import Data
The Import History screen will display a summary of all previously imported data.
You can view a basic import summary Including:
Import ID - Unique Transaction Number given by Fleet360
Import Type - Name of the Import Module that was used
Submitted At - Date the file was imported on
Submitted By - User ID of the User that imported the file
Stocking Area - If this was Imported from the Trocoder or Parts Inventory Routines what Stocking Area was the file imported into
Rows Created - If new data was imported in and not existing data, how many new rows were created
Rows Updated - If existing data as imported in, how many rows of data were updated and changed
Total Rows - This was the total number of Data rows that were originally in the import file
Filter or Search for Specific Imports
Use the available filters or search bar to locate a specific import based on Date, Import Type, or Submitted By etc.
Export or Download Import History (if applicable)
You can download the Import History List as a:
Spreadsheet file (Excel)
PDF file
See how to Exporting a Master List from this section
Viewing Adjusted Parts Data After TriCoder Import in Fleet360
After importing data from the TriCoder into Fleet360, you can verify the adjusted parts data by running the Parts Adjustment Report. Follow these steps to generate the report:
Access the Reporting Tool
Navigate to Home from the main menu.
Click on Analytics.
Select Reports to open the Fleet360 Reporting tool.
Locate the Parts Adjustment Report
In the Reporting Tool, expand the RTA Standard Reports section.
Navigate to Parts > Parts Adjustment.
Run the Report
Select the desired date range or filters to refine your report results.
Click Run Report to generate the Parts Adjustment Report.
Review the Adjusted Parts Data
The report provides transaction-based details, including adjustments made, quantities changed, and timestamps of the updates.
Use this report to verify the data imported from the TriCoder.
This report ensures you have a clear audit trail of inventory adjustments and can validate the accuracy of the imported data. For more information on this report see the Parts Adjustment Report