Employee Toolboxes
Overview
The Employee Toolbox module allows both employees and managers to efficiently track, validate, and manage toolboxes within Fleet360. Toolboxes represent valuable investments for your organization. This module ensures those tools remain accounted for, in good condition, and properly validated for safety and operational readiness.
Purpose
Toolboxes and the tools within them are essential assets. Regular tracking and validation protect your investment and support safety compliance.
Best Practices
Validate toolboxes at least annually (Fleet360 defaults to 1-year intervals)
Encourage employees to keep their tool information accurate and up to date
Managers should routinely review facility toolboxes for completeness and accuracy
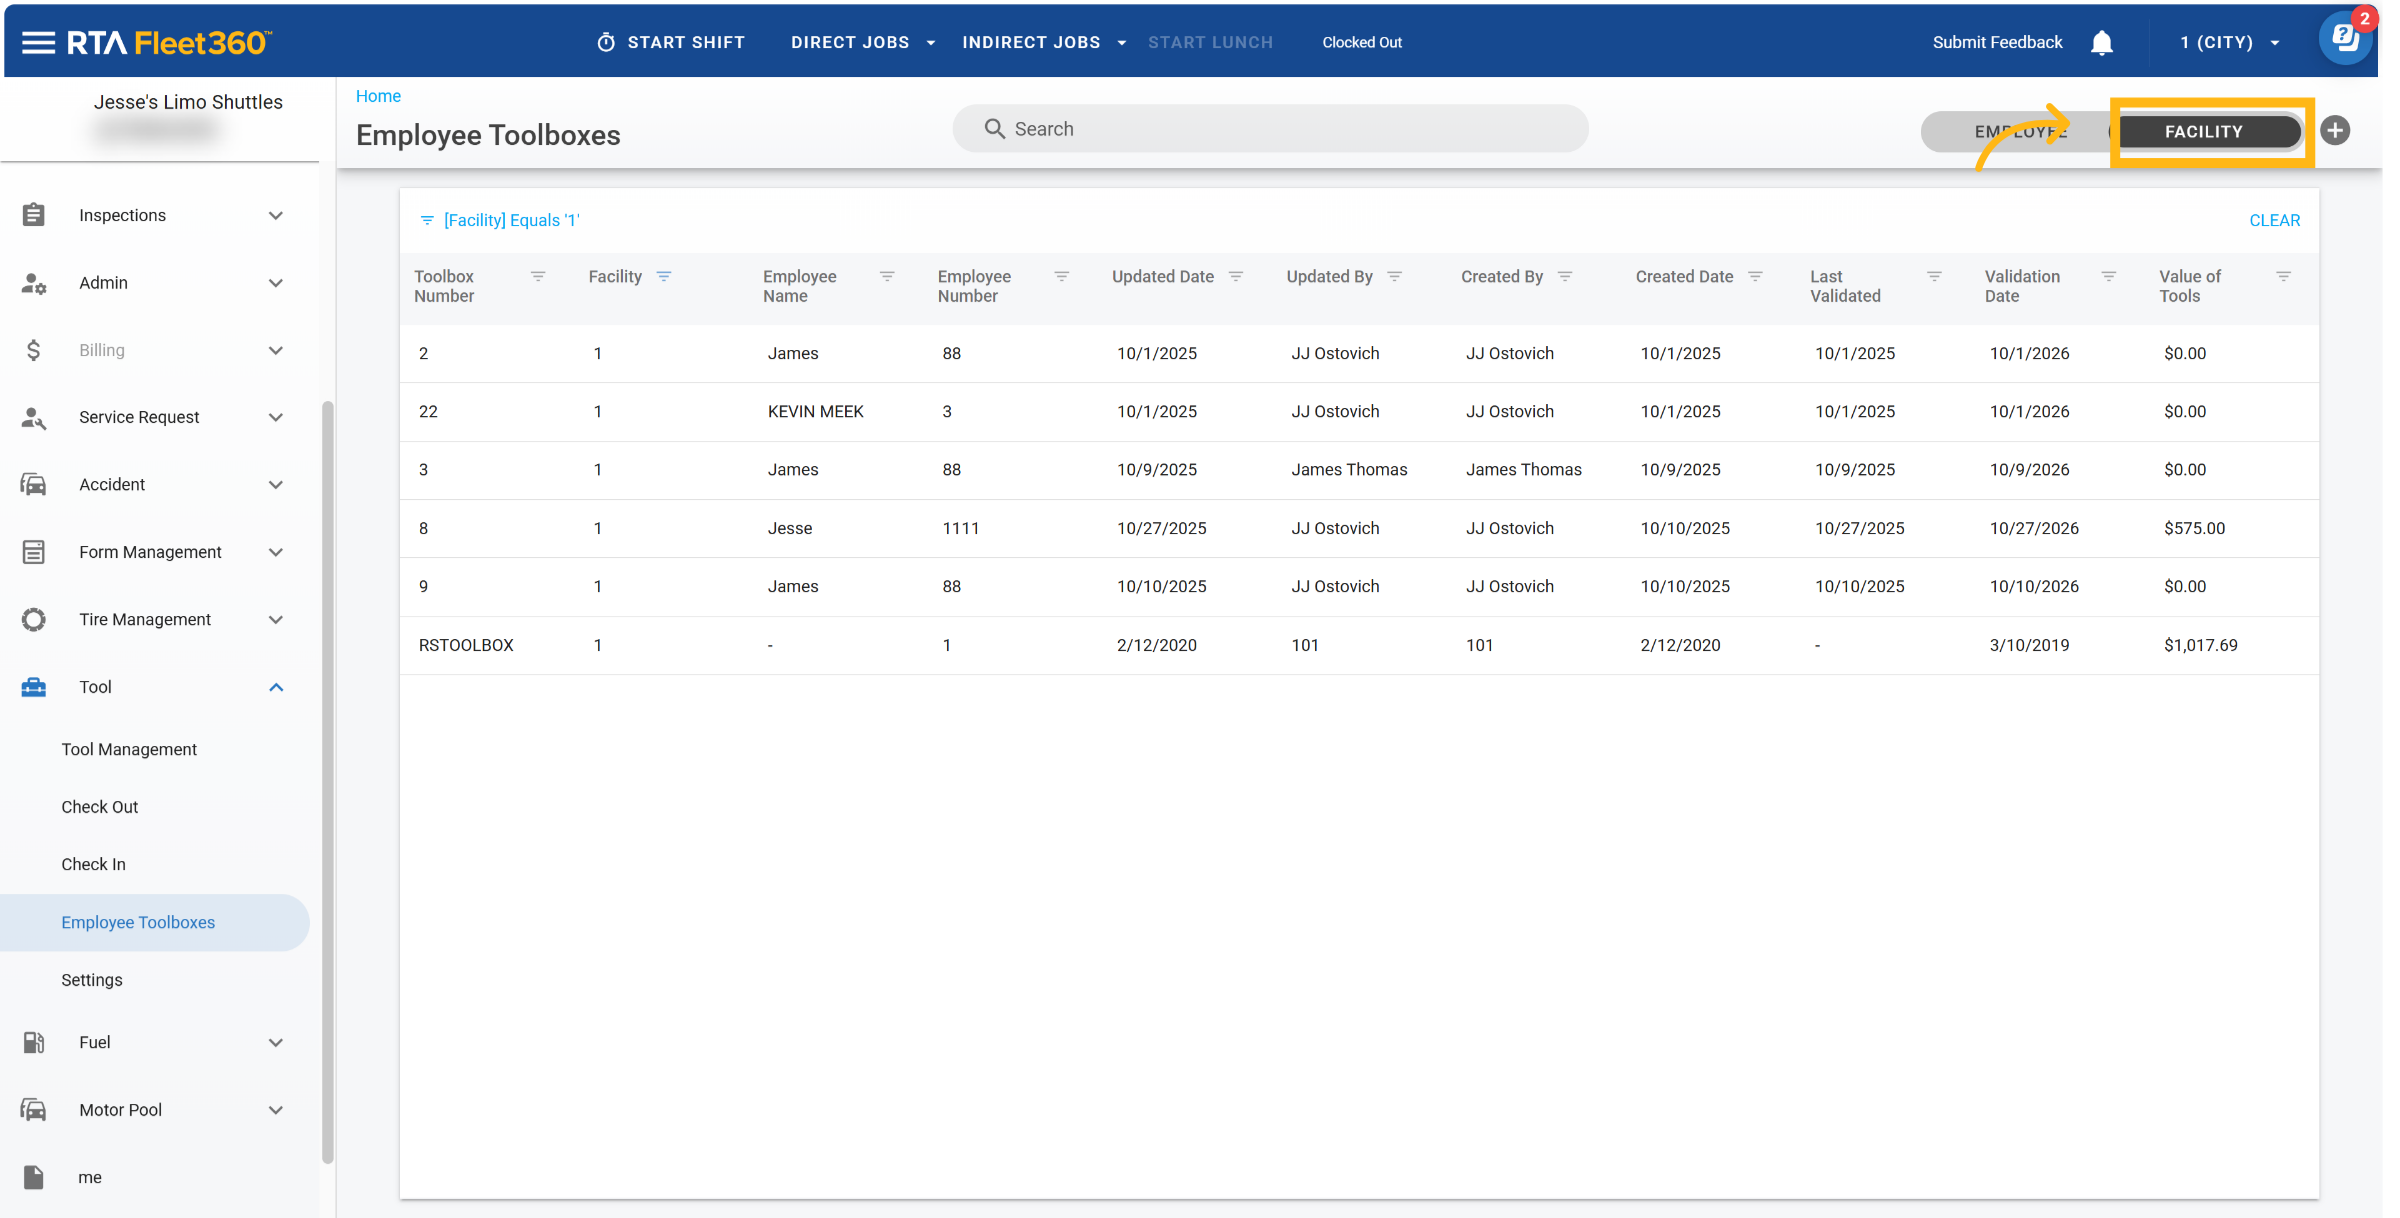
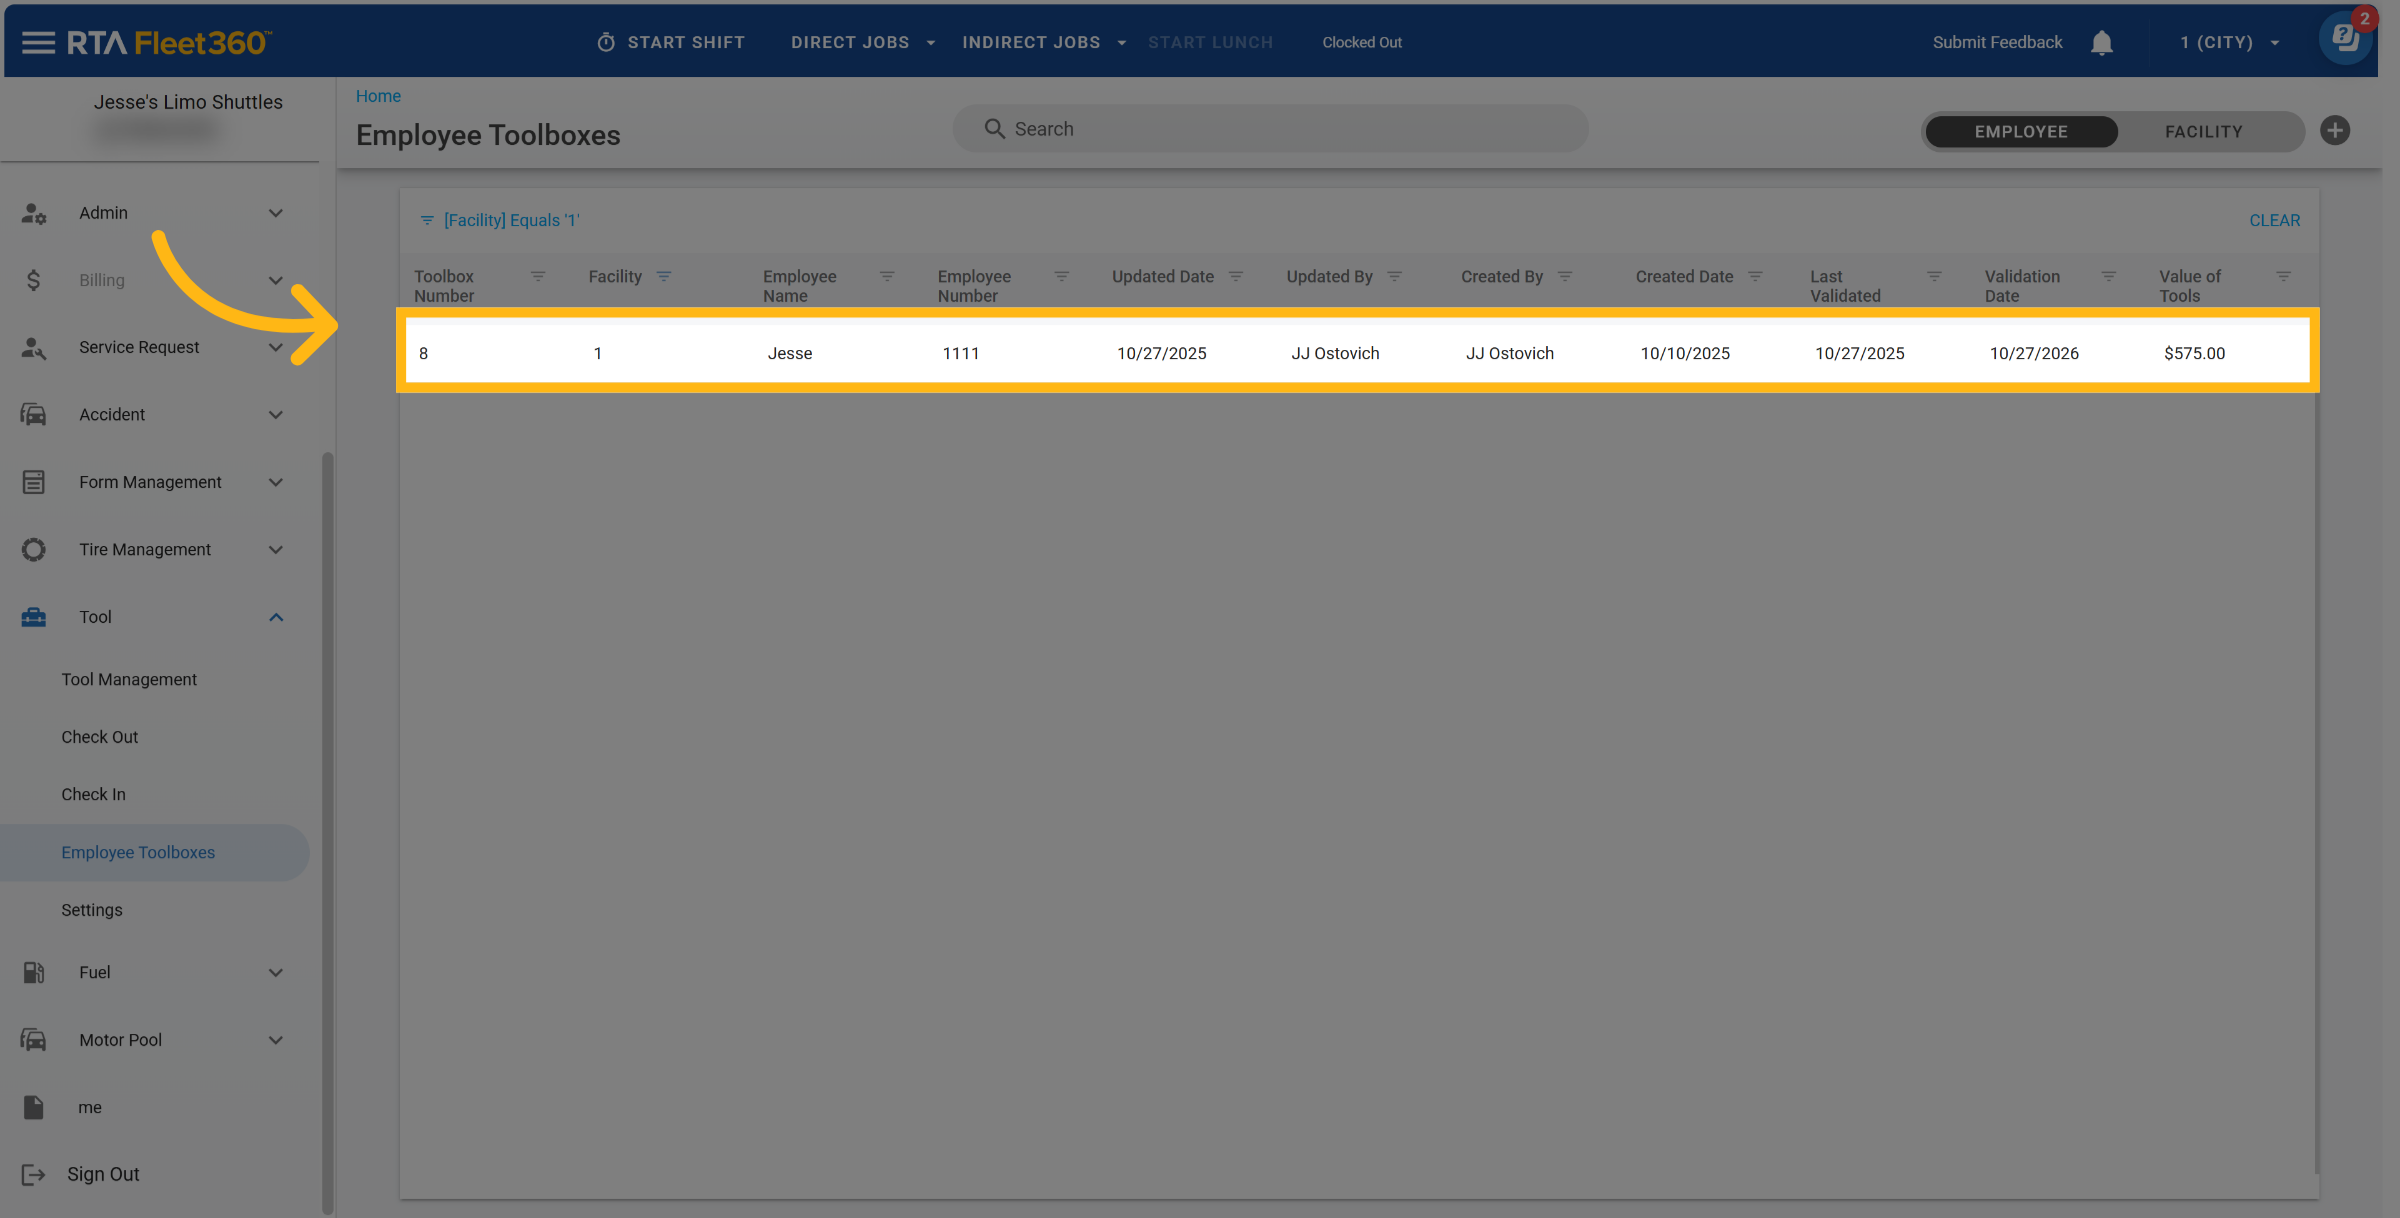
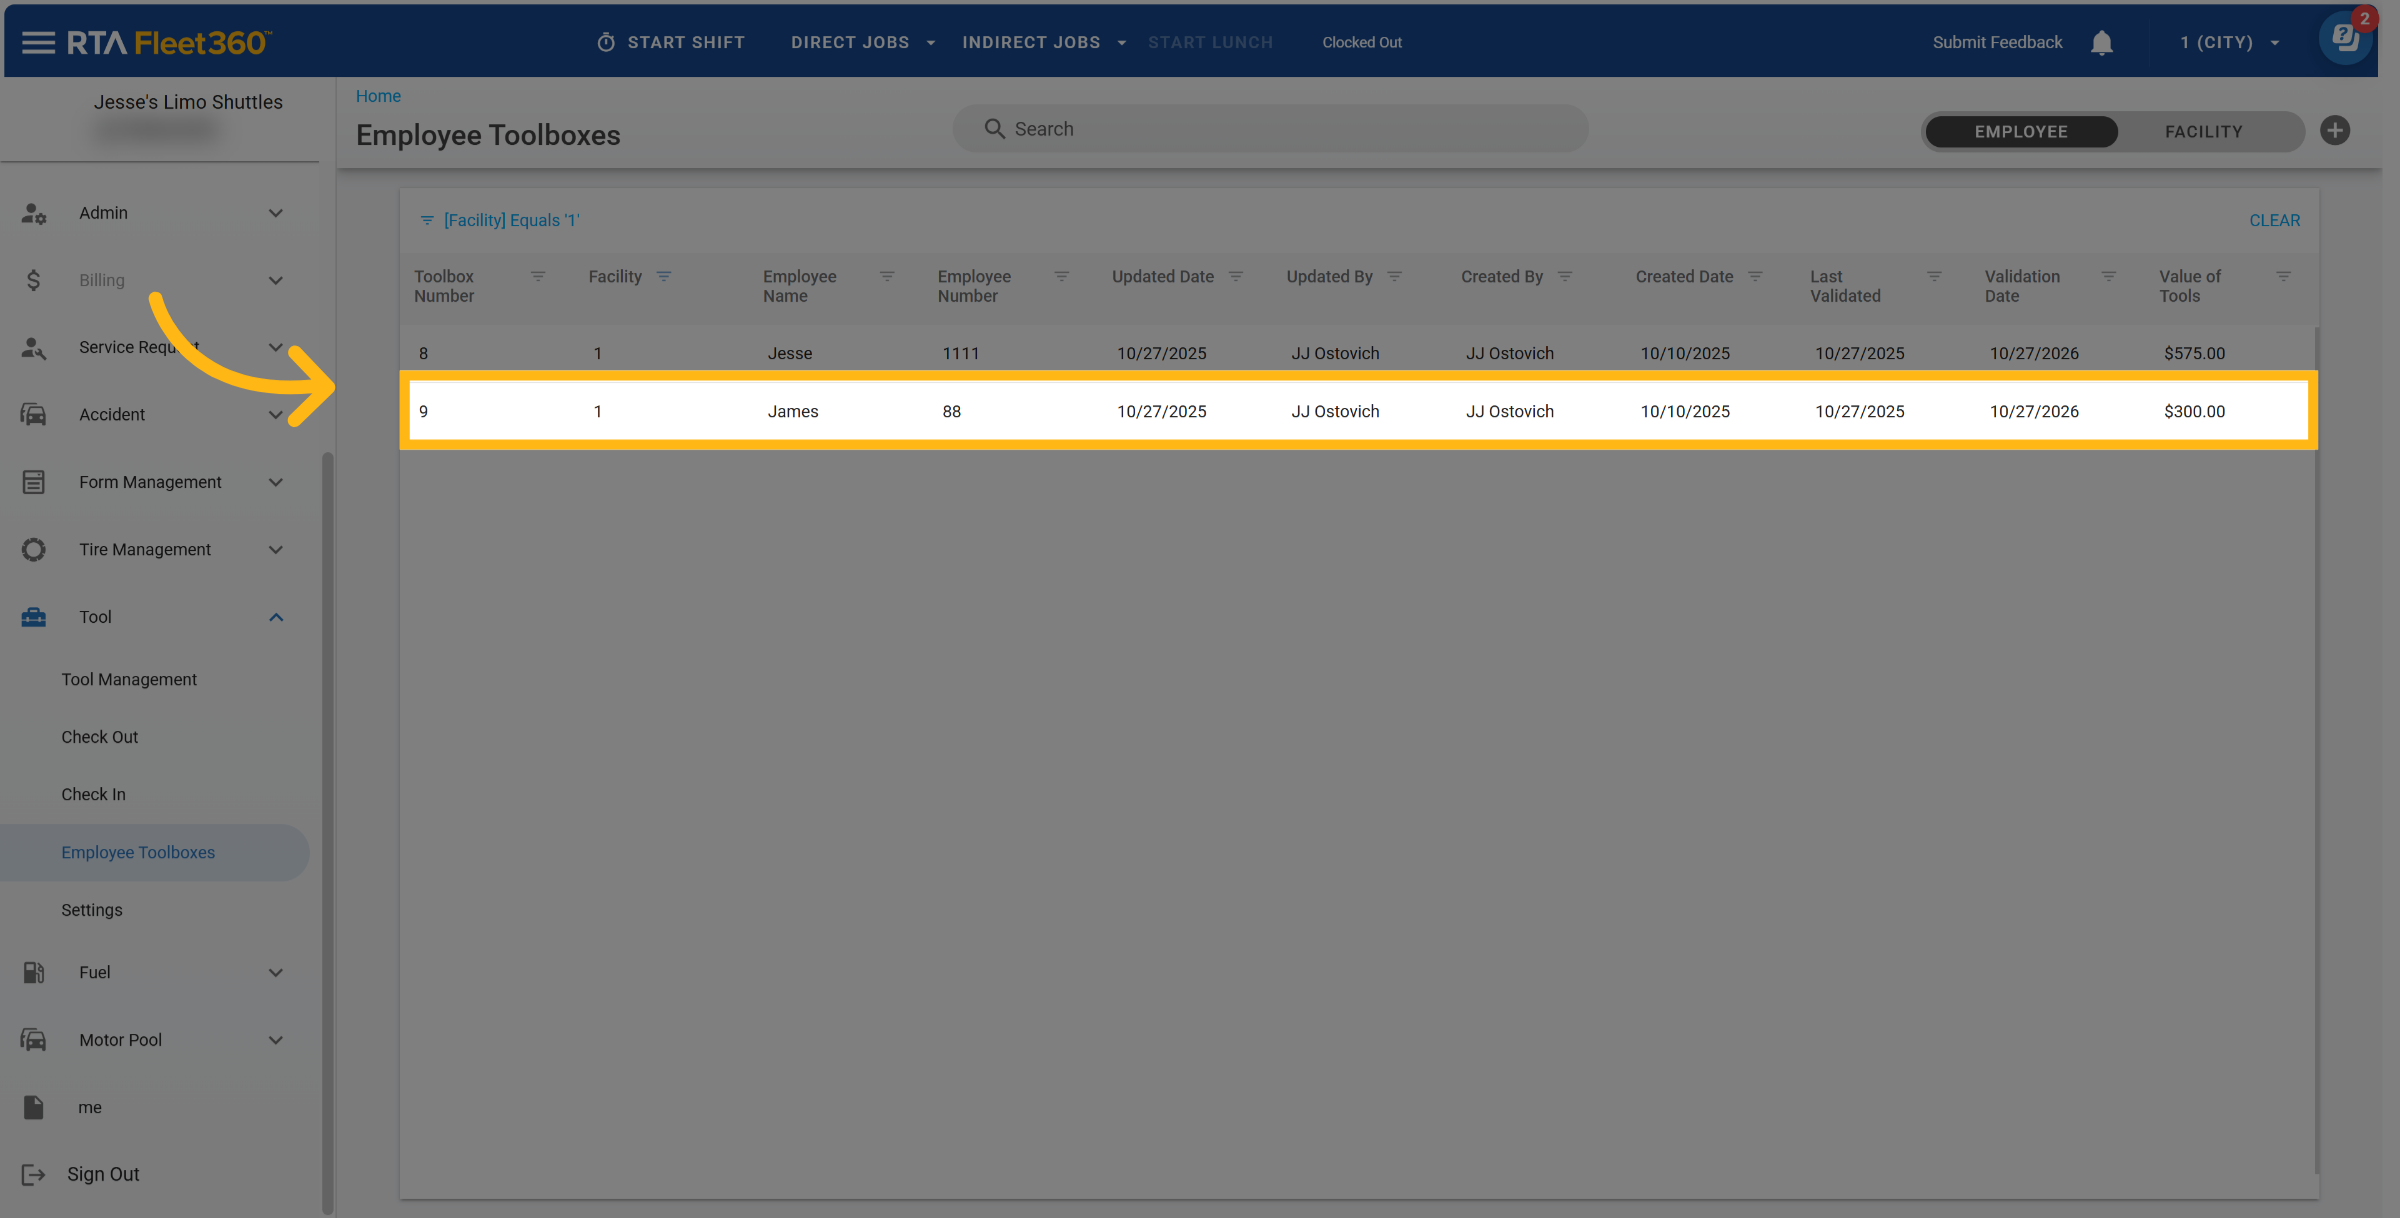
Toolbox Master Lists
You can access this feature by navigating to Tools > Employee Toolbox
There is two master list views, Employee and Facility.
Employee Toolbox Master List
Employees can:
Create and view their own toolbox(es)
Add or edit individual tool lines
Track tool condition, quantity, and total value
Validate their toolbox (if permissions allow)
Print or export a validation checklist as PDF
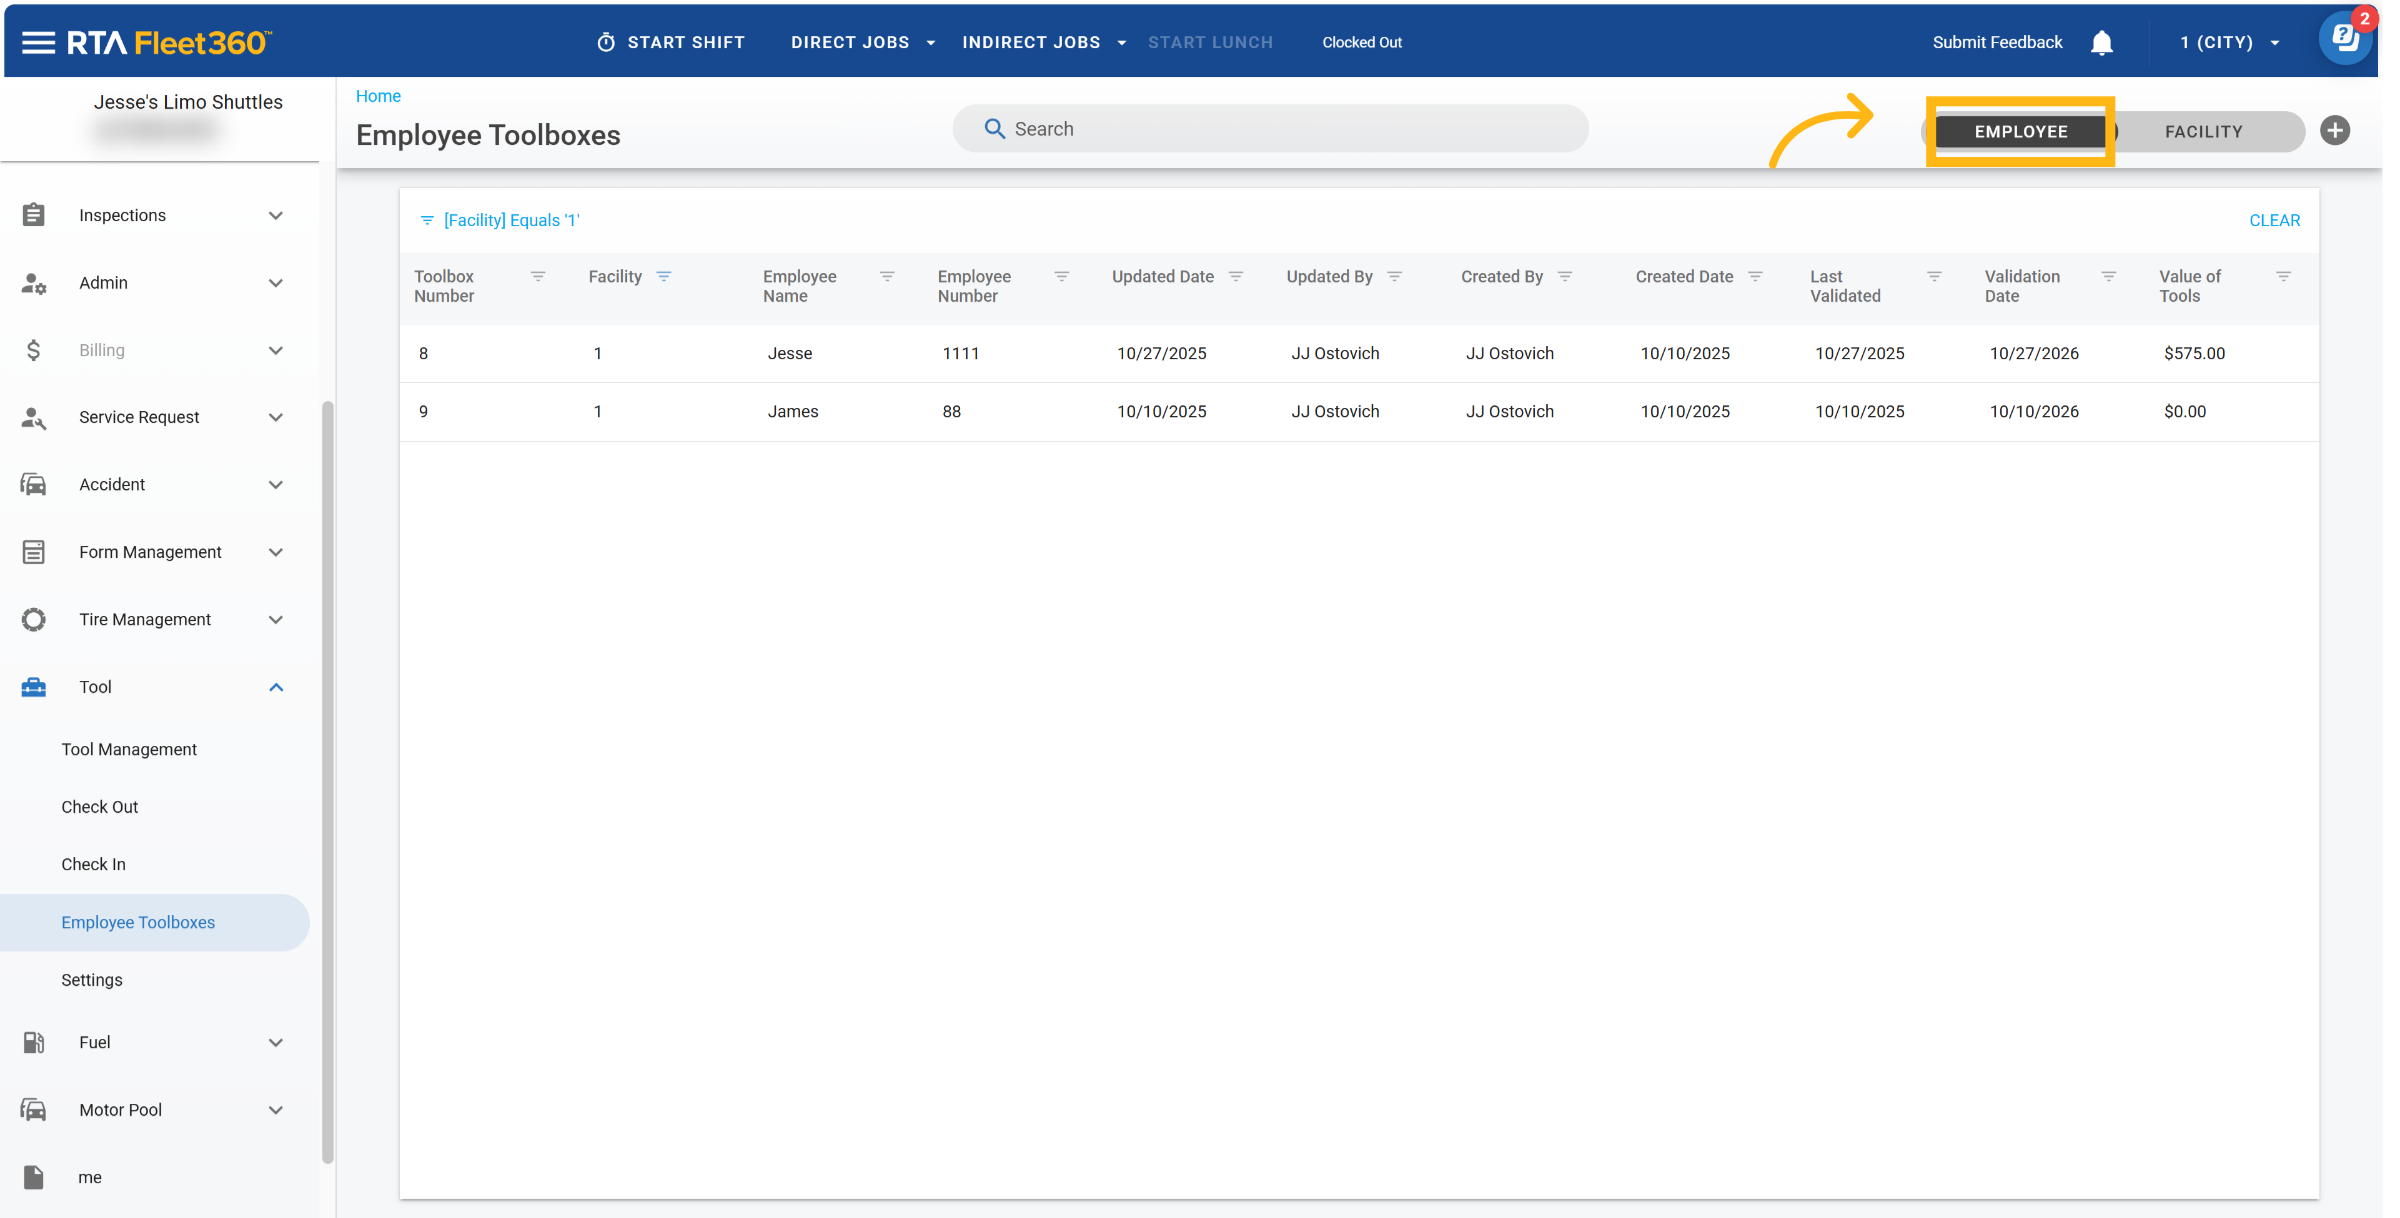
Facility Toolbox Master List
Managers can toggle between Employee and Facility views:
Employee View: Displays only toolboxes assigned to the logged-in user
Facility View: Displays all toolboxes for employees the manager supervises (based on validator permissions)
Managers can:
Review and validate multiple toolboxes
Access the same editing and reporting functions as employees (if permissions allow)
Adding Toolboxes and Tools
Add Toolbox
Click on the plus icon
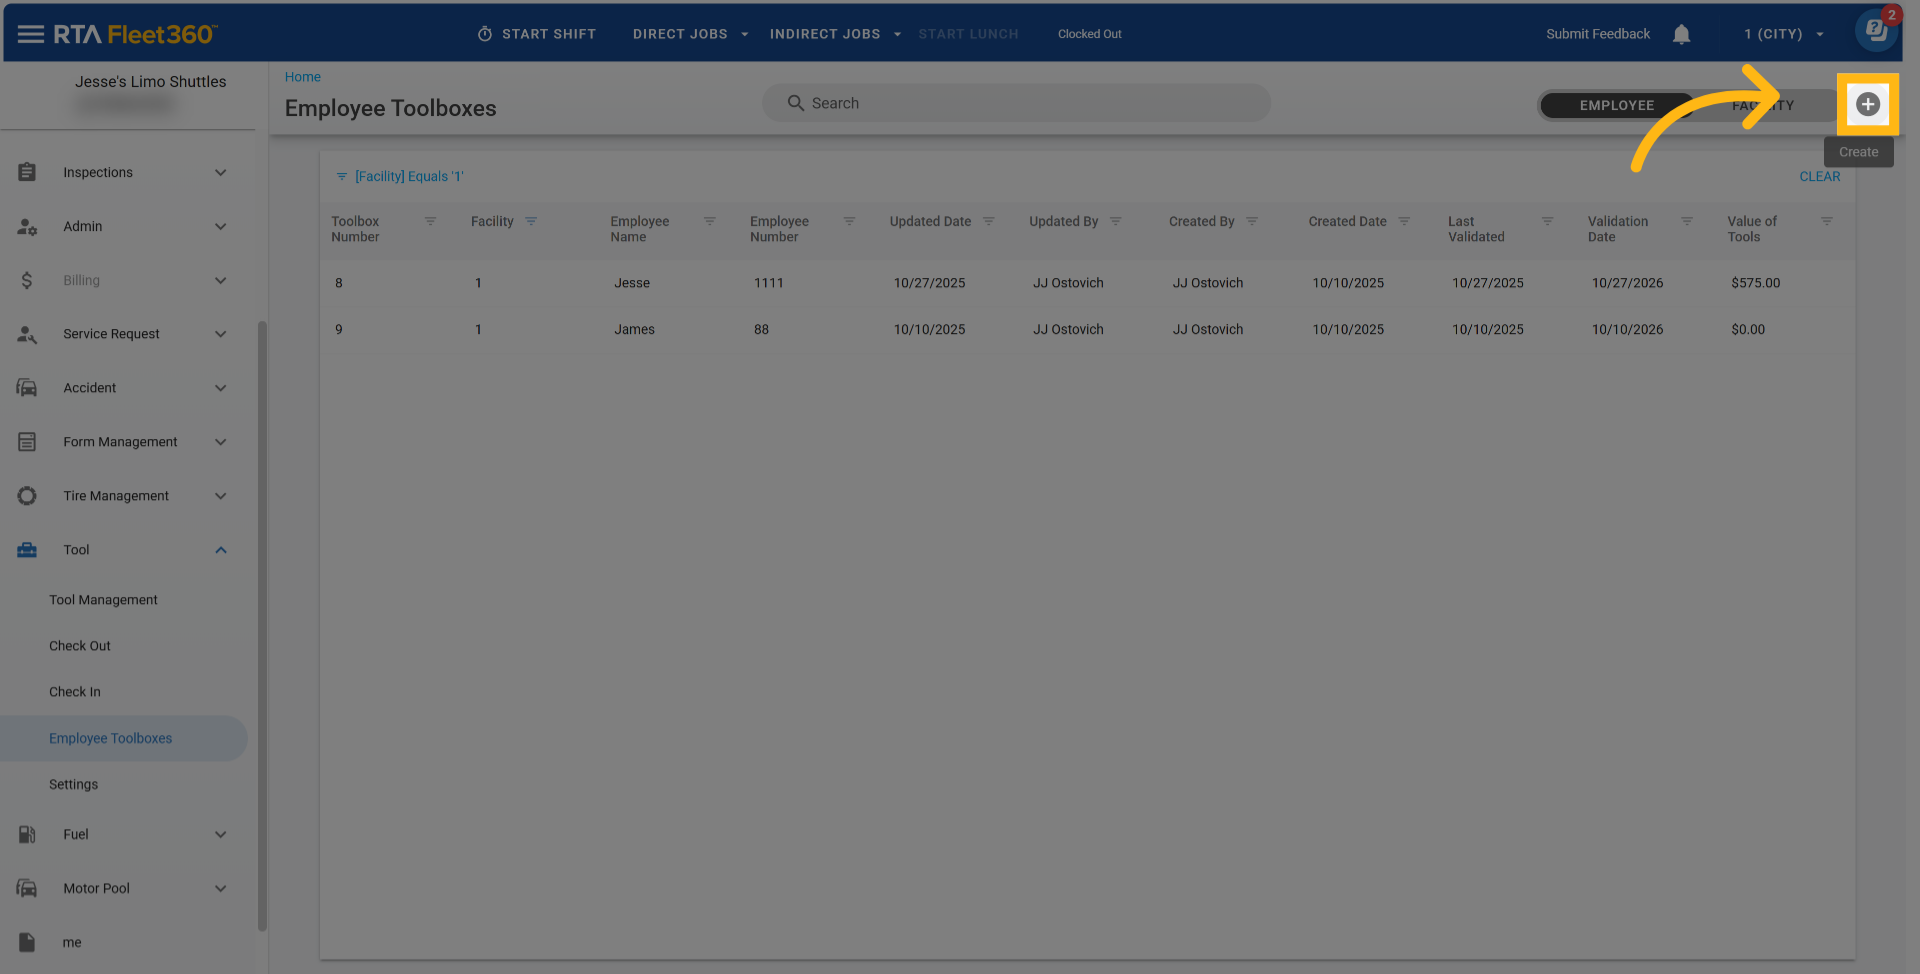
Add the following:
Toolbox Number - Identifier of the toolbox
Description - Short summary or label that helps identify what the toolbox is used for
Last Validation Date - This field prefills the date that the box is created. This can be edited
Employee Name - Who is responsible for the toolbox
Validator Name - Who is the responsible party to validate (inspect) the toolbox
Click Save

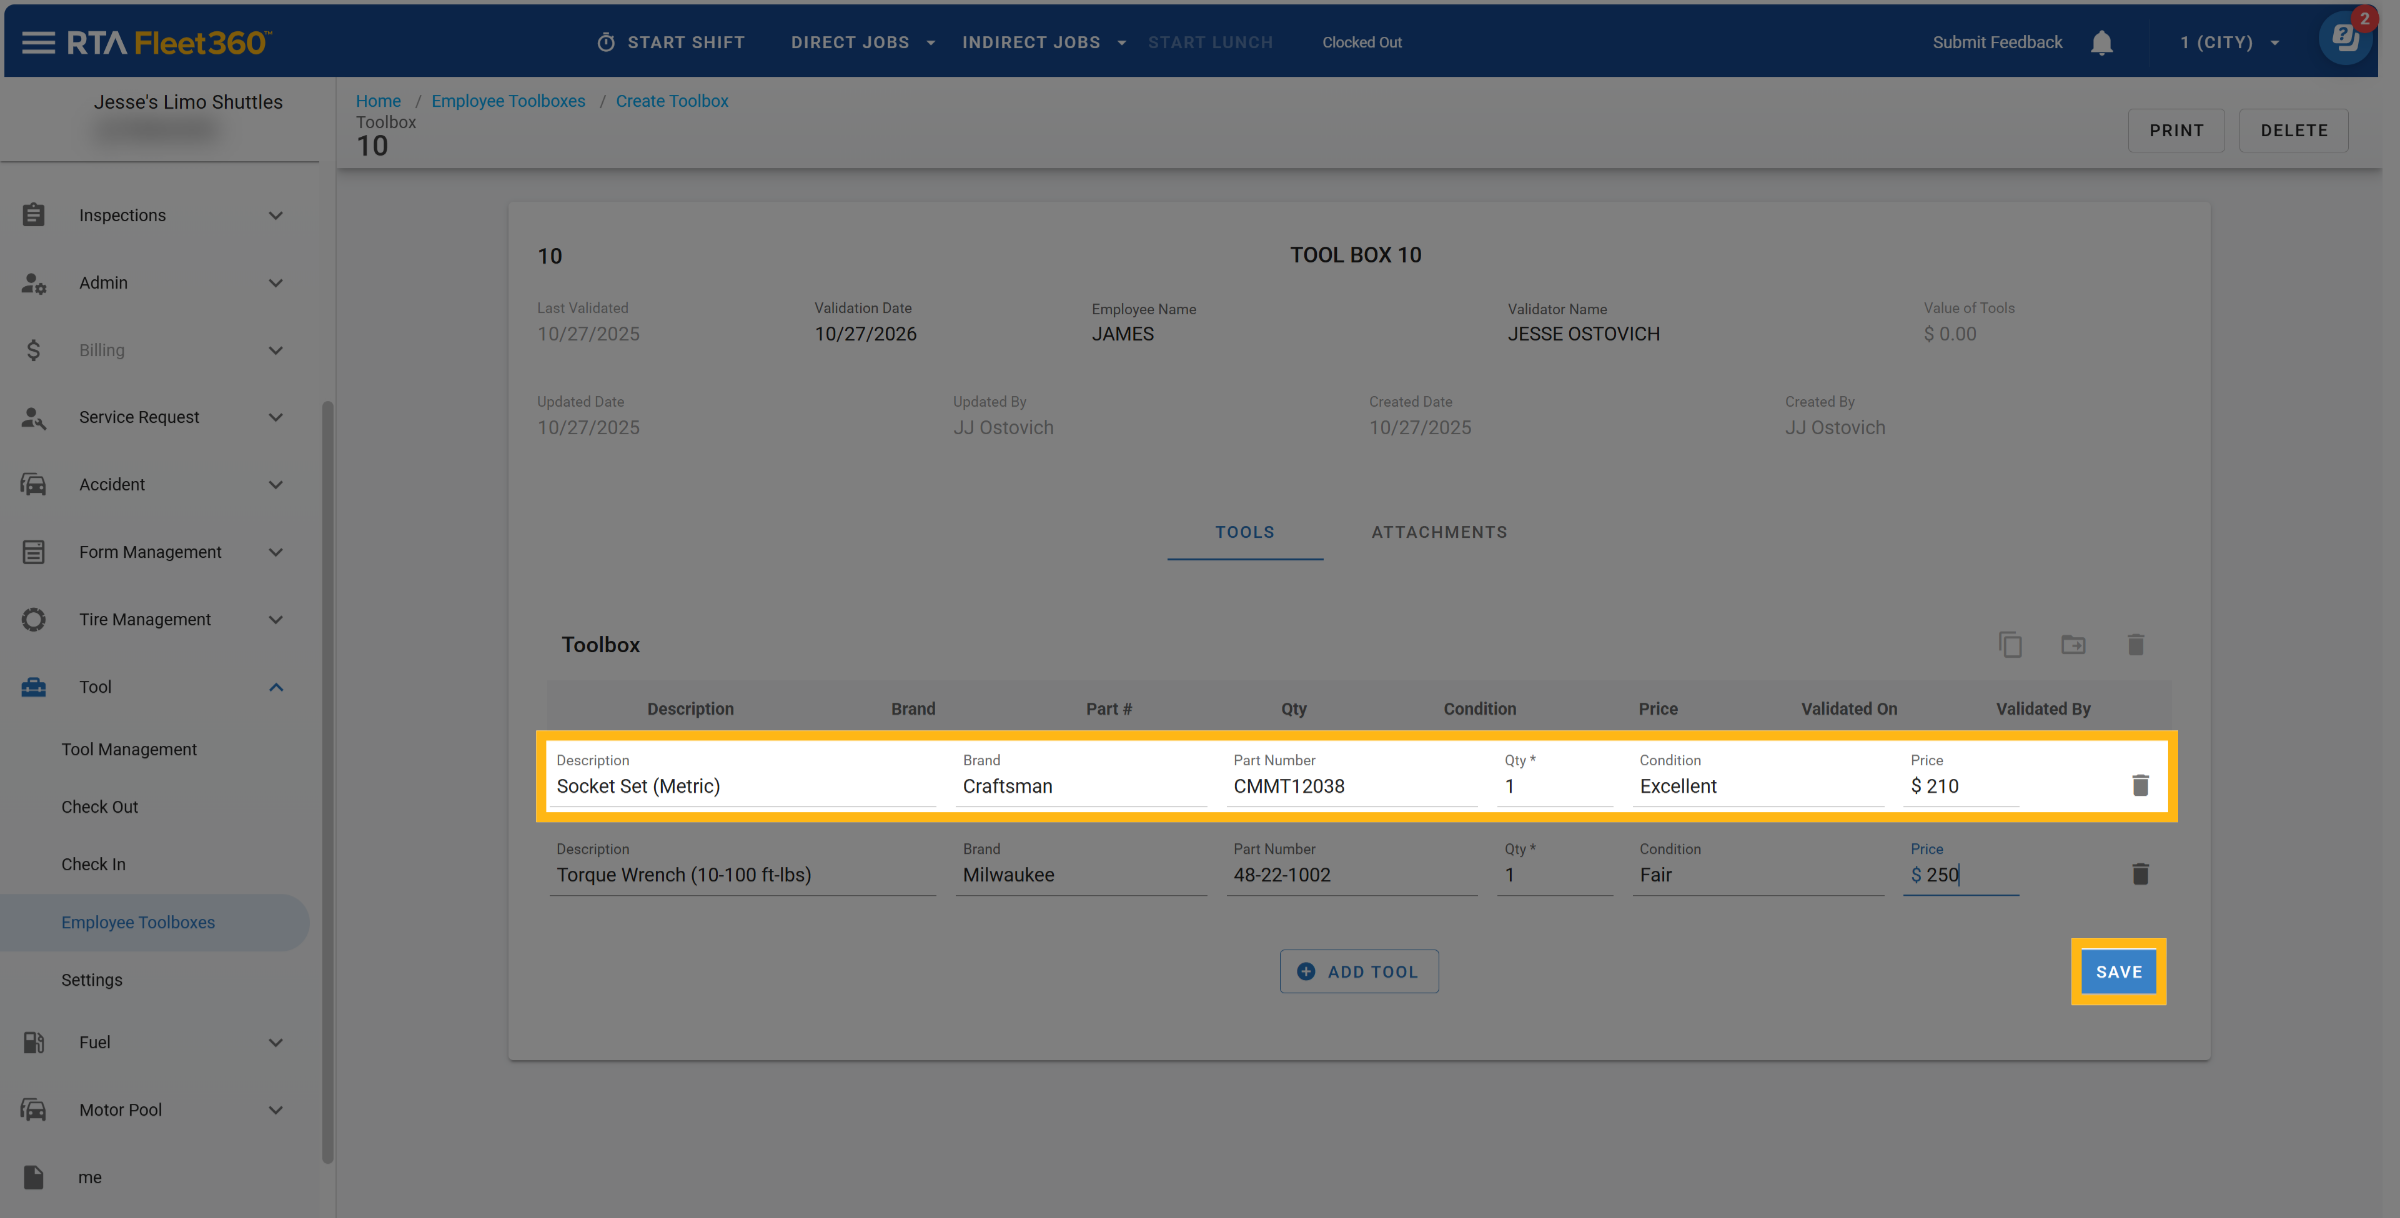
Add Tools to Toolbox
Now that a toolbox is created click “Add Tool” and begin creating tools
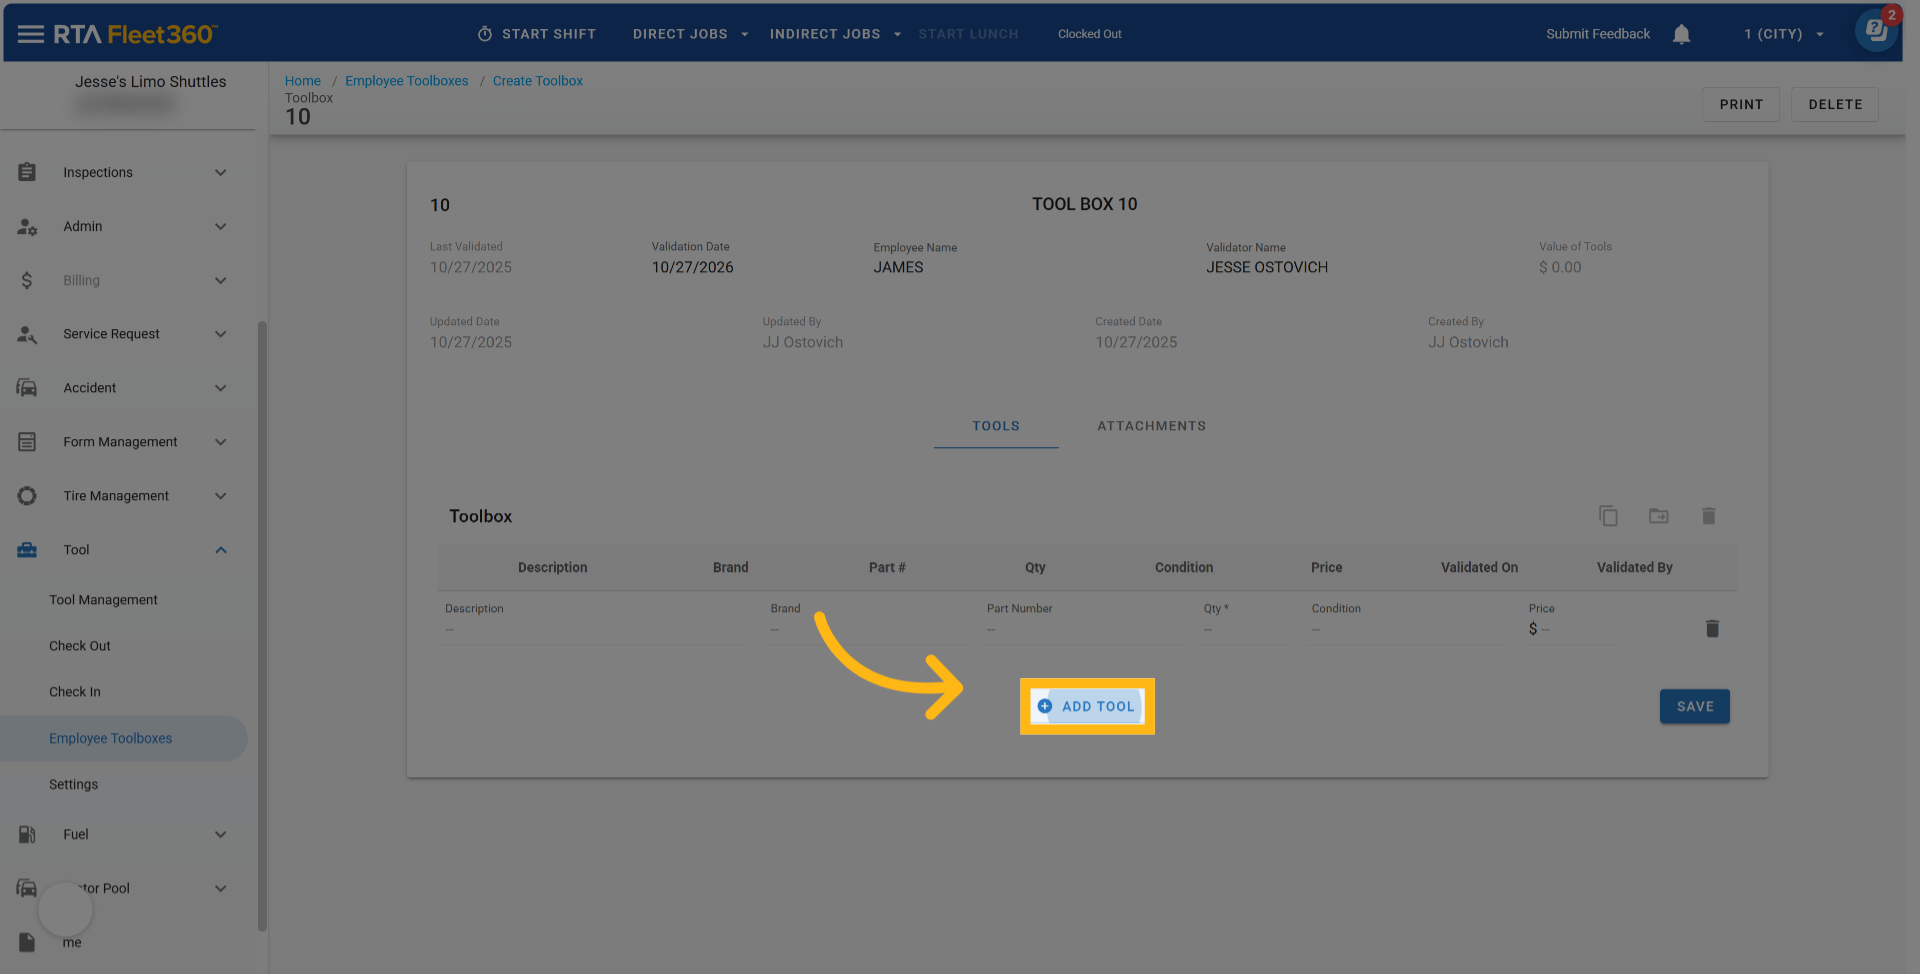
When creating tools add the following:
Description - Short summary or label that helps identify what the tool is
Brand - Enter the brand of the tool
Part Number - Enter the part number of the tool
Qty - Enter the quantity of how many tools
Condition - Enter the condition of the tools (Examples: Excellent, Good, Fair)
Price - Enter the price of the tool
Click Save
Based on allowed permissions, if there is a need to delete a tool line click the trash icon to the right of the tool.
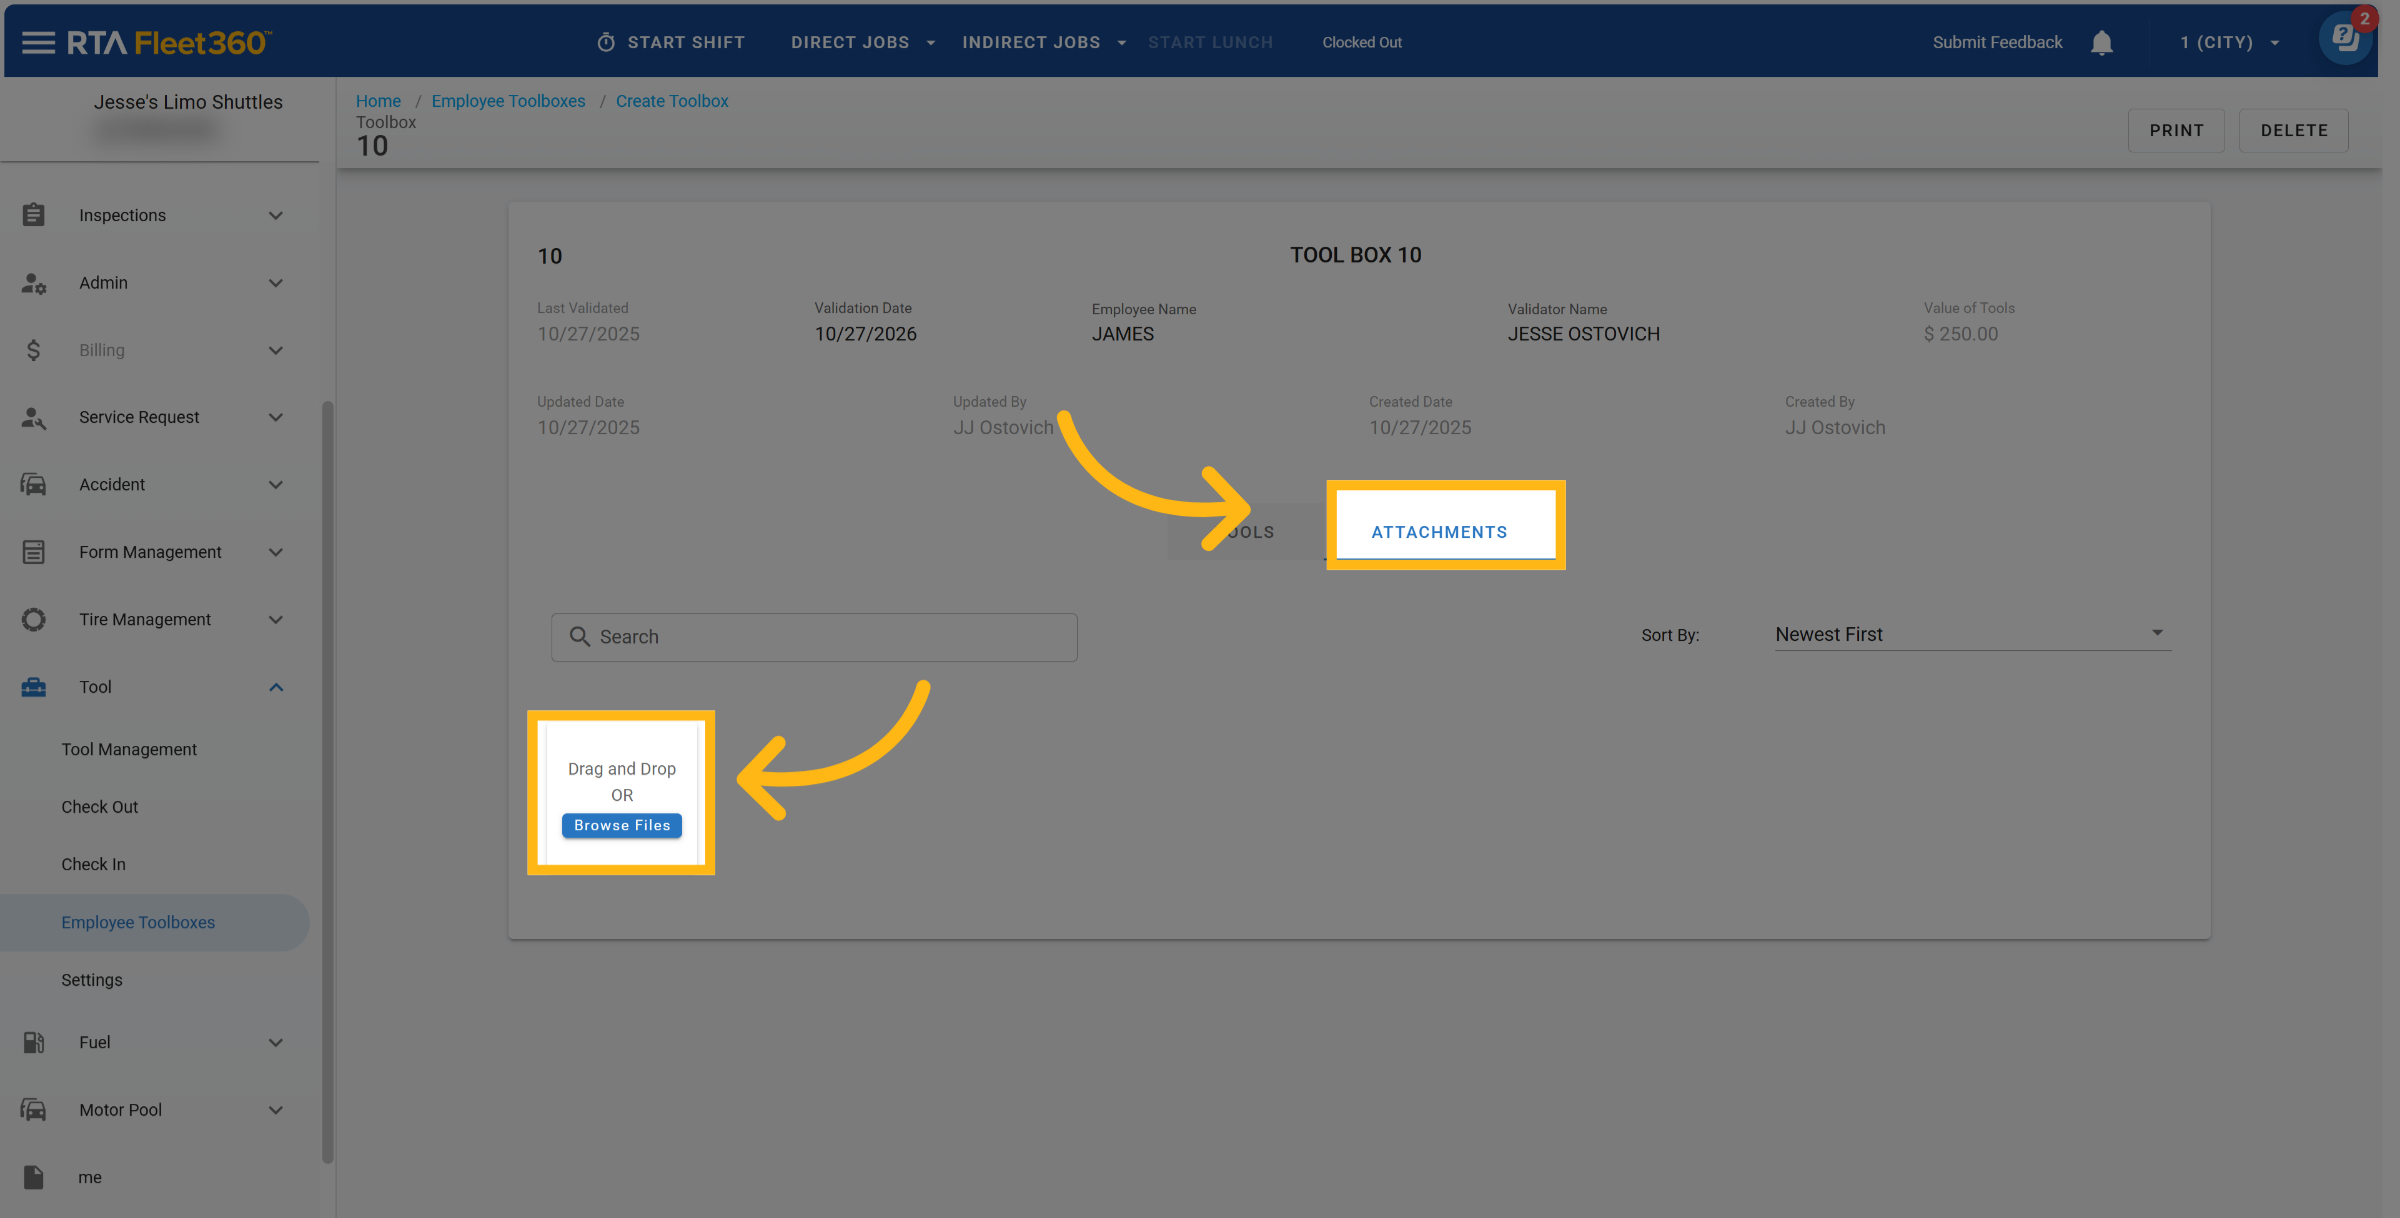
Adding Attachments to Toolboxes
Click Attachments in the Toolbox file
Add attachments by either dragging and dropping the attachment or click on “Brows Files”
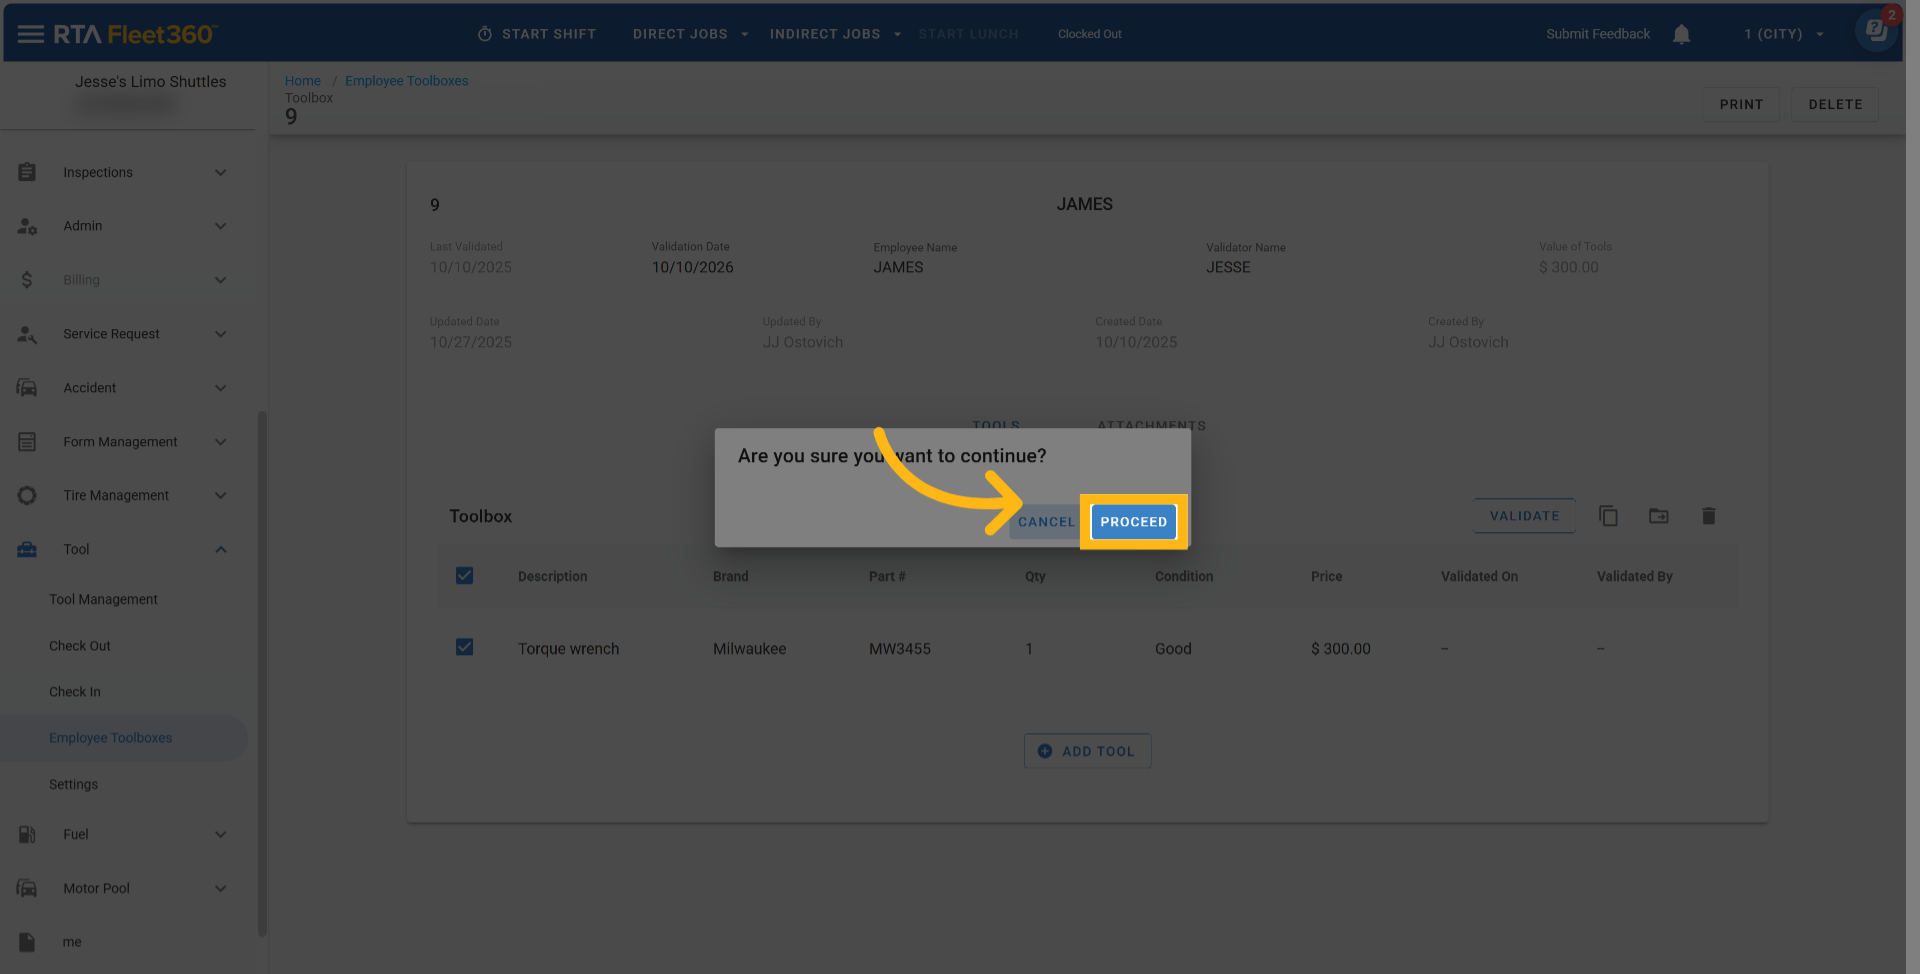
Validating Tools
Validating a toolbox can be performed by the person who has been appointed to validate and the employee has the ability to validate their tool box as well. Think of this as doing periodic inspections on the toolboxes to maintain accountability.
To Validate the tools in a tool box select the tools that

Click Validate
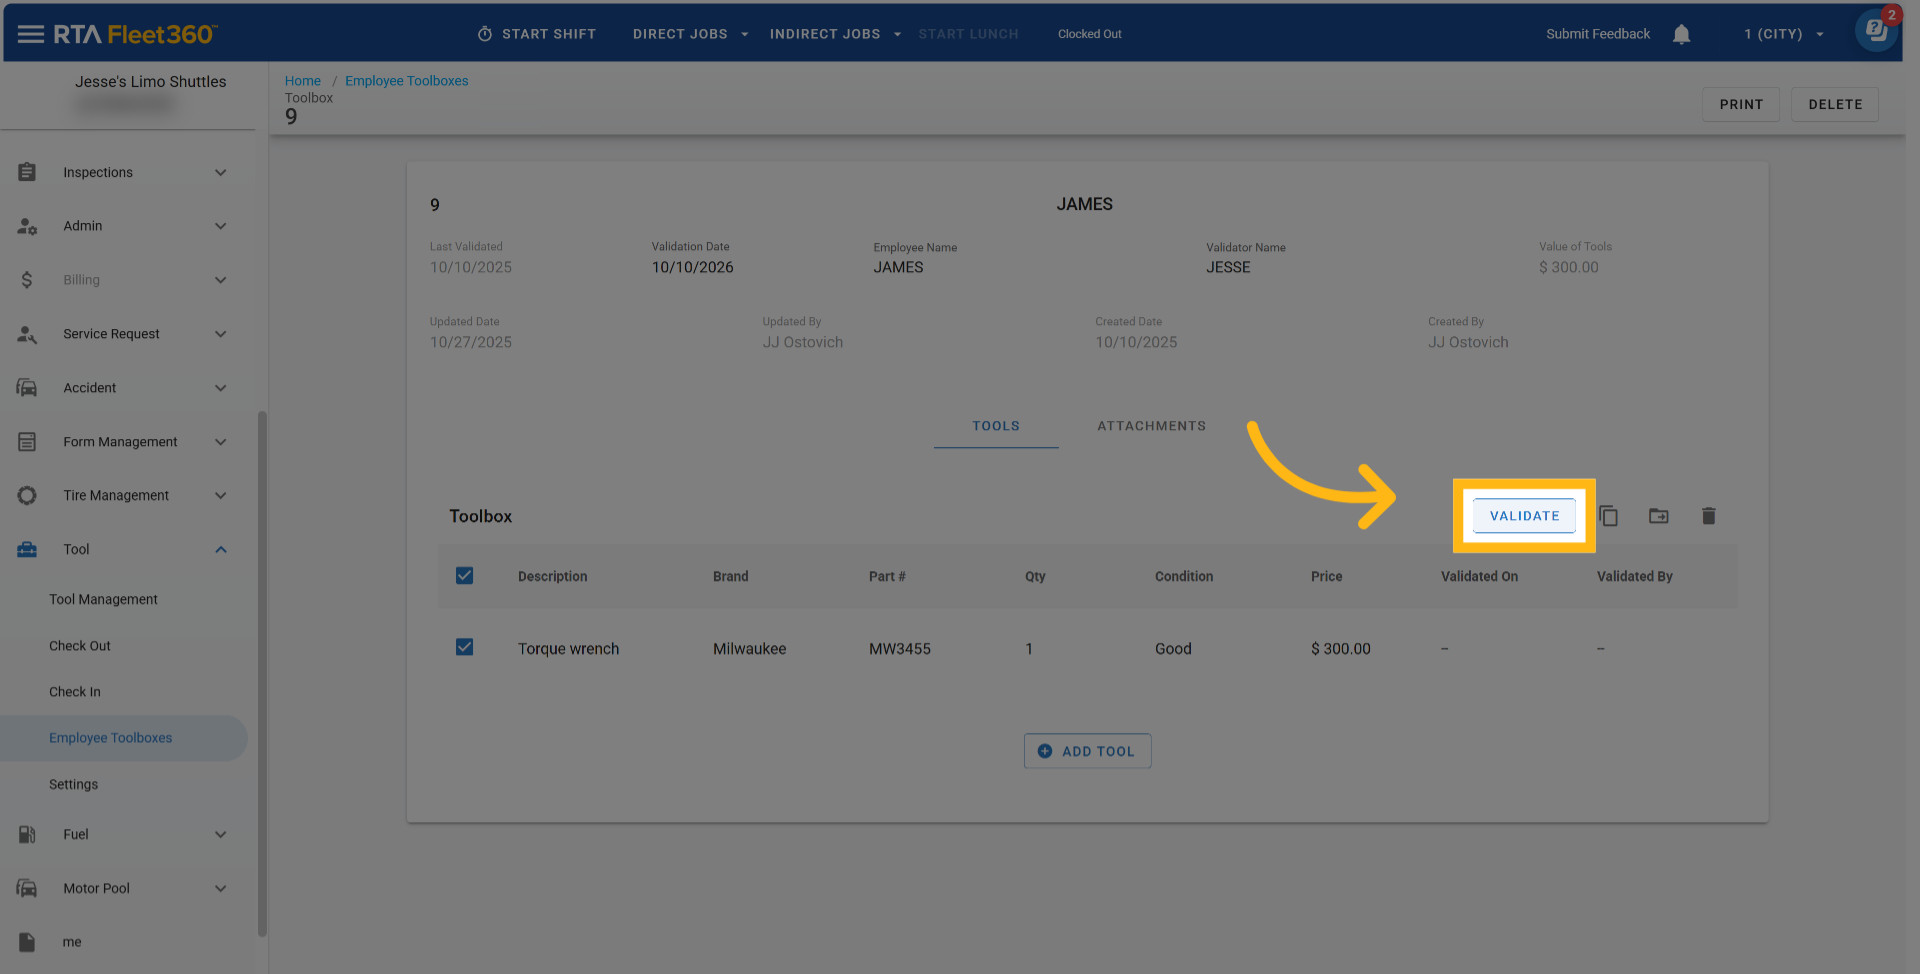
Click Proceed
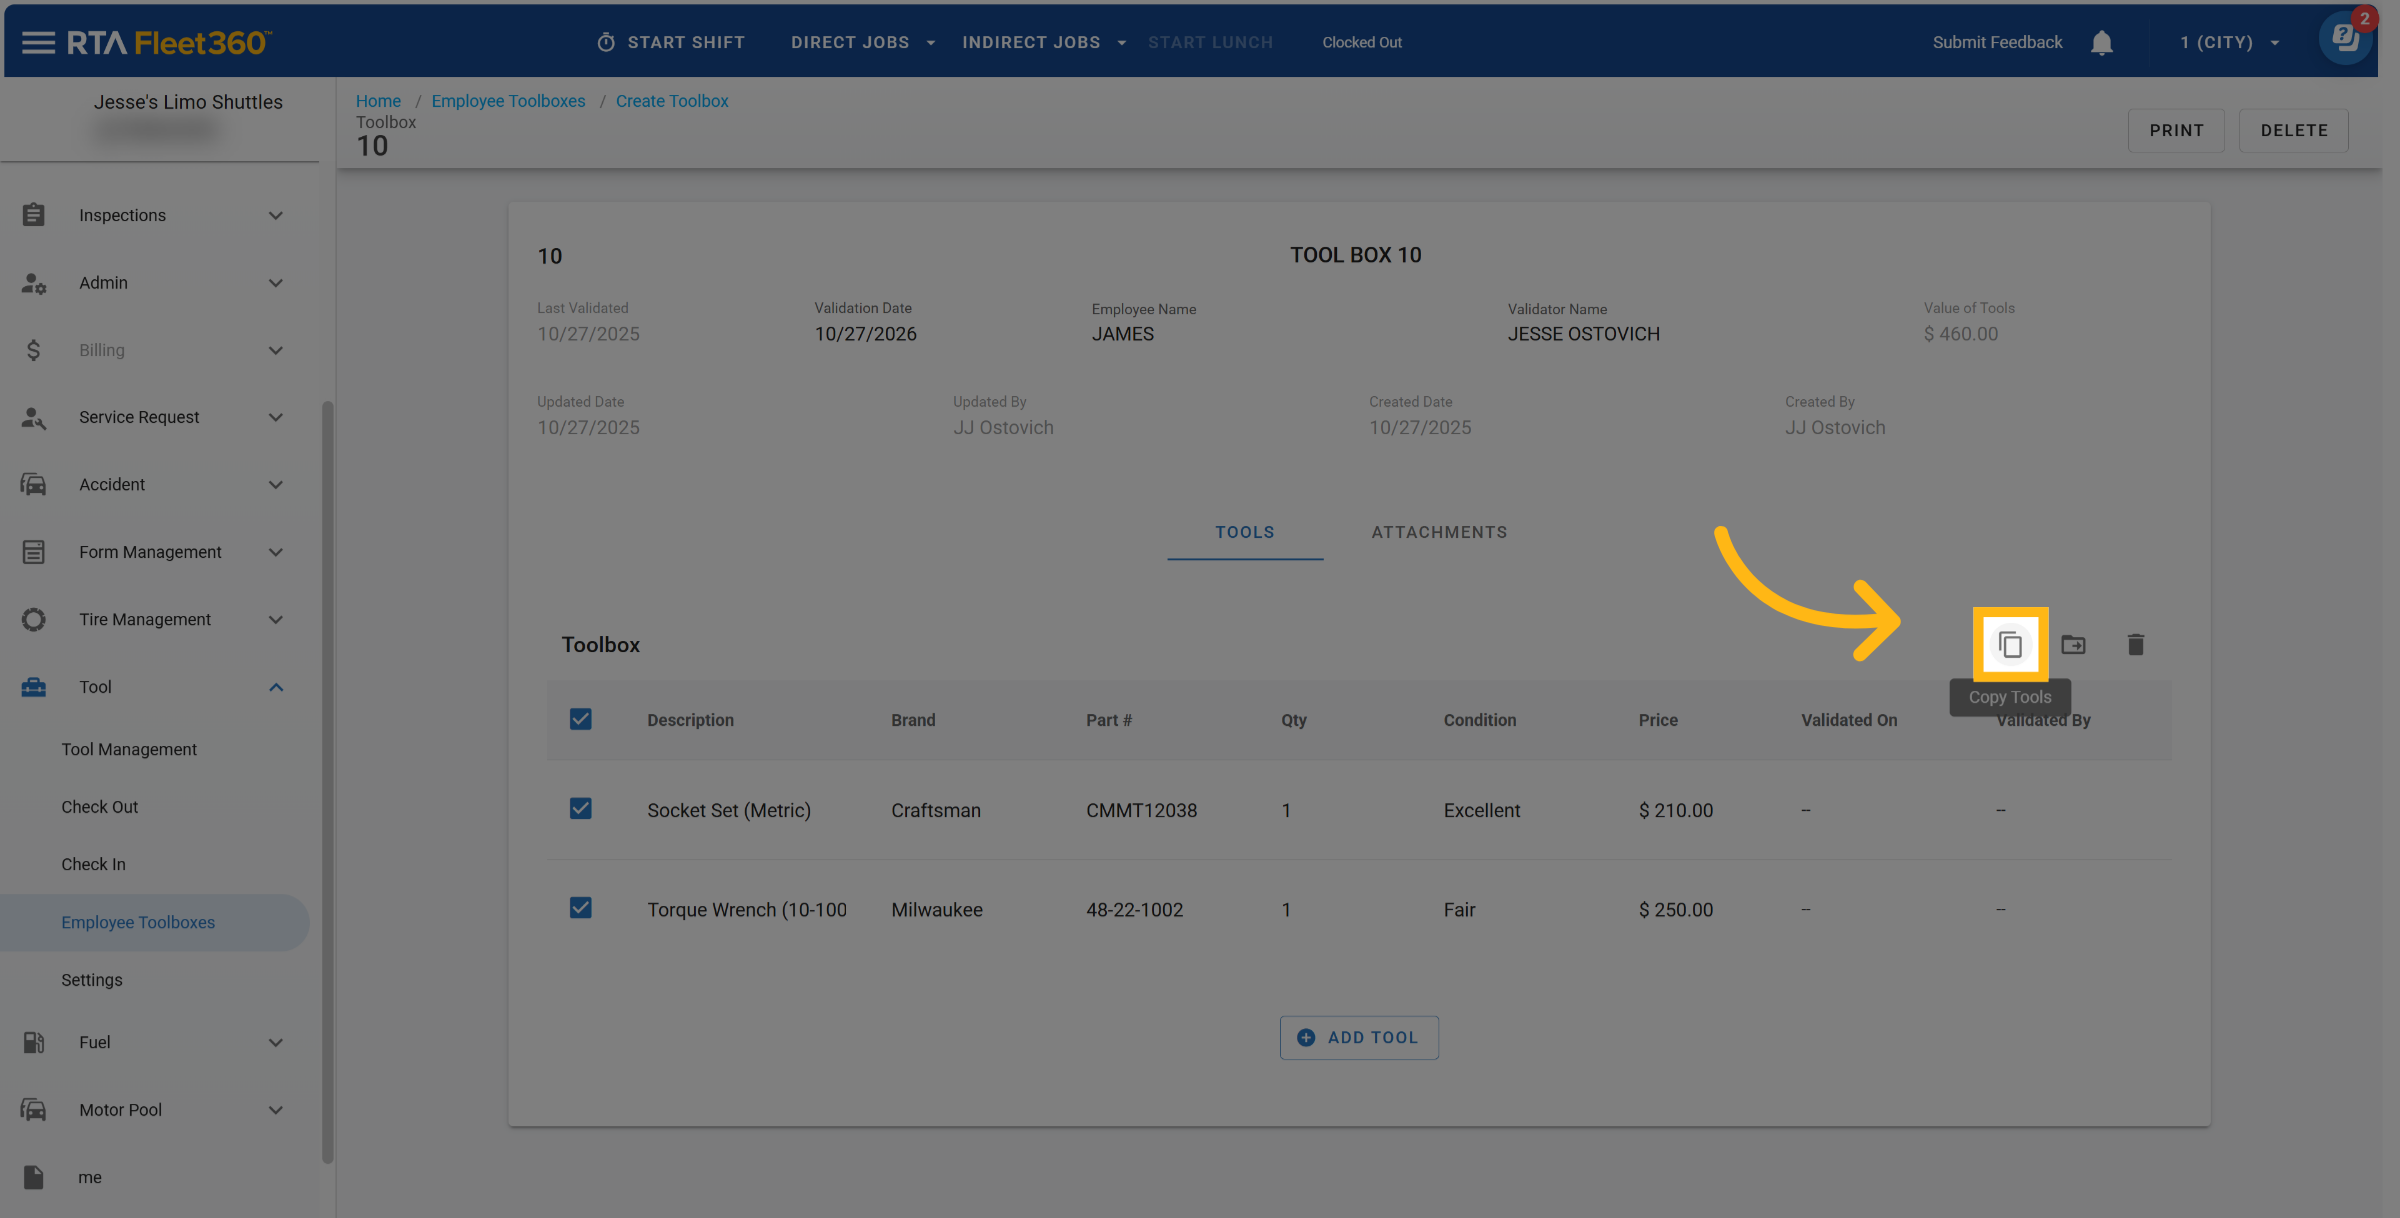
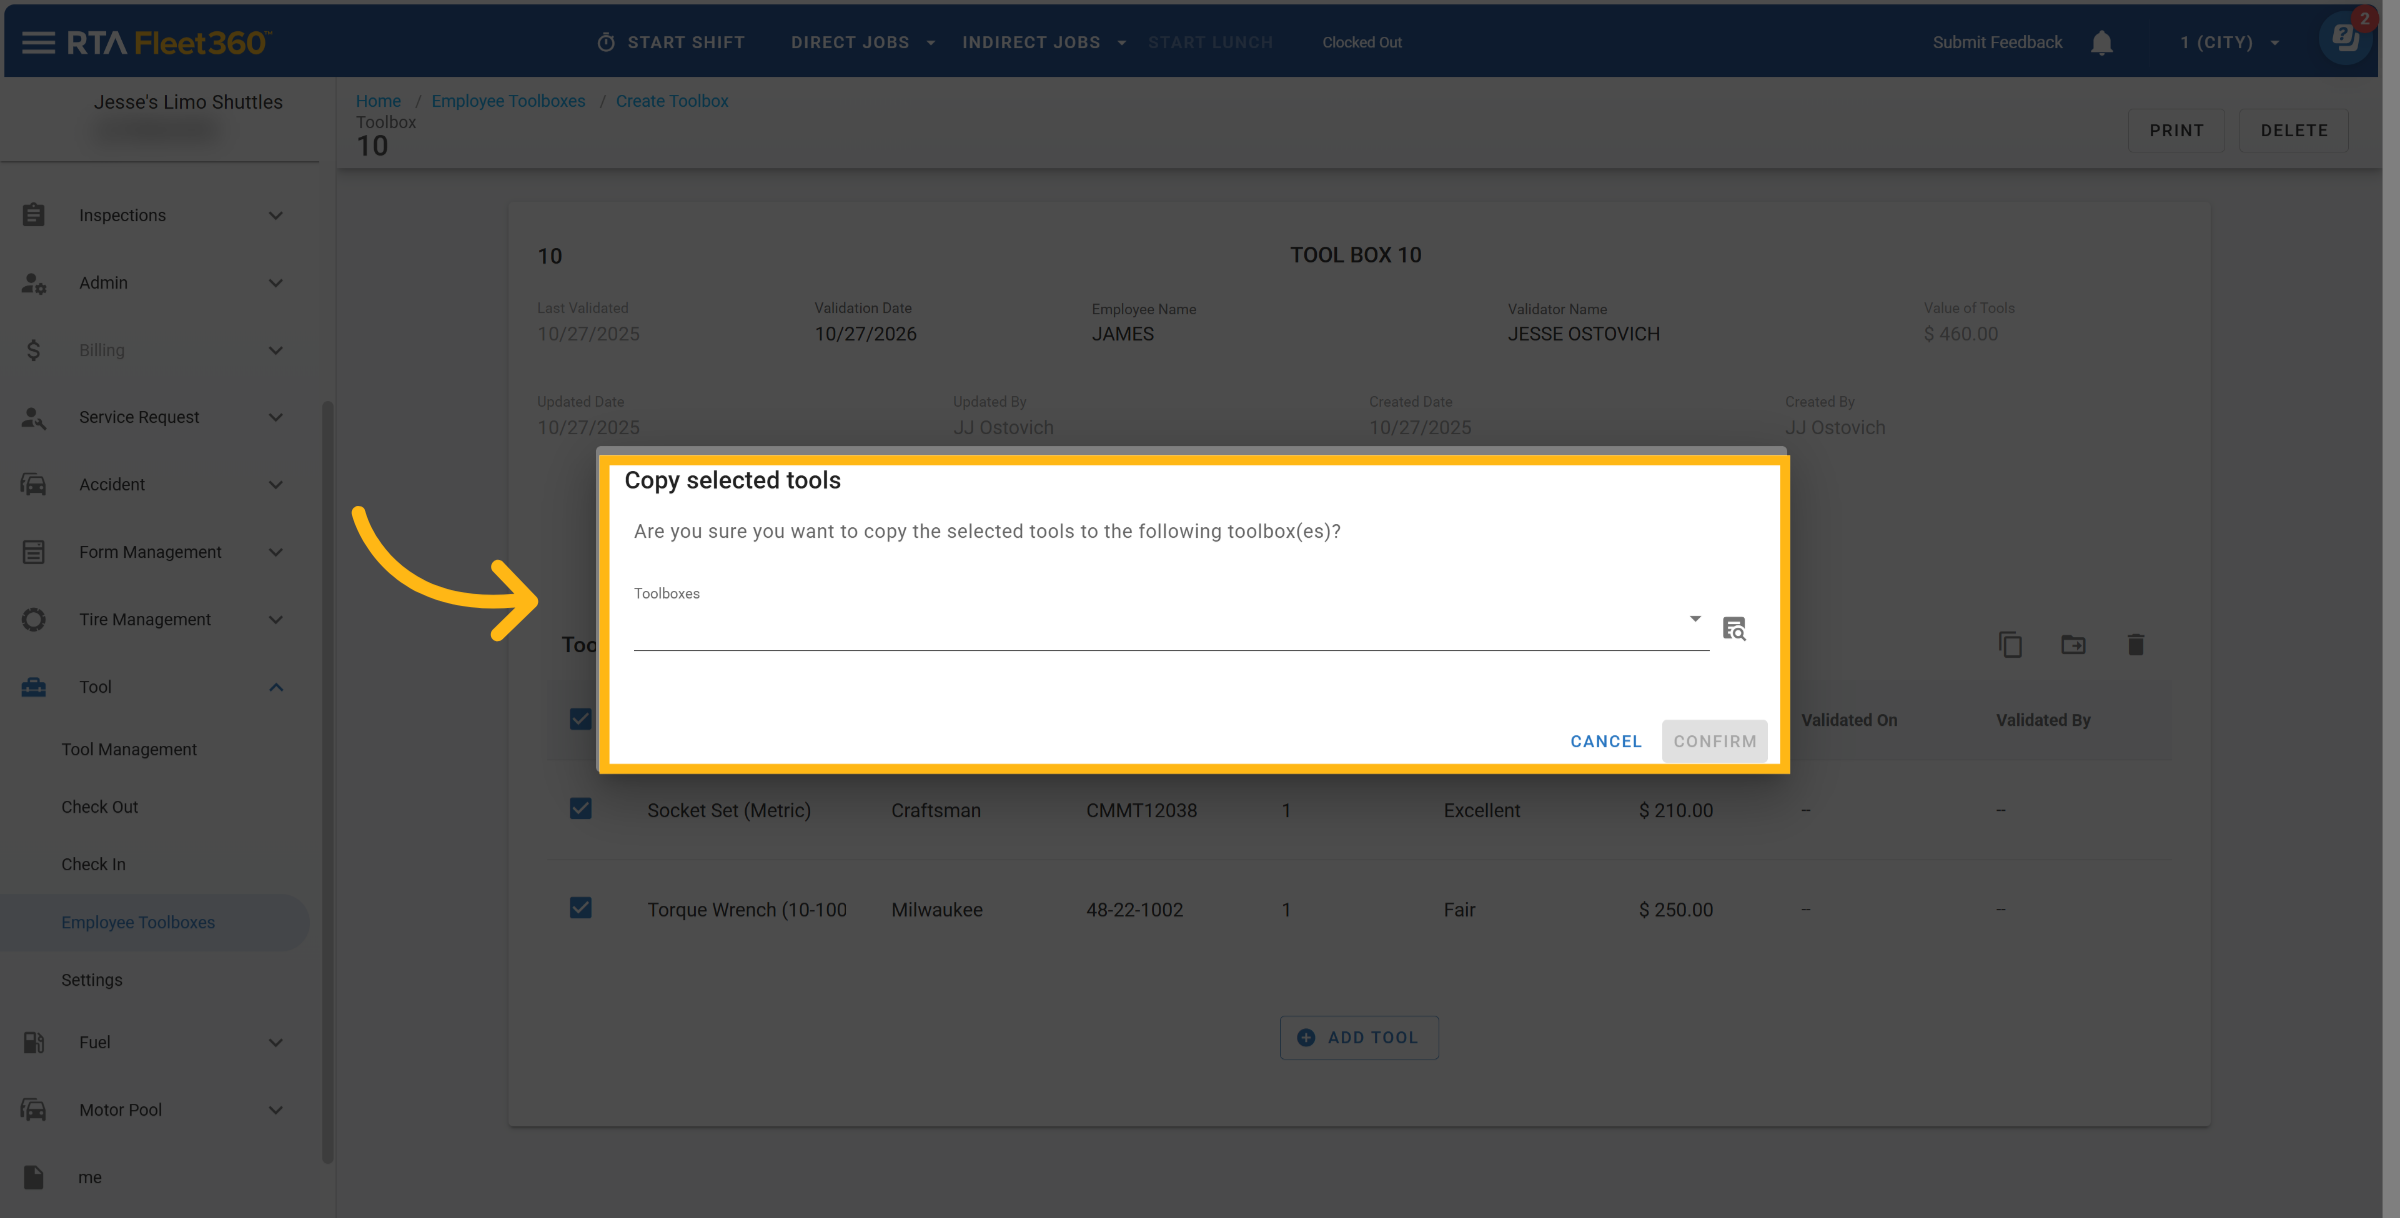
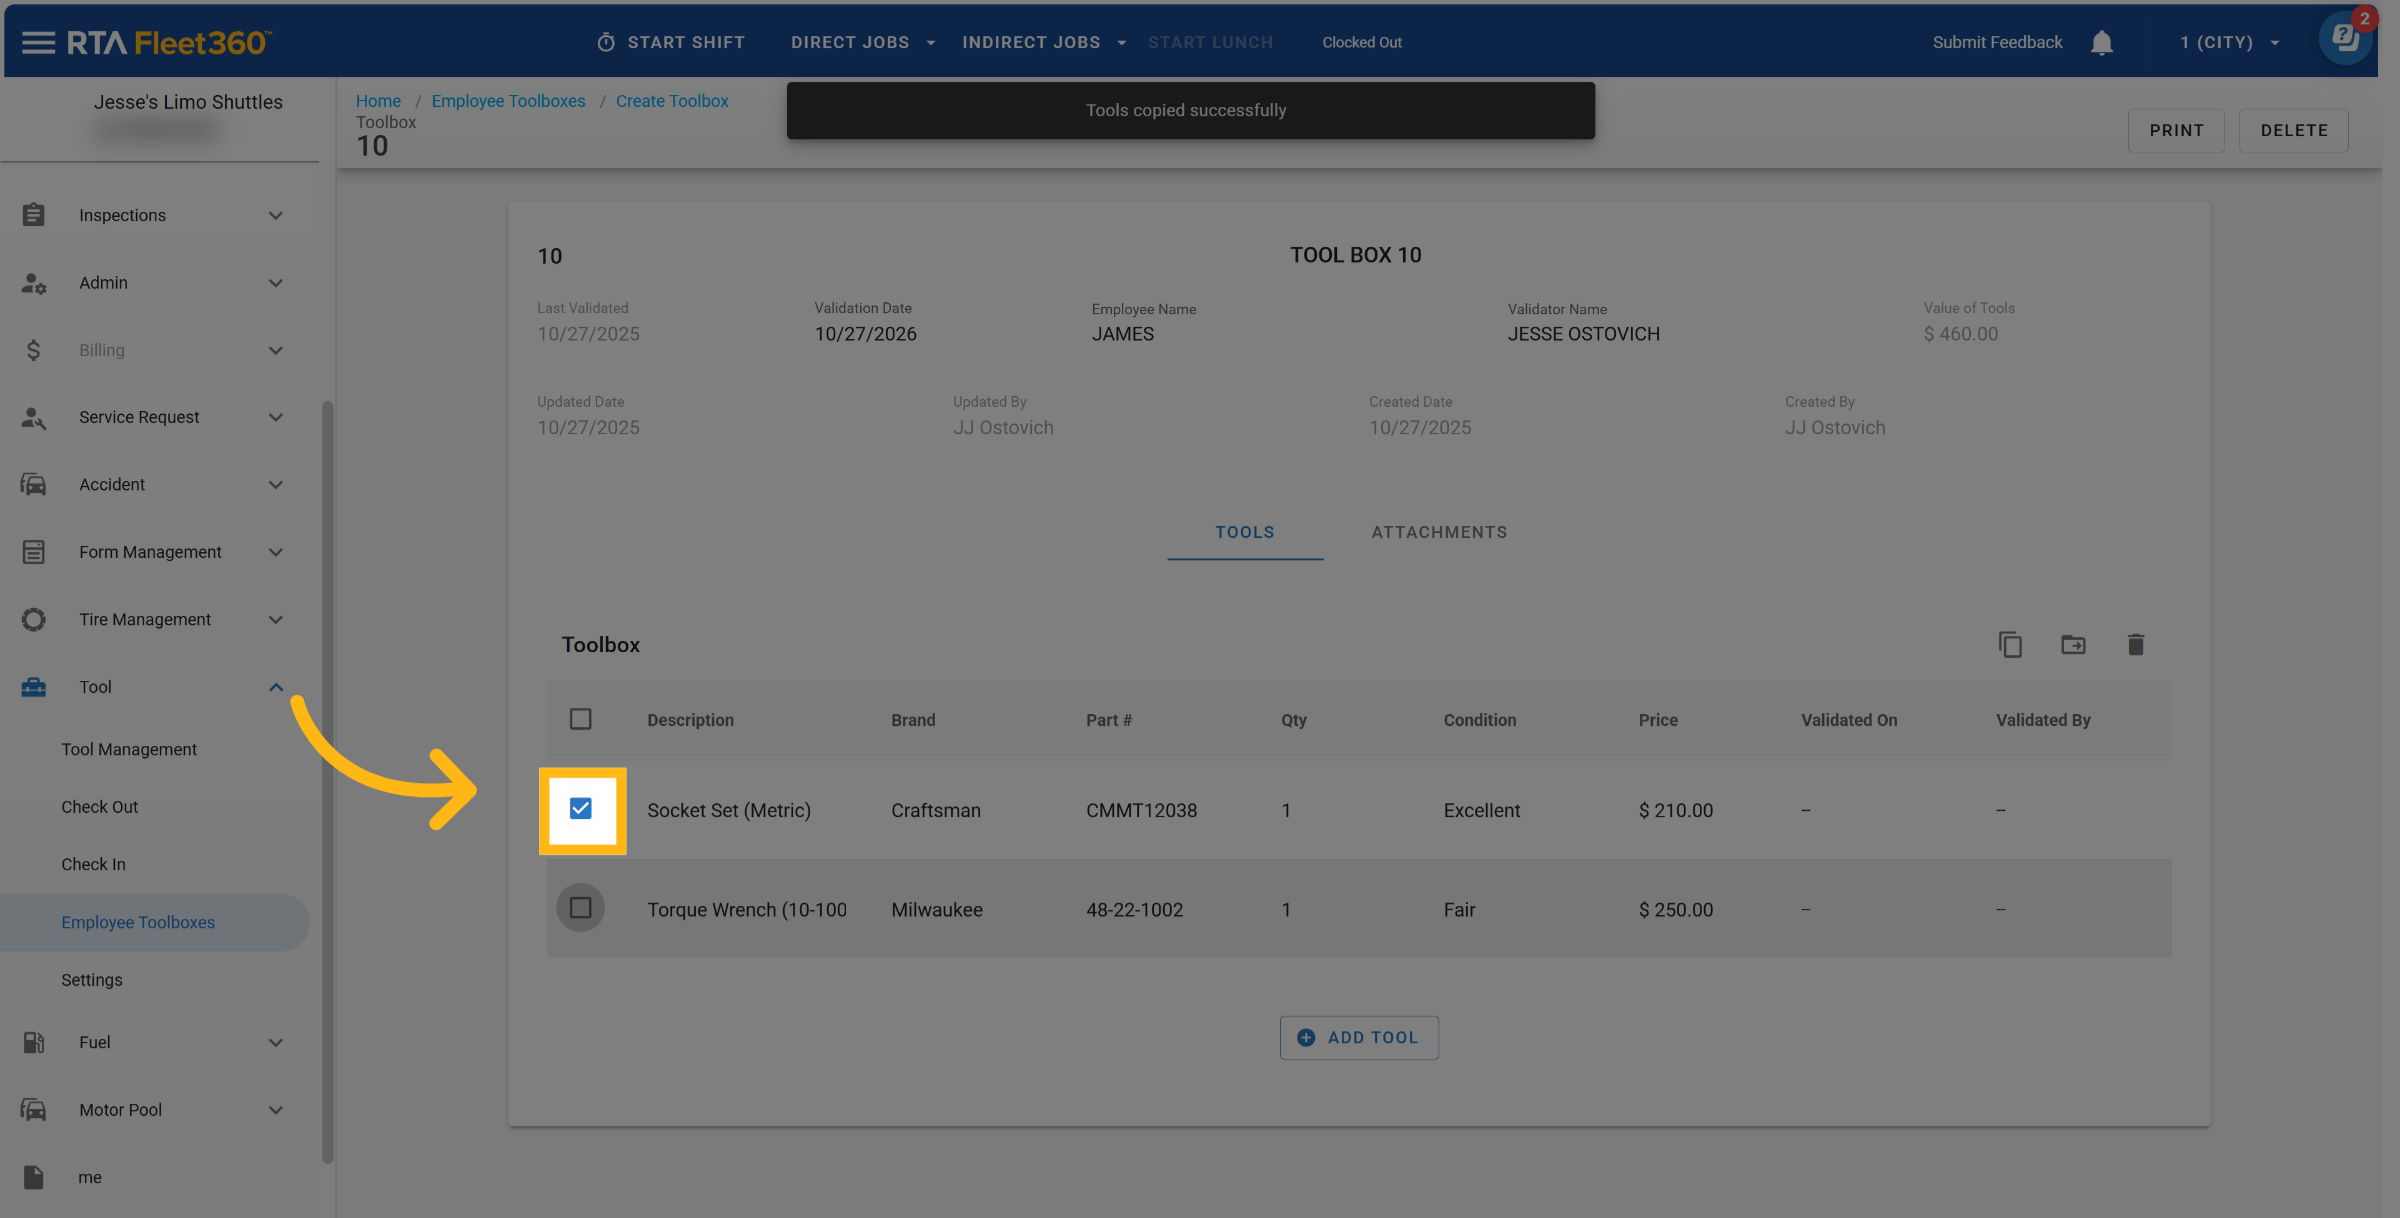
Copy Tools
Select the tool(s) to copy to another toolbox

Click on the Copy Icon
Select to the Toolbox(s) to Copy the tools tool from the drop down list
Click Confirm after selection
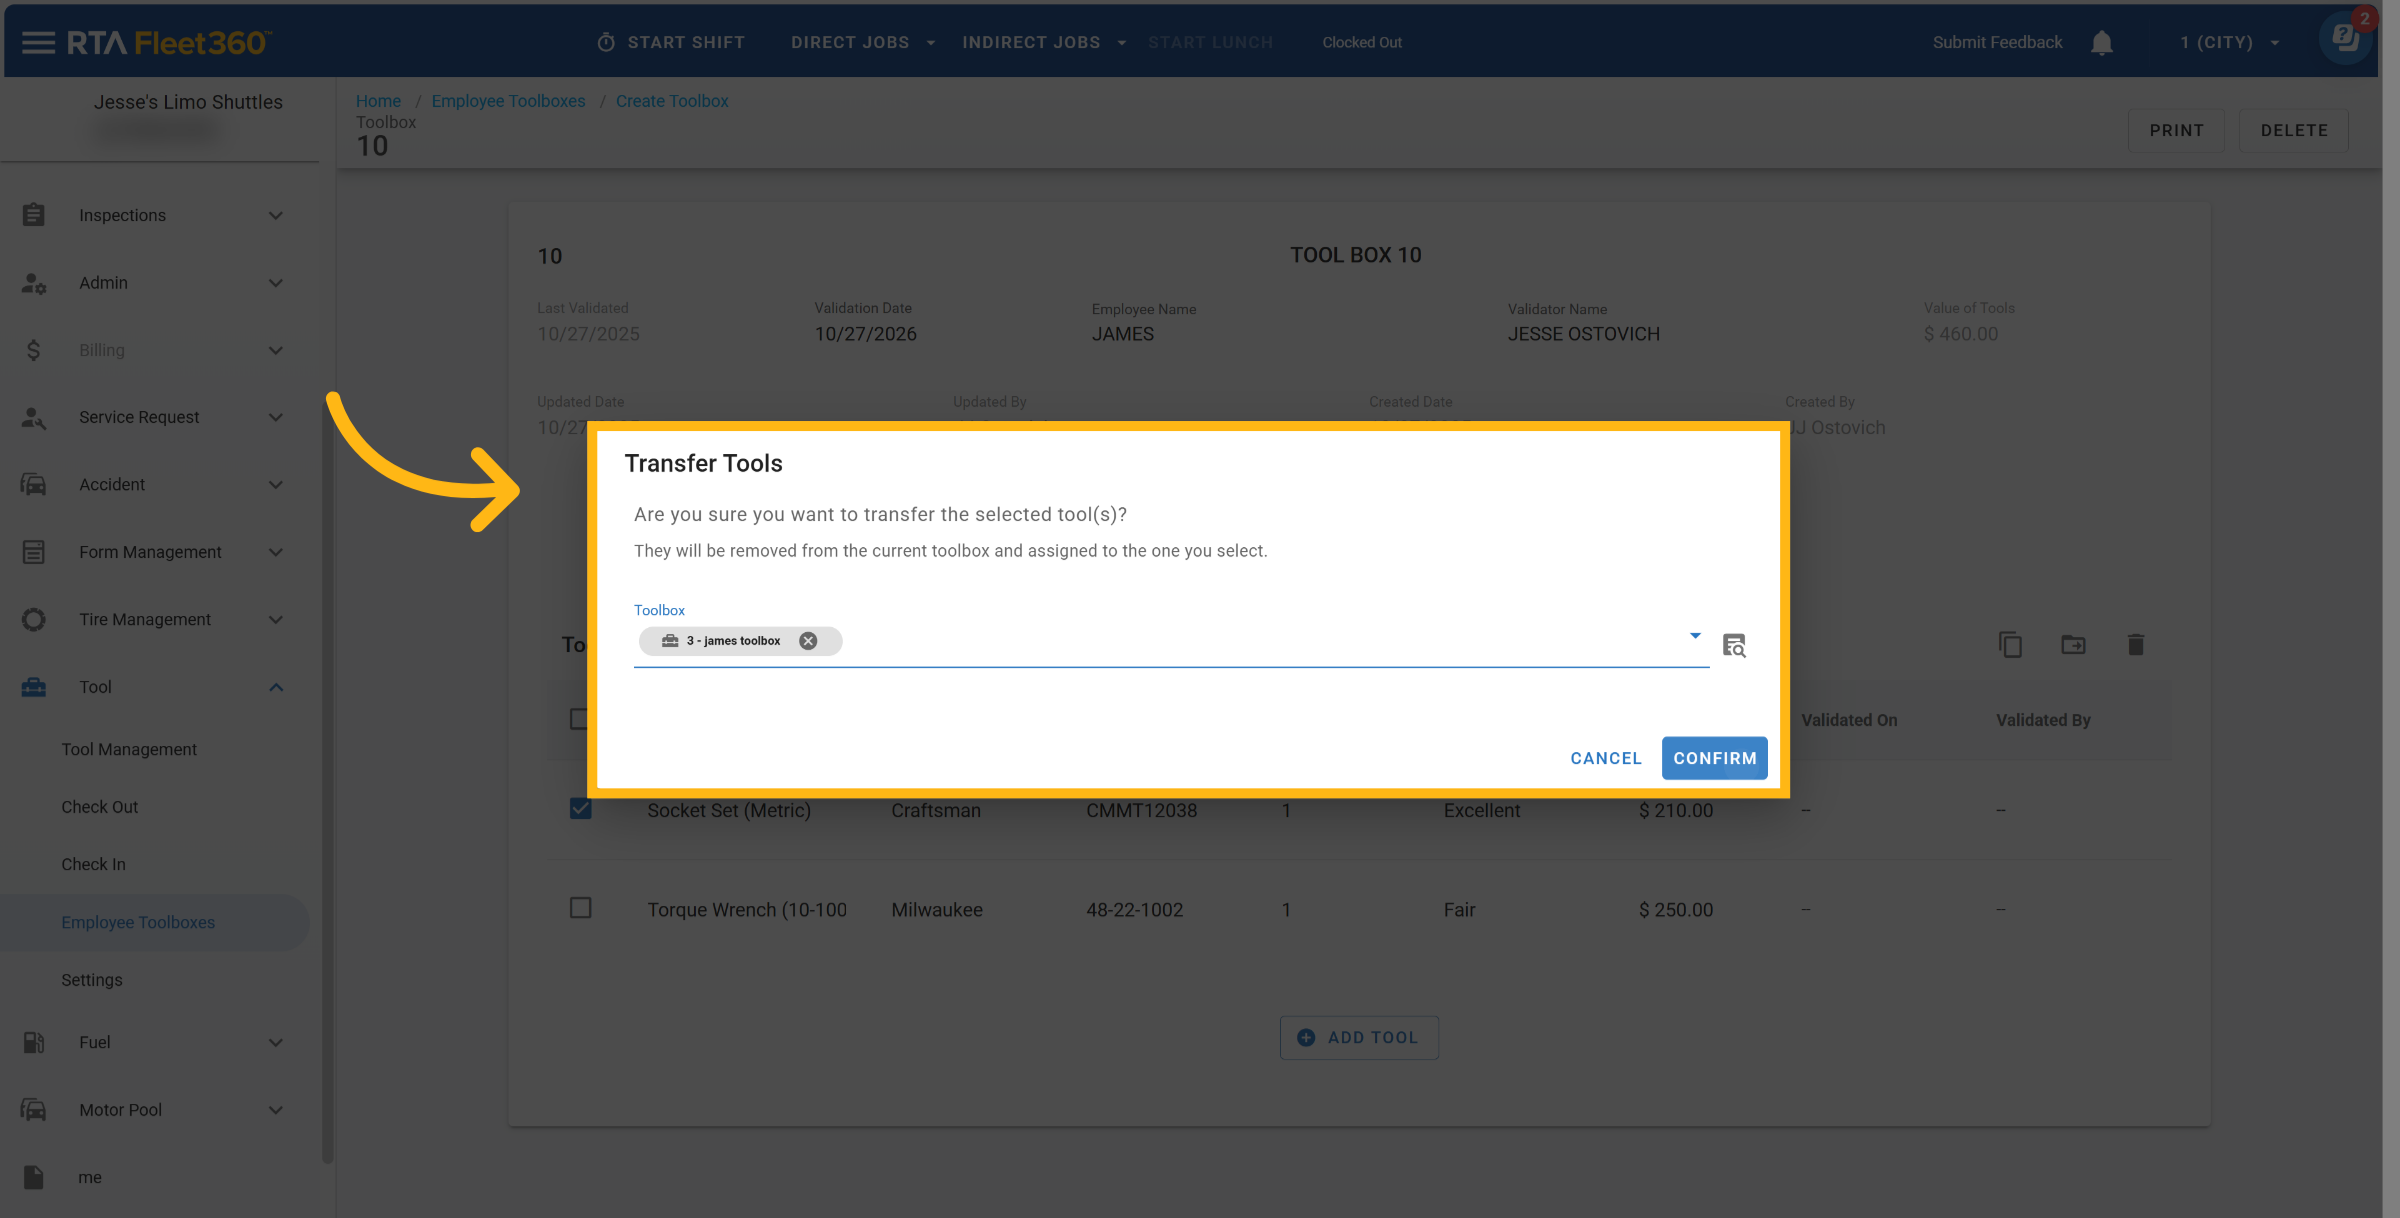
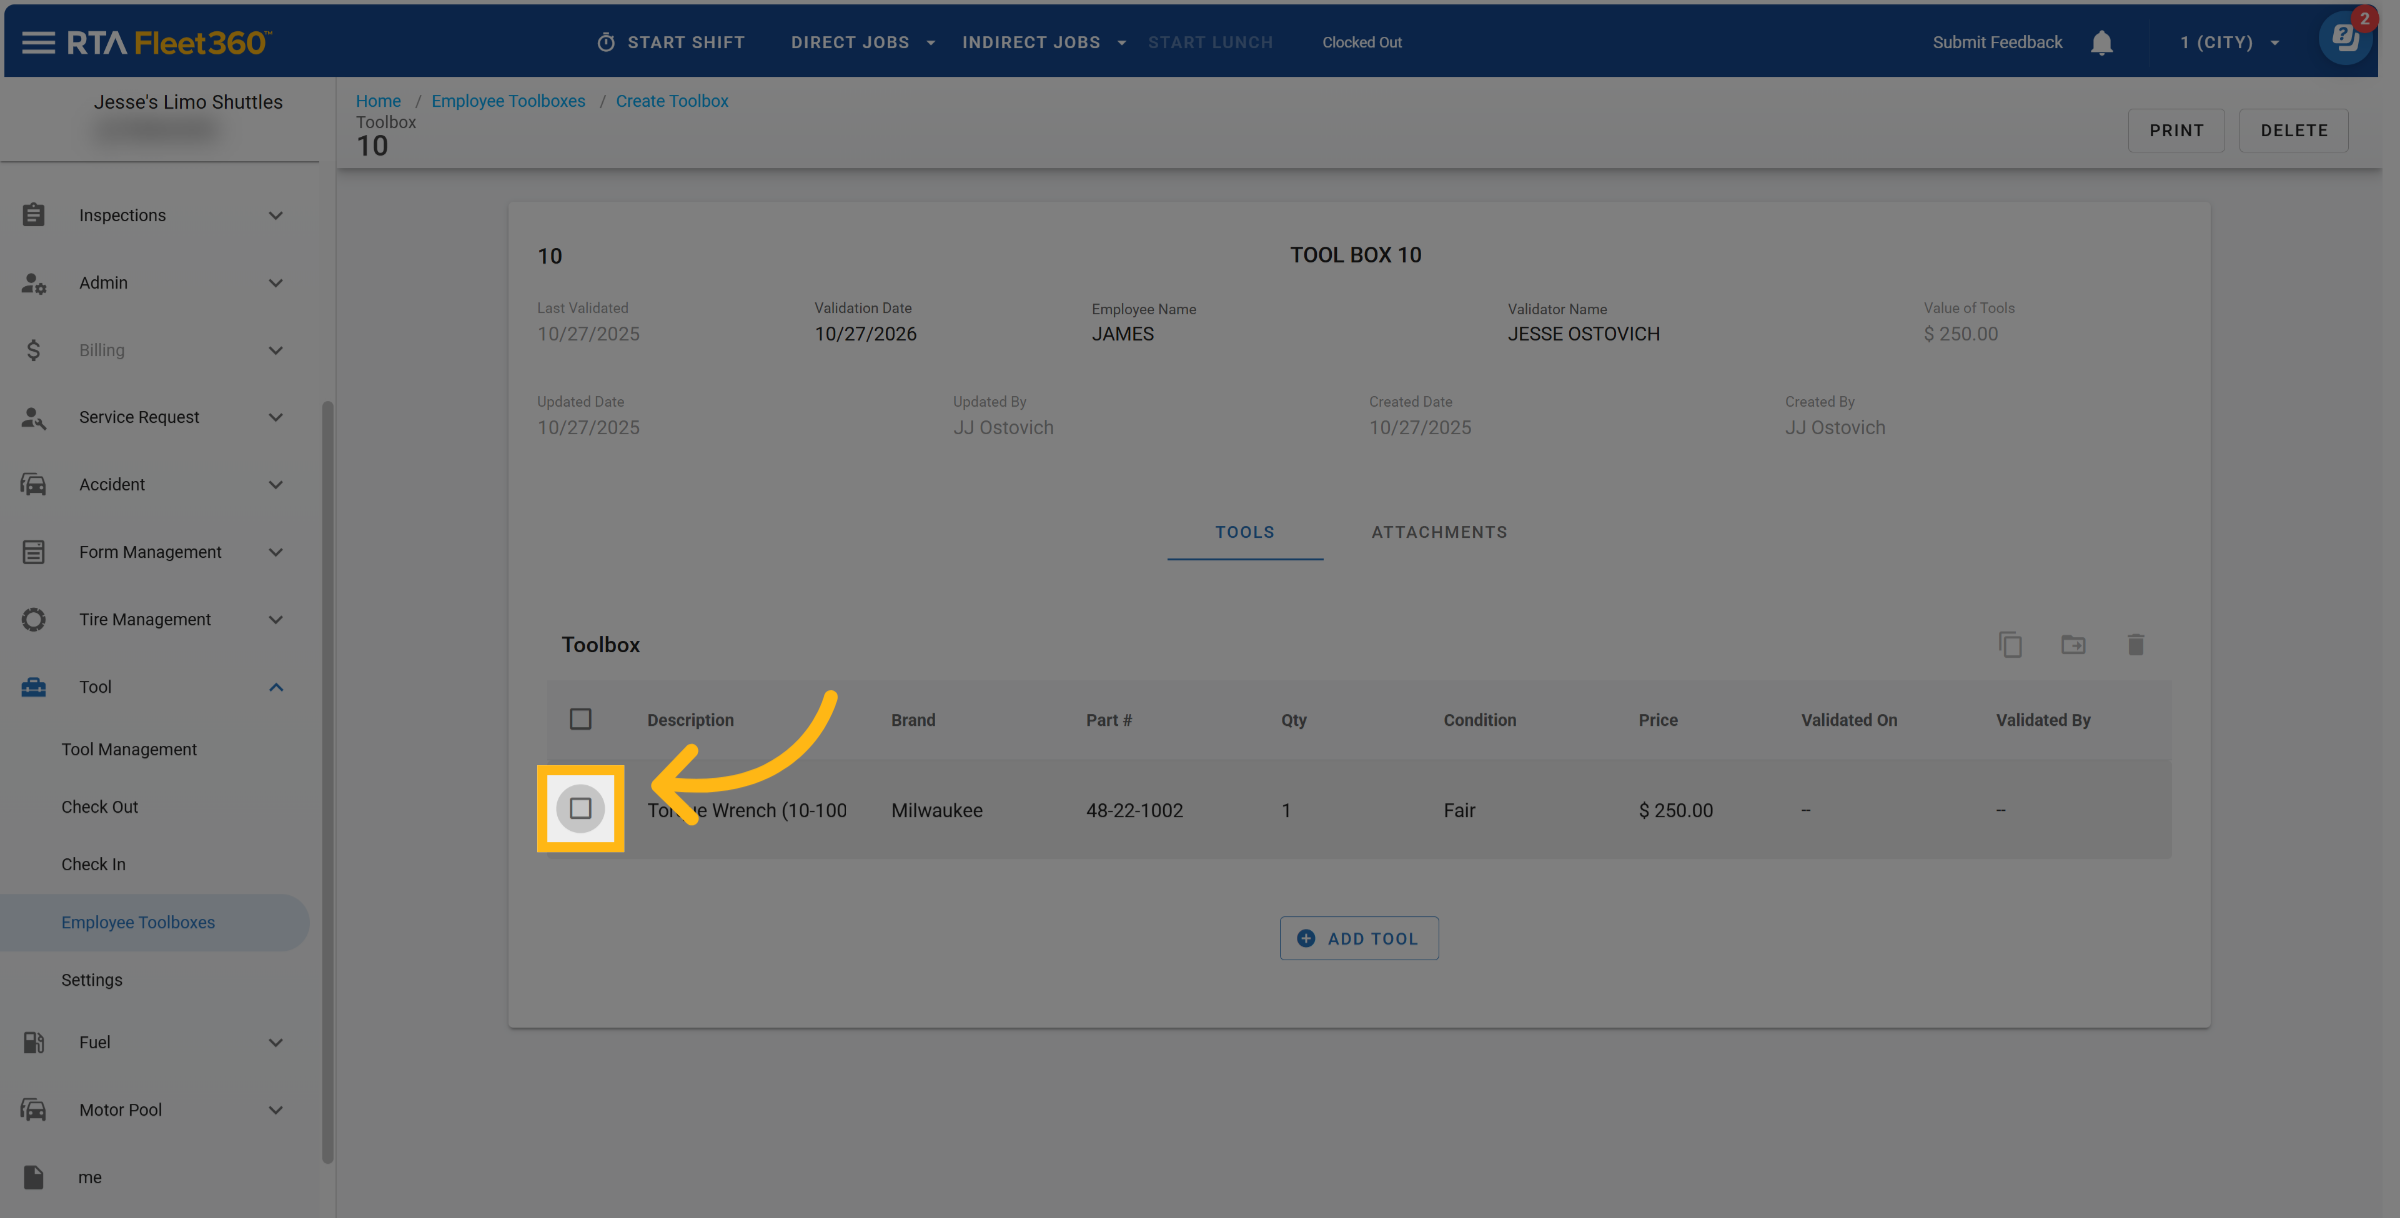
Transfer Tools
Select the tool(s) to transfer to another toolbox
Transferring to another toolbox will remove to the tools from toolbox transferring from
Click on the Transfer Icon
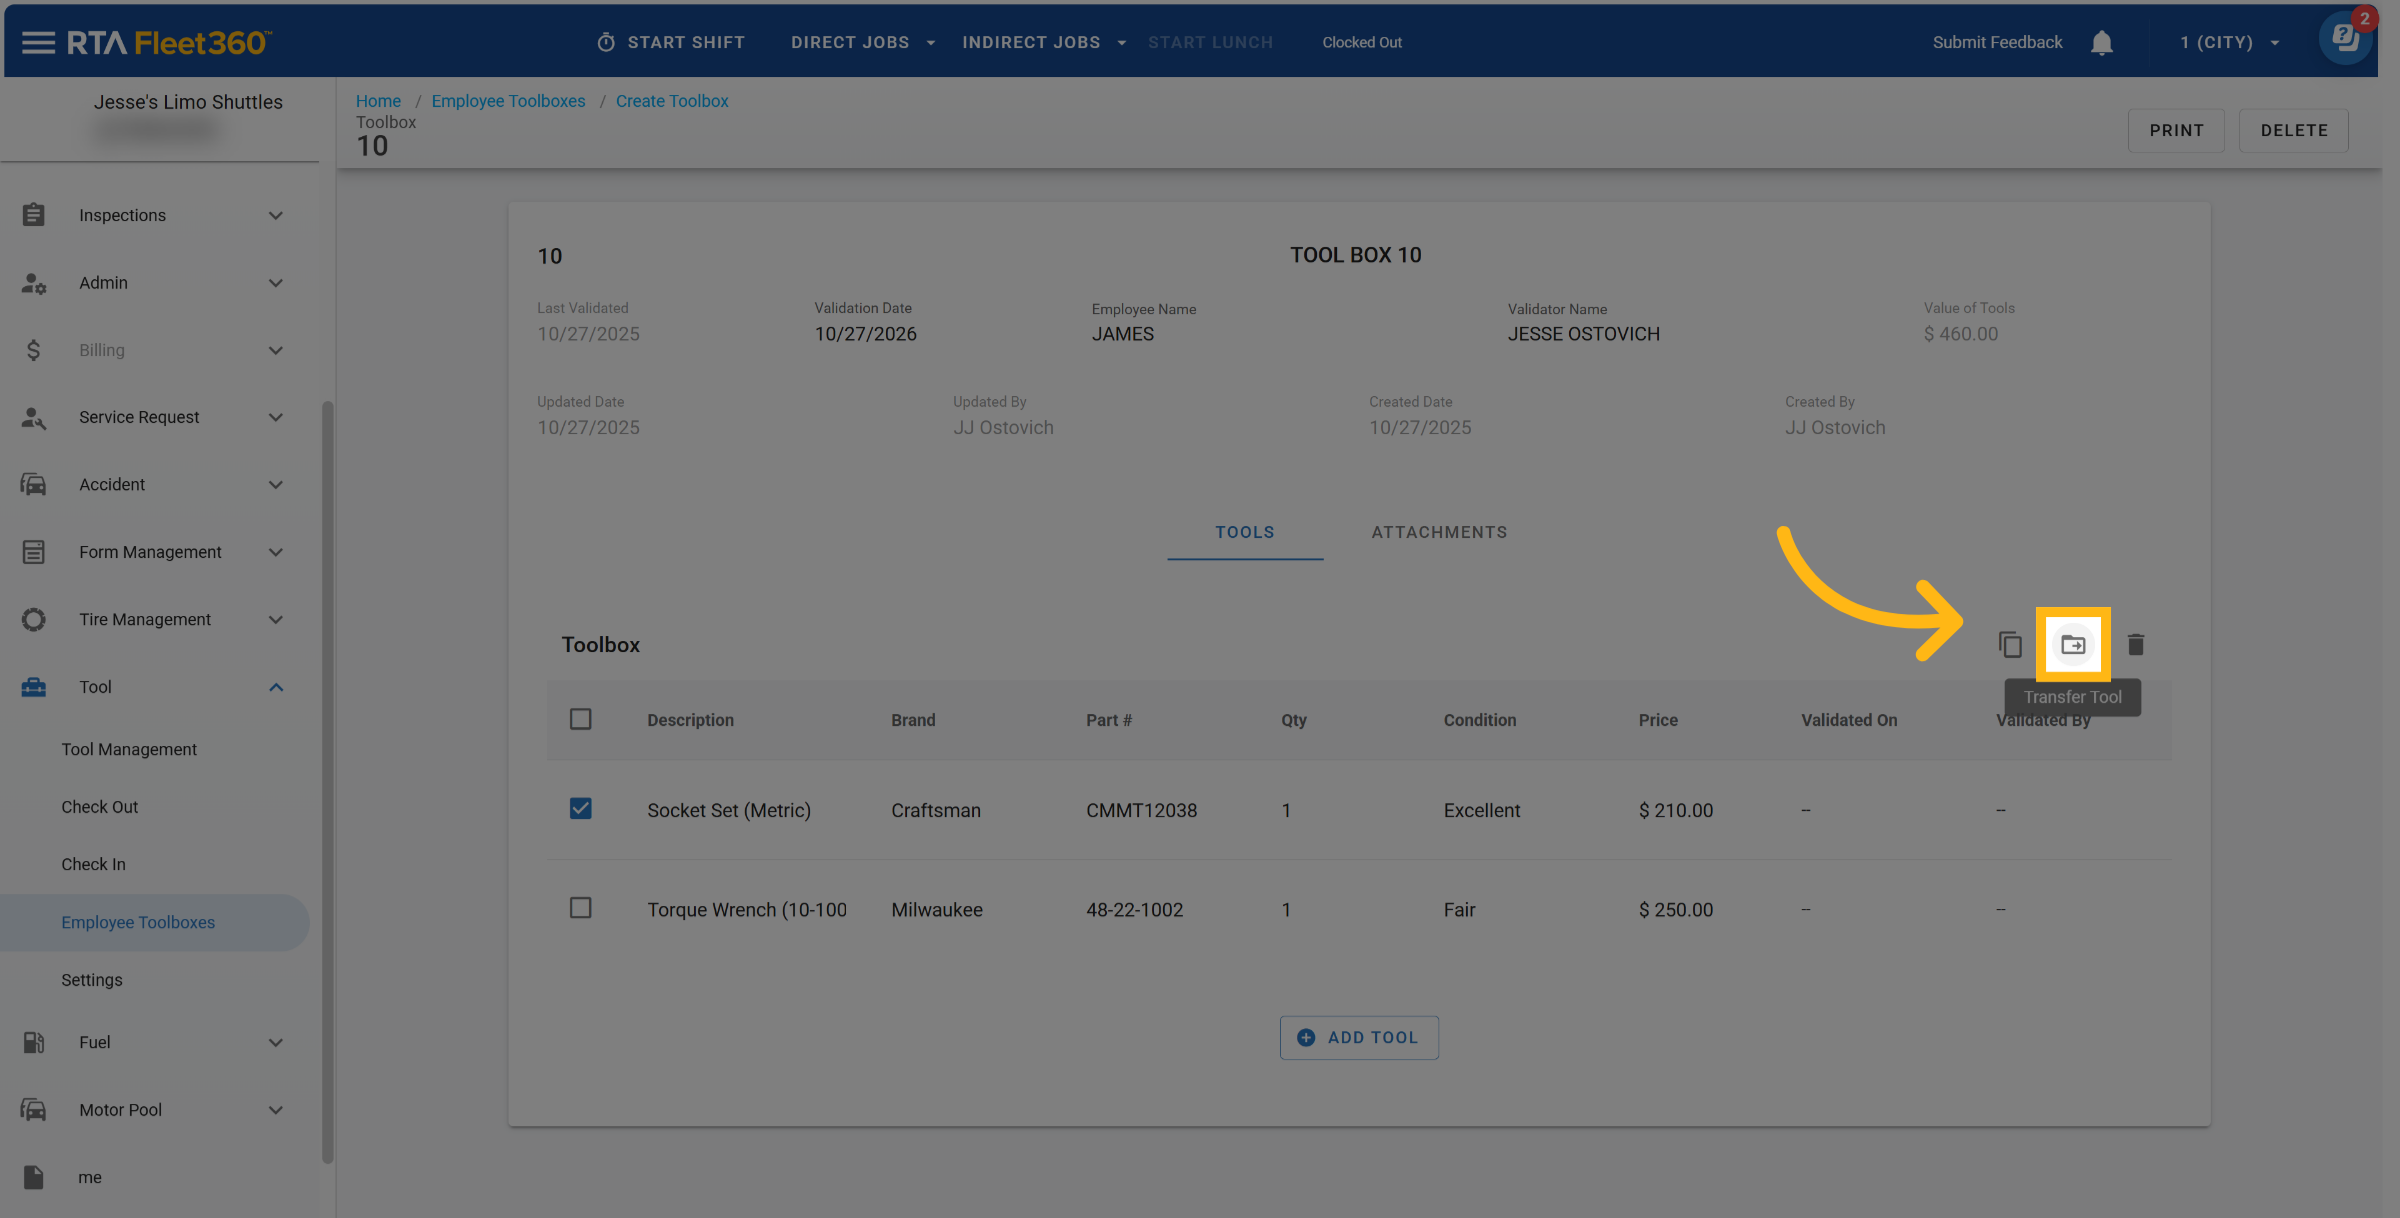
To Transfer tools, select the toolbox, to transfer to, from the drop down list
Click Confirm
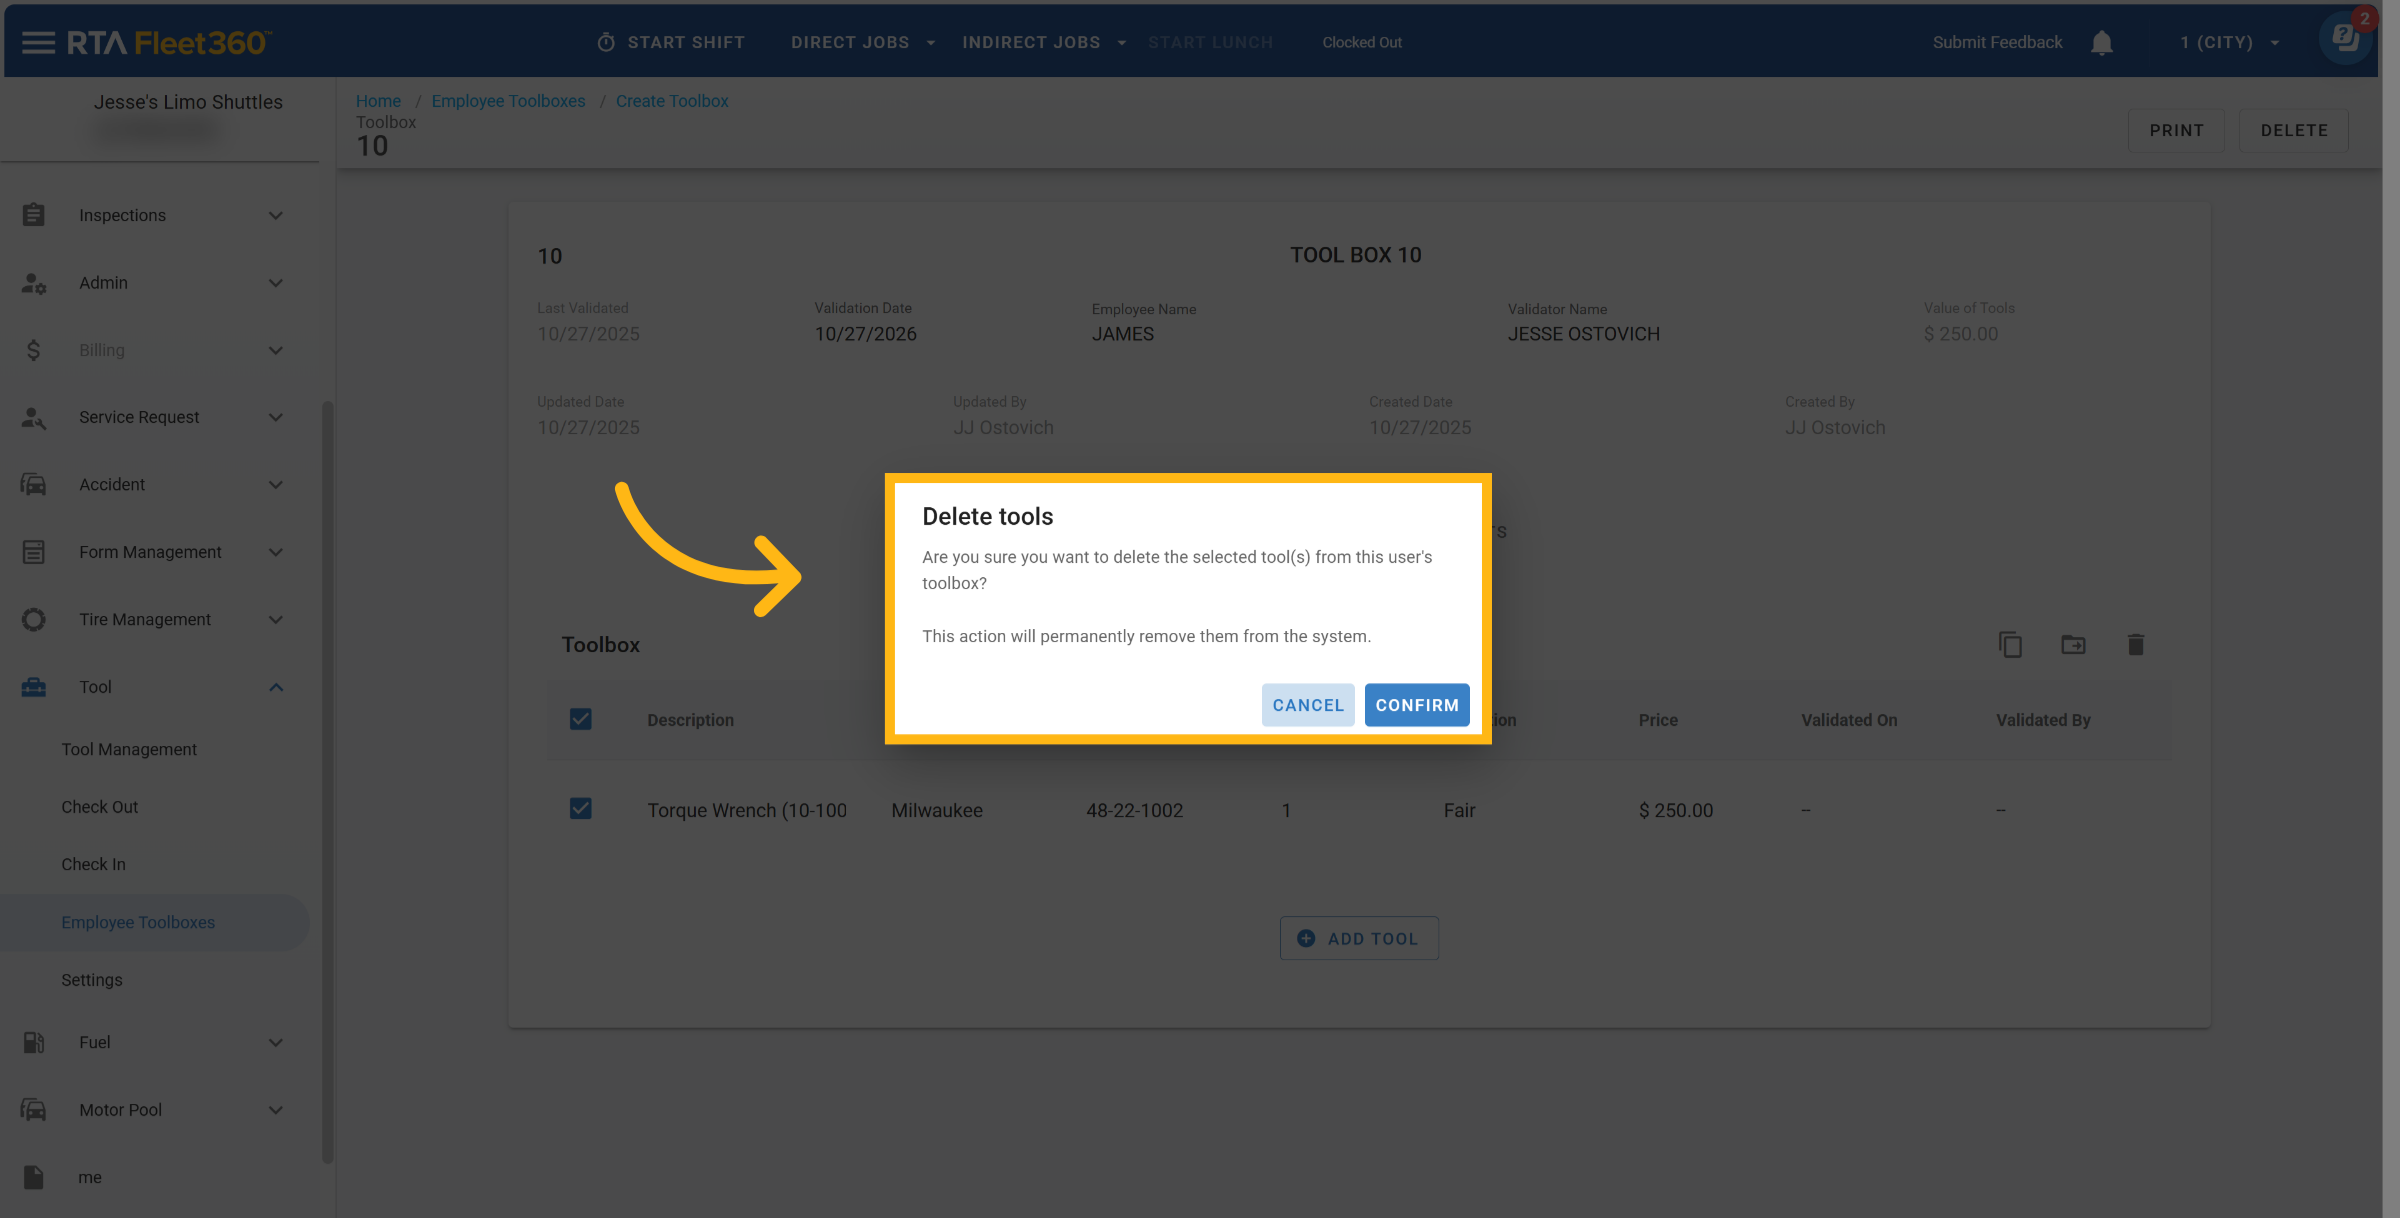
Deleting Tools
The ability to delete tools is limited to user permissions such as Admin and Shop Manager Roles.
Select the tool(s) to delete
Click on the Delete Icon
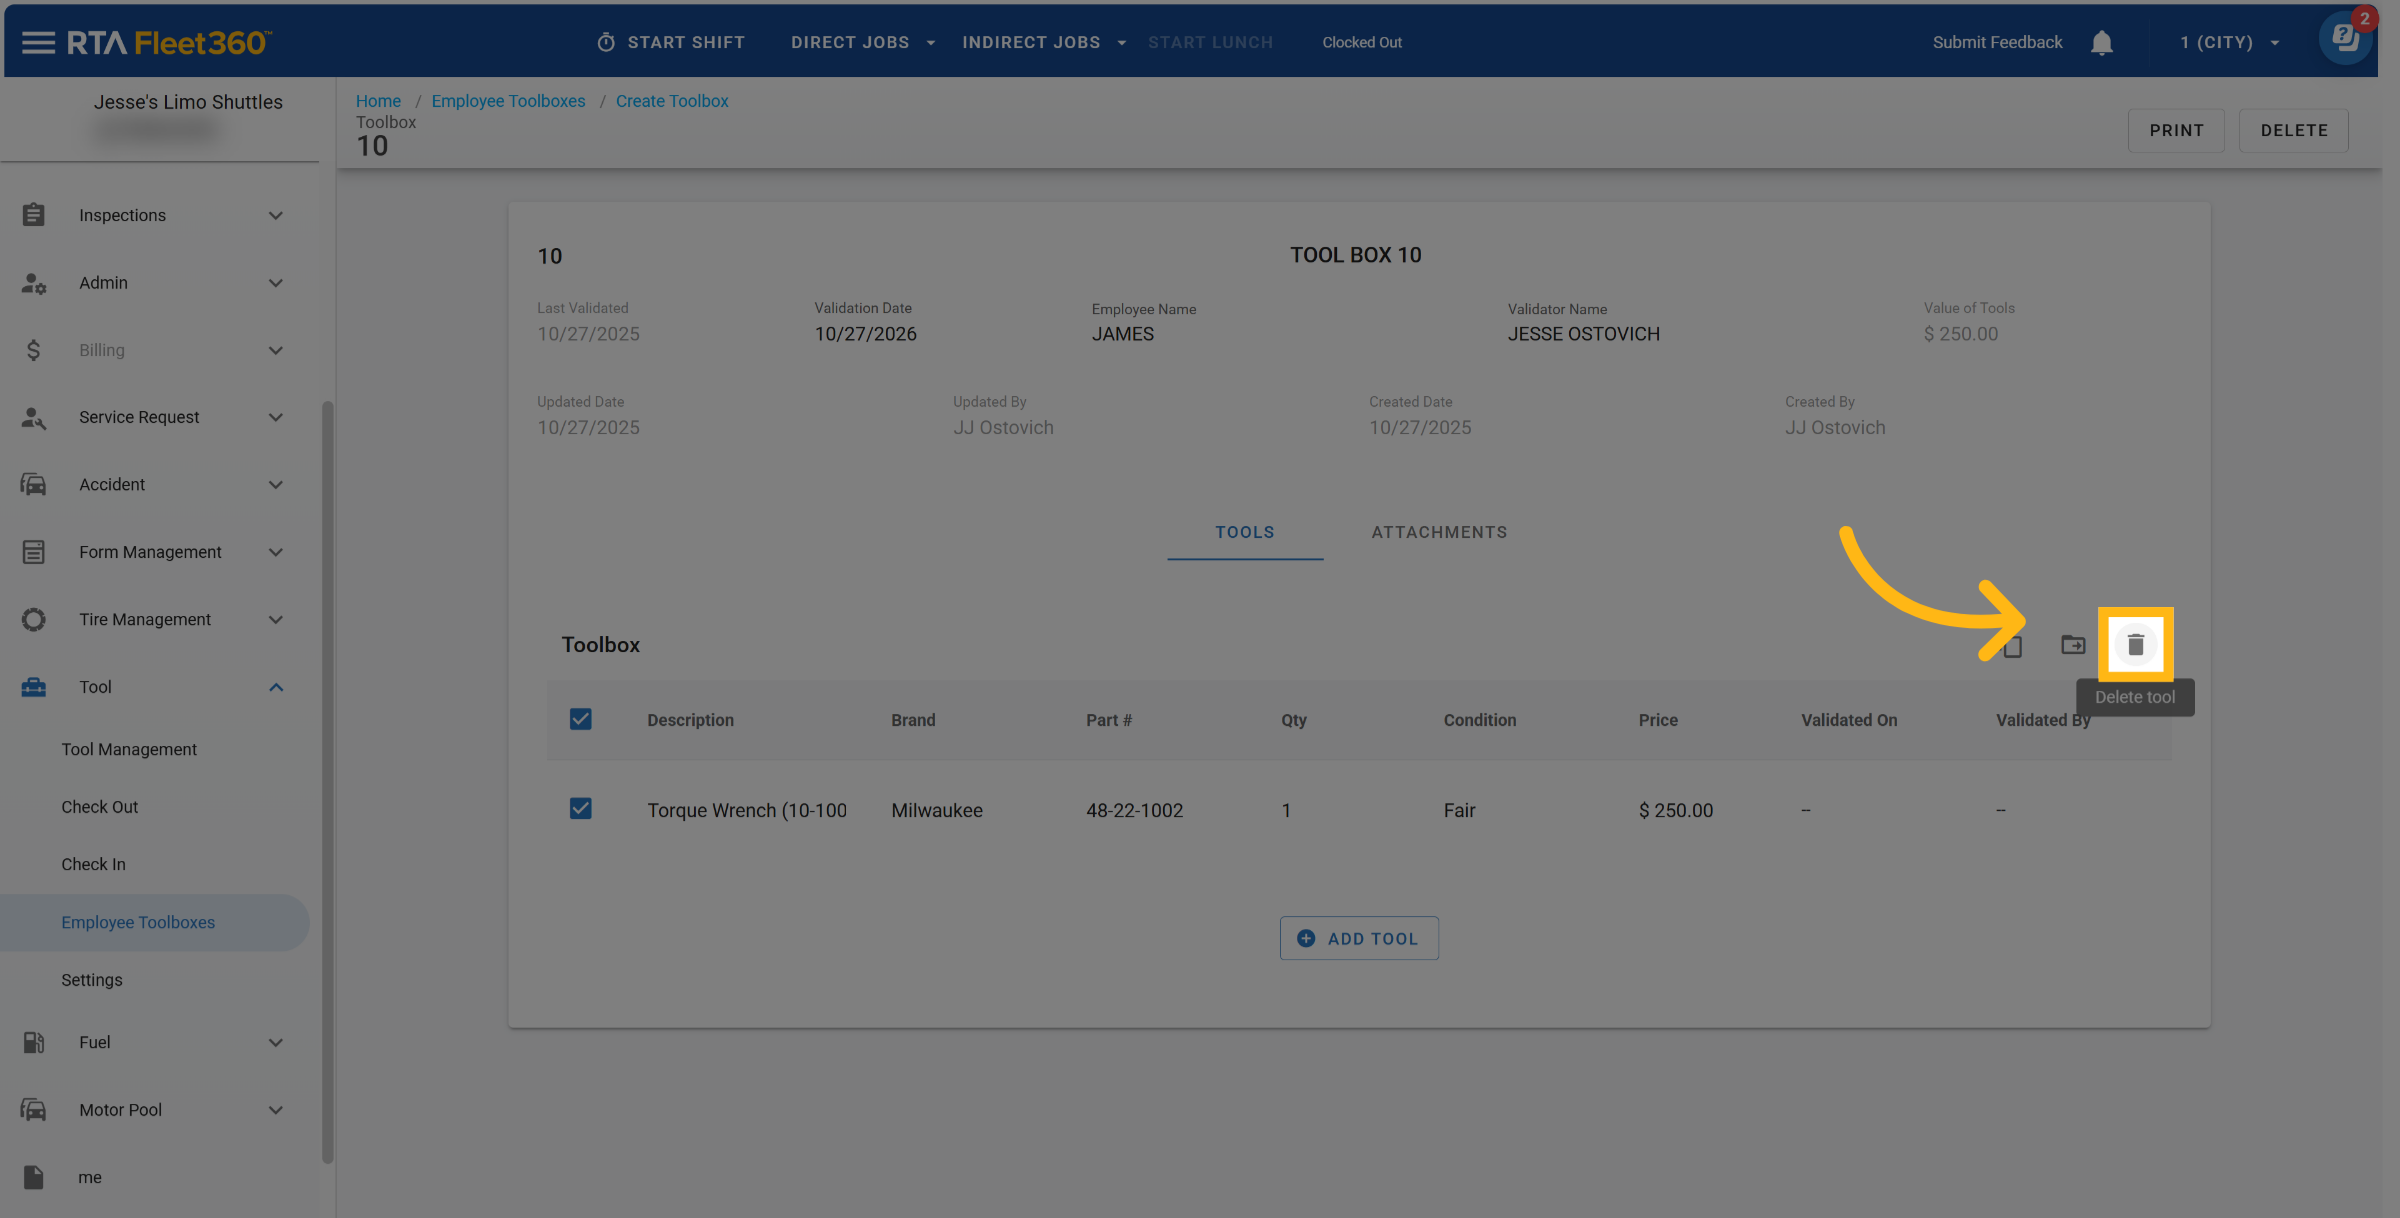
Click confirm to delete tools
Print Toolbox
Select the Toolbox to print
When in the Toolbox file click the Print Icon
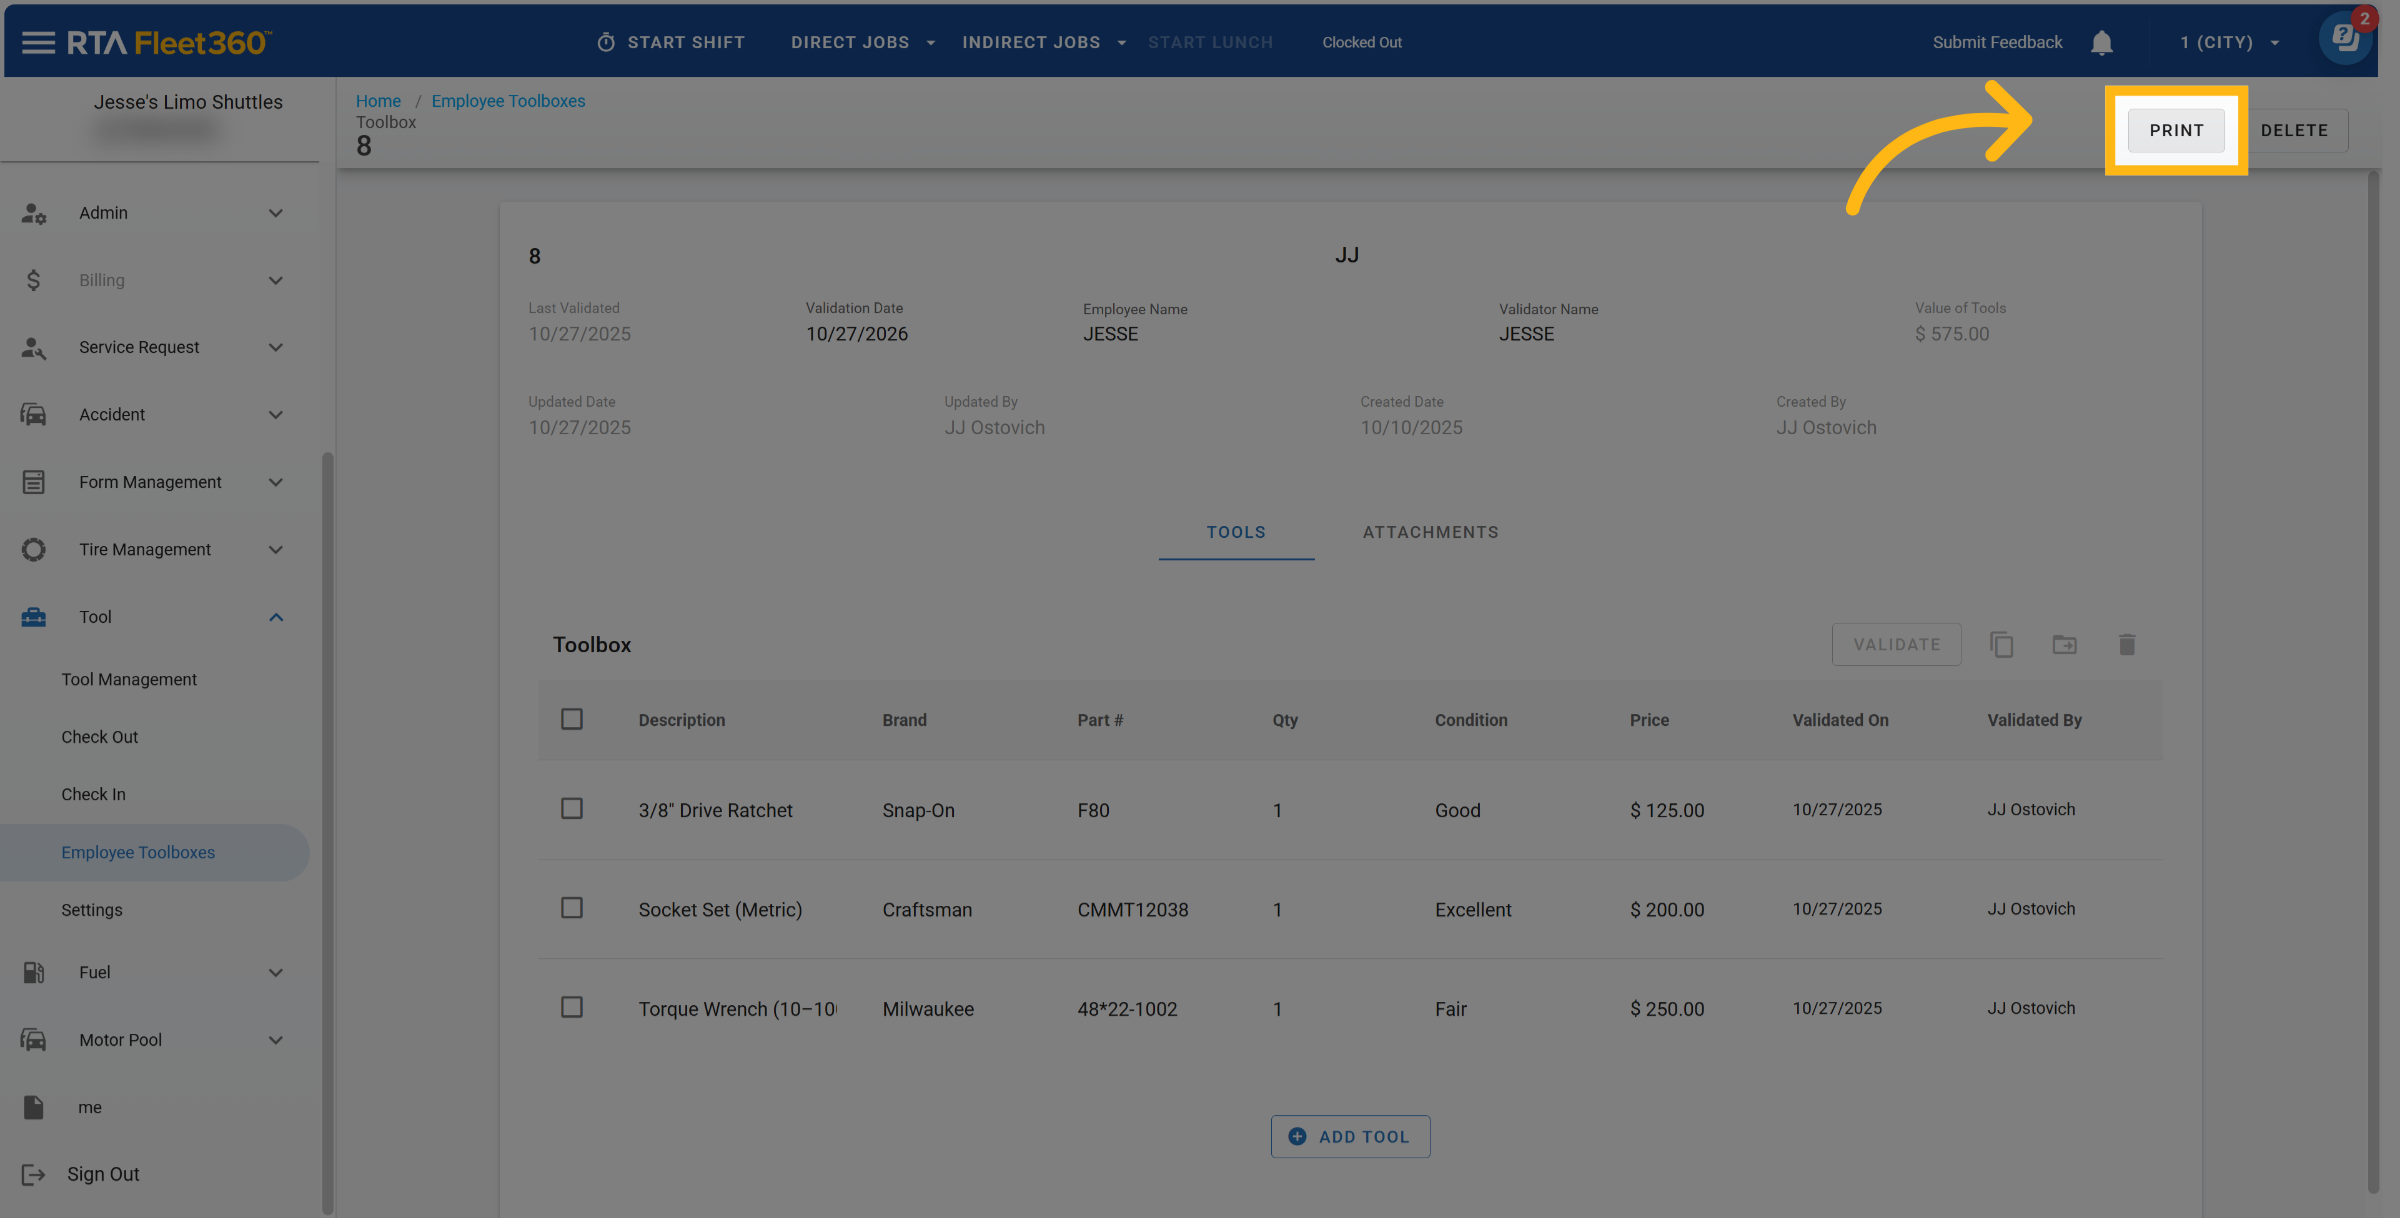
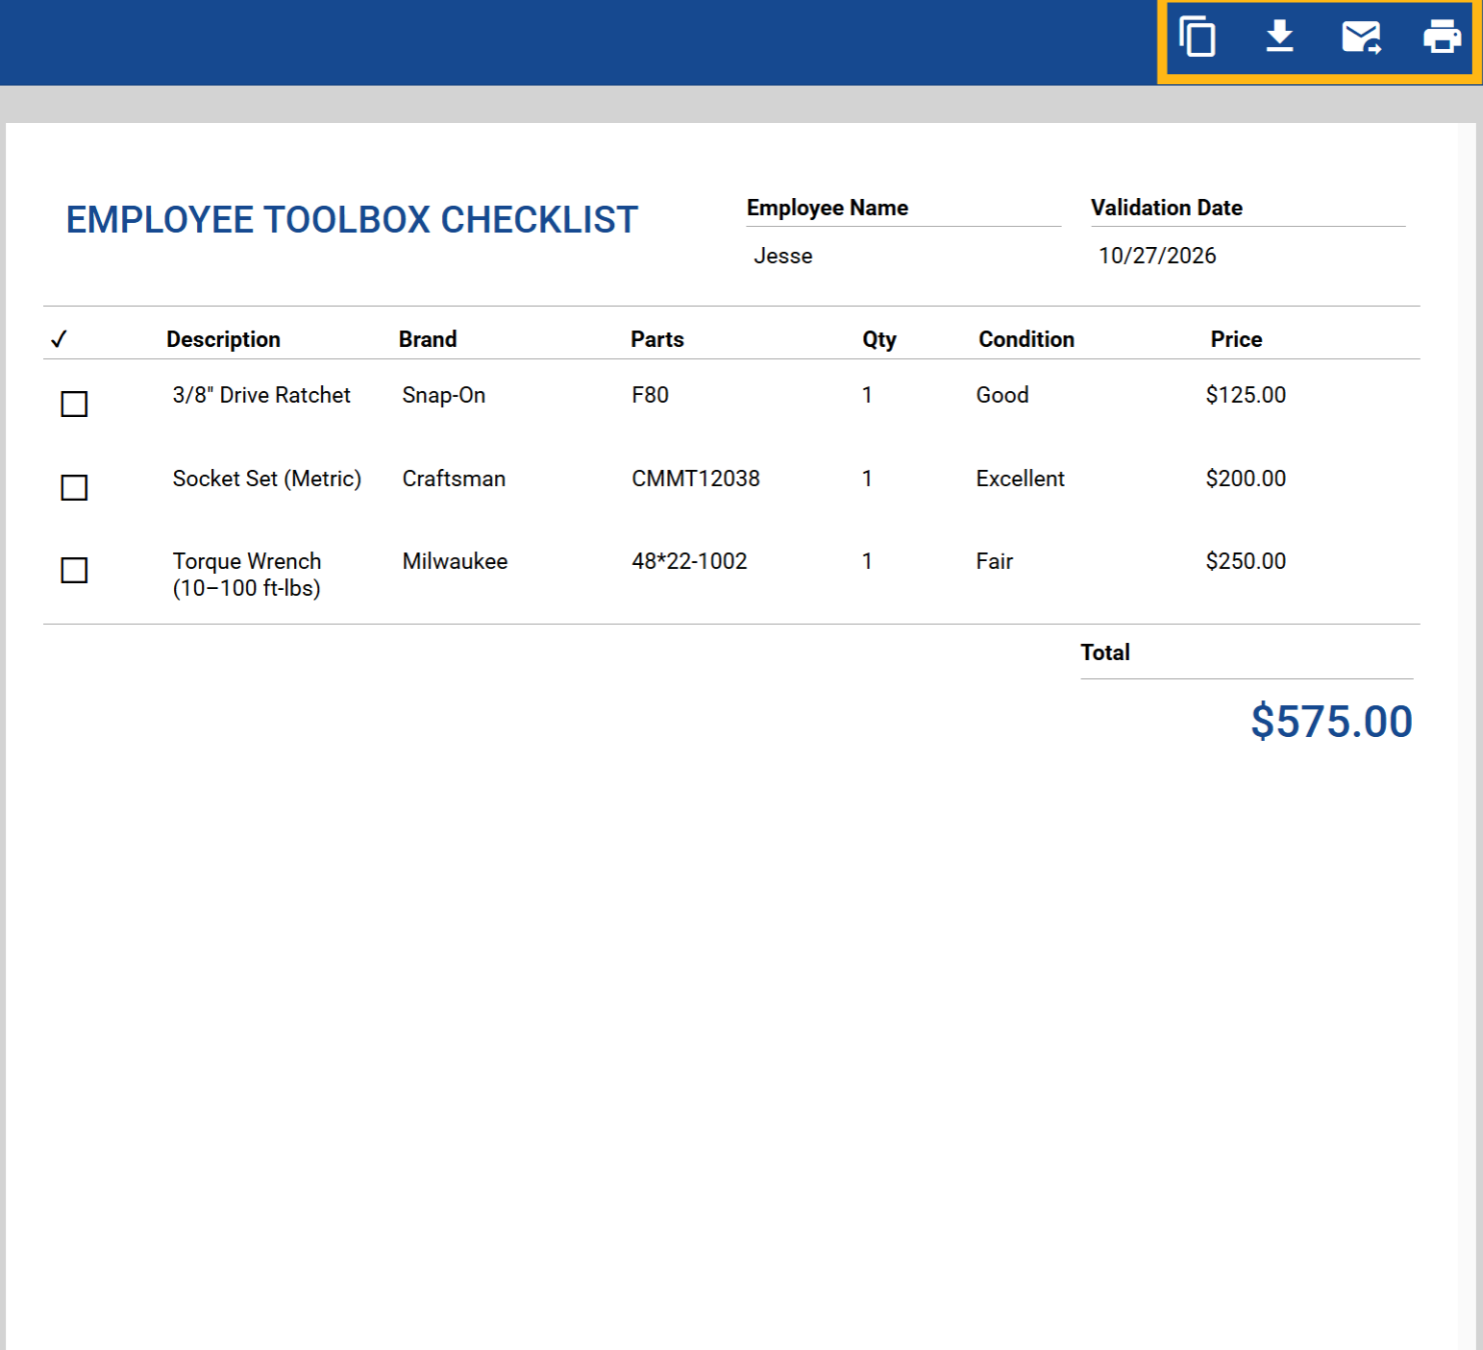
After clicking the Print Icon a PDF will populate and the following options will appear in the top right corner:
Copy Link
Download
Attach to Email
Print
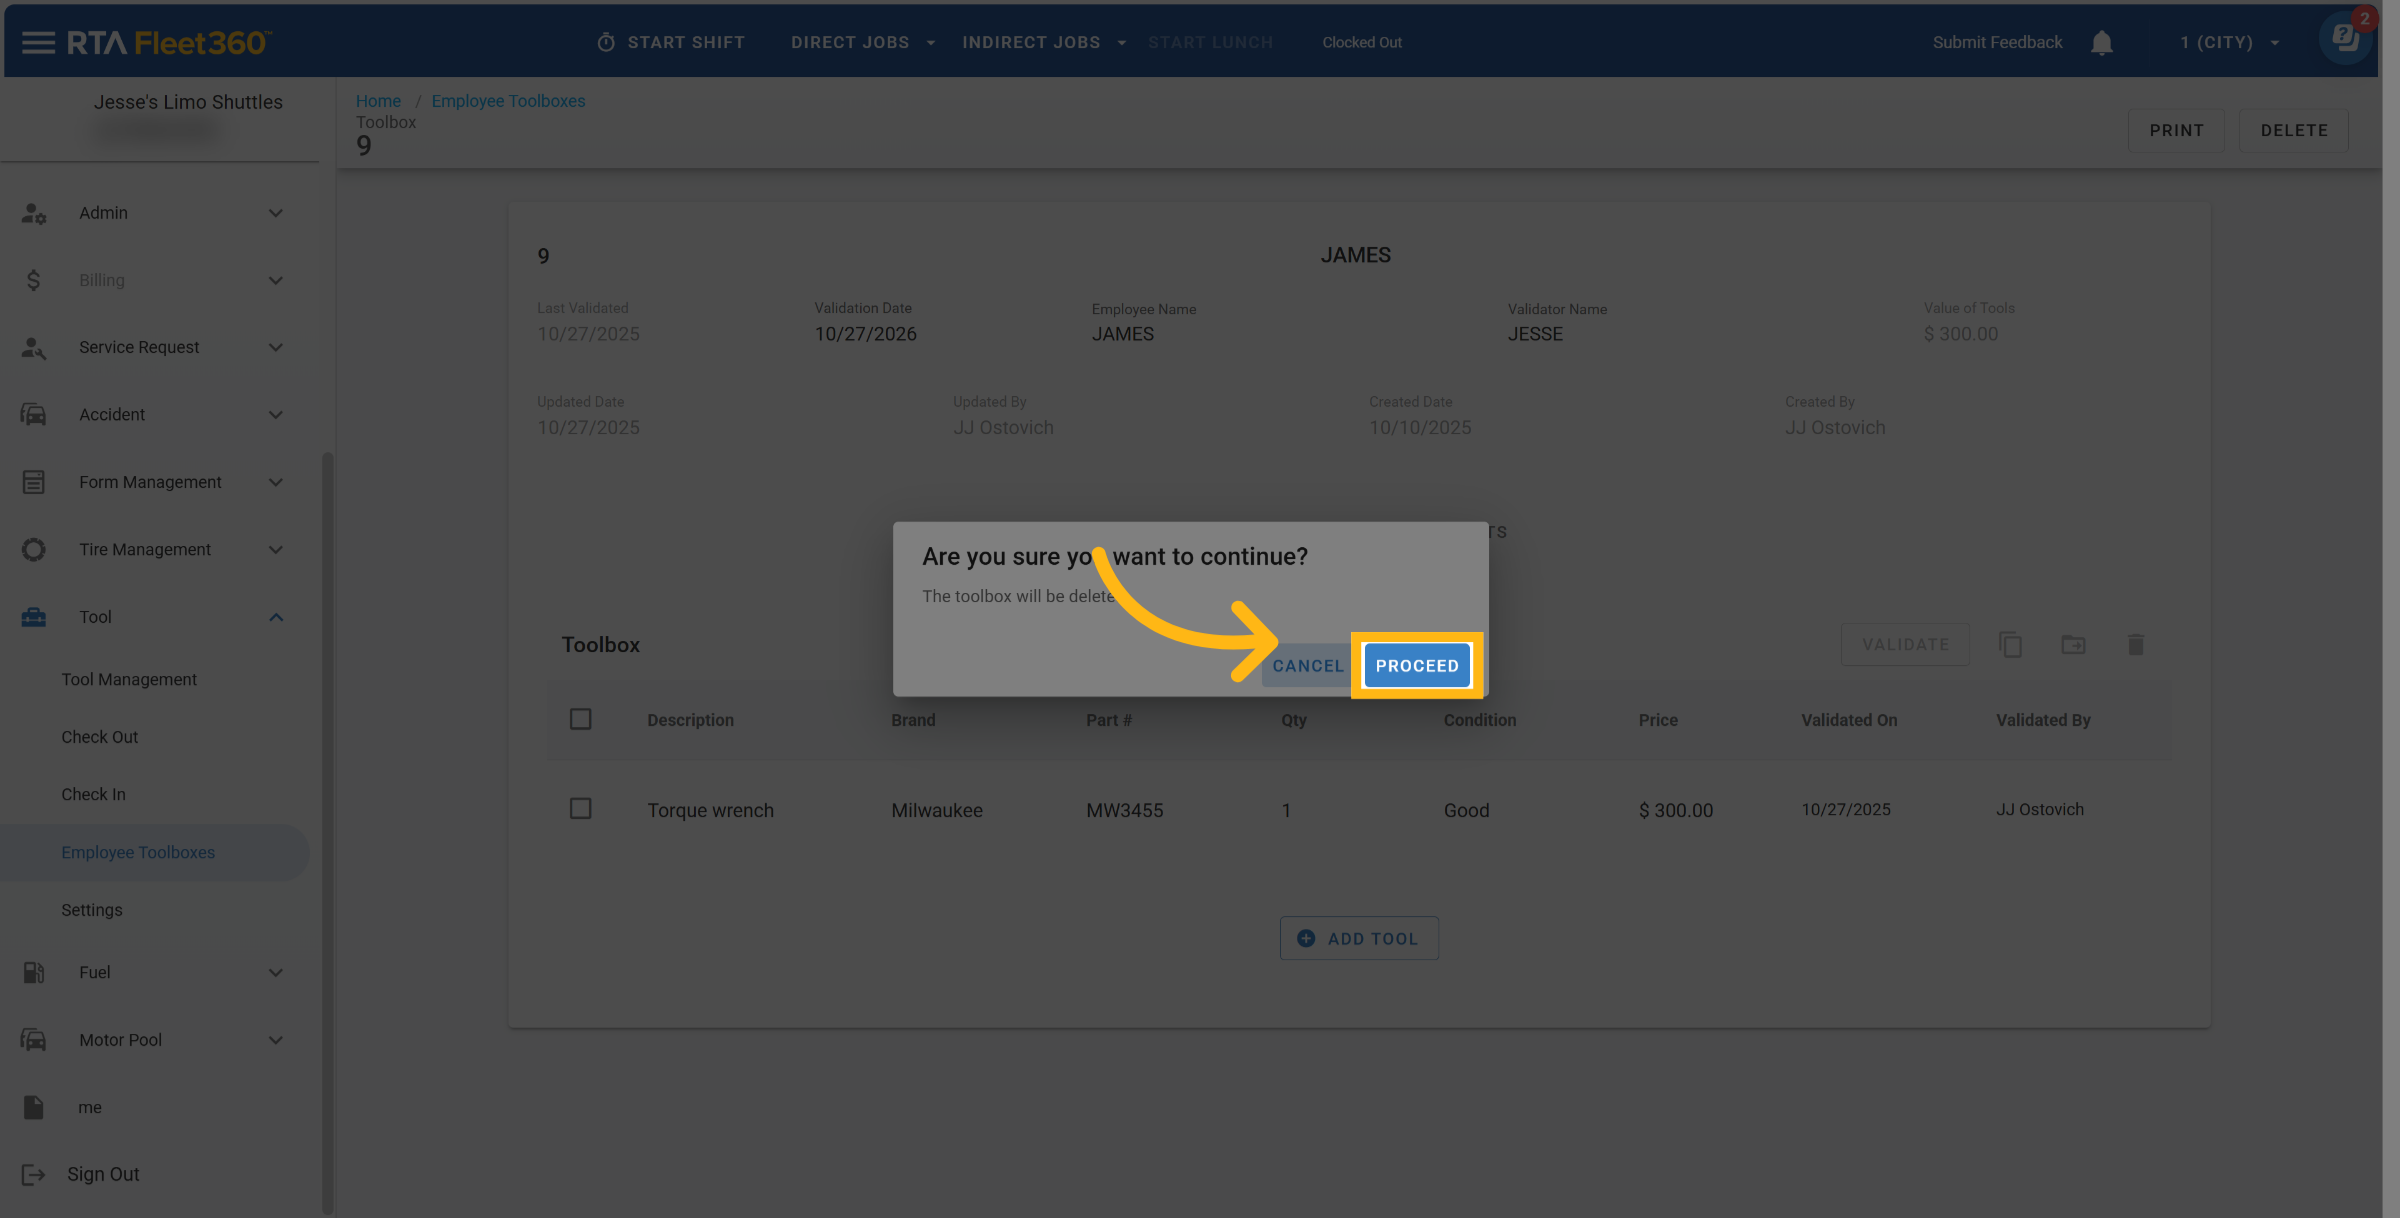
Delete Toolbox
The ability to delete Toolbox’s is limited to user permissions such as Admin and Shop Manager Roles.
Select the Toolbox to Delete
When in the Toolbox file, click the Delete Icon
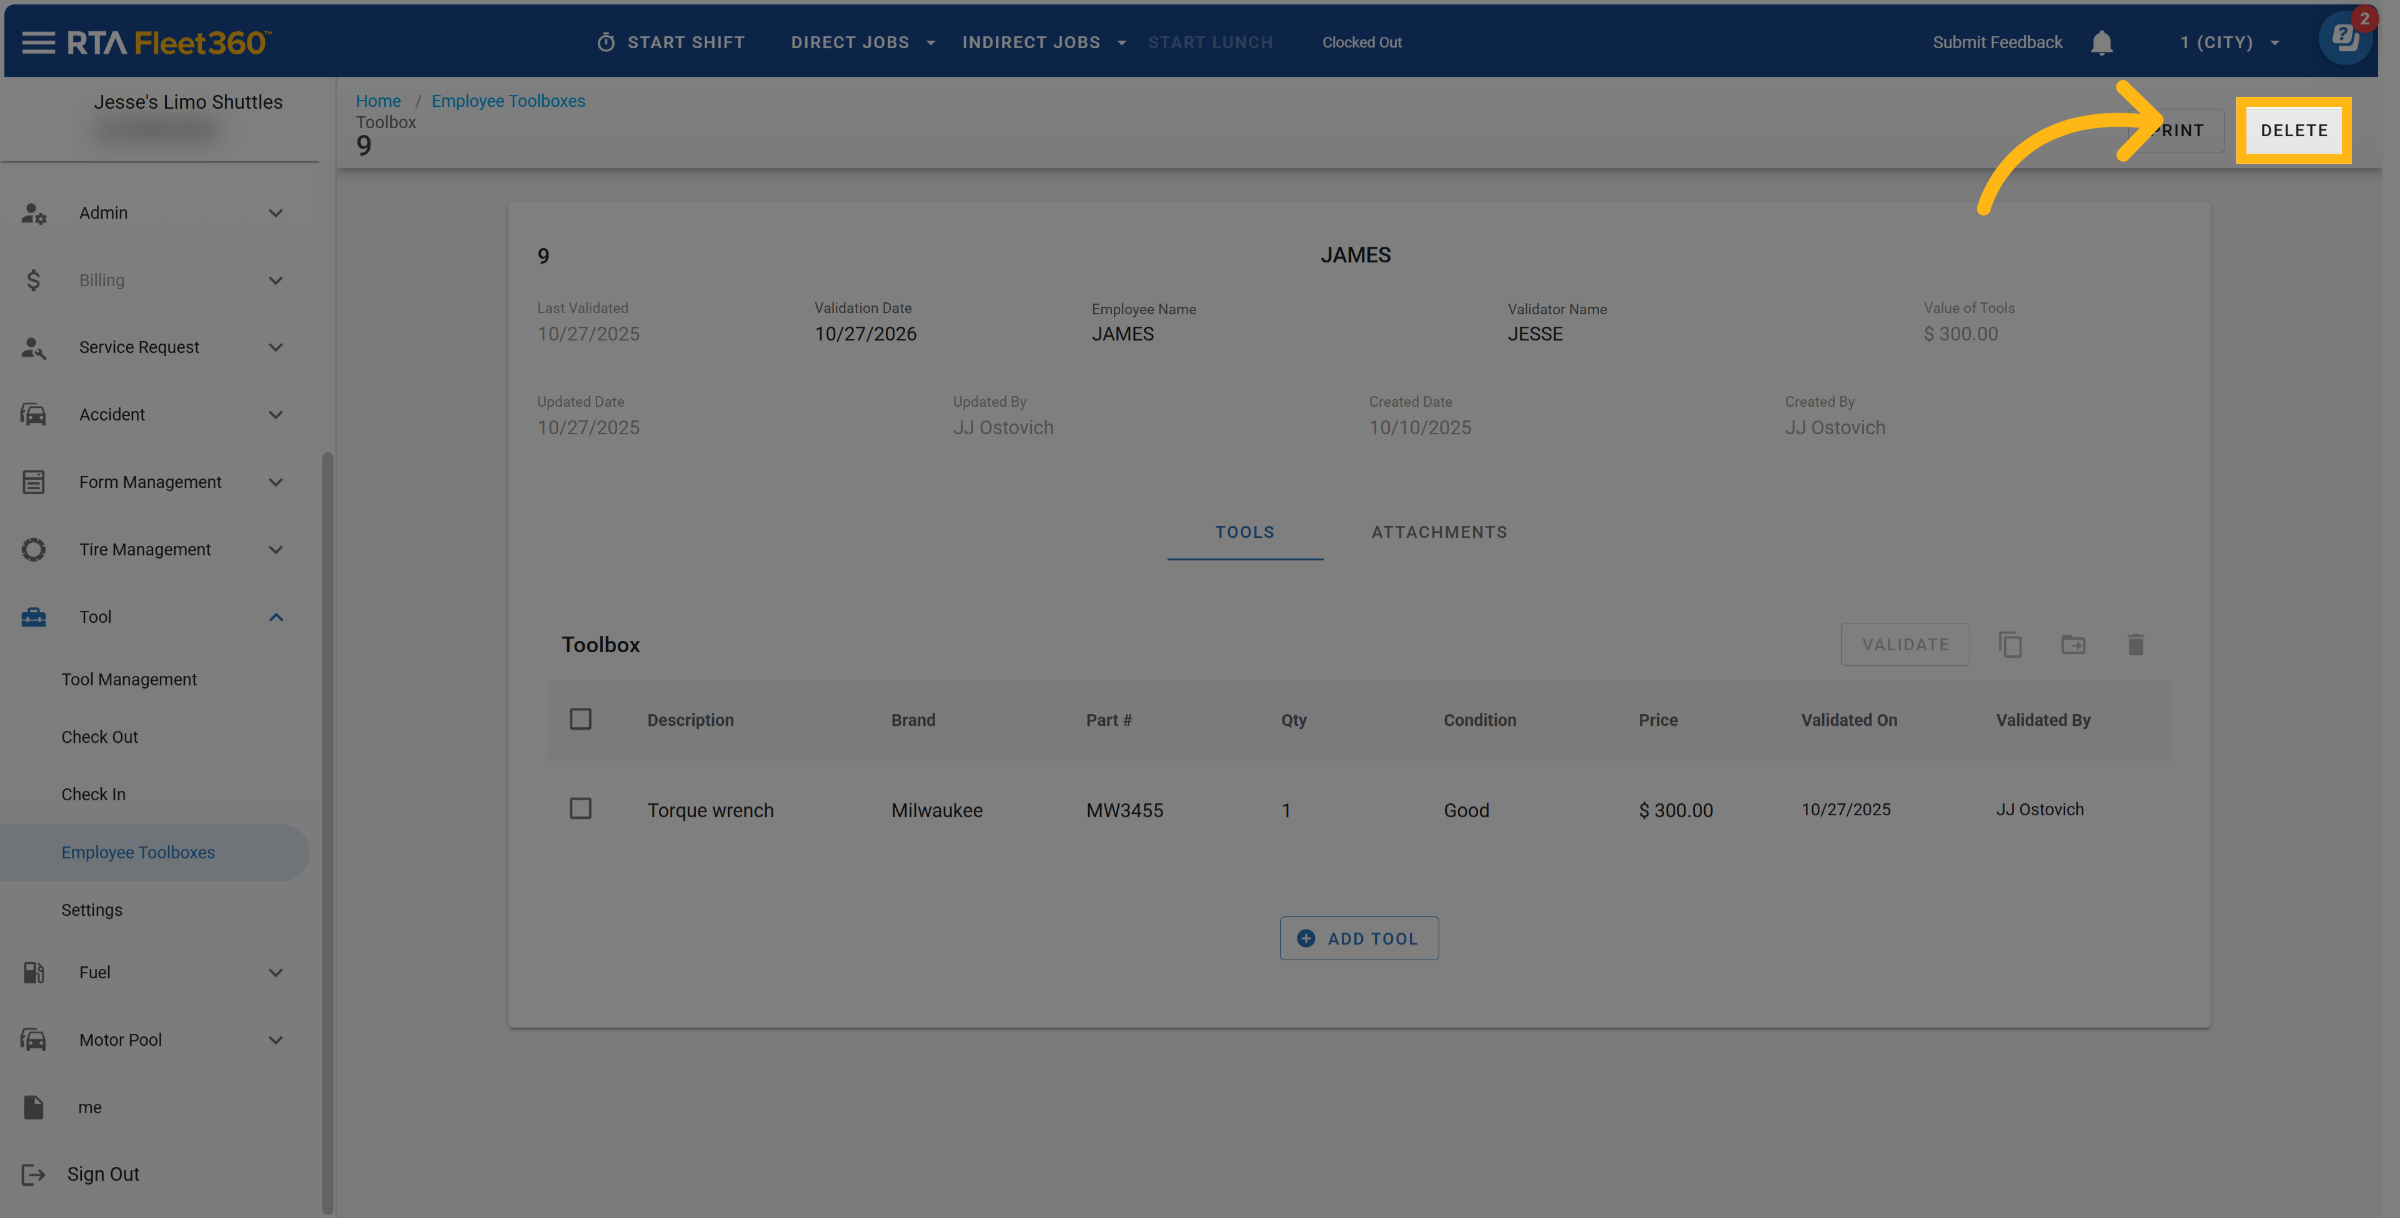
Click Proceed to delete the Toolbox