Accident Custom Fields
How to Access Accident Status Settings
Click on Accident
Click on Settings
Click on Accident Custom Fields
Custom Field Sections Overview
Before adding a custom field, it’s important to know all the various options contained within it for proper set up. There are decisions to make, and those decisions will directly impact the use of each custom field.
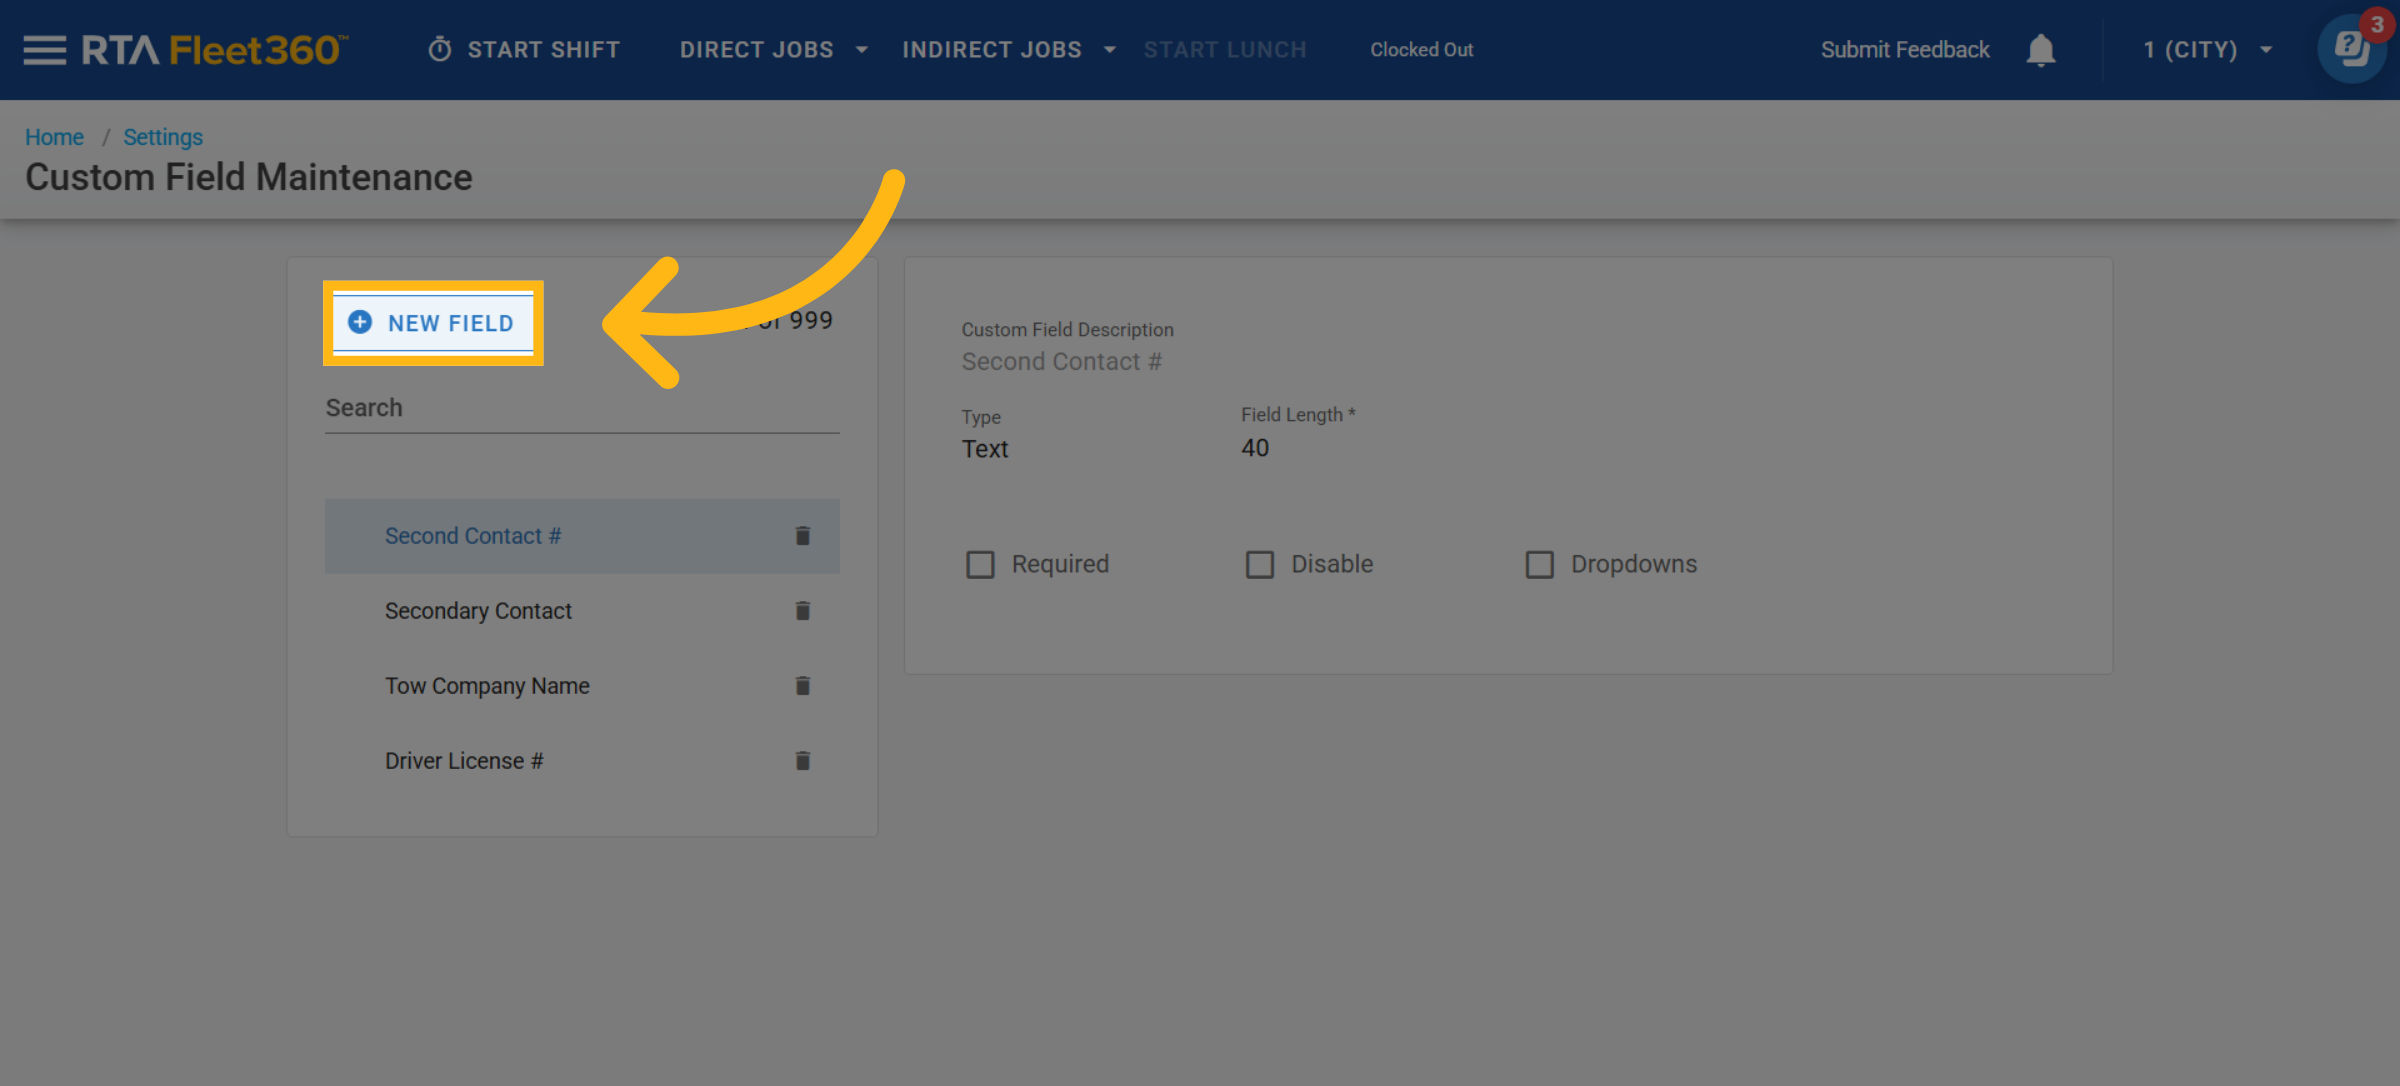
Adding a Custom Field
Click New Field
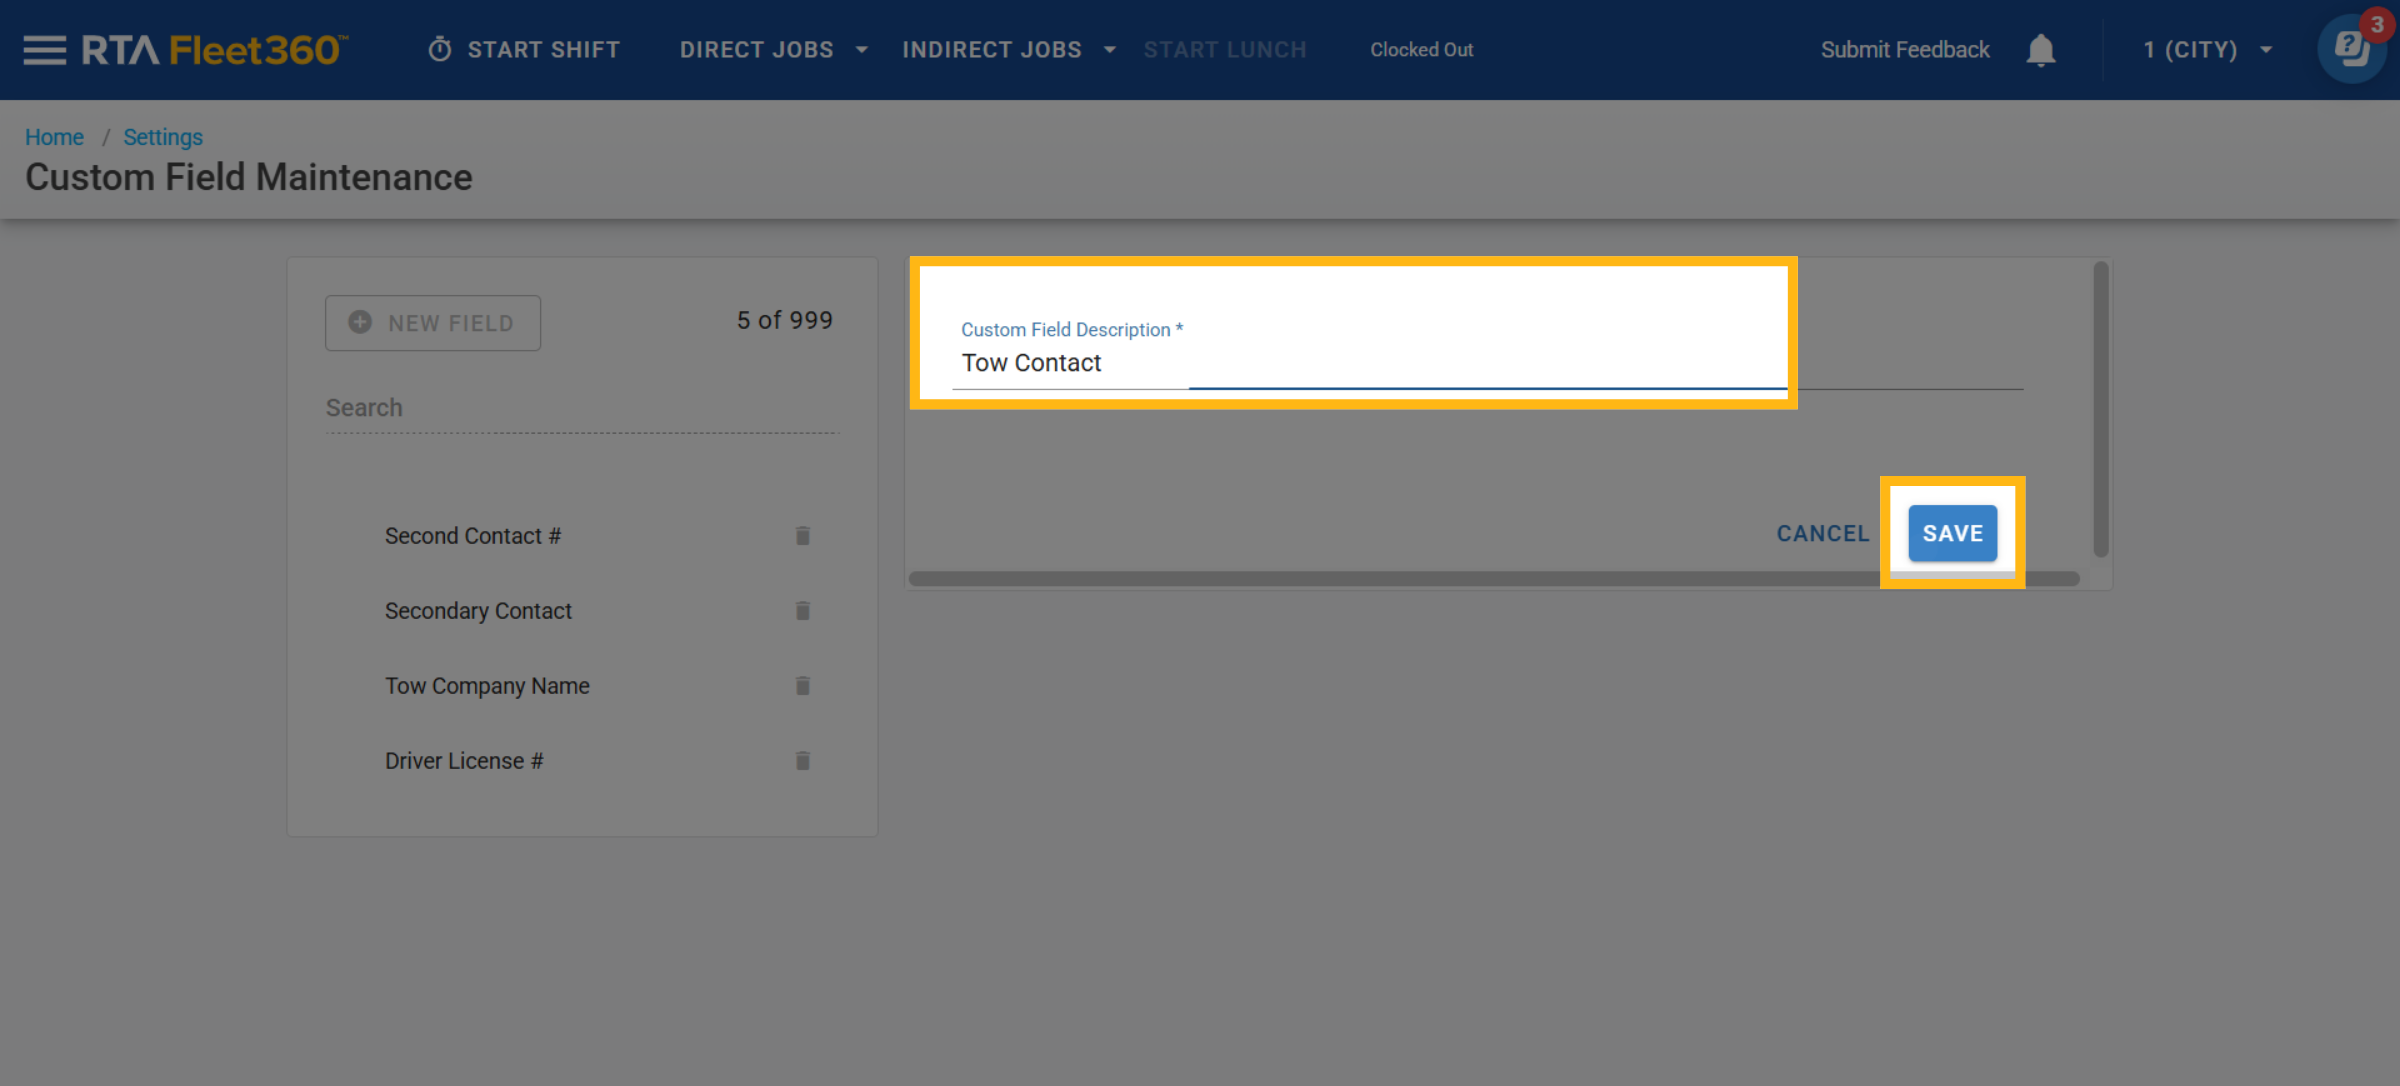
Enter a custom field description.
Click Save
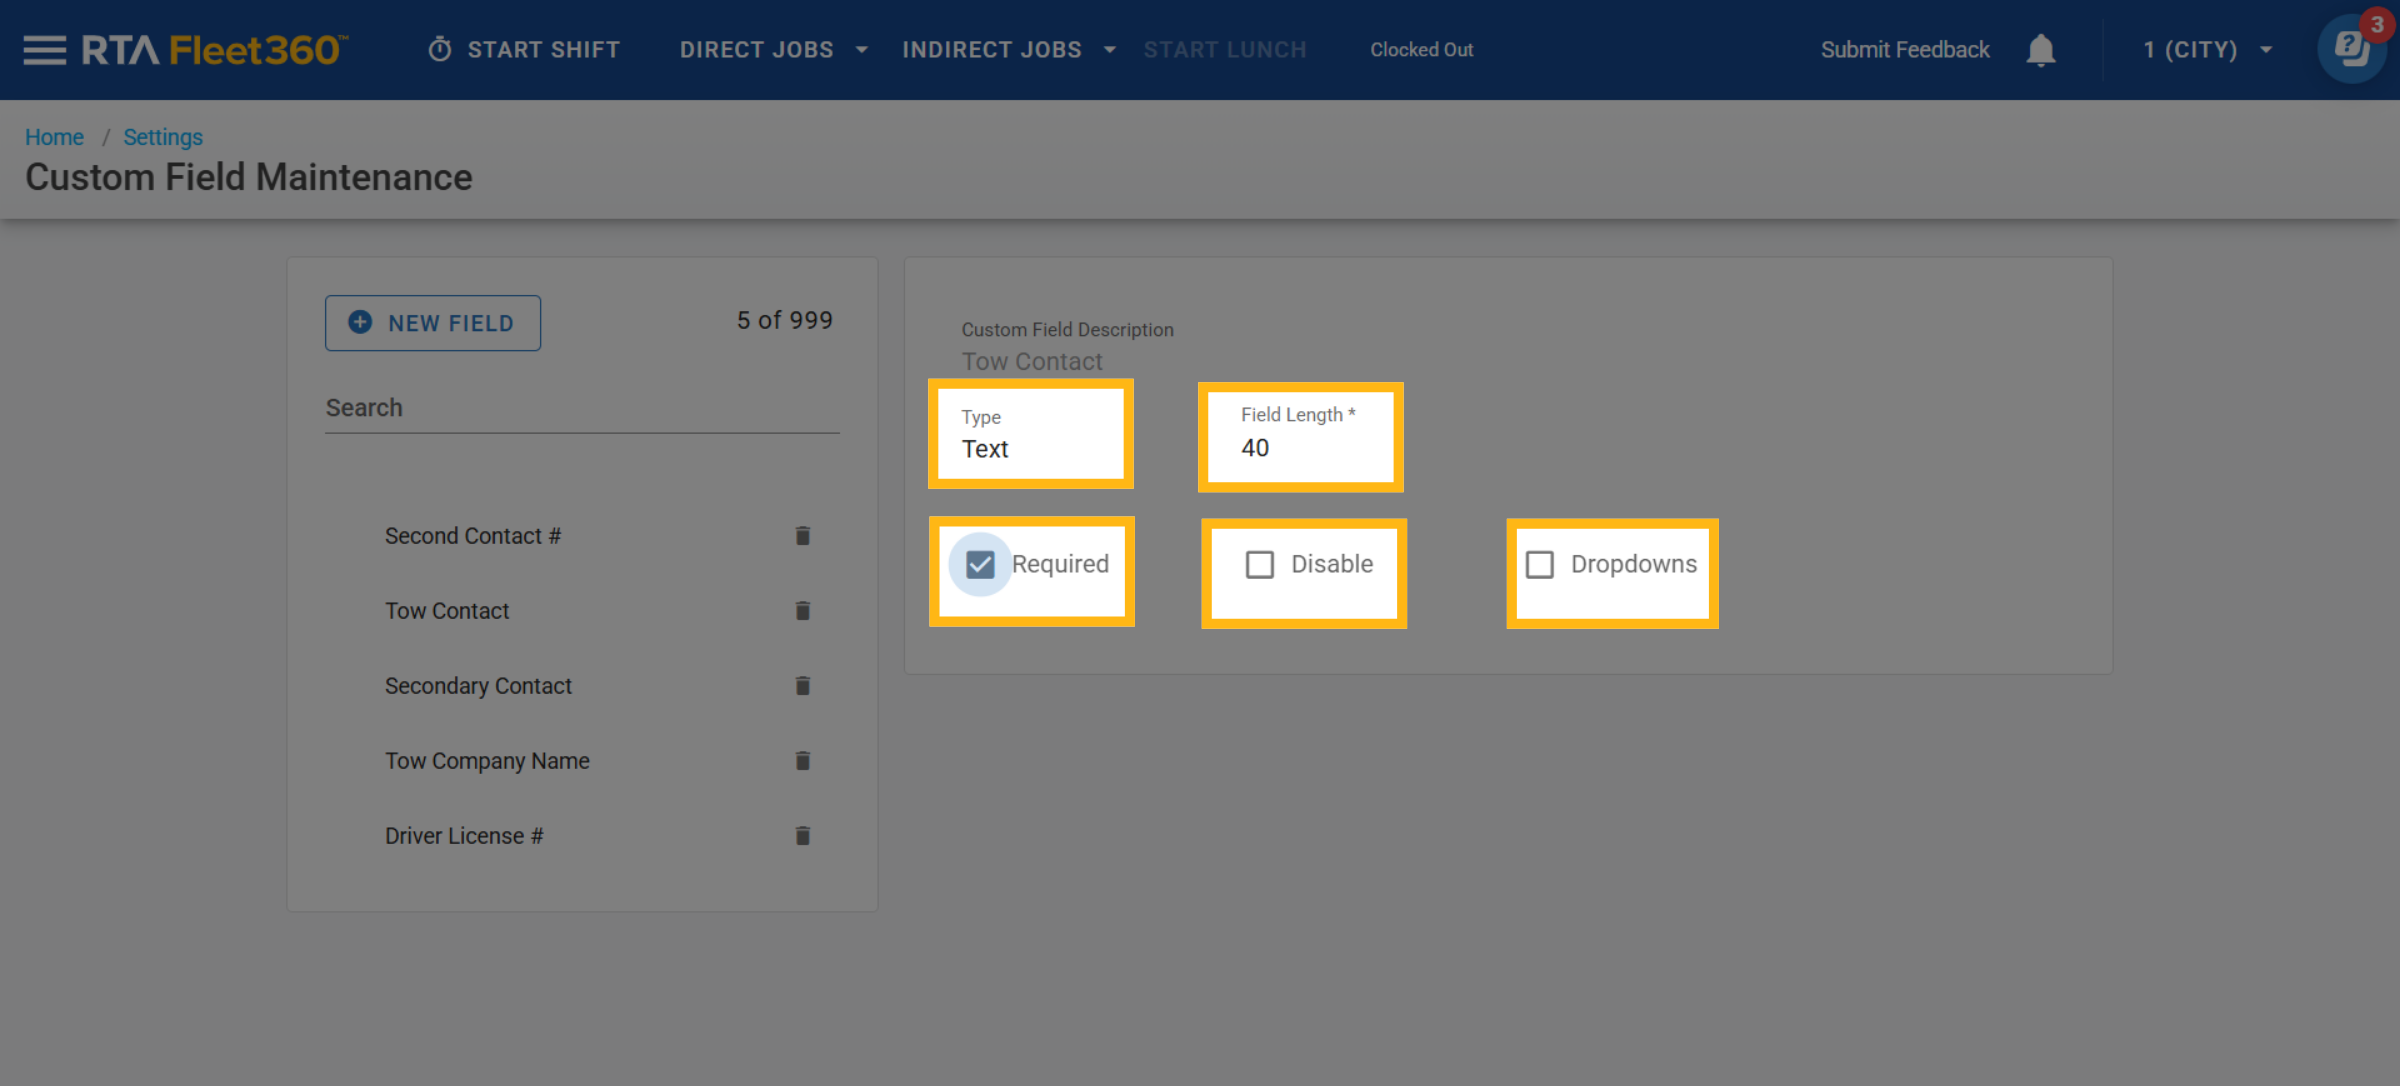
Select the necessary field type (Text, Number, or Date) and click the check mark to save.
Enter the maximum field length allowed for the data and click the check mark to save.
If wanting the data for the field to be required when added to an accident file, check mark the Required box.
If wanting to define specific values for the data, click the drop downs box (see below for more info)
Custom Field Options
Below is a breakdown of the various options/functions that are visible in the custom field options panel.
Field/Option | Field/Option Description |
|---|---|
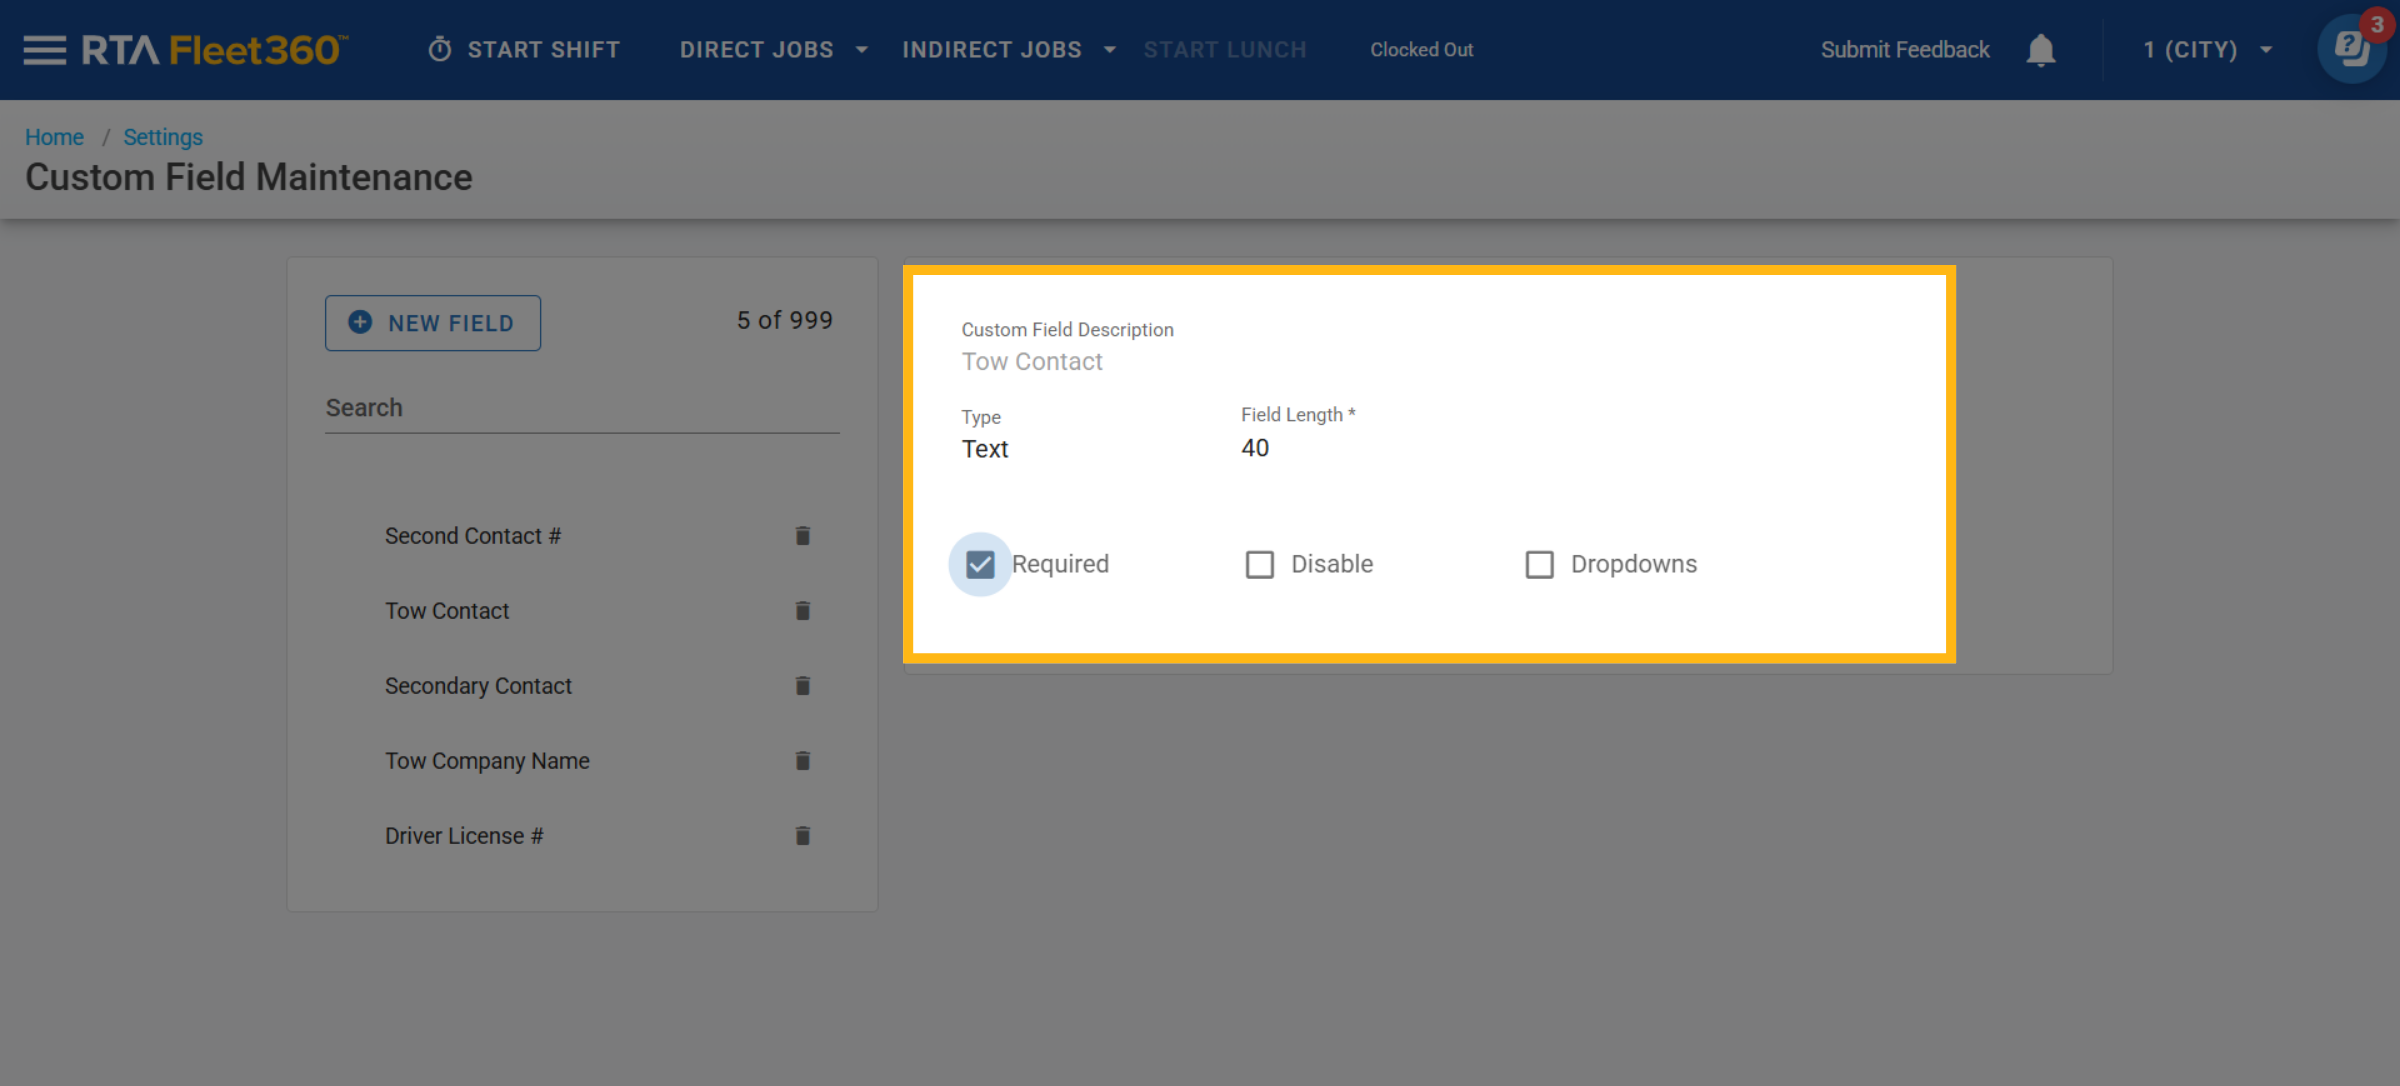
Custom Field Description | The description for the field. This field is important as it is what displays as the header for the field in the Additional Fields panel in the accident file and indicates the type of data or value to be input associated with it. |
Type | The option that allows the value of the field to be set as one of three field types:
|
Field Length | Sets the maximum length of the value entered. For example, a field length of 40 means that the entered value can be 40 characters in length at the maximum. |
Required Selector | Check this box if this custom field is a required entry into accident file. This option forces a data entry into this field when it is added to the accident file. |
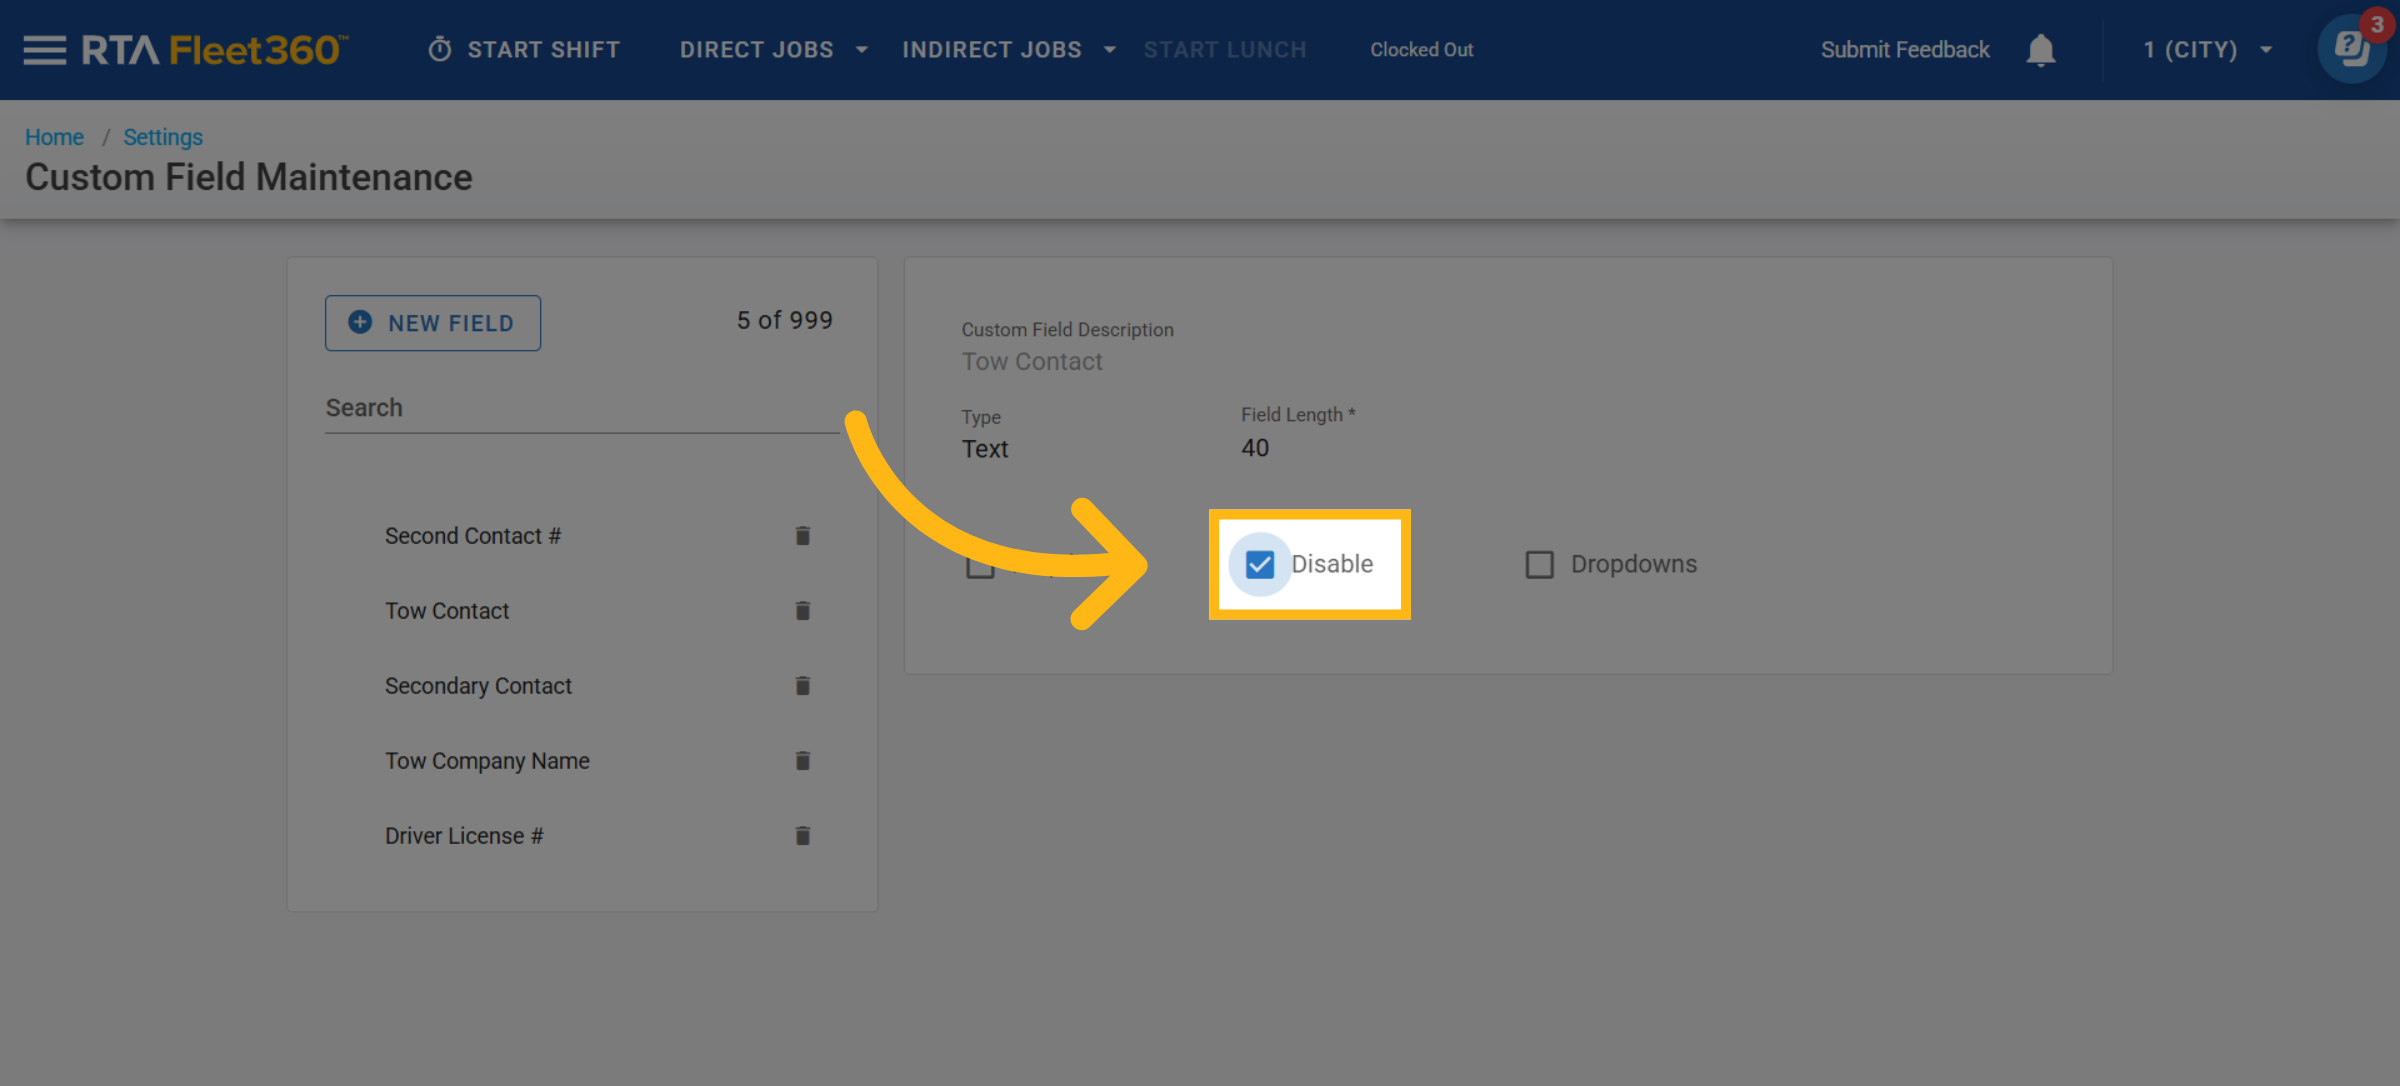
Disable Selector | Check this box if this custom field should no longer be added to an asset file. When this box is checked, when searching the list to add to the Additional Fields panel in the accident file, a disable custom field will not appear in that available list. |
Dropdowns Selector | Check this box to leverage secured dropdown values which limit users to selecting only the items listed in the dropdown as a field value. This helps with data accuracy and consistency. |
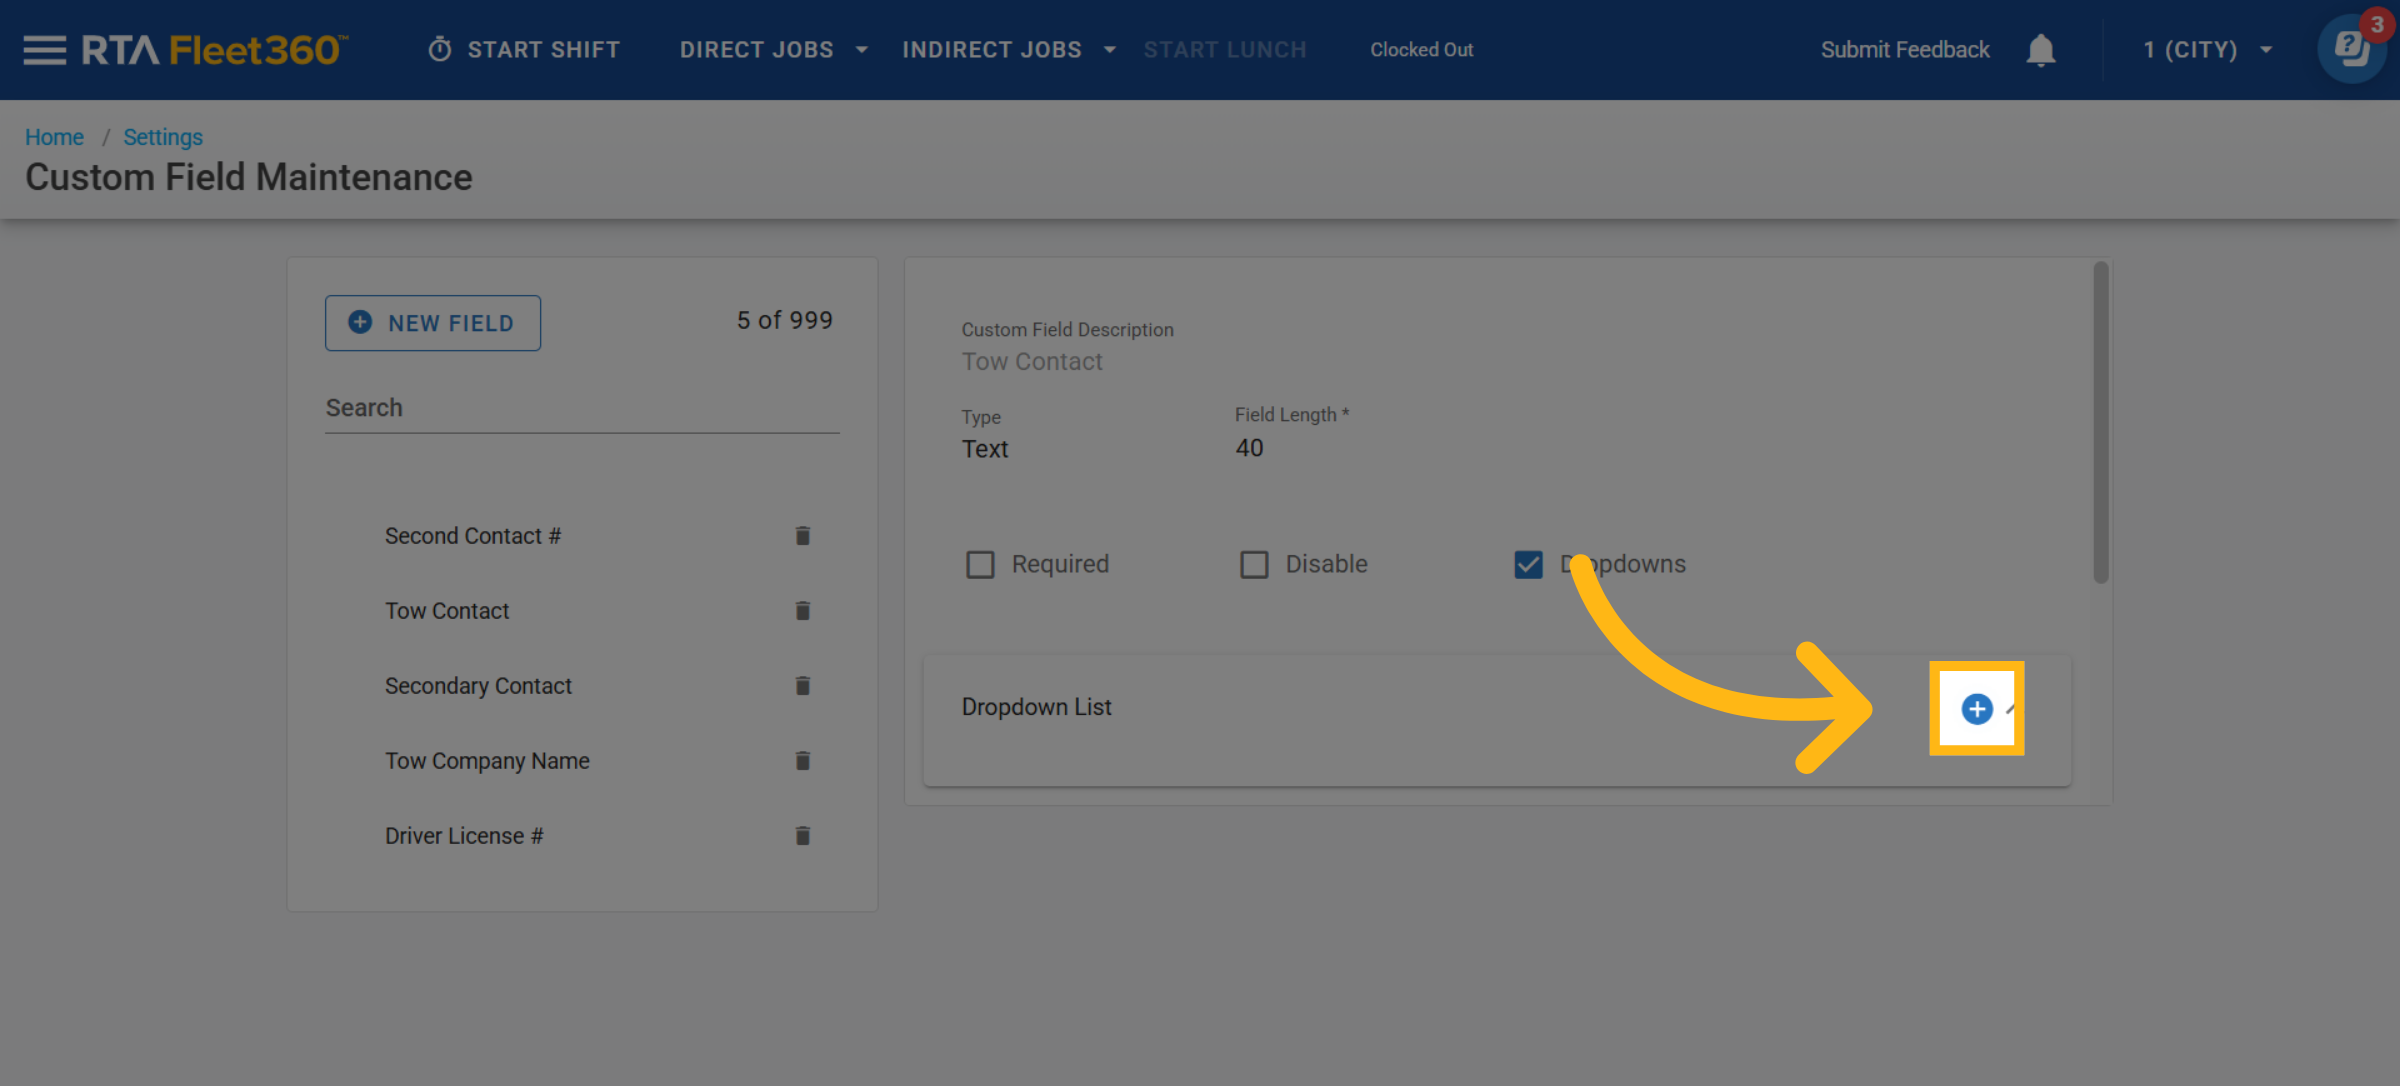
Creating Dropdowns
When clicking the check box to apply dropdowns to a specific custom field, it is necessary to then define (set-up) the items available for that drop down list.
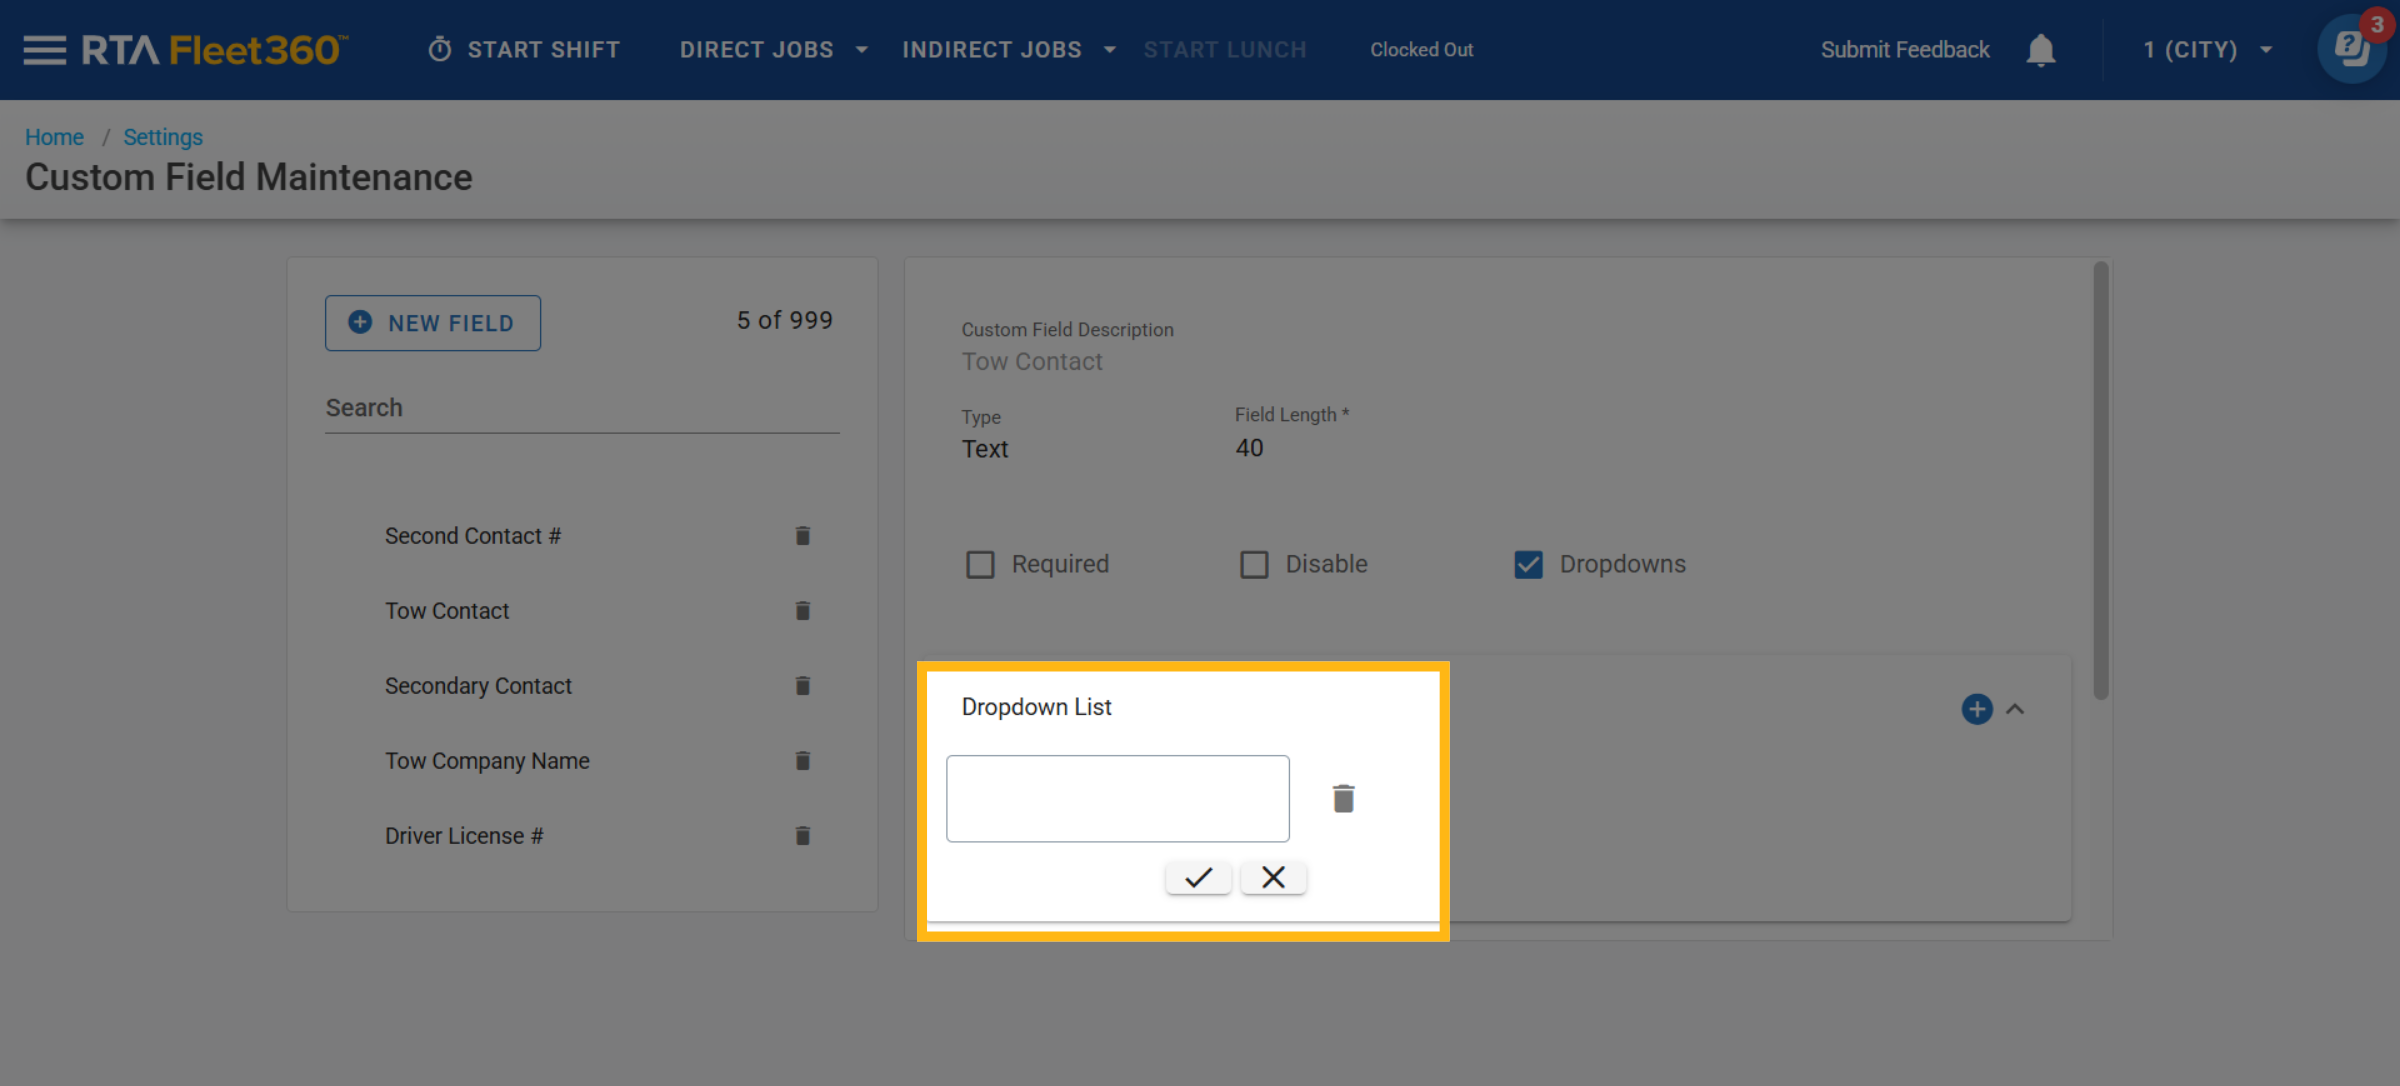
Click the + button after selecting the check box for dropdowns.
Enter a value into the available box and click the check mark to save.
Continue the add process until all listed values are included.
Editing a Custom Field
Various edits can be made to the custom fields in the list. Simply access the list, click on a field and make edits to the type, field length, or other options set for the field.
Disabling the Custom Field
This box allows the field to remain in the Custom Field Maintenance List for future use though while it is disabled, it will not be able to be added to Class Codes or asset files.
The Custom Field Description cannot be edited after the field is created.
Deleting a Custom Field
To permanently delete a created custom field, access the list, find the appropriate field, and click the delete (trashcan) icon to remove it.