RTA Web - Posting Parts & Labor
Did you know that you can request parts that are needed through the work order line. Refer to Parts Requests for information on how to submit a parts request and visit Managing Parts Requests for instructions on how to manage part requests that are received from technicians.
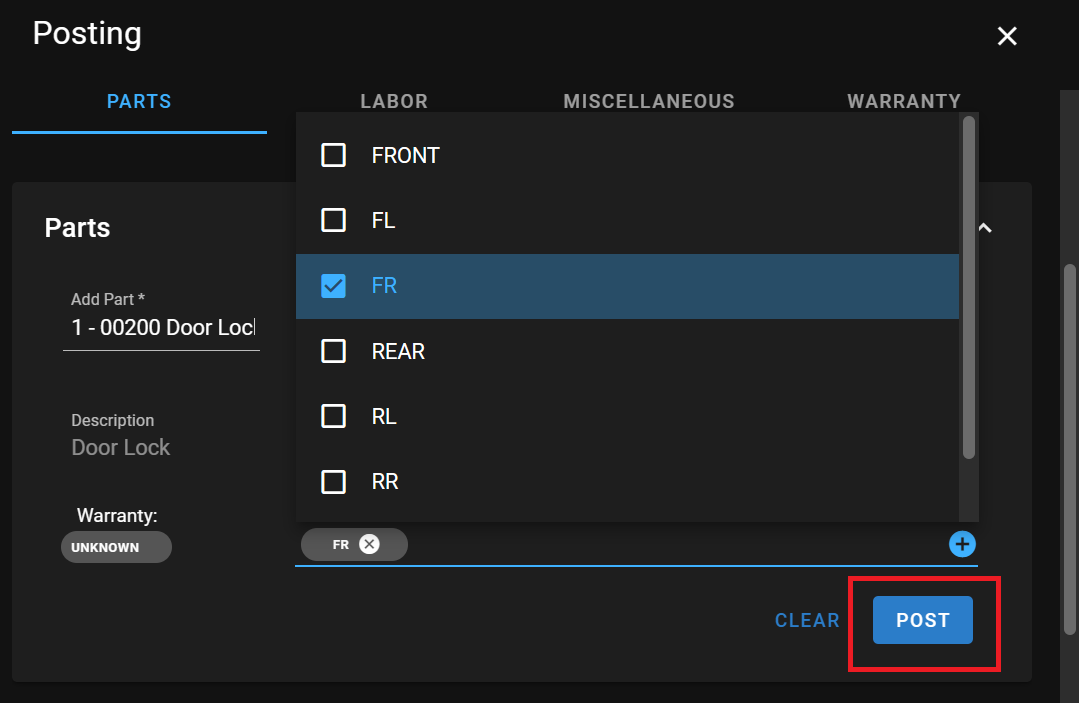
To post out parts, click one of the post options (Image A, Image B) and ensure that the Parts tab is selected once in the posting window (Image C).
Image A: Once in the WO you can find the Post button at the top right of that screen.

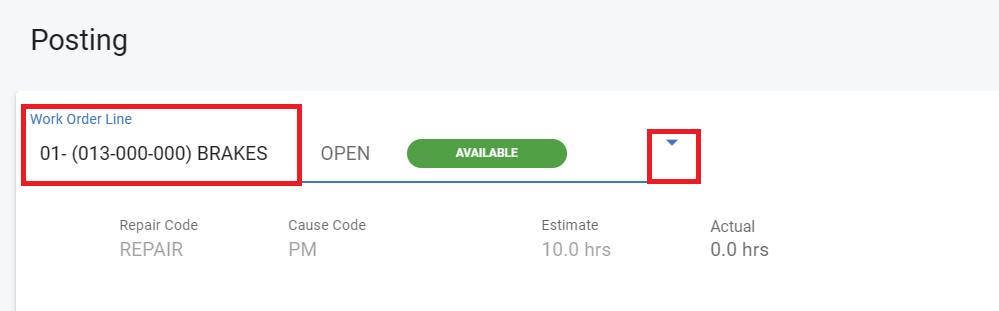
Image B: At the WO line level, you can also find a Post button. Click anywhere inside the line box, additional fields will populate, including the Post button.
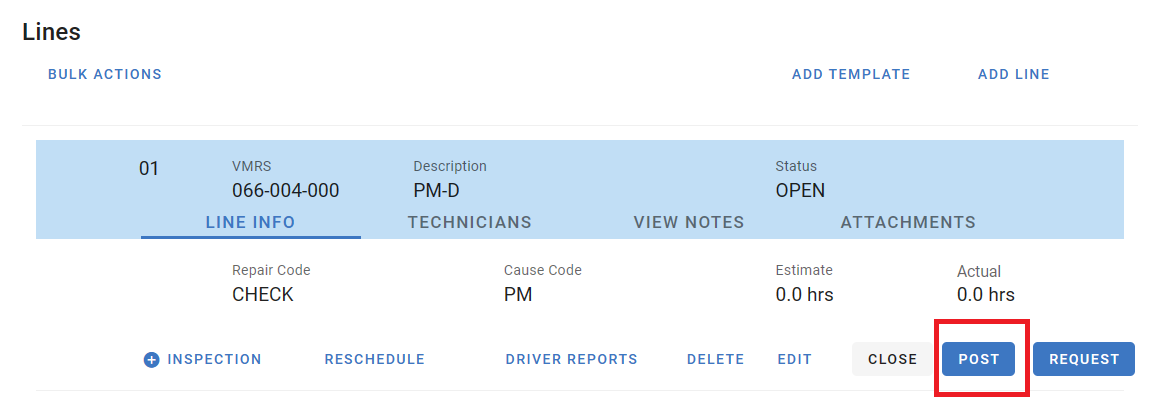
Image C:
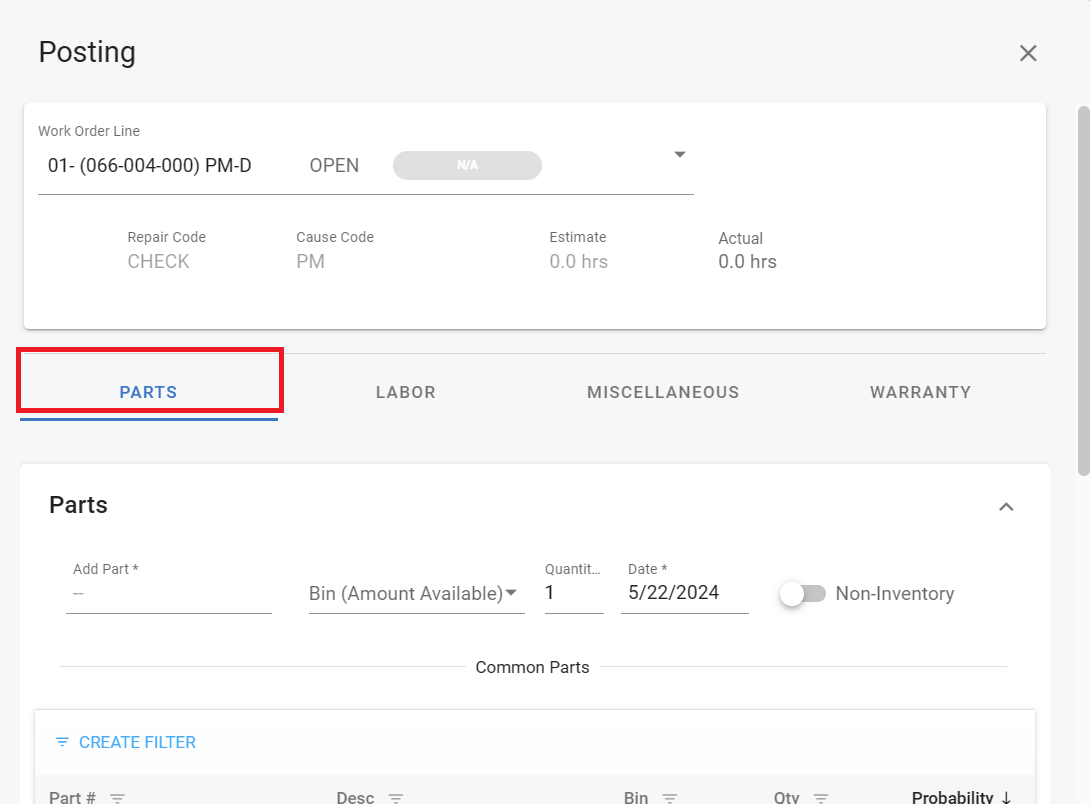
When using the Post button option at the top right of the work order screen, be sure that the correct work order line displays and if multiple lines exist, use the drop down to select the appropriate work order line for the transaction posting. See image below.
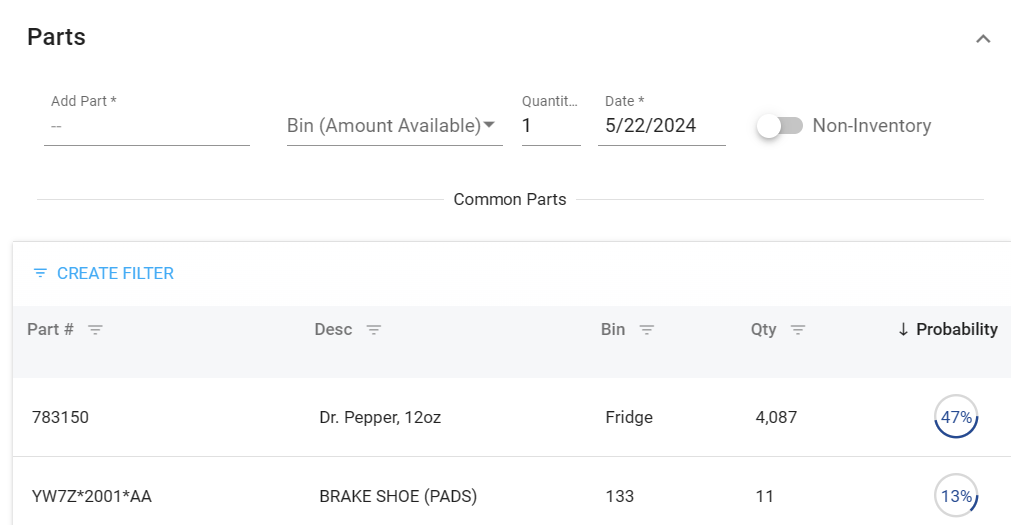
On the posting parts window, there may be a part probability screen that appears. This takes into account the probability of parts that may be posted out to this particular job.
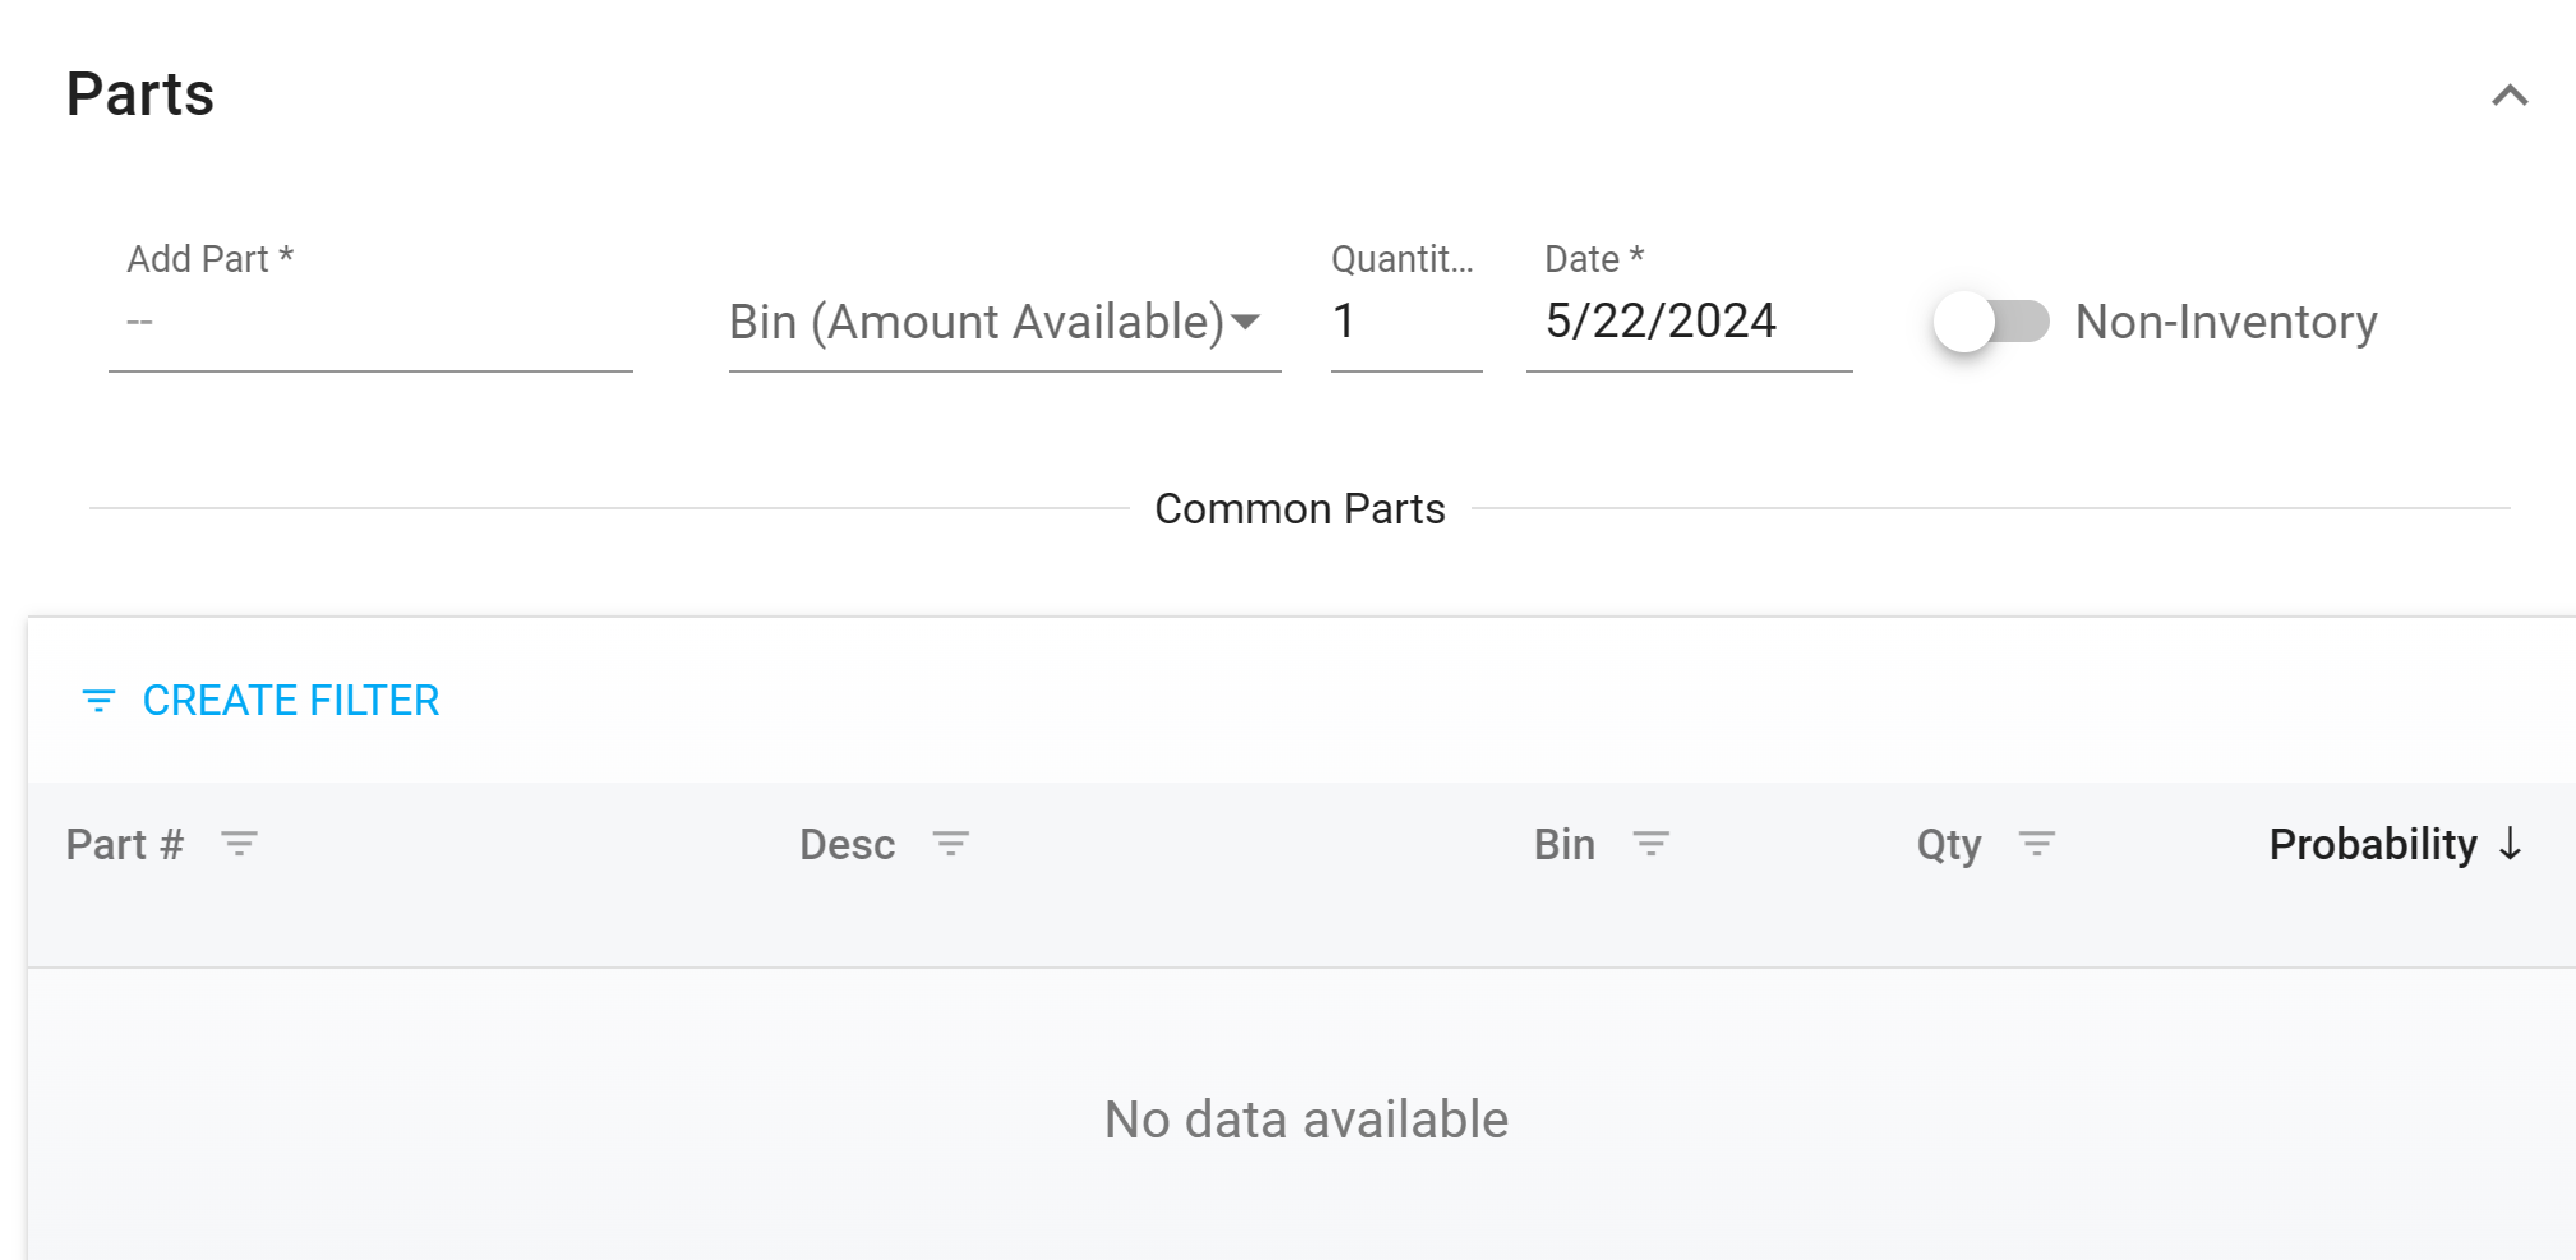
Users can select a part # in the probability screen to post it to the work order. However, if there is no probability, the section will have a “No data available” message, and the user can search parts then.
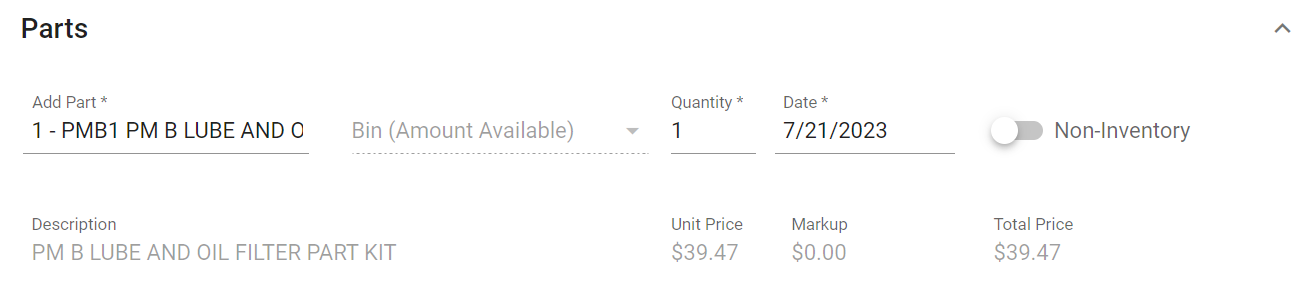
To post parts, the user will need to input the part number or name into the Part * field, choose the bin location the part is coming from and the quantity. Once you have that part, click the post button and the transactions section of the page will update with the part.
If a part file doesn’t exist. You can create the part on the fly through a Work Order or Purchase Order. Please refer to Adding Parts On The Fly for details.
Posting Parts with Location
If a part is tracking locations, you will see a location box, where you will need to add the location that the part will be added to.
Click inside the location box to select the appropriate location.
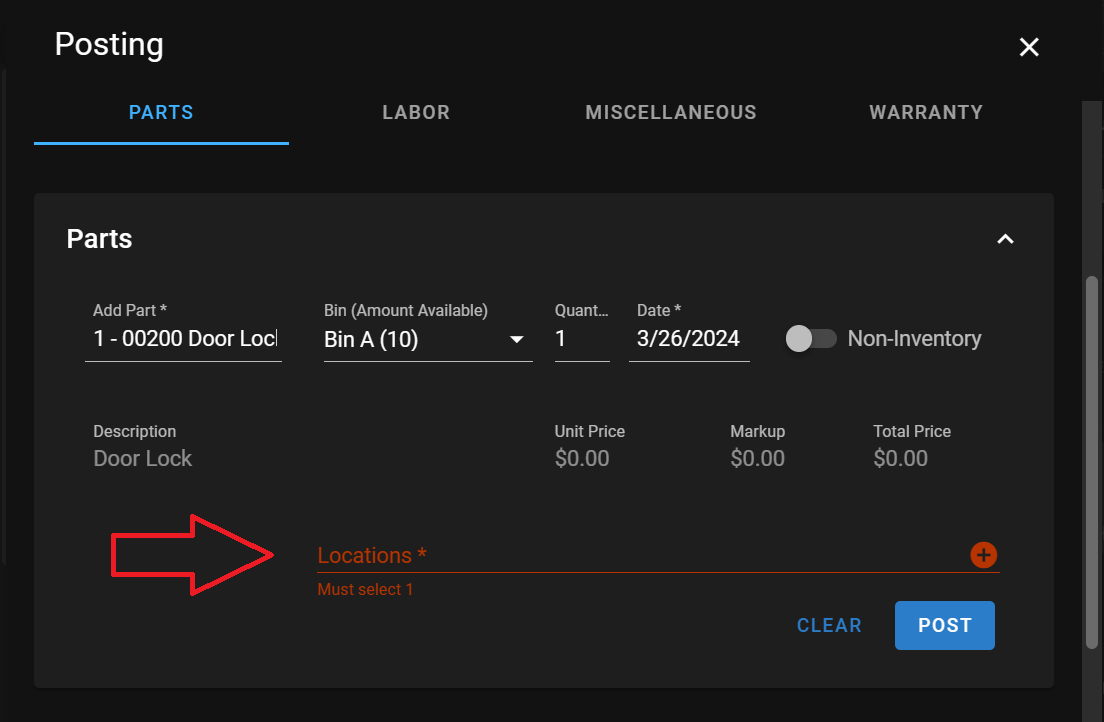
Once the location has been added, click post to add the part to the work order. The location box is quantity driven. Meaning, if you select a quantity of two, you will need to select to locations before you are allowed to post the part to the work order.
Posting Part Kits
If a work order line has a part kit pre-assigned to it (either at the line level or it is attached to a PM schedule), a message will display telling the user that one is assigned, and a “Post Part Kit” link will be available to post all the parts in the part kit.
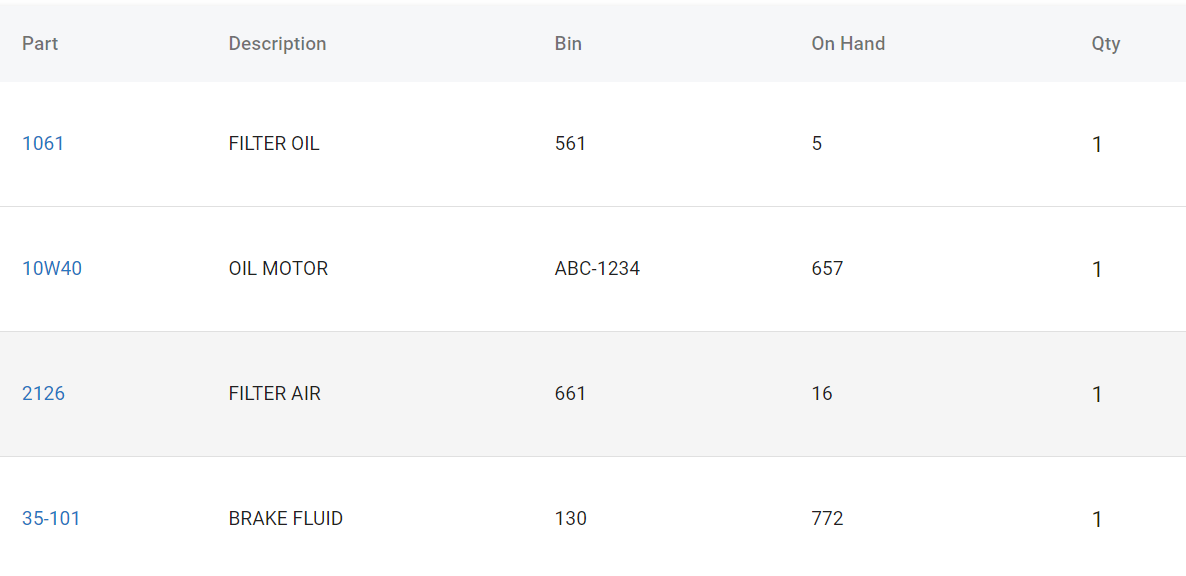
The part kit number and preview of the parts contained within the kit will auto populate in the parts posting panel, giving users the ability to see the parts that will be posted with the part kit, and verify that there are sufficient quantities of each part for the job.

If the part kit is not pre-assigned to the work order line, one can be selected when posting parts.
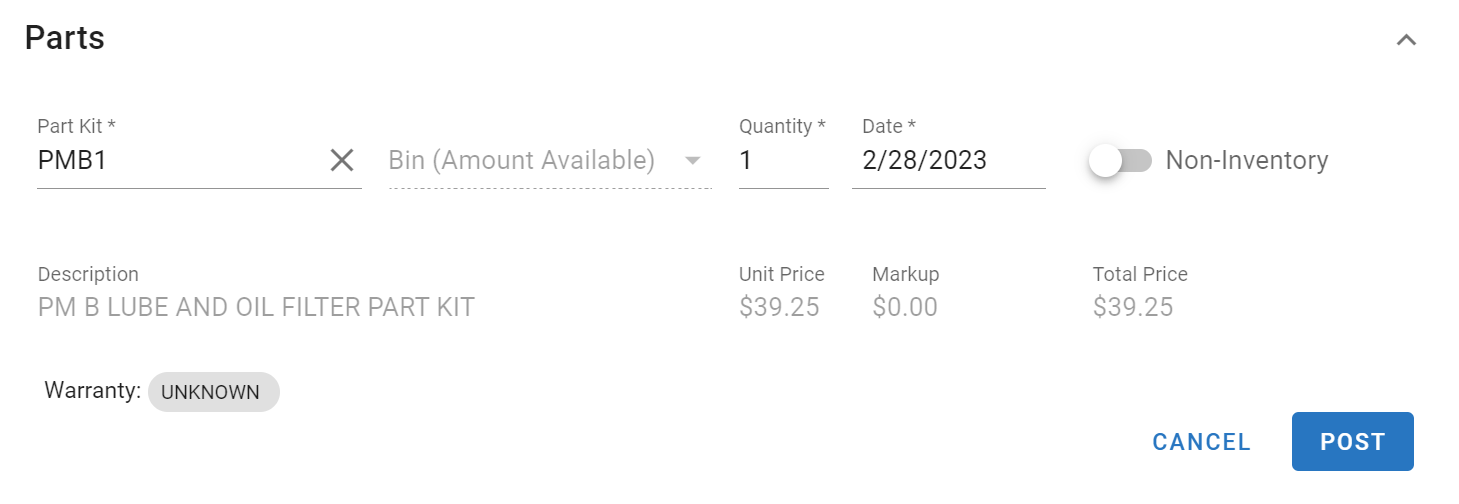
In the Part Number field, enter the part kit number
Enter the quantity (number of) part kits to be used with the line
The description and costs will prefill based on the part kit file
Click Post
Once a part kit number is selected, a preview of the parts contained within the kit will display under the posting information to easily identify which parts are contained in the kit.
The part kit cannot be posted if any of the component parts have insufficient on hand quantities for the job (this is based on the inventory showing for the part in the part file)
Adjustments will either need to be done via a Purchase Order or a Parts Adjustment to increase the quantity showing available.
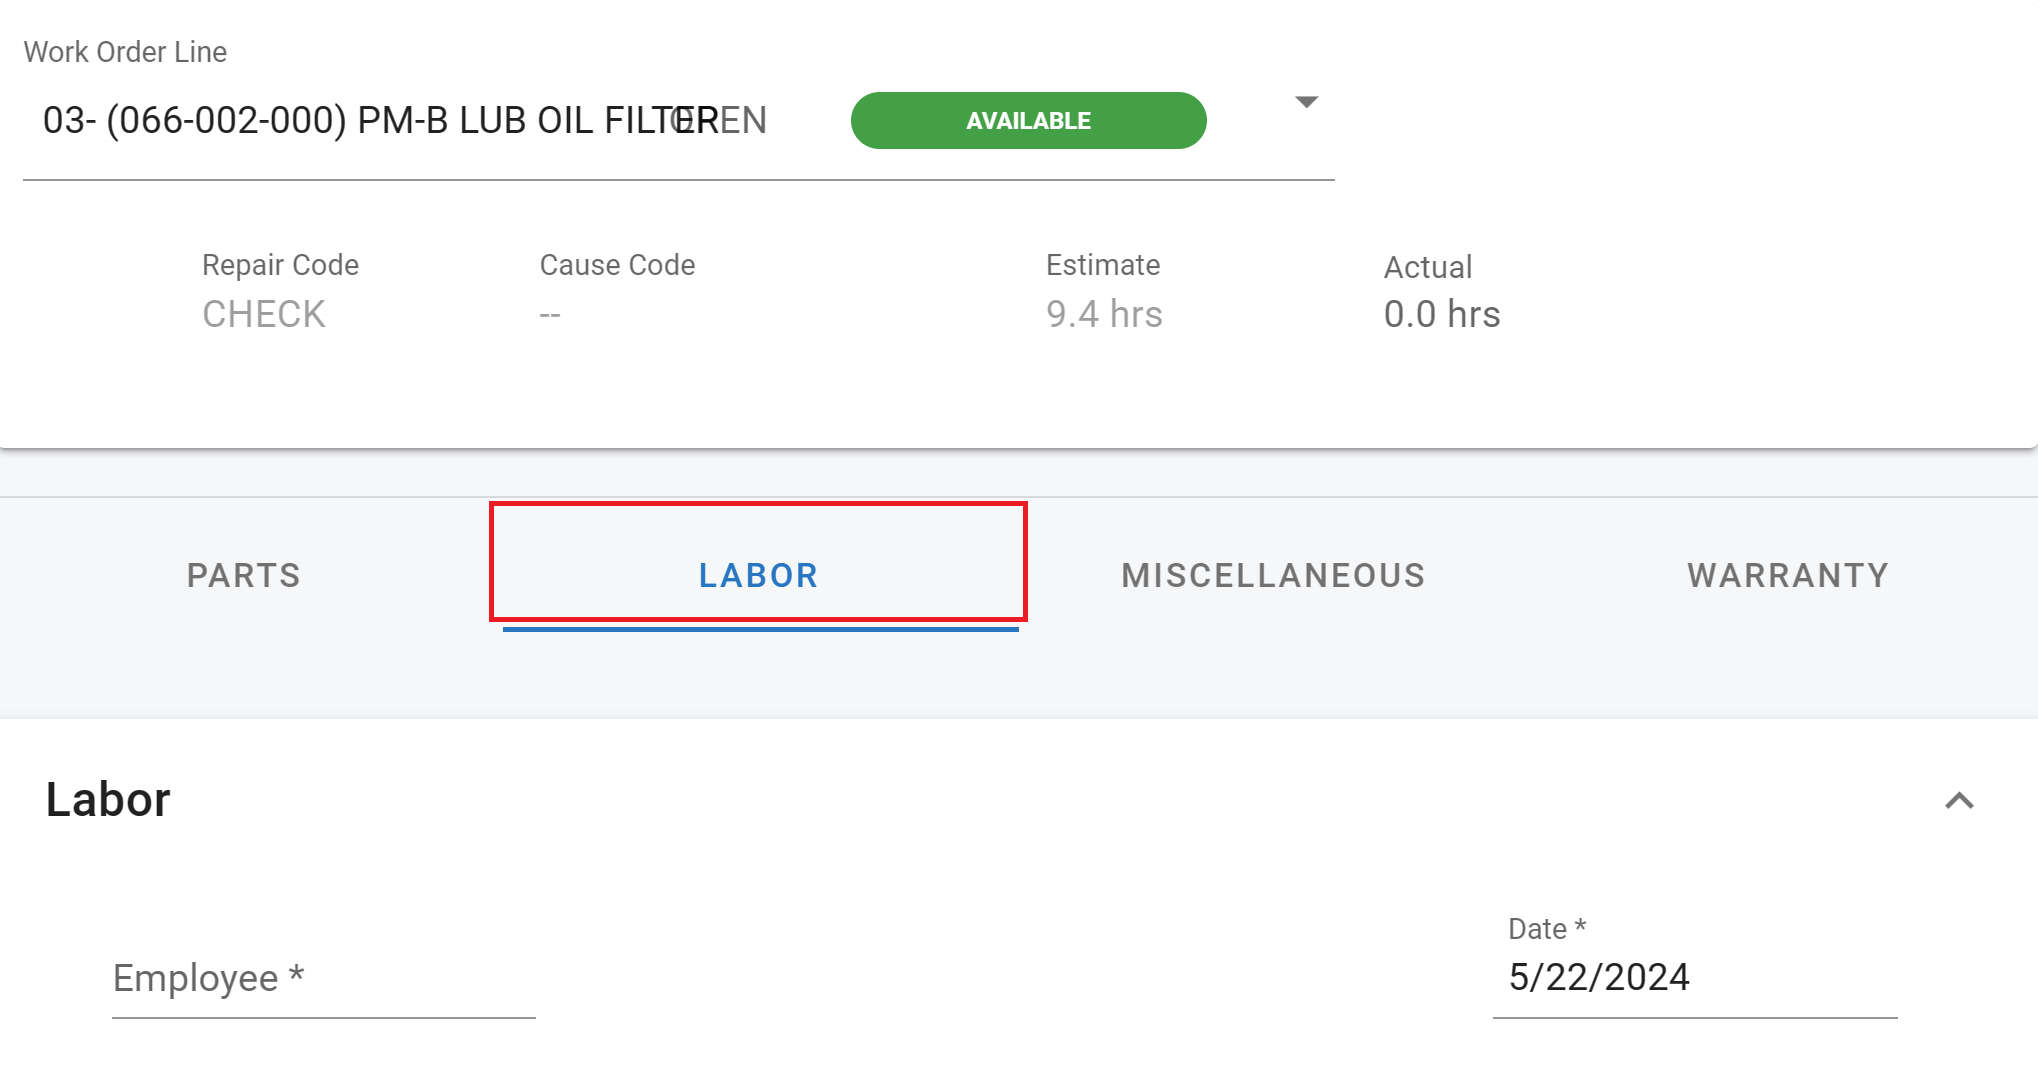
Posting Labor
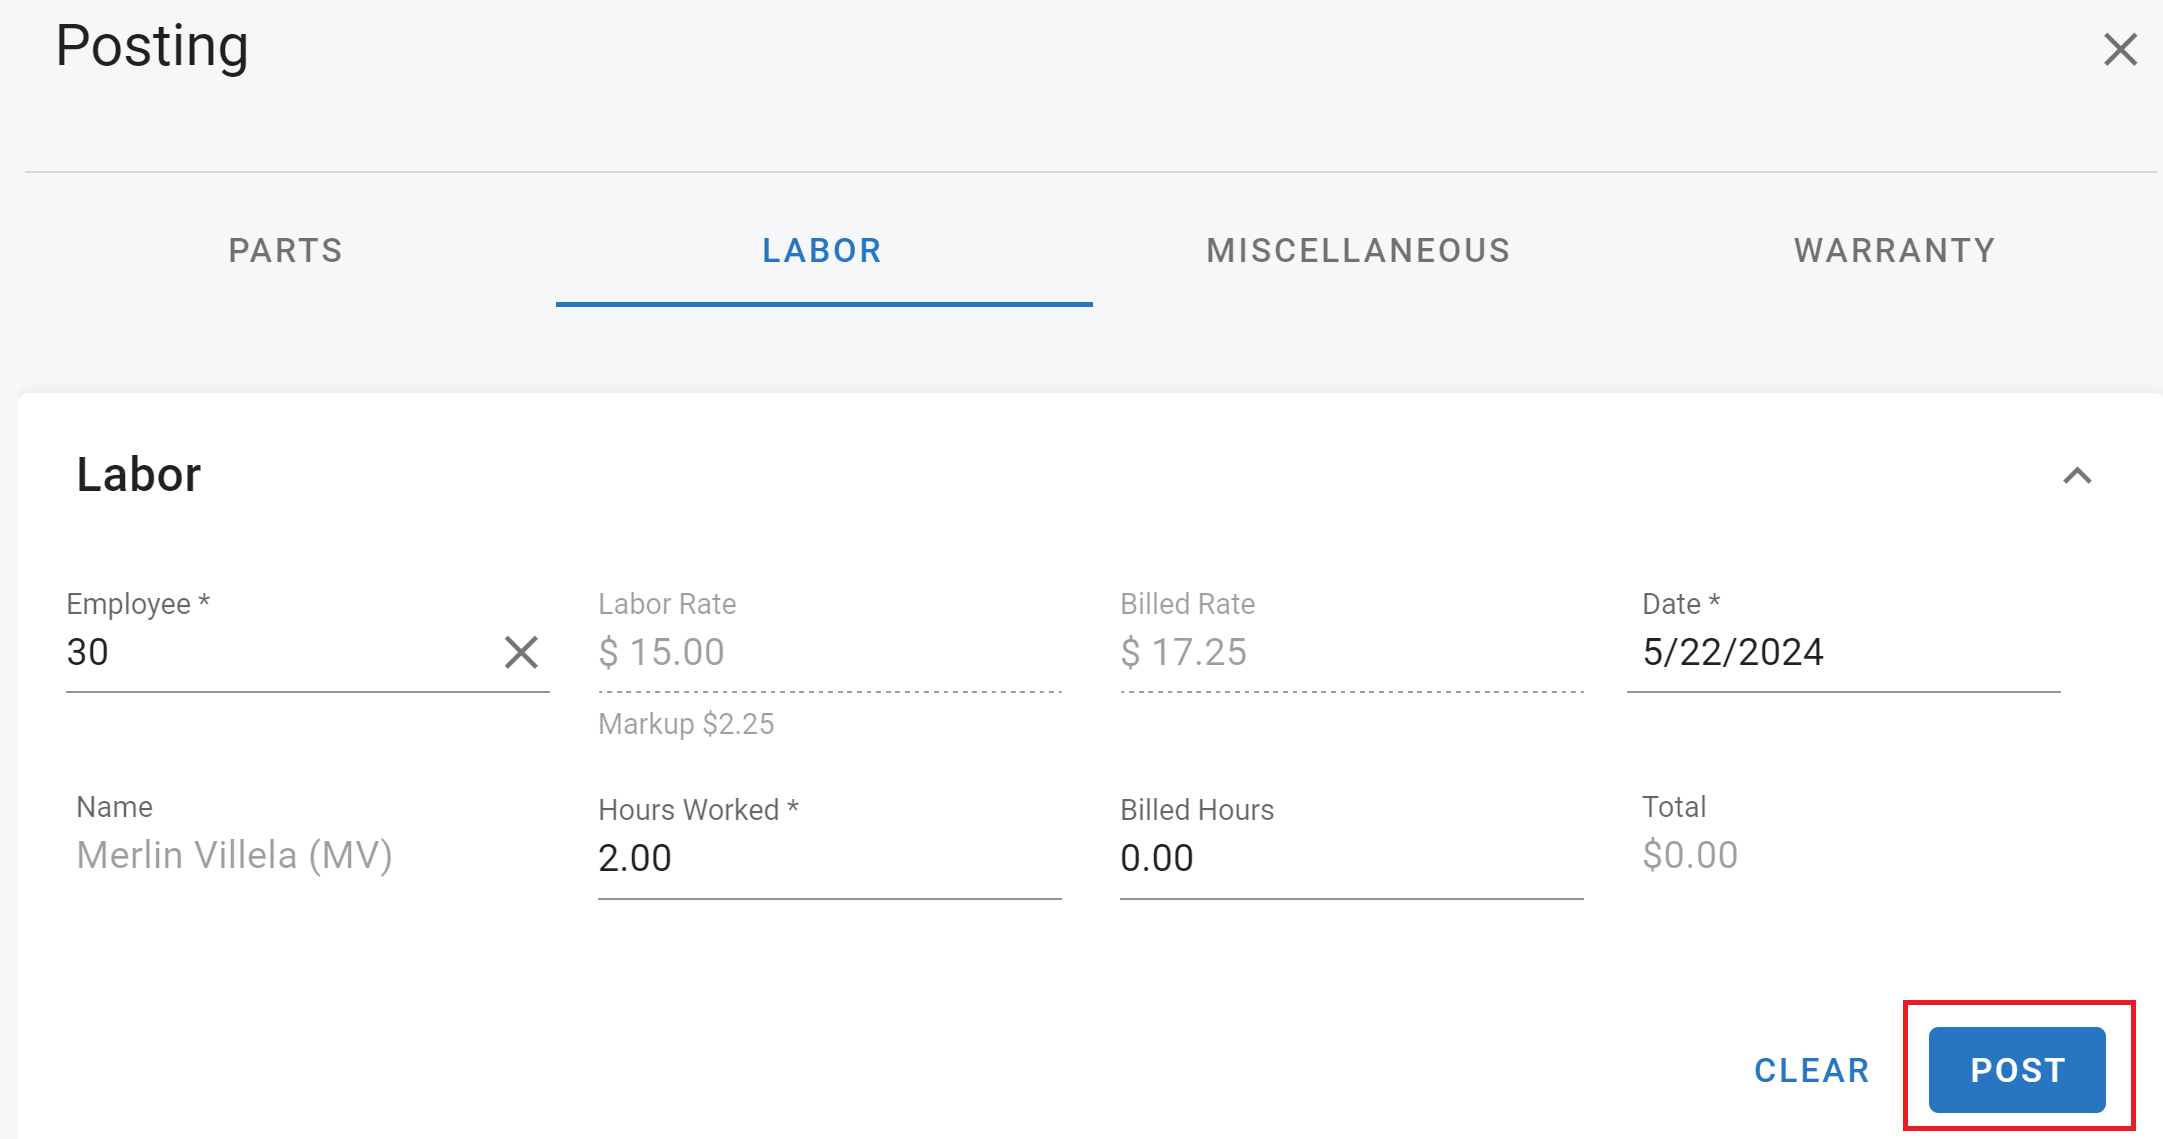
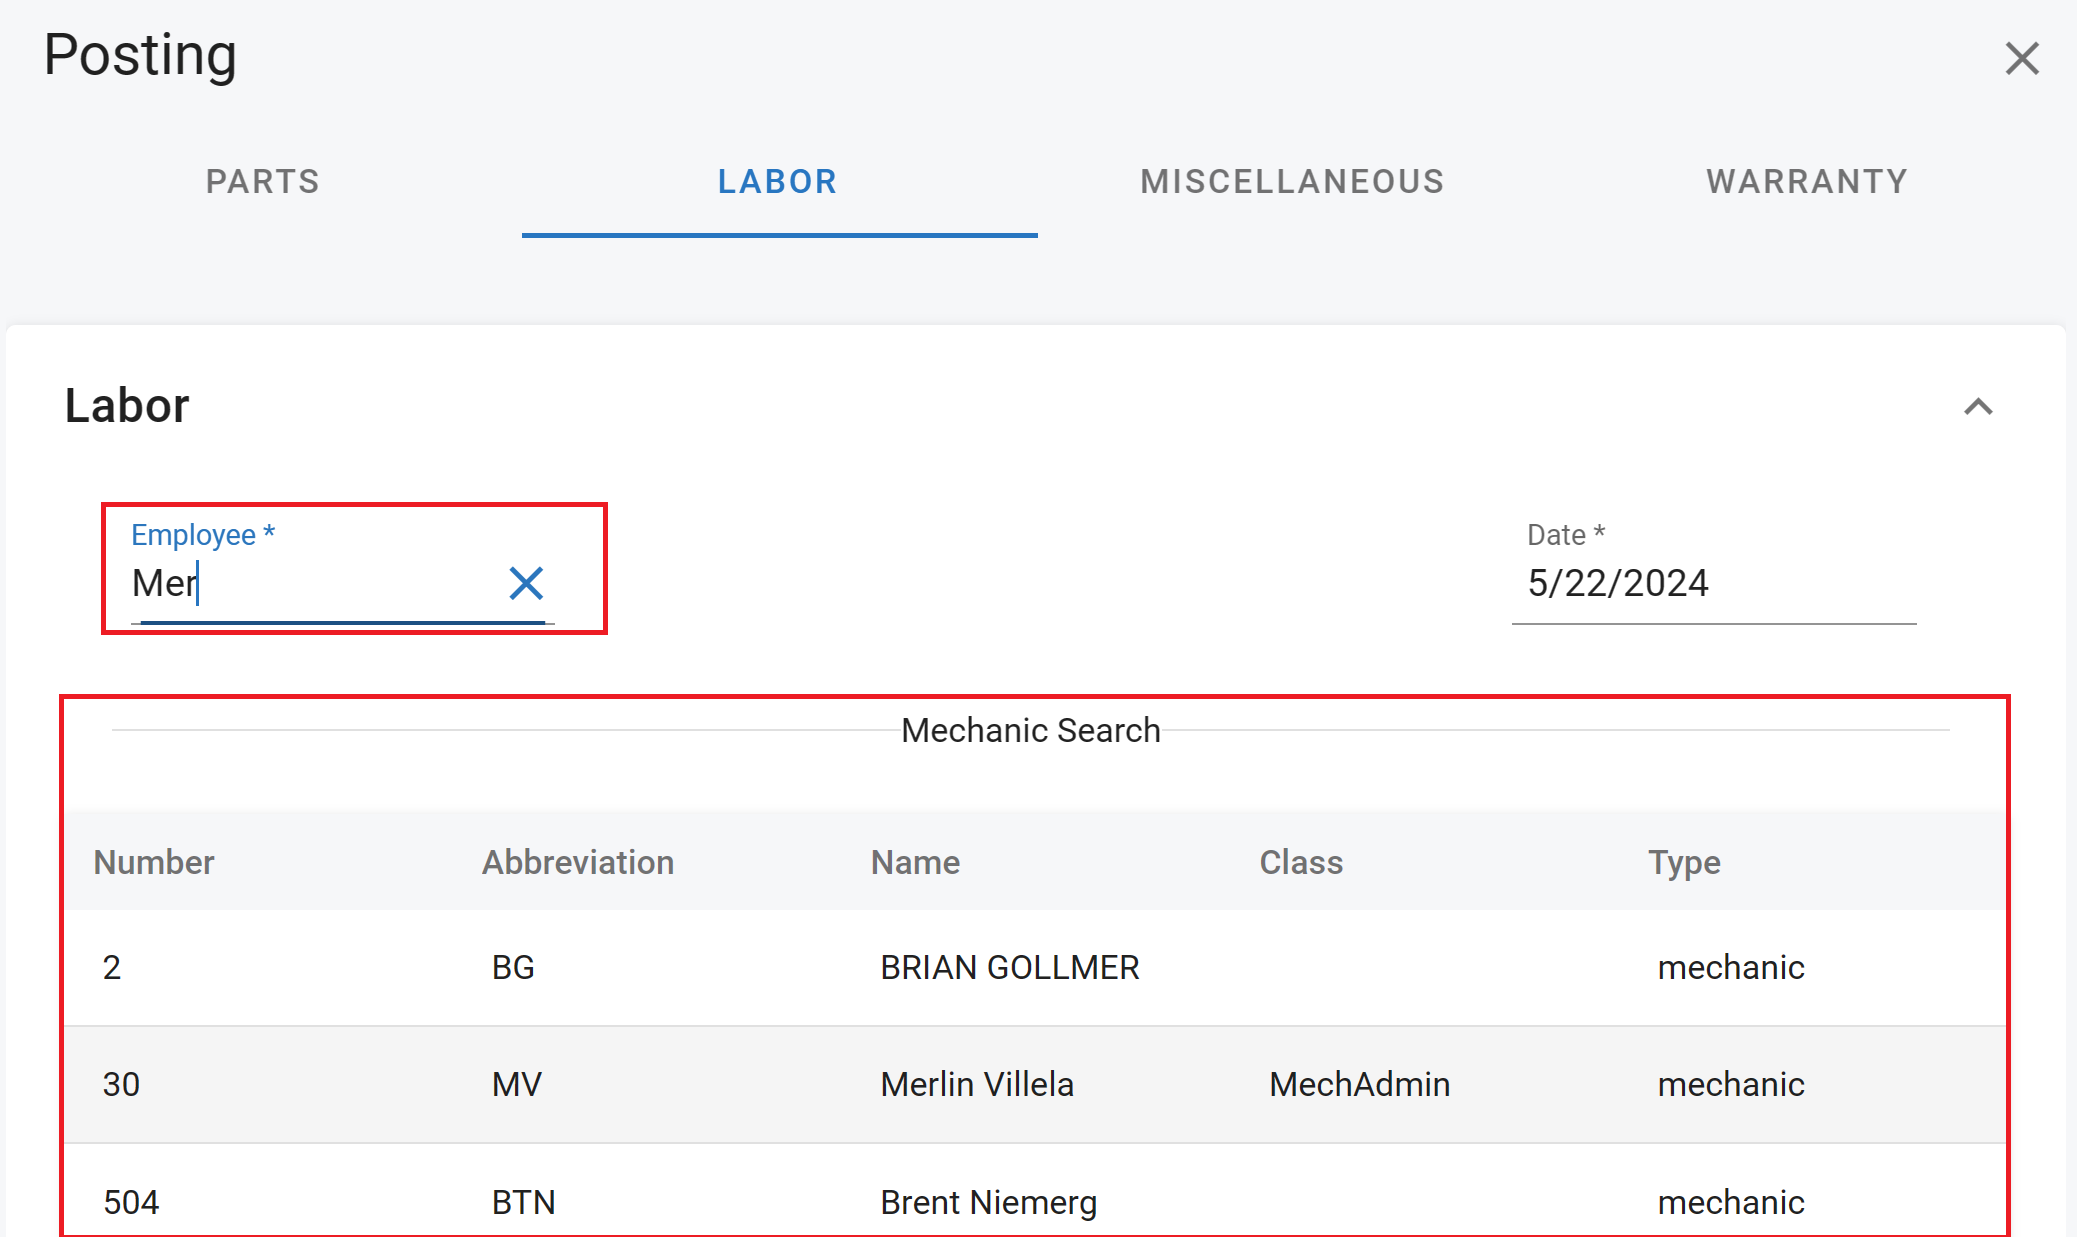
To post out labor, click one of the post options and ensure that the Labor tab is selected in the Posting window.
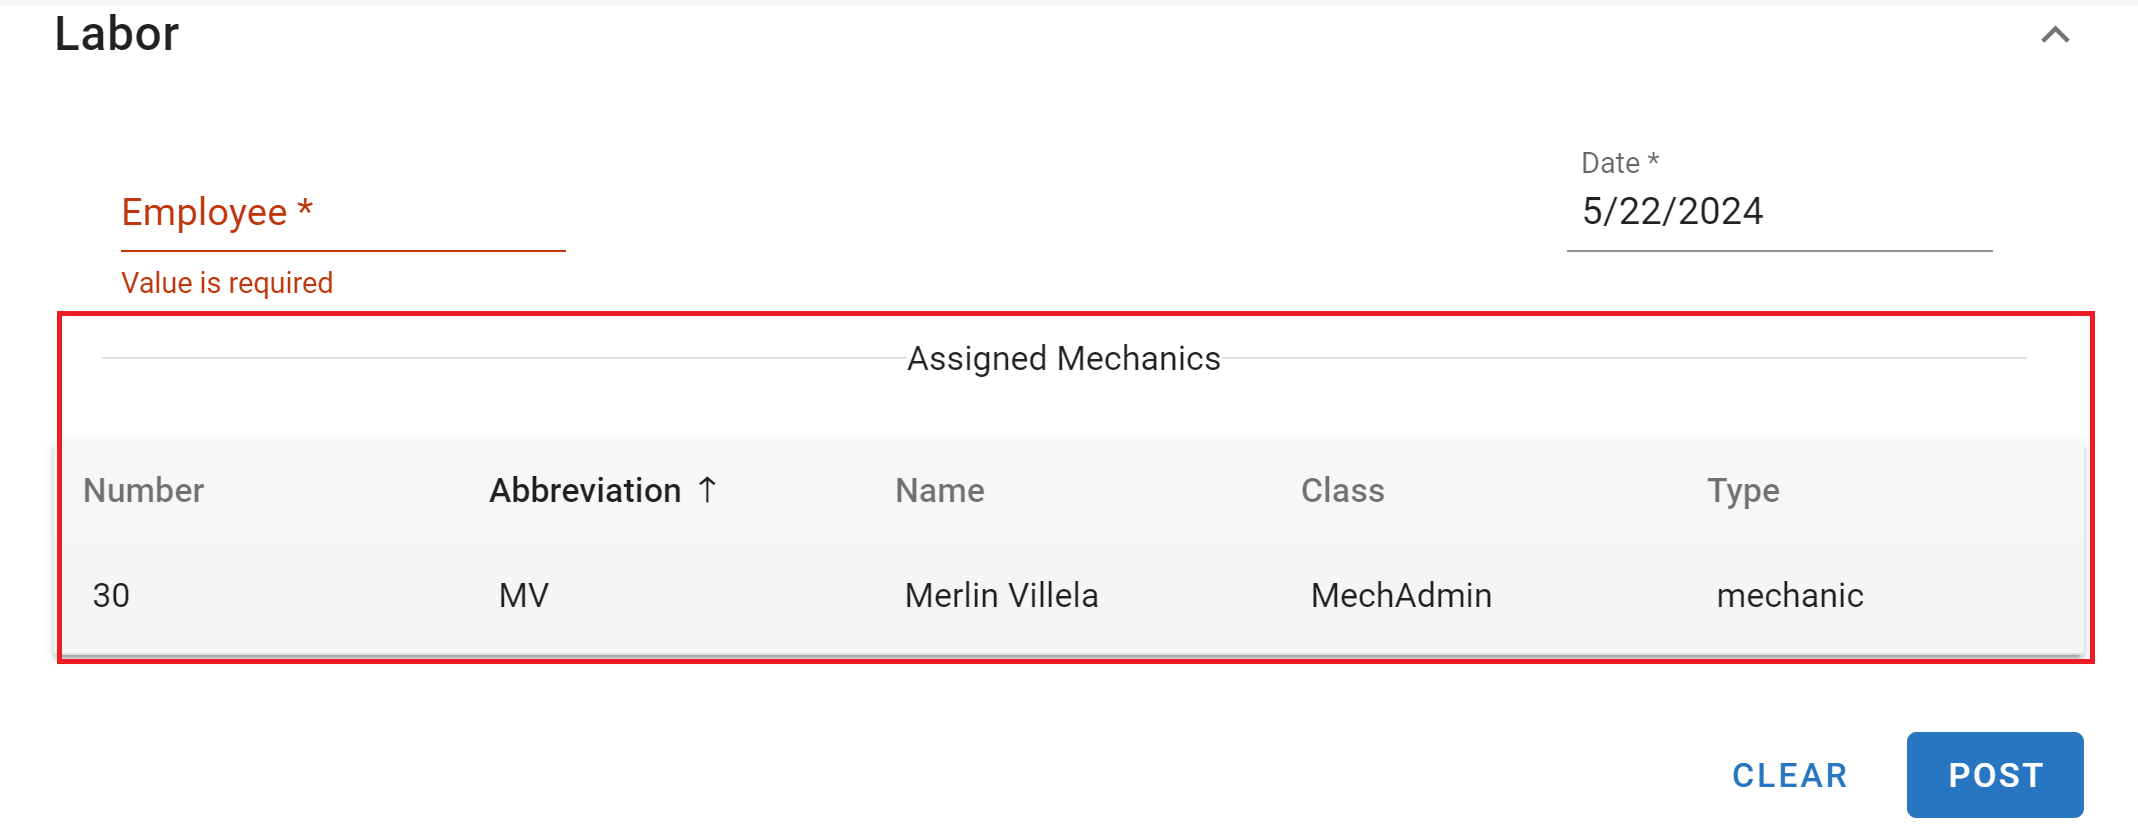
If a technician has not been assigned to the job, you can simply select the technician from the list that shows under the Employee tab or type their name into the tab and select the employee.
If a technician has been assigned to the job, their name will appear in the labor section under Assigned Technicians. Click on the assigned technician and from here you can modify their labor rate, hours worked and billed hours. Once the changes have been made, click the post button and the transactions section of the page will update with the labor.