
RTA Web - Warranty Claims Submitted Status
After the claim is created either manually or automatically, it starts in the pending status. From here, it needs to be reviewed and then submitted to the vendor for processing.
How the claim physically gets submitted to the vendor is between you and the vendor. Some will want the claim submitted through an online portal. Others may want a physical form delivered to them while some may even allow for a phone call.
Either way, the warranty claim file will help compile all the relevant information that may be needed to submit the claim.
If the vendor requires an RMA# for their claims process (Return Merchandise Authorization), that can be included in the warranty claim file under the Vendor Claim ID field in the Primary Info Panel of the file.
Refer to Warranty Claims File TOC for a breakdown of the claim file if needed for the location of information needed to create the submission to the vendor.
Once the claim is officially submitted to the vendor, be sure to update the status of the claim file in RTA.
Open the claim via the Warranty Claims Master List under the Vendor menu section in RTA
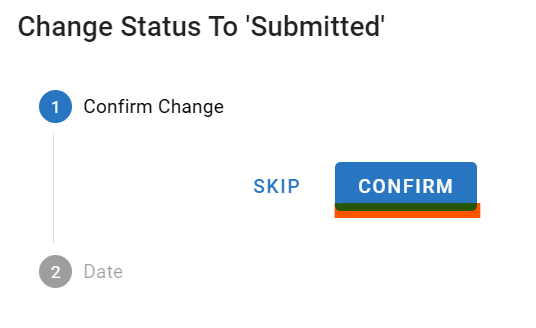
Click the status button in the upper right corner
In the drop down, select the Submitted status

In the confirmation window, click Confirm
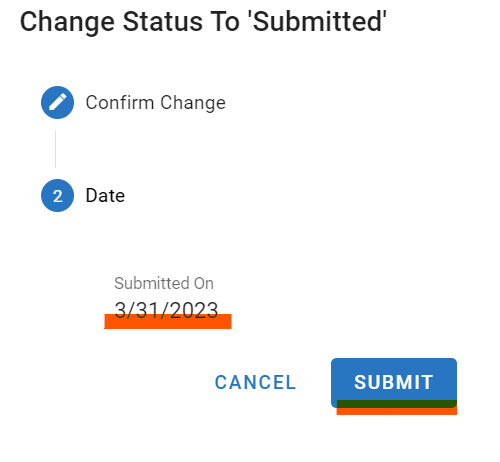
Ensure the submitted on date in the confirm window is accurate to the day that the claim was physically submitted to the vendor (update if necessary as it will default to the current date)
Click Submit to confirm the “submitted on” date
The status of the claim will now read as submitted and the “Age” column of the master list will now start over at 0 and reflect how many days the claim has been in the submitted status
Keep reviewing the master list to stay on top of status ages. Once submitted, it is now the vendor’s responsibility to take action.