RTA Web - Adding a Brake Inspection
Adding a Brake Inspection
Once the Brake Inspection Setup is complete you can enter the Brake inspections electronically in the system. See RTA Web - Brake Inspection Setup for more information on how to.
Inspections can be entered five different ways:
In the Asset File Manually (See Below)
From the Standard Work Orders. Refer to RTA Web - Work Order Brake Inspection to Add Brake Inspections in Work Orders.
From Work Orders in Paperless Shop. Refer to RTA Web - Shop Brake Inspection to Add Brake Inspections in Paperless Shop.
From the Standard Work Orders in Mobile. Refer to RTA Mobile - Work Order Brake Inspection to Add Brake Inspections in Mobile Work Orders.
From Work Orders in Mobile Paperless Shop. Refer to RTA Mobile - Paperless Shop Brake Inspection to Add Brake Inspections in Mobile Paperless Shop.
Adding a Brake Inspection through the Asset File
Select the Brake Inspection Section from in the Asset file
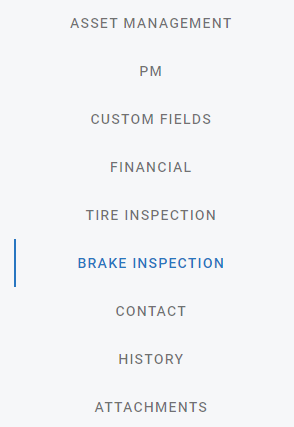
Brake Inspection Section

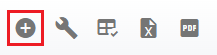
Select the ![]() button
button
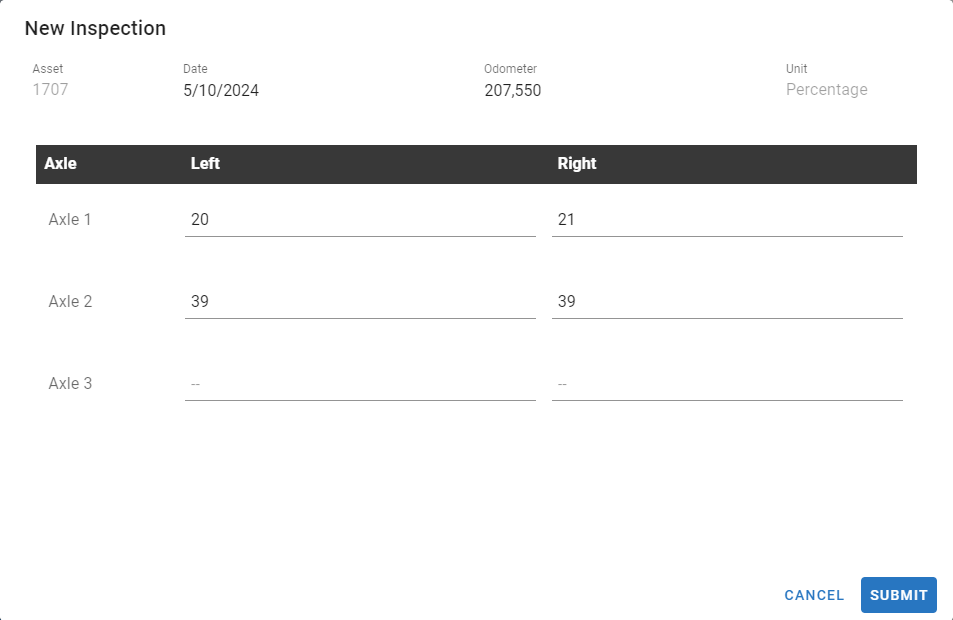
This following Inspection entry panel will pop up:
🔓 Denotes fields that are editable within RTA Web
The following items will be presented in the Tire New Inspection screen.
Asset – This field displays the Asset Number you are inputting the inspection for
🔓 Date – Select the date when the inspection was Completed
🔓 Odometer – Select the Asset Odometer reading when the inspection was Completed
Unit – This is the Unit of Measure for the Brake Inspection Readings:
Percentage
Inches
Millimeters
32nds
Axle – This is the Axle Position for the Brake Inspection Readings (Note: You can set between one and eight Axles)
🔓 Left – Left side reading per axle
🔓 Right – Right side reading per axle
Once the sections are updated then select the Submit Button.

Completed Brake Inspection Transaction
Once a Brake Inspection is completed the transaction gets added to the Asset file as a permanent record that can easily be reviewed throughout the service life of the Asset.
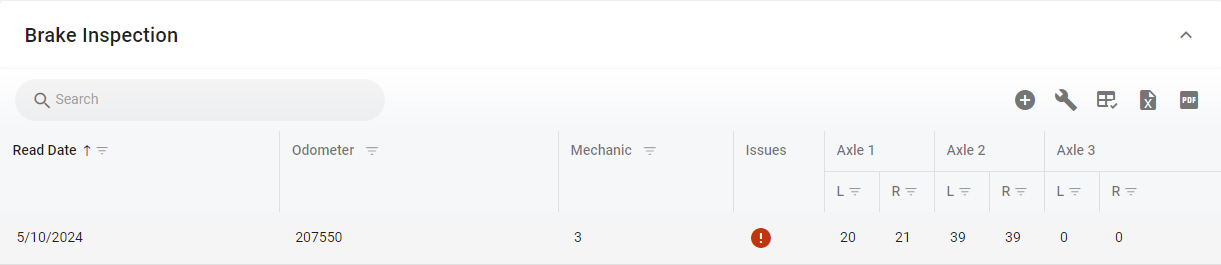
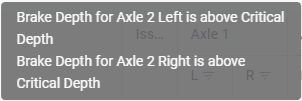
Note: If any of the readings are below the Critical threshold then you will see the Red❗icon show up in the Issues column.
Hovering over the Red❗in the issues column will also pop up information about the warning.