RTA Web - Employee Maintenance
The employee record stores information such as address, phone number, wage, driver's license number and expiration, productivity statistics, and certifications. Employee records need to be added for all technicians that will be working on or managing assets. You can also add records for other types of employees but keep in mind the RTA Fleet Management Software is designed to track fleet maintenance and costs and has no payroll functions. The employee file is used primarily by the Work Order module and Paperless Shop to track labor hours spent on jobs. A technician timecard is also available in the Paperless Shop option.
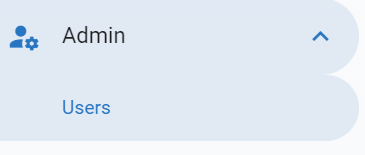
To access the Employee Maintenance area to link existing employee files to facilities or create a new employee file, navigate to the user profile under Admin.
Locate and click on the user
Click on the Facility Tab
Refer to the various sections below regarding the set up and maintenance of the Employee File.
Facility Linked Employee
Create a New Employee
To link an employee to a facility, they must first exist as an employee. Follow the below steps to create the employee.
Click the Add New Link
Click the Facility Field in the Add Facility Linked Employee Panel
Choose the facility the employee should be linked to
Click Create Employee
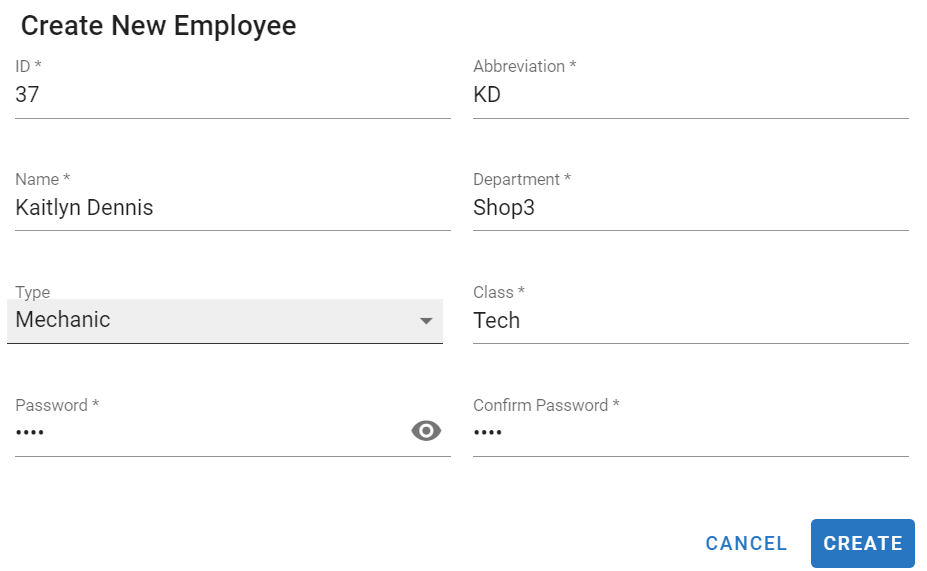
Enter the following information:
ID - This should be numeric and used like an employee ID number
Abbreviation - Initials or some other abbreviated identifier to use for the employee
Employee Name - First and Last
Department - The employee’s assigned department (limited to 10 characters)
Type - Choose between mechanic, driver, inactive, or office
Class - If using employee classifications, input the class the employee belongs to
Employee Classes can be set up via the Classic system. Refer to Employee Class for instructions
Password - The employee password is used only if technicians are required to enter a password to log into Paperless Shop. Passwords are required when the Password Prompt is set to YES in the "Paperless Shop" switch switch #15 in the Classic System Parameters.
Click Create
Link An Existing Employee to a Facility
Click the Add New Link
Click the Facility Field in the Add Facility Linked Employee Panel
Choose the facility the employee should be linked to
Click the Employee drop down to select the employee to link
Click Save
If the employee does not yet exist, you will click Create Employee. See previous section for those instructions.
Labor Rates
Add up to 5 Labor Rates associated with the user/employee. The shop may have a flat standard rate, an overtime rate, a holiday rate, etc.
The title/type of rate can be edited by clicking Edit Description, clicking in the corresponding field, typing in the new header, clicking the check mark, and then clicking done when finished with all fields.
The rate amount can be edited by clicking in the field below the labor header, typing in the amount, and then clicking the check mark to save the changes.
Productivity
Productivity information isn't required when adding new employees nor is it required if you aren't tracking employee productivity. However, if you wish to enter productivity history, you may do so.
Select the appropriate period radial button and enter in the historical values to get started. Productivity statistics are automatically updated as jobs are assigned to technicians, labor is posted to work orders, and end of period for mechanics is processed.
PO Approval
If using the PO Approval function in RTA, this panel is where the approval maximum amount can be entered for the specific employee/user.
Certificates Tab
The Certificate section stores the employee's driver's license information and training certifications; along with additional training certifications.
Use the Driver’s License Information panel to enter specific license information for the employee/user
Use the Certifications and Licenses panel to add additional certifications and training information
Click the add button
Enter the certification/training name, date, and expiration date if applicable
Click the +to add to the file (these can be removed by clicking the trash icon)
Custom Fields Tab
Use the custom fields tab to add any additional user-defined items to the file. Follow the process below.
Click Edit Description
Type in the header or field name for the data to be captured (For example: Mother’s Maiden Name)
Click the + button
Now you can edit the data value by click in the field below the description created
Type in the data and click the check mark to save the updates


