RTA Web - Asset Warranty Set Up
Save your fleet hundreds or thousands of dollars with warranty tracking!
Most new asset purchases, include bumper-to-bumper warranties. In addition, extended warranties can often be purchased to extend the coverage on the power train or transmission. Taking advantage of these warranties can save your fleet hundreds of thousands of dollars annually.
Trying to manually keep track of which assets have which warranties is a tedious task that's nearly impossible to keep straight considering the number of assets in the fleet, the number of warranties, the various expiration dates, etc.
That's where the Warranty Tracking feature in the RTA Fleet Management Software comes in. Once a warranty is set up, the RTA system handles the rest-there's no need for you to ever have to research whether a repair is covered under warranty; if it's covered, the RTA system will let you know.
Bumper to Bumper Warranty Set Up
Access an asset file through the Asset Master list
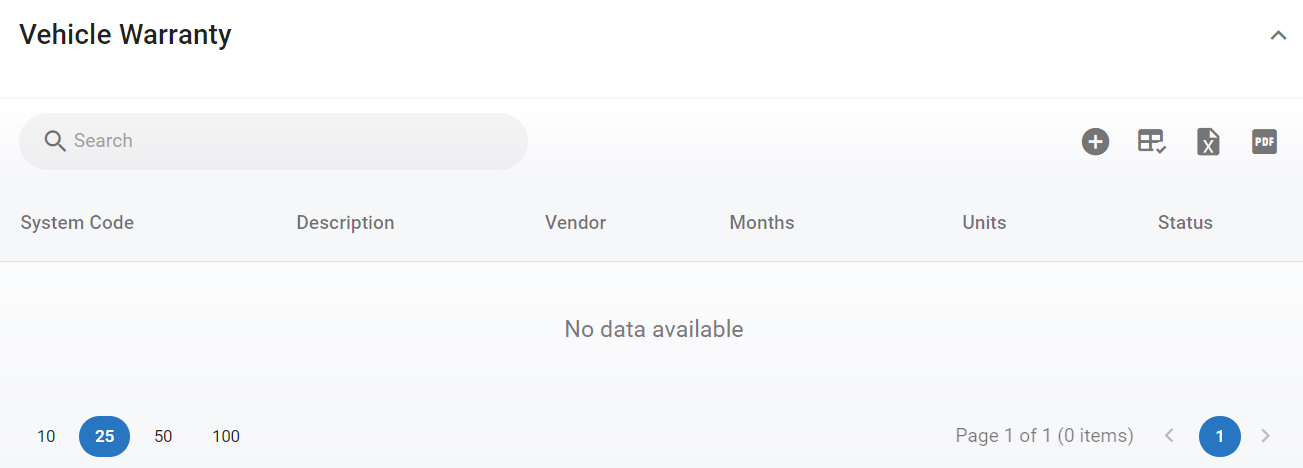
Under the Asset Management Tab, locate the Vehicle Warranty Panel
Click the + sign to add a warranty
Click the Bumper to Bumper Warranty button on the right side
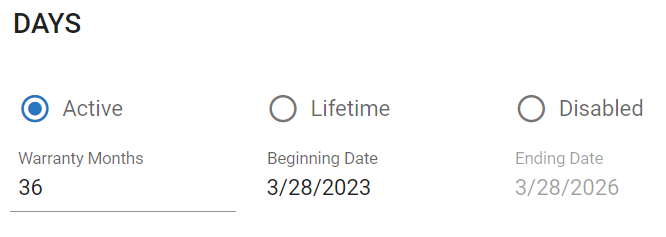
Under Days, add the following:
Click Active to add warranty days details OR click Lifetime, if the asset is covered for the life of the asset
Warranty Months - number of months covered under warranty
Beginning Date - the calendar date the warranty started (it will default with the current date, be sure to correct it)
Click the check mark to save the entry
Ending Date - this will prefill based on the warranty months and beginning date entered
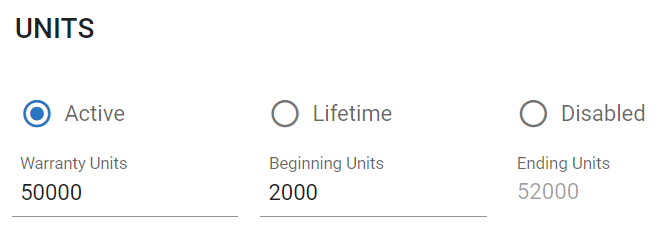
Under Units, add the following:
Click Active to add warranty unit details OR click Lifetime if the asset is covered for the life of the asset
Warranty Units - number of primary meter units for which the asset is covered under warranty
Beginning Units - unit/primary meter reading of the asset when the warranty began
Ending Units - this will prefill based on the warranty units and beginning units entered
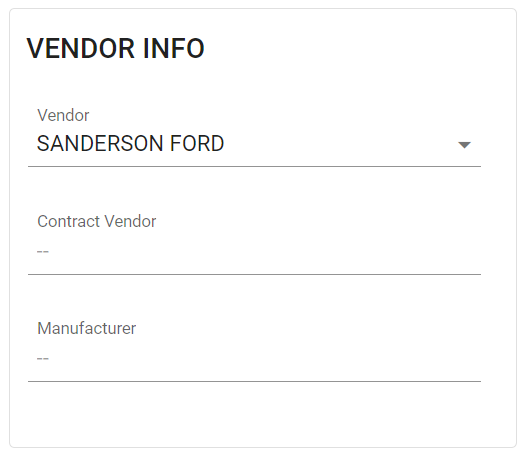
In the Vendor Info box, enter the following:
Select the vendor from the drop down with whom the warranty resides
Enter a contract vendor if applicable
Enter a manufacturer if applicable
Click Save
Set Up a Warranty Reminder PM
While the system will remind you when jobs are performed that are covered under warranty as jobs are added to work orders, it is also a good idea to ensure that the asset gets a thorough inspection prior to the expiration of the warranty so that work can be covered under warranty.
This is where the warranty reminder PM comes in handy. Setting this reminder up creates a one-time PM allowing the asset to be pulled into the shop, thoroughly checked, and transporting it to the warranty vendor for any work that is needed that is covered under the warranty prior to its warranty expiration.
You may need to create a new VMRS code for bumper to bumper warranties. Refer to VMRS Codes for information and instruction on VMRS code maintenance in the desktop version.
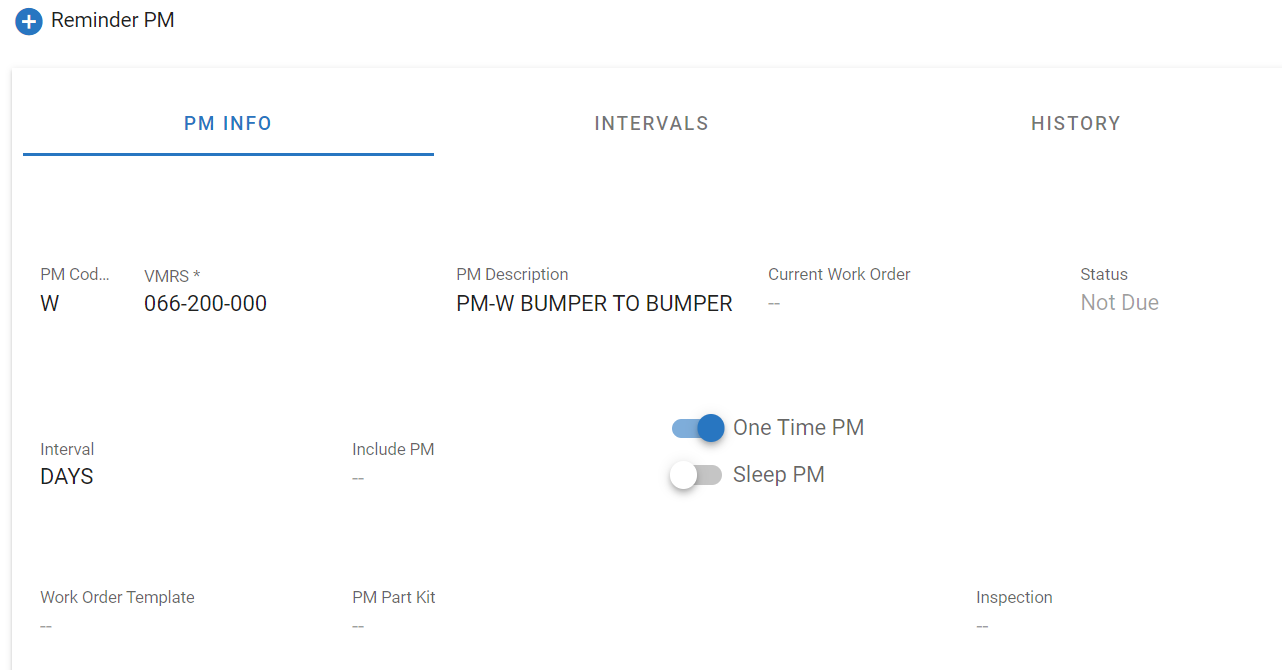
Under the Vehicle Warranty Panel, click the + for the Reminder PM
The panel will expand to display a PM window with three tabs
Under PM Info, enter the following:
PM Code - a warranty pm code will need to be set up via the VMRS Codes for use
VMRS - Select the appropriate PM VMRS code to be used for the warranty (This should be set up in the VMRS codes prior to use here)
PM Description - This will auto-fill based on the VMRS code entered
Interval - Select the interval for the PM reminder (For warranty, this is generally days)
Turn on the One Time PM option
Click Save
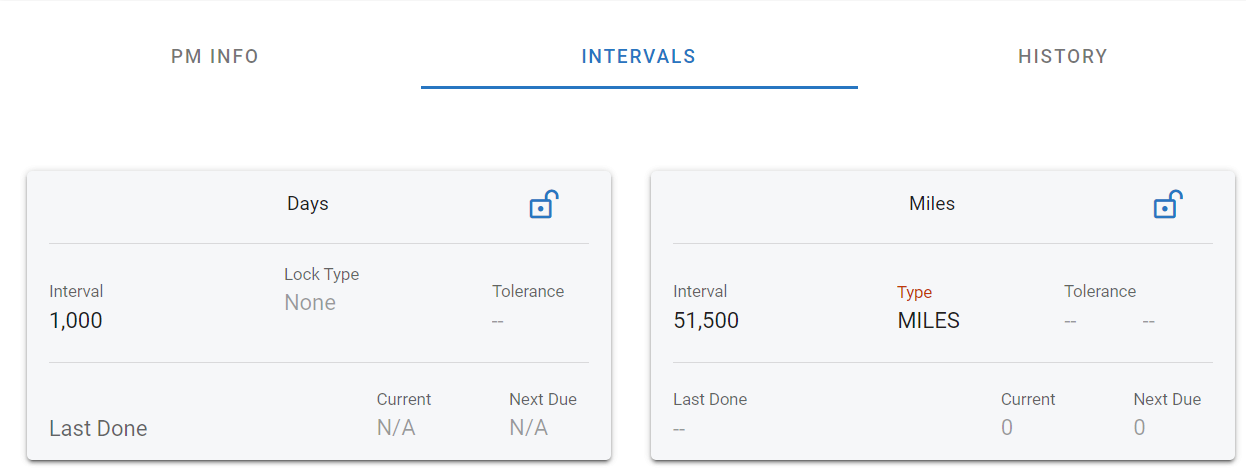
Click on the Intervals Tab (an interval for days and units will be completed)
Click the “Add New” button and enter the following:
Interval - enter the number of days to pass before the asset needs to be brought in for the thorough inspection
For example: if the asset’s bumper to bumper warranty is good for 36 months, then that would equate to about 1,080 days. However, give some lead time before the expiration to ensure the asset gets brought in and inspected with time to spare before the warranty expires
Click the check mark to save the entry
Type - The interval type will be days
Click the “Add New” button again and enter the following:
Interval - This time use the units/meter number
For example, if the bumper to bumper is good for 50,000 miles and the starting units were 2000 miles, then the warranty expires at 52,000 miles. Give some leeway and bring the asset in at 51,500 miles so there is plenty of room before the expiration
Click the check mark to save the entry
Type - This time use miles and click the check mark to save the entry
Extended Warranty Set Up
The set up of the extended warranty for assets is almost identical to the steps listed above for the bumper to bumper warranty and the warranty reminder PM.
Access an asset file through the Asset Master list
Under the Asset Management Tab, locate the Vehicle Warranty Panel
Click the + sign to add a warranty
VMRS Description - Select the appropriate VMRS Job Code related to the extended warranty area
For example: if the engine is under an extended warranty, one would likely use 045-000-000 as the job code to let RTA know that engine jobs are covered under warranty
Under Days, add the following if extended warranty coverage has a date or day-based duration:
Click Active to add warranty days details OR click Lifetime, if the asset is covered for the life of the asset
Warranty Months - number of months covered under warranty
Beginning Date - the calendar date the warranty started (it will default with the current date, be sure to correct it)
Click the check mark to save the entry
Ending Date - this will prefill based on the warranty months and beginning date entered
Under Units, add the following if extended warranty coverage has a unit/meter based duration:
Click Active to add warranty unit details OR click Lifetime if the asset is covered for the life of the asset
Warranty Units - number of primary meter units for which the asset is covered under warranty
Beginning Units - unit/primary meter reading of the asset when the warranty began
Ending Units - this will prefill based on the warranty units and beginning units entered
In the Vendor Info box, enter the following:
Select the vendor from the drop down with whom the warranty resides
Enter a contract vendor if applicable
Enter a manufacturer if applicable
Click Save
Be sure to set up the reminder PM for extended warranties as well. See instructions above.
Warranty Notification
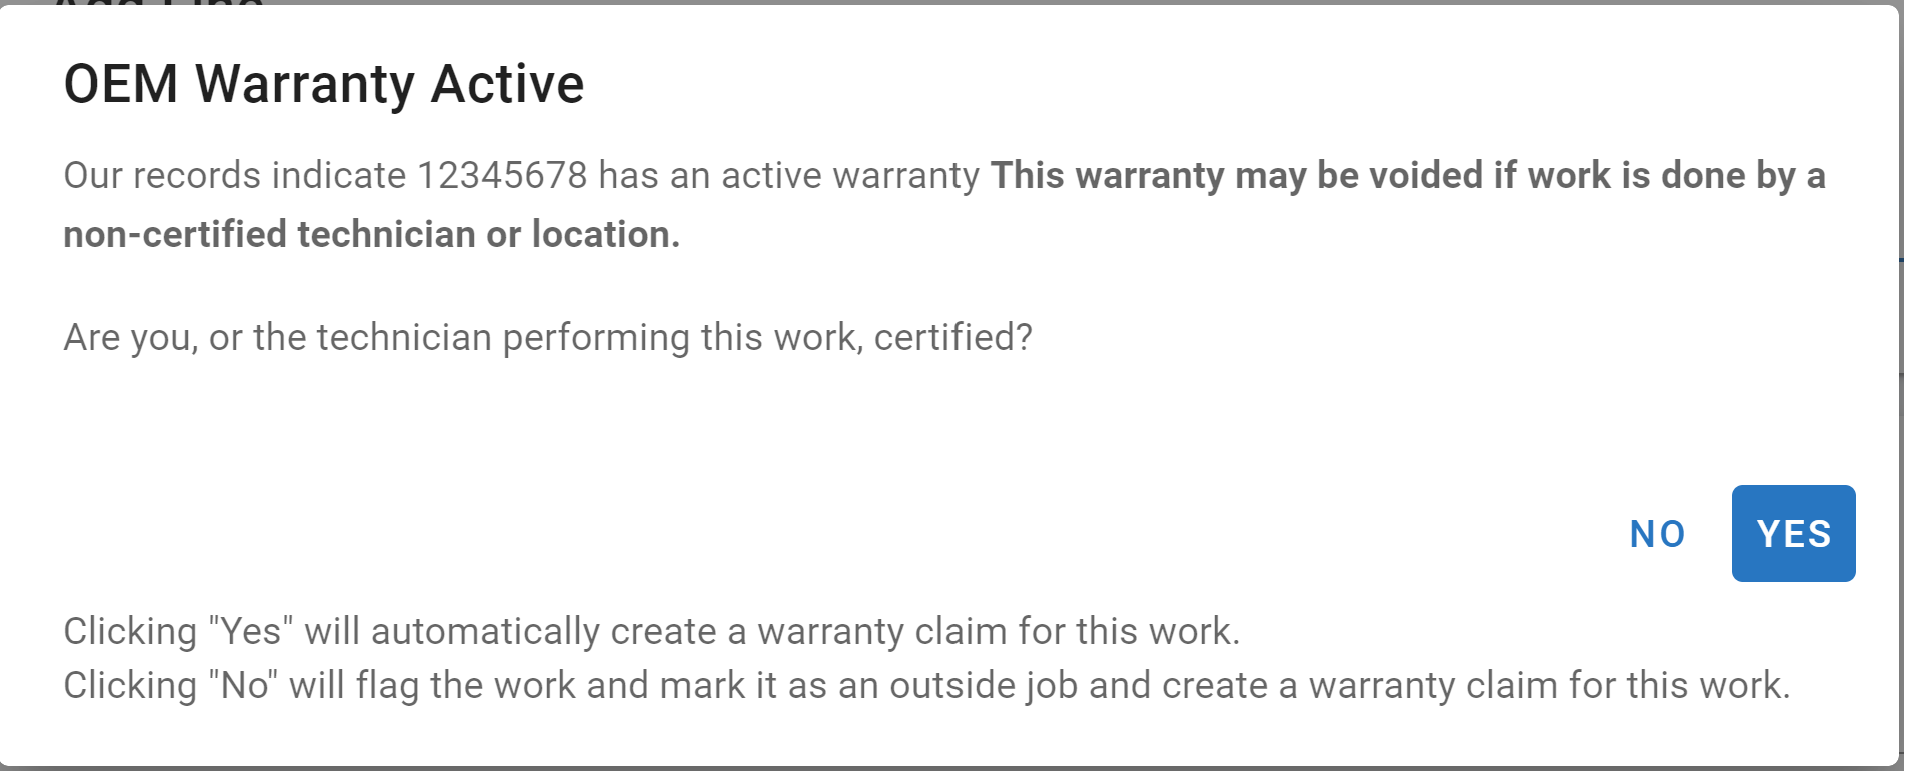
When OEM warranties are set up on an asset and a warrantied job is added to a work order there will be a pop up notification to assist in OEM warranty tracking.
You will be asked if the technician performing the work is certified to perform the warranty work. This is to ensure the warranty is not voided unintentionally.
By choosing “yes” RTA will create a warranty claim (If using warranty claims module) for the job and add the line to the work order.
By choosing “no” the line will be created as an outside line and the vendor completing the warranty work will need to be identified.
