
RTA Web - VMRS Code Maintenance
The RTA system contains hundreds of pre-defined Vehicle Maintenance Reporting Standard codes. The VMRS codes, sometimes referred to as job codes, contain descriptions and estimated hours for repairs and services performed in the shop.
VMRS codes are required when adding work order lines, vehicle warranties, and part warranties. They also play a big part in tracking mechanic productivity--the estimated hours are compared to the actual completion times.
The VMRS code may contain up to nine digits consisting of the following:
Three-digit major code - Used to indicate the area of the asset where the work is to be performed
Three-digit intermediate code - Used to indicate the type of job to be performed in the area
Three-digit minor code - Can be used to allow even more detail about the job RTA defaults to only use a 6 digit code and we recommend using this because it’s easy to use and provided the needed detail for tracking history
A system switch exists in Classic to change the setting to default to a 3, 6, or 9 digit code using switch #38 in the Main System Parameters
(e.g., 013-004-000)
VMRS Master List
The VMRS Master List displays the codes available for use with work orders. This list can be viewed as a whole or can be sorted/adjusted for specific views. The ability to sort and customize columns as well as to export the master list are available.
Refer to Master List Functions TOC for instructions.
This list has two viewable settings. Using the toggle next to the search bar, a user can view the list at the single level (only seeing the major code categories) or all (seeing the major code categories along with the subsequent intermediate codes within those categories)

Adding a VMRS Code
The VMRS code file is used by the entire system and is not facility specific. To add a VMRS code, do the following:
Click on the Admin area of the menu
Click on System Settings
Click on VMRS
Click on the + (add) icon in the upper right of the search banner
Enter a three digit major code (Use the major codes already available to determine where the job best fits)
Enter a three digit inter code (Be sure to choose a code that is not already in use in that area)
Enter three zeros for the minor code unless using a 9-digit code system
Enter a description for the code (This should clearly identify what the job is for)
Select Prompt for Condition if using condition codes with work orders
Select Allow on Schedule if using shop scheduler
Select Warranty if this job is covered under bumper-to-bumper asset warranties
Select Add Part VMRS to ensure that this code is also copied over to the Part VMRS file to be used for part warranty tracking

Enter time standards for the job (see info below)
Click Save
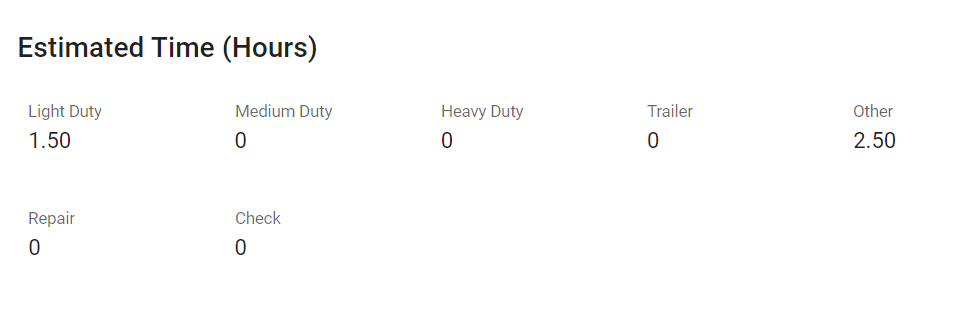
Estimated Time (Hours)
The remaining fields in the VMRS code record allow estimated times to be set to indicate how long checks, repairs, and replacements for this job should take. The estimates are used for computing mechanic productivity percentages and system flat rate billing.
Enter the estimated time for each asset type and click Save
Estimated times based on vehicle class can also be defined via a utility in Classic. Select Utilities > Link Class Code from the menu or clicking on the Link Class icon in the toolbar. Specify the class to define and then enter the estimated Check, Repair, and Replacement hours for that class.
How the System Determines Estimated Time for a Job
The system will use the repair type selected for a work order line to determine the estimated job time.
Repair Type | Est. Hours to Use |
CHECK | Check |
REPAIR | Repair |
REPLACE | Replace |
DAMAGE | Replace |
PM | Replace |
If “Replace” estimated hours are needed, the system will look to the asset’s size (Light, Medium, Heavy, Trailer, or Other) to determine which hours to use.
Editing a VMRS Code
Use extreme caution when making changes to existing VMRS codes if you have already added work orders, vehicle warranties, or part warranties in the system!
Changes can be made to existing VMRS description, warranty flag, and estimated hours. When the VMRS description is changed, reports will display the new description even if the job was performed prior to the change.
To edit an existing VMRS code, do the following:
Click on the Admin area of the menu
Click on System Settings
Click on VMRS
Locate the VMRS code to be edited and click on it
Click into the field to edit or add the check mark to the item to be changed
For field edits, be sure to click the check mark after the edit is done to save it
Deleting a VMRS Code
Use extreme caution when deleting VMRS codes!
If a report includes a deleted VMRS code, the system attempts to use the description from the header VMRS code. If a header VMRS code isn't found, **************** would print as the description.
To delete a VMRS Code, do the following:
Click on the Admin area of the menu
Click on System Settings
Click on VMRS
Locate the VMRS code to be edited and click on it
Scroll to the bottom and click Delete VMRS