
RTA Web Parts - Vendor Tab
Adding vendors is an important aspect of the part file. This tab displays the vendors where a particular part can be purchased from. Multiple vendors can be applied to a part file and arranged in the preferred order.
For example, Part 1234 may have Vendor A and Vendor B listed in the part file. Vendor A is listed as the primary vendor because that vendor has the best price or the fastest delivery time. Either way, Vendor A is the first choice for orders. Vendor B is a secondary vendor that can be used when necessary.
This article covers the fields found in the vendor tab.
Each vendor entered into a part file will be displayed within its own panel
Vendor hierarchy can be adjusted by drag and drop. For example, if Vendor 2 is desired as the primary, click and hold the vendor 2 line and drag and drop it above Vendor 1.
The label of primary and secondary on the line item will update automatically
New vendors can be added by clicking the Link Vendor option
Refer to Adding a Part for information on adding new vendors.

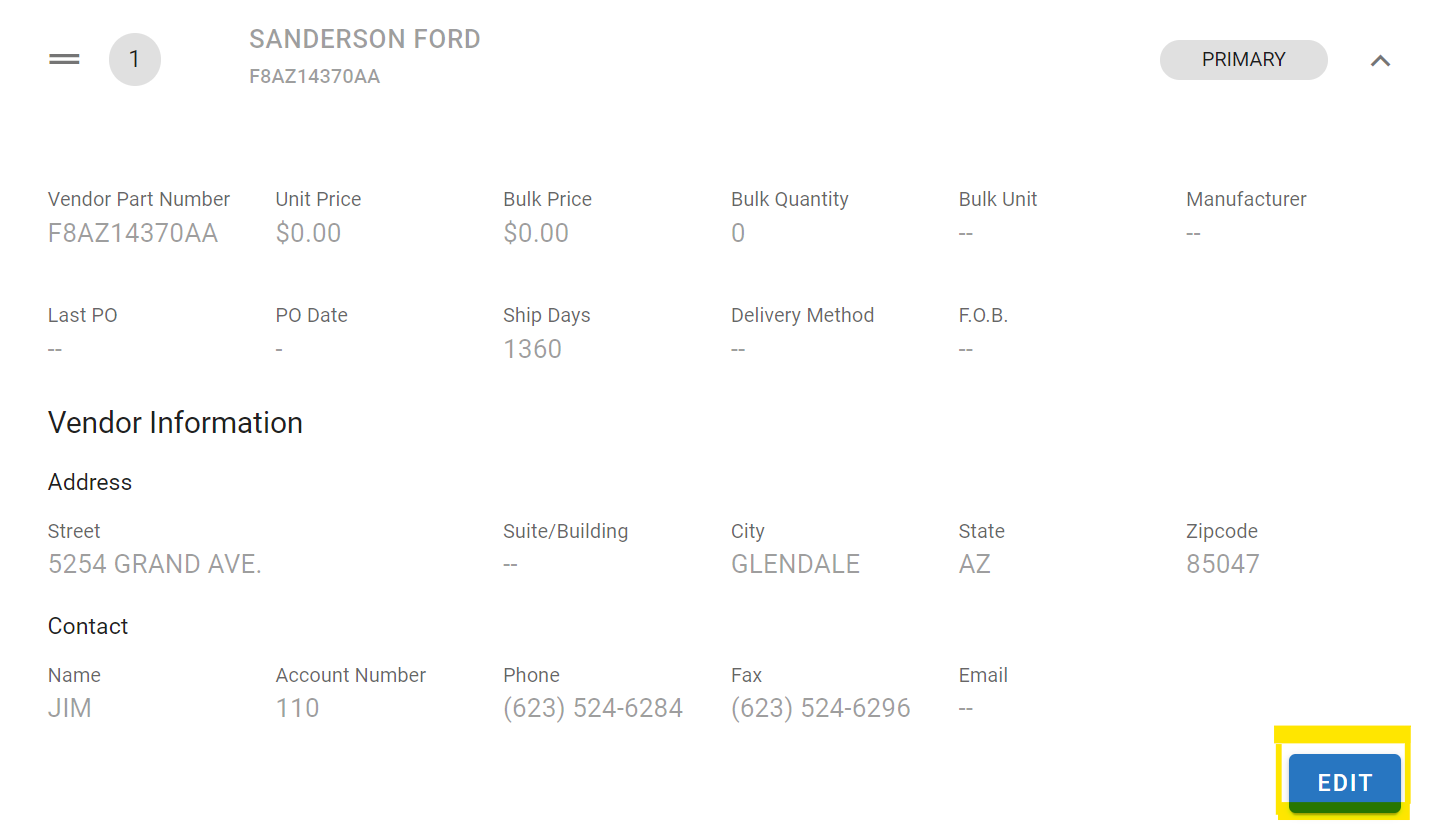
Click on any of the assigned vendor panels to view full vendor details
Clicking the “edit button” when the vendor panel is expanded allows the user to edit some of the vendor detail fields.
Denotes an editable field when linking a vendor to a part file
🔓 Vendor Position - Editable by drag and drop method explained above
🔓 Vendor Name - Click in the field and select the appropriate vendor from the list
Vendors must be set up in RTA before they can be used as a vendor for a part
Refer to Vendors for instructions on creating vendor files through RTA Classic for use in the Web Version.
🔓 Vendor Part Number - Also referred to as Alt Part in the Purchase Order file which refers to a cross-reference for the part file that allows the association of the part file across multiple numbers Click in the field and update the part number as necessary (This does not change the primary file part number. The vendor part number is the number that the particular vendor uses for the part and may or may not be different than the primary part number used when adding the part to RTA)
Vendor Designation - Check or uncheck the primary designation box (Primary will always be in position 1)
Price - This is not editable in RTA Web as the Unit Price entered in the Primary Panel is the price per unit by the primary vendor
🔓 Bulk Price - Some parts may be purchased in bulk each time. For example, brake pads may be purchased from the vendor in cases of 20. In this scenario, enter the Bulk Price as the total dollars charged for the bulk order (what the total case costs)
🔓 Bulk Quantity - If using bulk pricing, enter the quantity of individual units included in the bulk unit. Using the example above, the count would be 20
🔓 Bulk Unit - If using bulk pricing, enter the description of the bulk unit type. For example, case, pack, drum, barrel, etc.
🔓 Manufacturer - A specific manufacturer can be entered here
Last PO - Will display the Purchase Order number associated with the last purchase order for this part if using Purchase Orders within RTA
PO Date - Will display the date of the last Purchase Order associated with the last purchase order for this part if using Purchase Orders within RTA
Ship Days - Will display the average ship days for this part from this vendor. This is calculated by RTA based on the time when the part was ordered and when it was received if using purchase orders in RTA
Delivery Method - Will display based on the information received with the Purchase Order if using POs in RTA
F.O.B. (Freight On Board) - Denotes the location when you (the buyer) take ownership of the shipment
Vendor Information Section:
Address for Vendor
Contact Person for Vendor
Address and Contact are editable in RTA Classic. Refer to Vendors for instructions on accessing in RTA Classic.