Axle and Tire Position Instructions
Initial Setup
Things you’ll need to do before using the module:
Add Axles to vehicles.
Add Tire Positions to Axles.
Configure Inspection Sequence.
Set up Tire Widgets on Dashboard. (If needed)
There are no system switches to configure but you will need to first configure your Axles and Tire positions before you can enter tire readings for PSI and Tread Depth (or TD for short) taken in a specific order on a vehicle.
Setup System Switches (SSM)
To enable the ability to create and edit Tire/Axle configurations, under the Misc.1 system switch tab, #49 “Tire and Axle Module” should be set to YES.
Setup User Security (SUM)
New user switch added under Tires; 181 – Edit Axle/Tire Configuration. This switch controls the ability to edit the PSI, PSI +/-, and the minimum tread depth in the vehicle configuration screen. With the switch unchecked users can ‘view’ the Axle/Tire Configuration screen but all fields will be ‘grayed out’ and un-editable.
This does not apply to the global program “glaxlcfg.cob” since management will be the only ones with access to this program.
Configure Vehicle Axles and Tire Positions
In the Vehicle Master Screen a Tires tab has been added. On this tab will be displayed a history of the last 10 readings. From this tab you may also chose the Update button which will bring up a window and allow for entry of readings for this vehicle only. Also on this tab is a history button, this will prompt for a date range and display a history report based on that date range for the current vehicle only.
Tracking current Tire Tread Depth can be found in the Tire File Maintenance F1 lookup list. Use https://docs.rtafleet.com/rta-manual/net-f1-lookup/conditional-formatting/ to set triggers for your tire replacement, as desired.
There is a stand-alone multi-vehicle TD/PSI entry screen that runs outside of RTA. This will allow for PSI and Tread Depth readings taken from multiple vehicles to be entered one at a time and update the history of those vehicles.
Each Vehicle can have a maximum of 8 axles and a maximum of 24 tire positions.
Configuration setup can be done one vehicle at a time or to a range of vehicles by Class per Facility.
Single Vehicle Axle/Tire configuration:
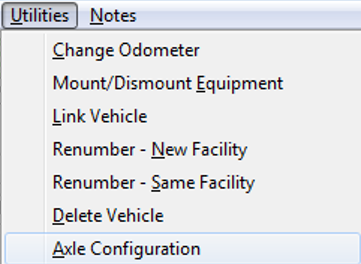
From the Vehicle Master Screen (MVM) top Menu Options bar, select Utilities>>Axle configuration (UA)
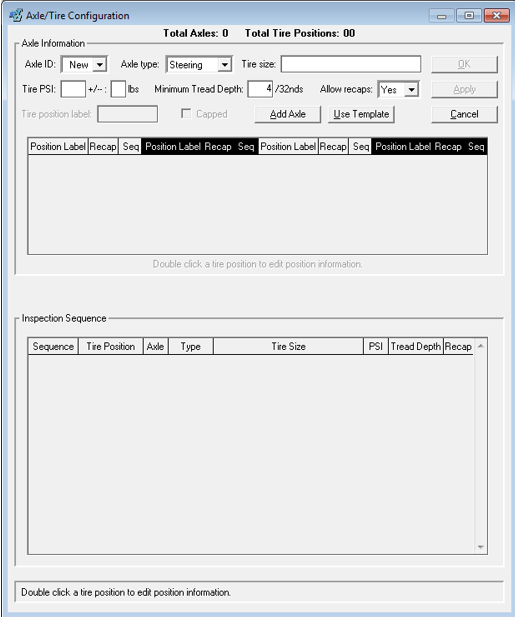
You must first create an Axle then create tire positions, one axle at a time. You can either manually enter in the configuration or select Use Template button to select a previously configured vehicle to use as a template for this vehicle. The Use Template feature will be covered later.
For initial setup or adding additional axles, select New from the Axle ID pull down menu.
After each Axle is set up it will then be selectable from the pull-down as a number 1, 2, 3…up to 8 Axles per vehicle
The first axle type by default is Steering. You can also select Drive, Tag, Pusher, or Dead from this pull down menu.
Enter the Tire Size.
Enter the expected Tire PSI and acceptable variance +/-.
Enter the minimum acceptable tread depth in 32nds of an inch; the default is 4/32nds.
Lastly, select whether or not Recapped tires will be allowed to be mounted on this axle. This is notational information only. The default for all axles is Yes.
Now click on Add Axle, the cursor will now be in the Tire position label field.
Type in a label for each tire position, up to 6 characters.
To note whether or not the currently mounted tire for this position is a “capped” tire, put a check in the box, if not leave it blank.
Then click Add Position to create the tire position on the axle. Continue adding positions until all positions are filled for the current axle. Up to 4 positions can be entered per axle.
You can now add additional axles and tire positions by selecting New from the drop down menu and follow steps 1 through 11 until all axles and positions are entered. Up to 8 axles can be added per vehicle.
Select Apply to save this information to the vehicle. Clicking “OK” saves all and exits the Master Vehicle screen.
Editing single Vehicle Axle/Tire configuration:
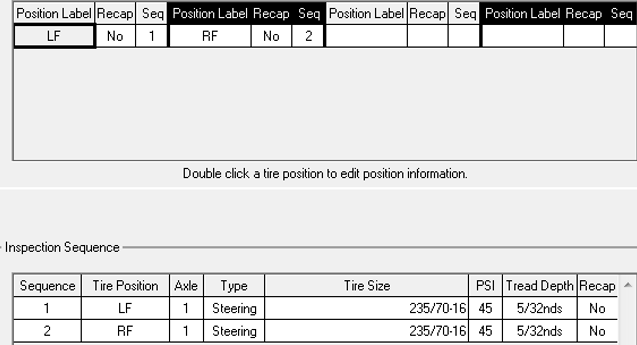
After entering axles and tire positions the Axle/Tire Configuration screen will now show editable position information in the middle of the screen and Inspection Sequence on bottom.
To edit the Position Label information one axle at a time, double click the Position Label field and type when the letters are highlighted.
To change whether or not a Recapped tire is mounted in this position, double click the Recap field, it will toggle back and forth between Yes and No.
The Seq field must be changed in the Inspection Sequence area at the bottom of the screen.
The Inspection Sequence section lists all Tire Positions and Axles in the sequence they were entered.
Simply Drag and Drop the records in the order you wish to enter data.
At any point in editing the records the Apply to saves the information to the vehicle. Clicking OK saves all and exits the configuration screen.
Deleting Axles or Tire configurations:
You can delete an axle or a tire position by selecting Delete Positionto delete a single tire position or Delete Axle to remove an axle and all associated tire positions.
Note: If a vehicle has TD/PSI readings and you delete an axle or tire position, ALL history of TD/PSI readings for that Axle or tire position will be deleted from the Tire History Report (MVT) as well.
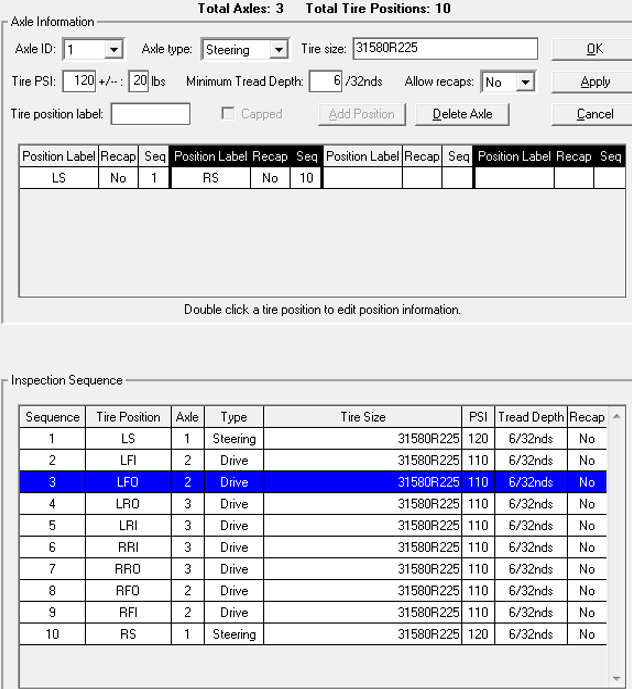
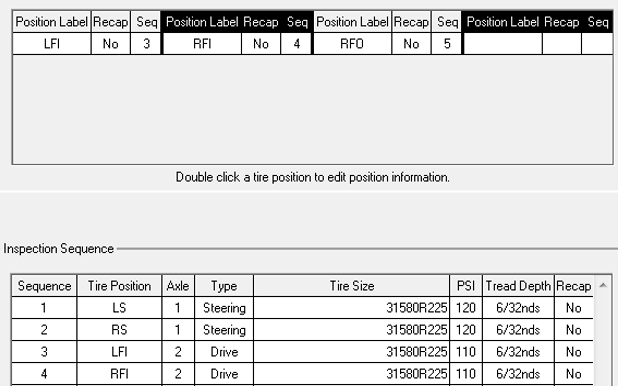
In the example below, the “Inspection Sequence” shows that there are 3 axles and 10 tire positions. This is because a Peterbuilt was used as a template for a Toyota Prerunner.
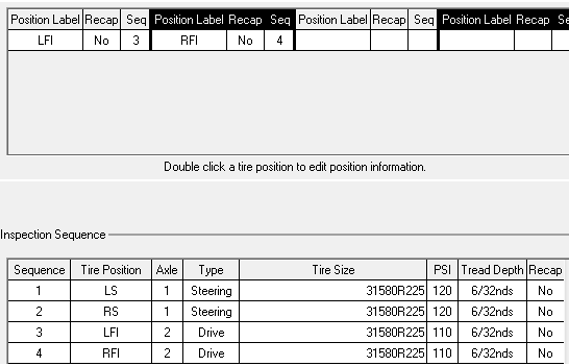
To make this template accurate we will be deleting Axle #3 and its associated tire positions then deleting tire positions LFO and RFO from Axle #2. This will leave 2 axles and 4 tire positions.
To delete Axle ID #3, select 3 from the Axle ID pull down list.
Click Delete Axle .
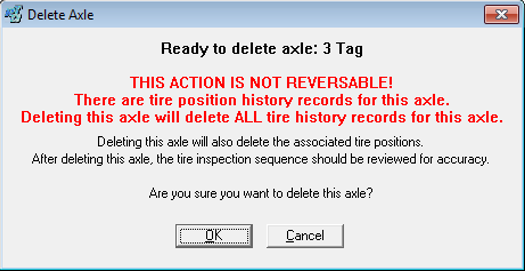
If a vehicle has TD/PSI readings, you will get the following warning dialog box;
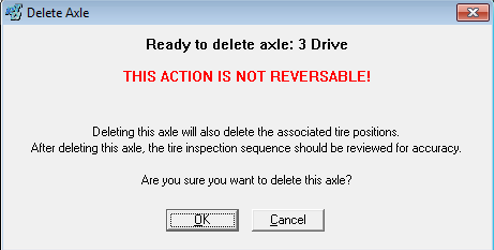
This is to warn you that by selecting OK, the deletion is an immediate action, deletes all history of TD/PSI readings for this axle, and to check the Inspection Sequence after the deletion is complete. This is because all tire positions and Tread Depth/PSI readings associated with the 3 Drive axle will subsequently be removed from the inspection sequence and from the Tire History Report (MVT).If a vehicle does not have any TD/PSI readings, you will get the following warning dialog box;
This is to warn you that by selecting OK, the deletion is an immediate action, deletes the axle and all current positions, and to check the Inspection Sequence after the deletion is complete.We now have only 6 tire positions after starting out with 10 because we deleted axle #3 and its 4 tire positions.
If you need to re-add axle #3, tire positions, and inspection sequence you will have to manually re-enter the information.To delete tire positions LFO and RFO from Axle #2, select Axle ID 2 from the pull down list.
Tire position information for Axle #2 is now displayed in the middle area of the screen.
Select LFO by clicking on it. The background will turn grey and the field will be outlined in black.
Now click Delete Position.
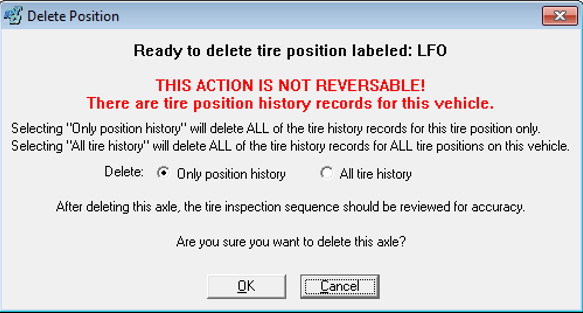
If a vehicle has PSI/TD readings , you will get the following warning dialog box;
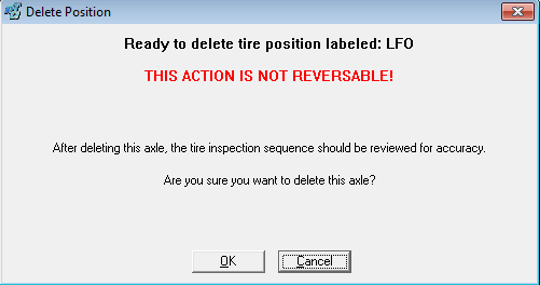
Here we can select whether or not to delete TD/PSI reading history for this tire position (LFO) only or for all tire positions on all axles for this vehicle in the Tire History Report. Select the option you need. As with the axle deletion warning, this is to warn you that by selecting OK the deletion is an immediate action and to check the Inspection Sequence after the deletion is complete. This is because the LFO tire position will subsequently be removed from the inspection sequence (See image in step #12).If a vehicle does not have any TD/PSI readings, you will get the following warning dialog box;
As with the axle deletion warning, this is to warn you that by selecting OK the deletion is an immediate action and to check the Inspection Sequence after the deletion is complete. This is because the LFO tire position will subsequently be removed from the inspection sequenceWe are now left with tire positions LFI, RFI, and RFO tire positions and 5 tire positions displayed in the Inspection Sequence area.
Remove tire position RFO the same way we removed LFO, we now have 2 axles and 4 tire positions.
Select Apply to save this information to the vehicle.
Clicking OK saves all and exits the Vehicle Master screen.

