How to add vehicles in RTA Inspect
Vehicles are a core component of RTA Inspect and are required to be able to perform and inspections.
There are two options for adding vehicles:
Link from existing RTA Desktop vehicles
Directly add vehicles in RTA Inspect (not tracked by RTA Desktop)
Link from your Fleet Management Software
For the next step on adding Inspections, please see:
Creating an Inspection in RTA Inspect
Linking vehicles is meant to be as painless as possible.
Log into the RTA Web App
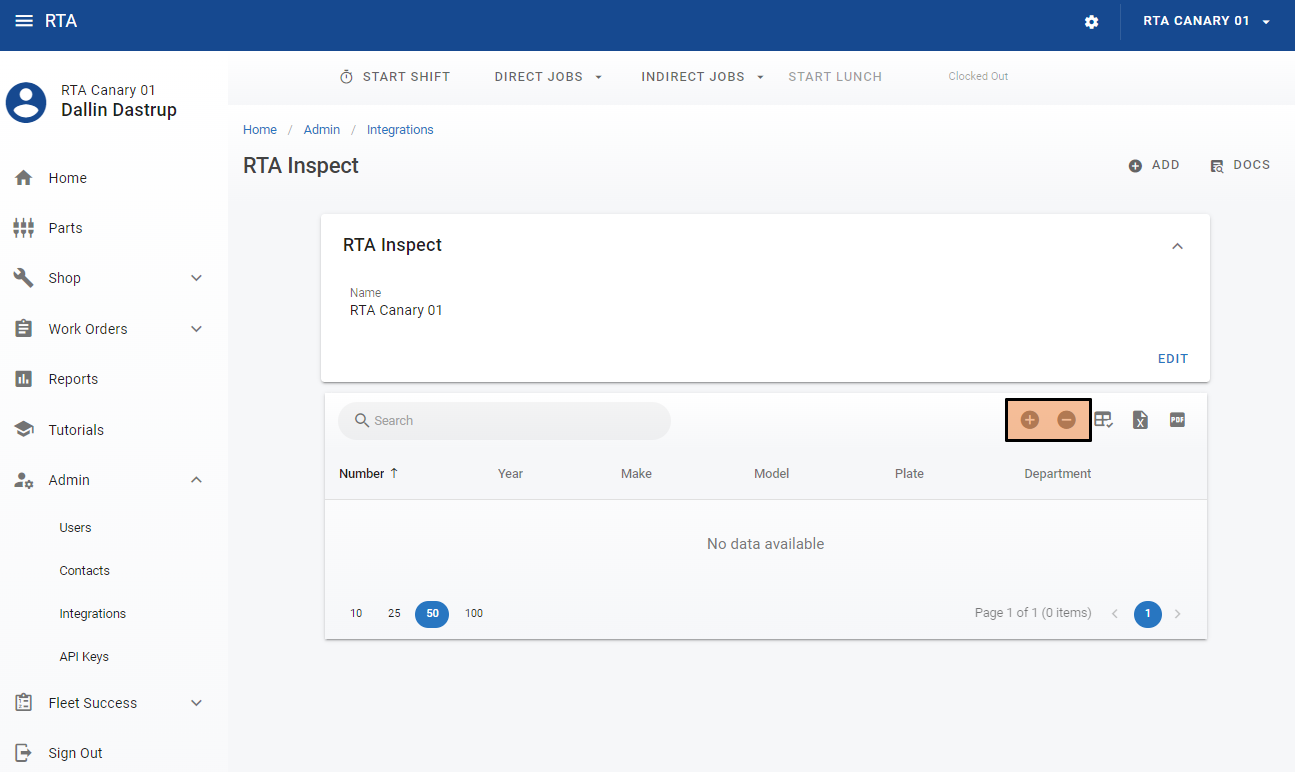
Click the “Admin > Integrations” link in the left sidebar, then select “RTA Inspect”
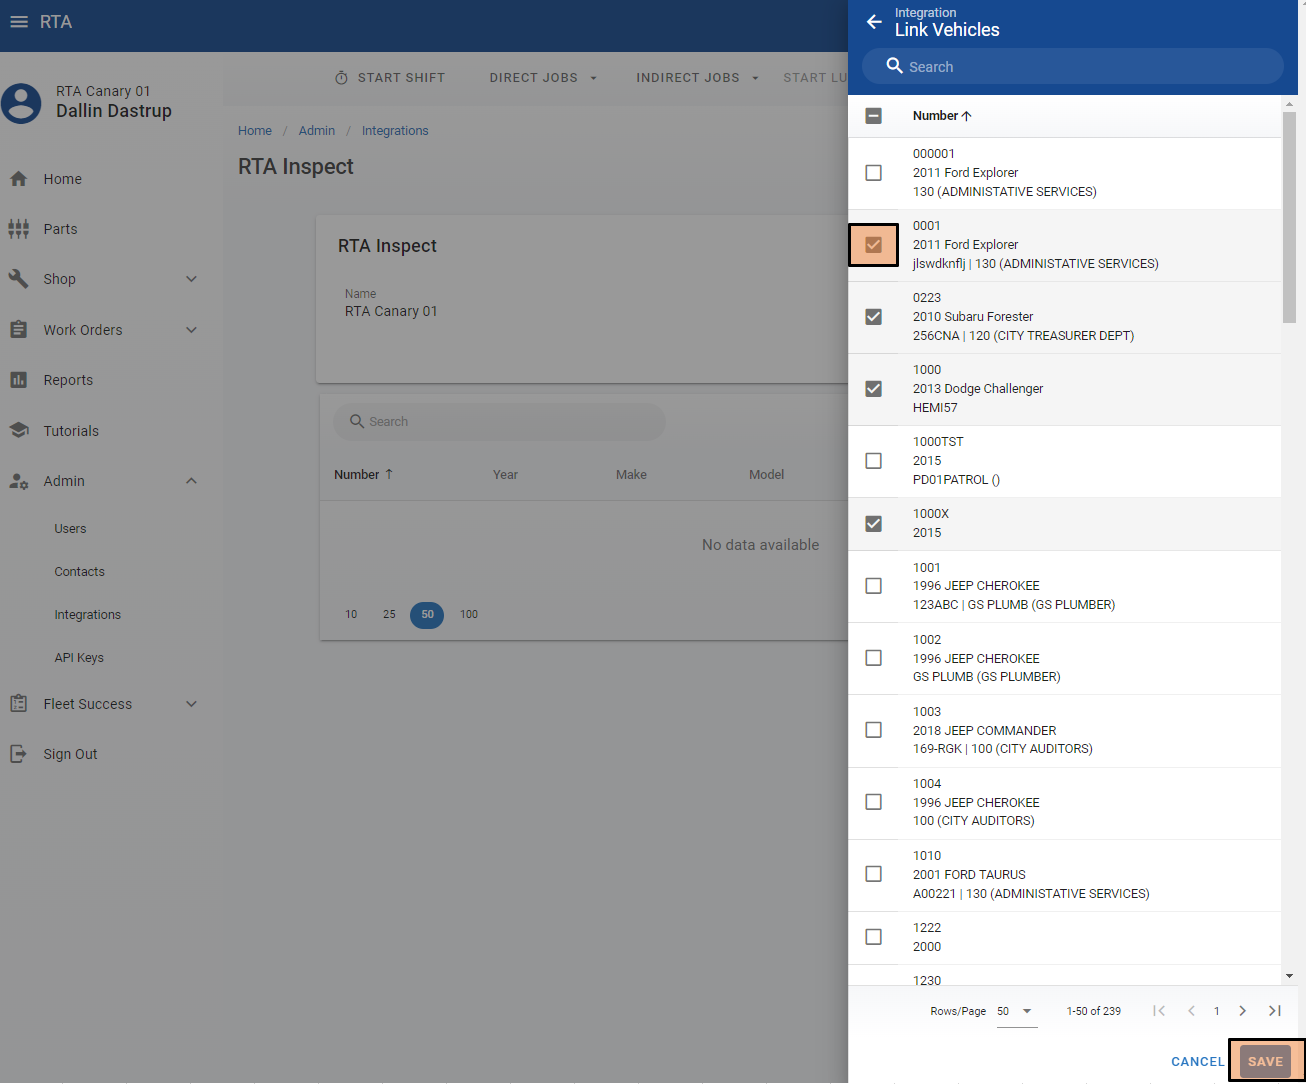
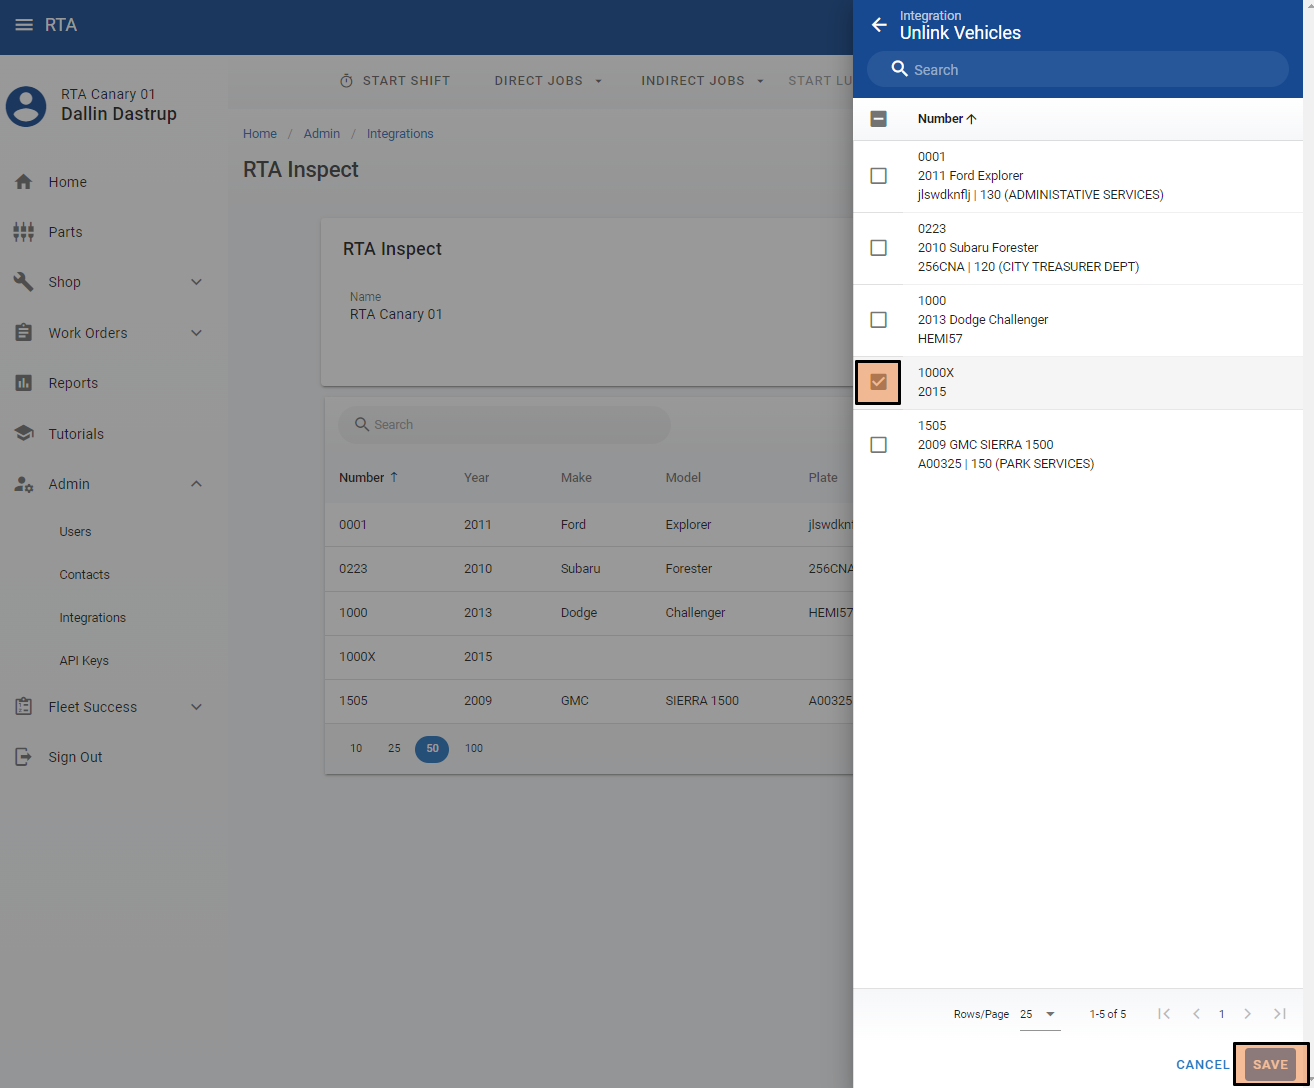
To Link your vehicles, click the “+” button in the top-right and check the boxes of the vehicles you wish to link to RTA Inspect. Click Save. You can also Unlink vehicles with the same process through the “-” button.
After hitting save, the vehicles you have selected will begin to be created in RTA Inspect.
That’s it! If you refresh the page after some time, you should see the list of your linked vehicles.
For the next step on adding Inspections, please see:
Creating an Inspection in RTA Inspect
Directly add vehicles in RTA Inspect
Note: Only account owners can add vehicles in RTA Inspect.
Open the RTA Inspect Inspect app on your phone or tablet device.
At the bottom of the screen, tap **Fleet**.
Next, tap **Vehicles** in the middle of the screen.
Tap the **Add** button in the center of the screen or the ➕ button in the upper right of the screen.
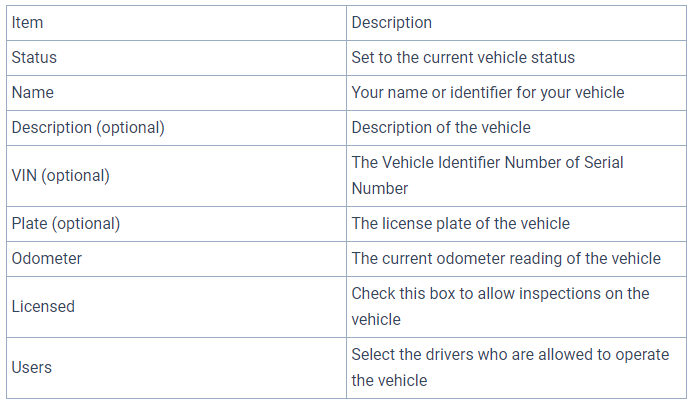
Enter the following information:
Once all vehicle data has been entered, tap the Save button.
For the next step on adding Inspections, please see:
Creating an Inspection in RTA Inspect
Common Reasons for Links to Fail
You have exceeded your license limit in RTA Inspect. In RTA Inspect, you are only allowed a certain number of licensed vehicles, so syncing vehicles over the limit will result in failures. No fret! You can simply “Unlink” a vehicle by checking its box within the “Unlink” button. Once that is done, a license should be freed up, and you can try to link again!
Duplicate VIN numbers on vehicles that were manually added to RTA Inspect. When linking over, if you have preexisting vehicles in RTA Inspect, RTA tries to match vehicles based on VINs. If RTA Inspect has 2 vehicles with the same VIN, the integration will fail to link because simply, we don’t know which RTA Inspect vehicle that RTA vehicle maps to!
Issue Sync
Issues found from RTA Inspect will be automatically added to the Driver Reports module in the vehicle’s home facility that they were reported on, and update the vehicle odometers accordingly. As status changes are made (for example, the issue is assigned to a work order in RTA), the integration will call back to RTA Inspect and update its status accordingly (such as “In Progress”). That’s it! Nothing else you need to do, except do your work and let RTA and RTA Inspect handle the rest!
Currently, it could take up to 15 minutes for issues to be synced both ways. So, if you expect something to be there, wait for at least 15 minutes, and then reach out to RTA Support (support@rtafleet.com) for troubleshooting.
Did you know that you can have the component and location split out and digested by RTA by using a special convention? Simply use a pipe “|” character, and the left side will go into the component field in RTA, and the right side will go into the location field!
For example, take “Fender | Passenger Side”. It would end up like this in RTA:
Component: Fender
Location: Passenger Side
For additional questions, please see RTA Inspect - Formerly Xerifleet


