System Codes
There are multiple customizable fields/identifiers in RTA that effect various Master screens and modules. Most of these features exist within the RTA System Codes (SSY).
To access the System Codes, as they have to do with system-wide configuration, a level 3 password is required. To launch the System Codes, go to System > Setup System Switches > System Codes (SSY)
System Codes Tabs
Available Lines: 9
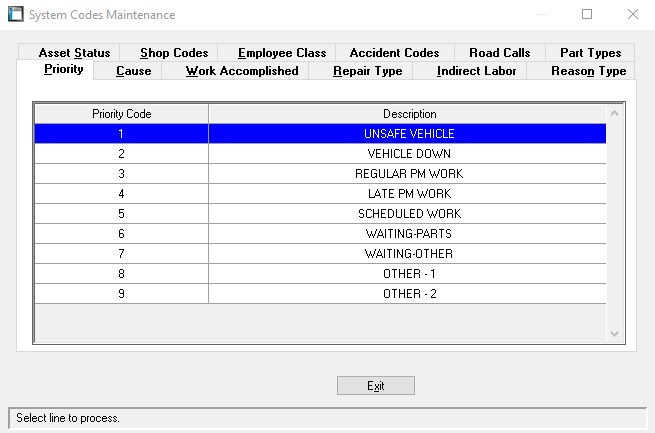
Priority codes set within the Work Order master screen, in the top-information box.
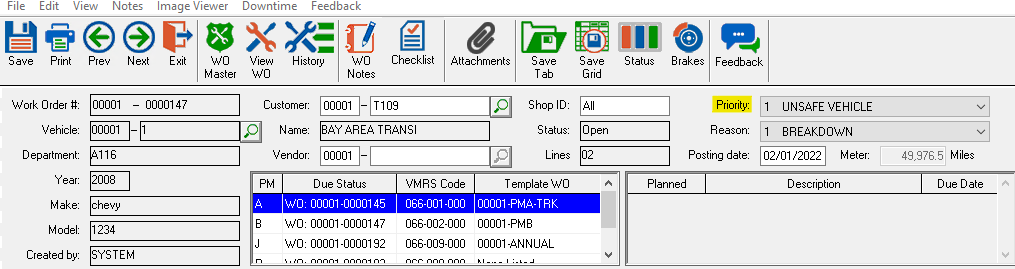
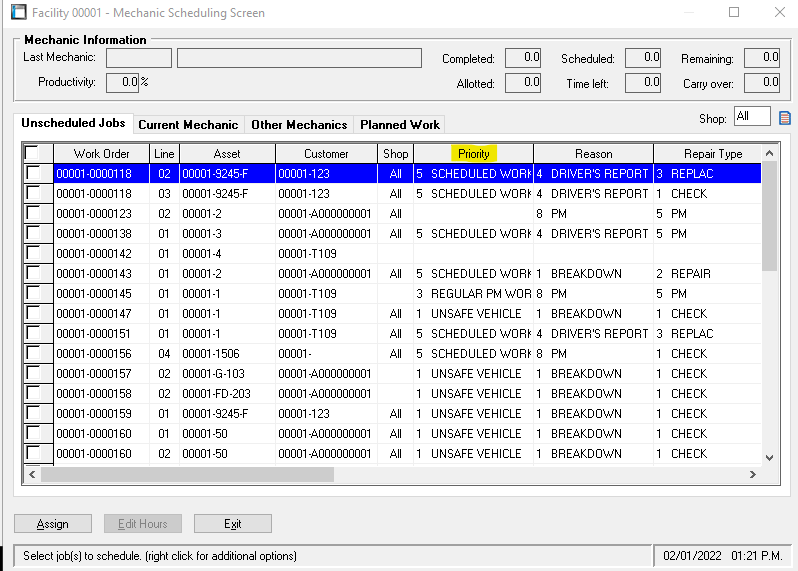
The set priority code can be used when determining F1 filters in the Work Order lookup screen (WW > F1). Setting Priority also transfers to Paperless shop when Supervisors are assigning Scheduled Jobs (WPS).
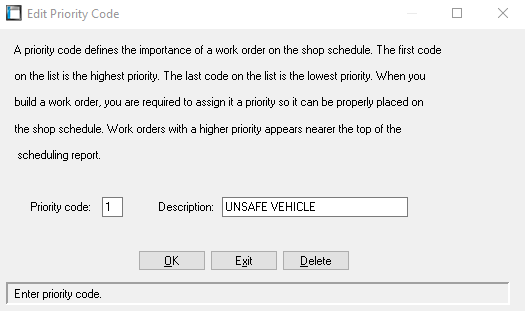
Editing the Priority Line option:
Double-Click the line you want to Add/Edit. Se the Priority Code # and set the Description as desired
Available Lines: 676
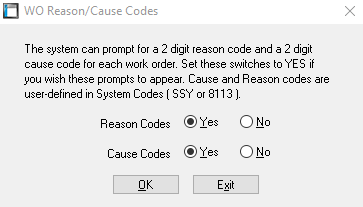
Cause Codes are used within the Work Order Line, in the Add/Edit line information box, and dictate the cause for the particular Work Order Line.

Use of Cause codes can be toggled with RTA System Switch Main# 39
Cause Codes can be added to the Work Order F1 lookup list as a filter option. I can also be included within the Advance Report Viewers RNWW, RNWL and RNWT
Editing the Cause Code option:
Double-Click the line you want to Add/Edit. Se the Cause Code with a 2-letter sypher and set the Description as desired
Available Lines: 99
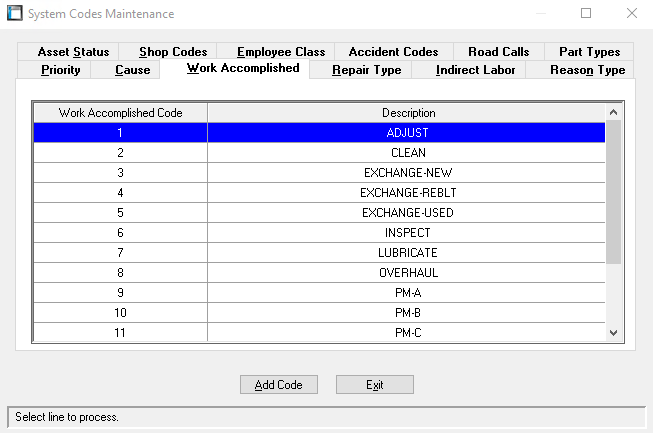
Work Accomplished Codes are an option which, when closing a Work Order Line, an accomplishment code can be attached. Accomplishment codes define the type of work that was completed by the mechanic on the job.
These codes are assigned at the Add/Edit a Work Order Line screen, and can be toggled from the System Switch Main# 40:
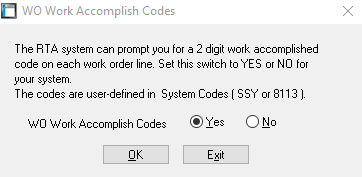
In order to define the Work Accomplished code, there must be labor applied to the Work Order Line. If labor is applied and the WO is closed, the following screen will prompt (both in WW and in Paperless Shop)
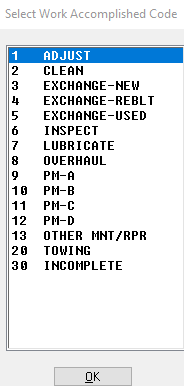
Work Accomplished Codes can be filtered and viewed through the Advanced Report View RNWL after a Work Order Line has been closed and assigned an accomplish code.
Editing the Work Accomplished codes
Double-click the line in question and set the code with up to 2-digits. Update the Description. Click OK to Save.
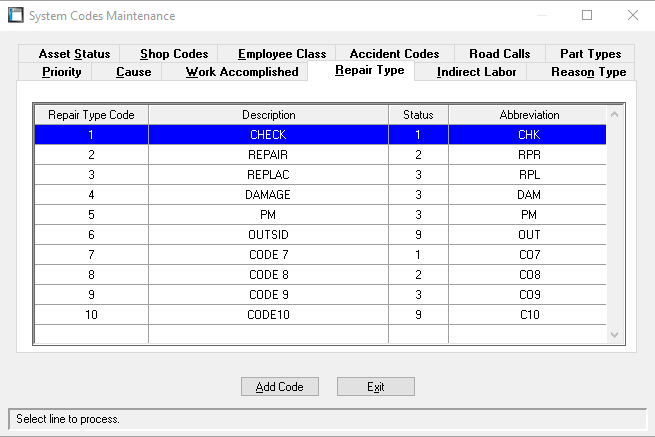
Available Lines: 99
The Repair Type code defines the type of Work Order repaid. The Repair Type status along with the asset difficulty/size factor (MVM, MRM) determines the estimated hours to complete the job.
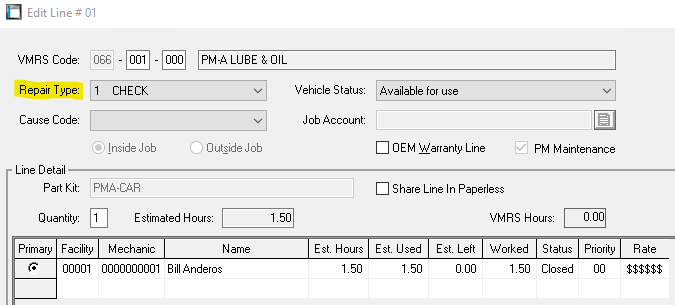
When a Work Order line is created, the repair type can be added beneath the VMRS code. If the repair type is edited, the estimated time can change. For example, checking a Battery will likely be faster than replacing one. Repair type can also be used to identify jobs that have been created due to a PM or Pre-trip inspection under the type: PMRPR (PM Repair). This tells the user that the work was found as a preventative measure vs. reactive. You caught an issue before it became an issue.
Editing the Repair Type codes
Double-click the Repair Type Code and update the Repair Code, Description, Status and Abbreviation
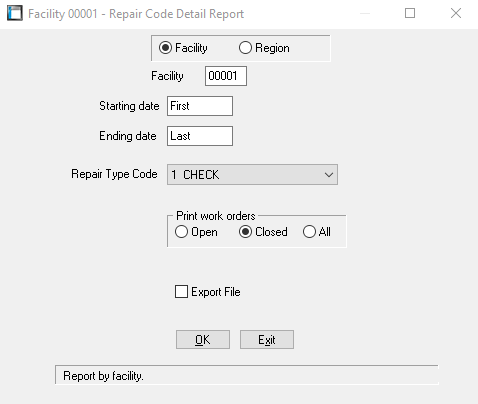
Reporting on Repair Type
Repair Type, as it’s a work order line detail specific to each line, can be pulled on the Advanced Report Viewer RNWL. There is also a Work Oder report, the Repair by Work Type (ROR), which is easily Exportable if the need is required. See a list of Work Order Lines by the type of repair that was done. This report is run by date and facility.
Available Lines: 10
Indirect Labor codes are used with the Paperless Shop module of RTA and can be labeled from the System Codes. These codes are identified by a 2-digit code, description and up to 2 abbreviations.
Indirect codes are used when a mechanic is on the clock, but not currently posting their time towards a particular vehicle or work order line. These codes can be used to properly track mechanic accountability against downtime.
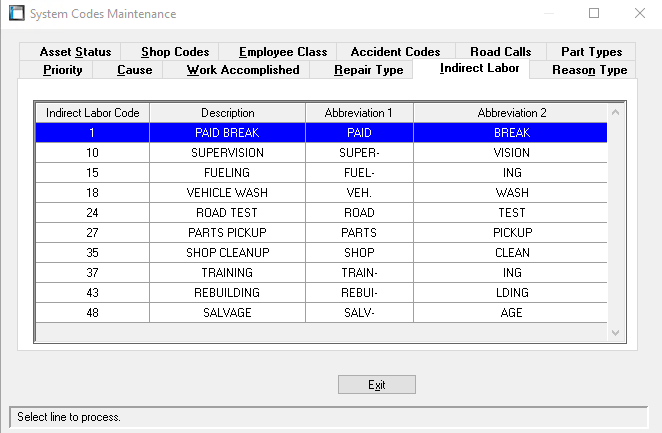
Once a mechanic is logged into Paperless shop, one of the options is titled “Indirect Labor”. When clocked onto an Indirect job, a mechanic’s productivity will fluctuate between direct, indirect and downtime. These details can be reviewed on the Indirect Labor Report (REI).
Additional Details: Indirect Labor https://docs.rtafleet.com/rta-manual/paperless-shop-module/assigning-indirect-jobs/ https://docs.rtafleet.com/rta-manual/paperless-shop-module/logging-indirect-hours/
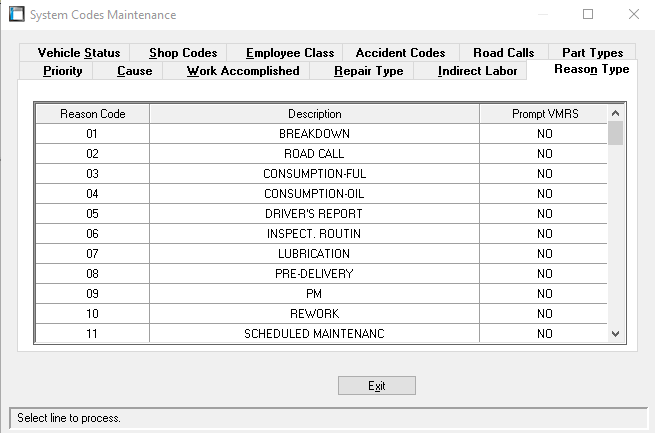
Available Lines: 99
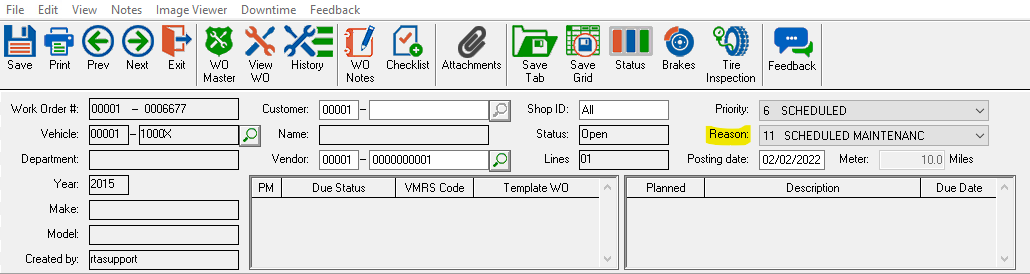
The Reason Code defines the reason the repair was requested
Reason Codes are selected from the Work Order master screen, top-menu. The use of the Reason code can be toggled with System Switch SSM Main# 39

Editing a Reason Code
Double-click the line in System Codes and update the Code# with a 2-character code (can be any combination of letters and numbers) and a description. You can also determine if a VMRS code is required when performing this reason of work, such as a Breakdown requiring a specific Job to run a diagnostic.
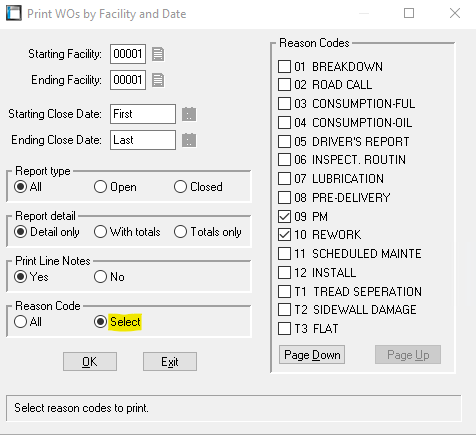
Reporting with Reason Codes
Using the WO’s by Facility report (WLF), the user can identify a date range and see a list of work order within those dates with a particular (or multiple) reason codes. Choose “Select” in the Reason Code parameter and check which Reason Codes you want to view in the list. Then click ‘OK’ to run the list.
Available Lines: 99
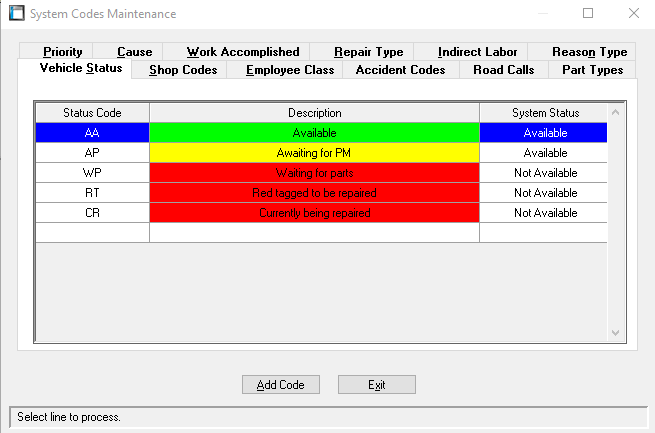
The Vehicle Status essentially sets the availability of each asset so that, at a glance, any user can see the overall current health or position of the asset. These statuses are set between Available and Unavailable, and can be color-coded specific to your operation’s preferences (text color and background color).
Vehicle Statuses are set through either the vehicle master file (MVM) or through the Work Order lines. This preference is identified from System Switch SSM Misc.1 #39. If the switch is set to Automatic, then the true vehicle status will be identified through the Work Order screen. When all work order lines are completed, the vehicle status will ‘Automatically’ reset to Available. If the switch is set to Manual, then the only way to update the true vehicle status will be in the vehicle master screen (MVM), under the General Tab.

Editing a Vehicle Status code
Double-click the status you want to edit, or select “Add Code” to create a new status option. Enter the Status Code as a 2-character code (Any combination of letters or numbers). Input the valid Description and choose, if desired, to update the text and/or background color with the color-wheel button right of the Description, then identify if this status is to be known as Available or Unavailable. Click ‘OK’ to save.
Reporting with Vehicle Status
Vehicle Status Reports: https://docs.rtafleet.com/rta-manual/vehicle-inventory/vehicle-status-(va)/ https://docs.rtafleet.com/rta-manual/motor-pool/vehicle-status-report/
Status is also an available option in both the vehicle’s F1 lookup list and the Vehicle Advanced Report Viewer (RNVV)

Available Lines: 99
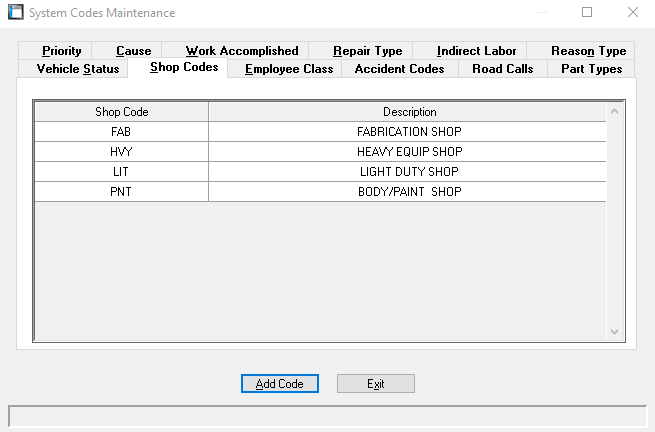
Shop codes are used to indicate which subdivision of your shop is assigned to do the work. You are prompted for a shop code when creating new work orders. Entering the Shop Code is found on the Work Order top-menu.
The use of Shop Codes is allowed/toggled through System Switch SSM Misc.1 # 17
Editing Shop Codes
Double-Click the code in question, or select ‘Add Code’. Enter a Shop, which can be up to 3-letters, then a Shop Description.
Reporting with Shop Codes
Shop codes can be used in the Work Order F1 Lookup screen to isolate or filter Open/Closed/Partial jobs within each shop. If unlisted in the column headers, click on “Edit Columns” in the top-menu and find Shop Code. Double-click to add it to the end of your list.
Available Lines: 99
The Employee Class codes are options to separate and identify the types of Employees within RTA. They can be as simple as Technician or Driver, or they can be broken down into tiered mechanics including specialties or title descriptions.

The Employee Class is set within the Master Employee File (MMM), which is locked behind a Level 1 password, as it can contain sensitive information.
Employee Class can be listed as a column header in the Master Employee F1 lookup list.
https://docs.rtafleet.com/rta-manual/getting-started/employees/
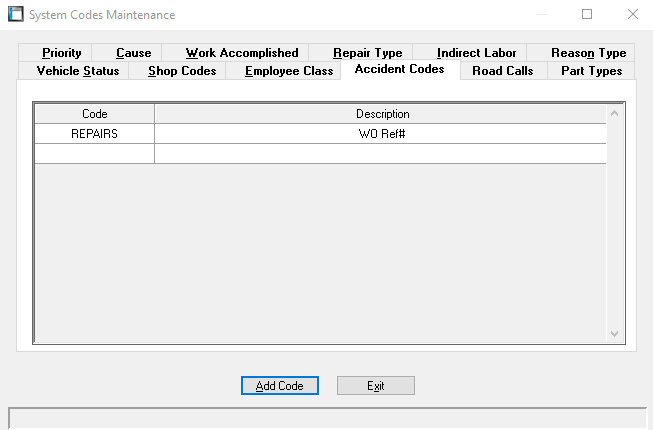
Accident codes are used by the https://docs.rtafleet.com/rta-manual/accident-tracking-module/. You are prompted for a shop code when creating new work orders. Many accident codes may be defined in the system. A few of them have been pre-defined; you can edit them and/or add new codes as needed.
Available Lines: 99
Part Type codes allow you to expand the built-in part types by specifying your own part types and descriptions. You must assign your new part type to place it's cost into an existing cost bucket when the part is used so that it's cost can be captured and recorded when used by a vehicle. The built-in part types may not be edited (A C F G H O P R T). When adding or editing part records in the Part Master Screen (MPM), you specify which part type it is, which drives the cost of parts used into specific categories and allows subtotaling inventory by part type.
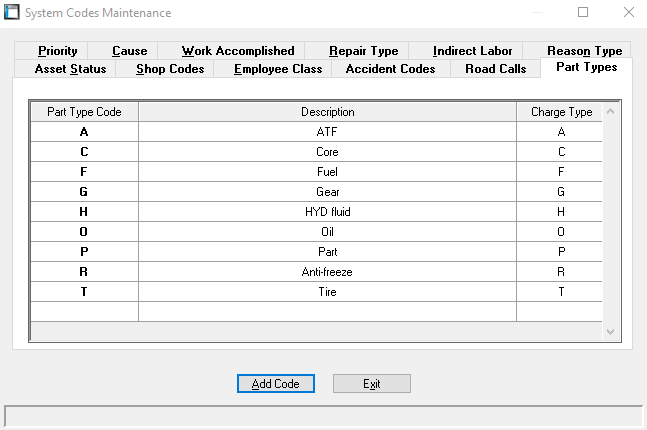
Adding a new Part Type can be done by either double-clicking an empty line, or select ‘Add Code’. Input the Part Type code as any available 2-character Letter and Number combo. Add the Description and input the Charge Type. These codes can then be added to a part file.
Part Types can be identified in the Parts Master File (MPM) F1 lookup list, where they can be sorted and filtered.