RTA Web - Creating a Motor Pool Reservation
Starting a new reservation can be done in two ways.
Use the create icon from the Reservation Search List after navigating to Reservations under the Motor Pool Menu option

Click the New Reservation button while in another reservation to immediately jump to the next creation

Once the create process has started, there are a few fields that are required for a reservation.
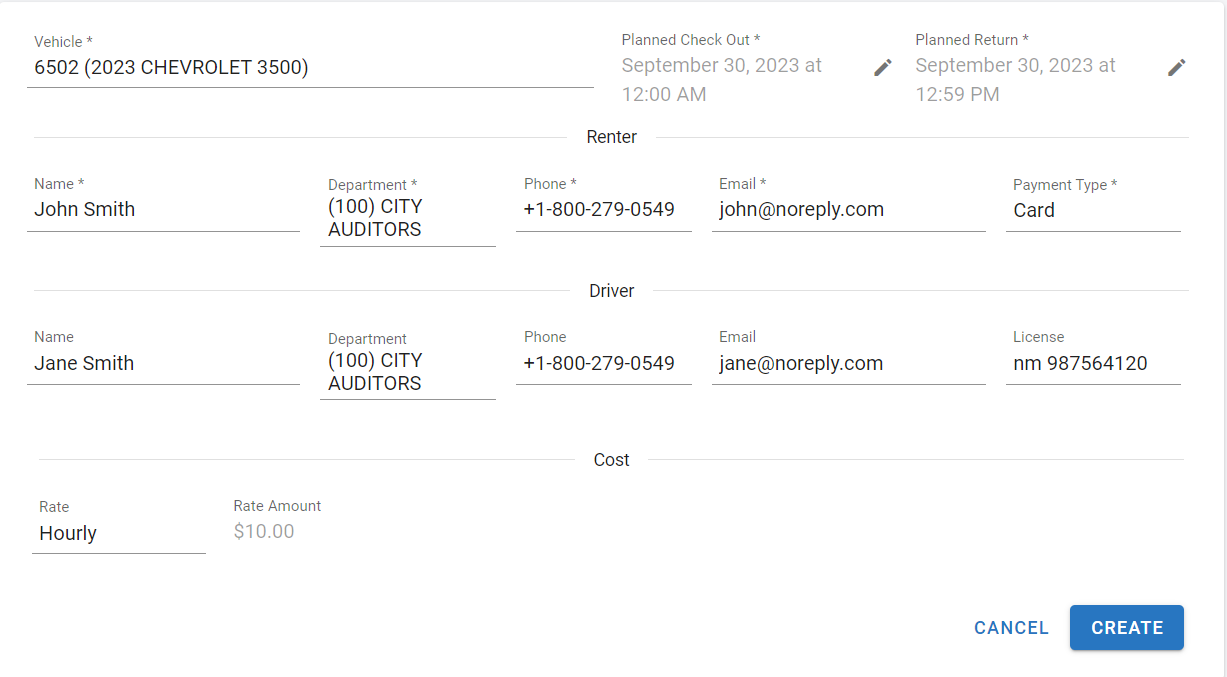
Enter the Vehicle Number for the reservation
The vehicle needs to be set up as part of the motor pool prior to adding to a reservation. Refer to Motor Pool Assets for information on setting up assets to be part of motor pool if necessary
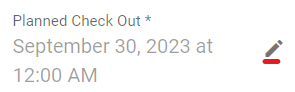
Click the Edit Pencil for the Planned Check Out field and enter the date and time the renter/driver will be checking out the asset
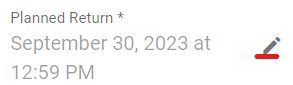
Click the Edit Pencil for the Planned Return field and enter the date and time the renter/driver will be returning the asset
Enter the Renter’s information in the Renter section. This includes the renter’s name, department they are associated with, phone number, and email
The Department is associated with created departments in your RTA software. If the department does not exist in your Department list, it cannot be used and would need to be added to your software. Refer to Departments for information on Departments in your software.

Enter a Payment Type for the reservation. Select one of the 4 options available
If you do not do payments for reservations, select any type
Your RTA software does not use this field and it is notational for the records

Once all required items are entered, the user can click Create or move on to the additional fields and click Create after all fields are entered
Additional Fields includer the below:
We do recommend entering the reservation rate at this stage to save the time later but it can be added later
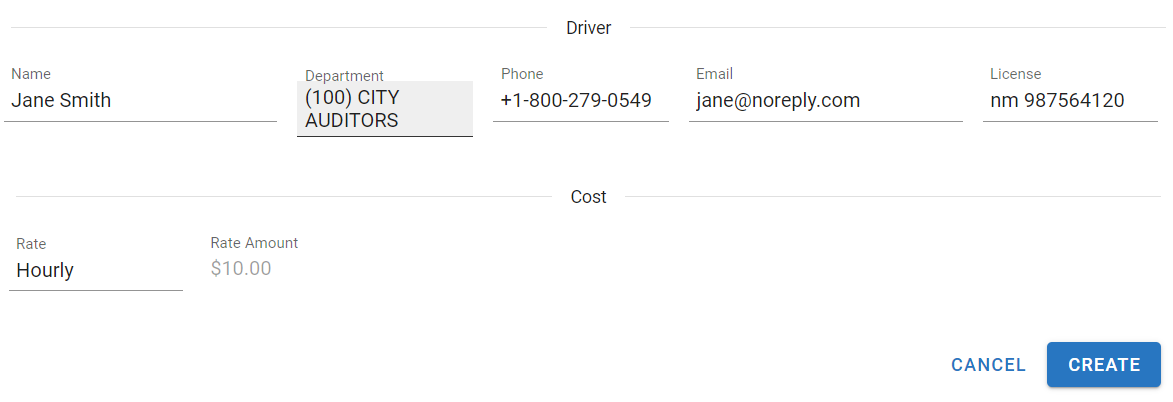
Driver Information can be entered if different than the renter
Reservation rate can be entered at this stage
Be sure to click Create after all fields are entered to save the reservation.
For instructions on managing the reservation including the actual check out and return, refer to the Managing Motor Pool Reservations section of the documentation.