Maintenance & Repair System Draft
Cause: A Cause Code defines the cause of failure for an asset. You can add up to 99 cause codes.
Click to review cause code set up
From the main menu, select Maint. & Repair> Settings> Cause
A. Select the  NEWCODE Box

B. Add a Code # and Description

C. Click save and the new cause code should display in your code list

Indirect: Indirect Labor Codes define the work a mechanic is doing when not performing labor on a work order. You can add up to 10 indirect labor codes.
Click to review indirect labor code set up
From the main menu, select Maint. & Repair> Settings> Indirect Jobs
A. Select the  NEWCODE Box
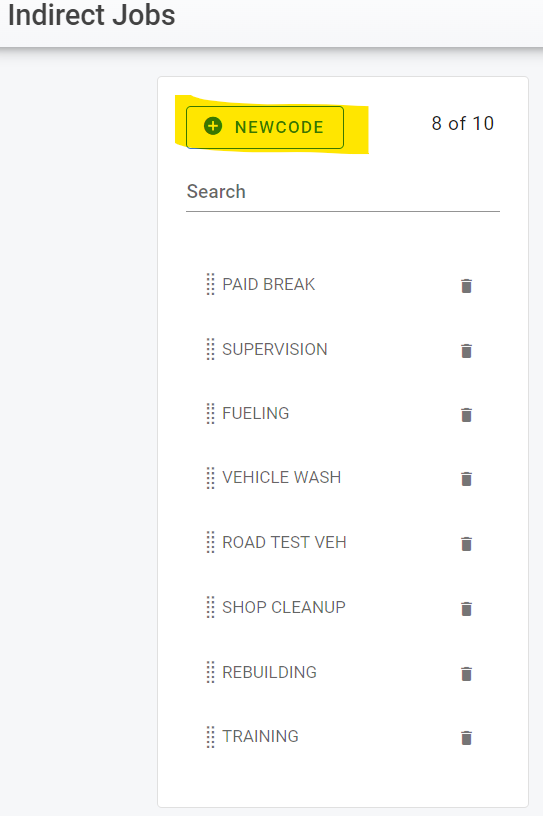
B. Add the indirect code # that is available and a description

C. Click Save and the new indirect code should now display in your code list

Reason: The Reason Code defines why a repair was requested. You can add up to 99 reason codes.
Click to review reason code set up
From the main menu, select Maint. & Repair> Settings> Reason
A. Select the  NEWCODE Box

B. Add a code number and a description for the code, you also have option to check the Prompt VMRS code
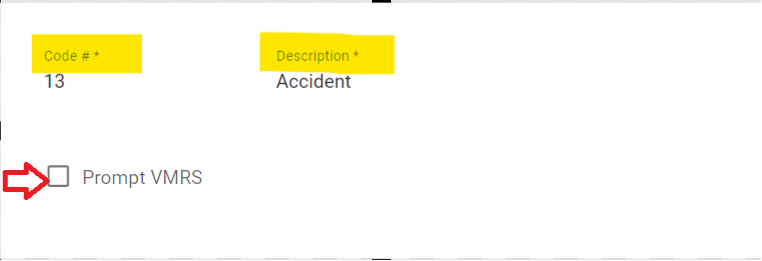
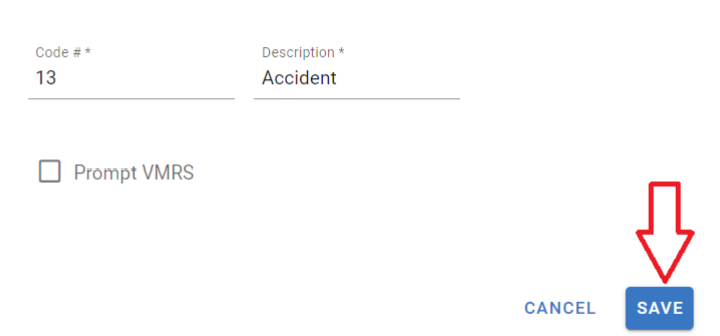
C. Click Save and the new reason code should display in your code list
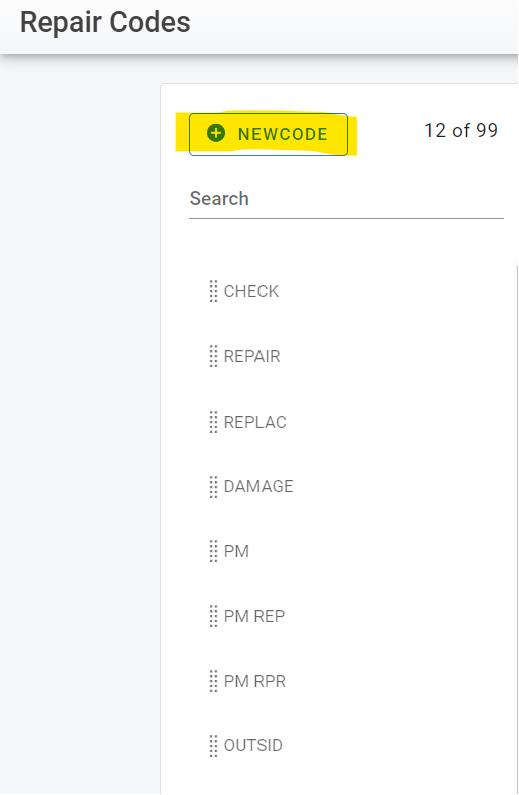
Repair: These codes define the type of Work Order Repair that will be conducted, it also helps to determine the estimated hours to complete the job. You can add up to 99 repair codes.
Click to review repair code set up
From the main menu, select Maint. & Repair> Settings> Repair
A. Select the  NEWCODE Box
B. Add a code number, a description and an abbreviation. You also have the option to check the disabled box
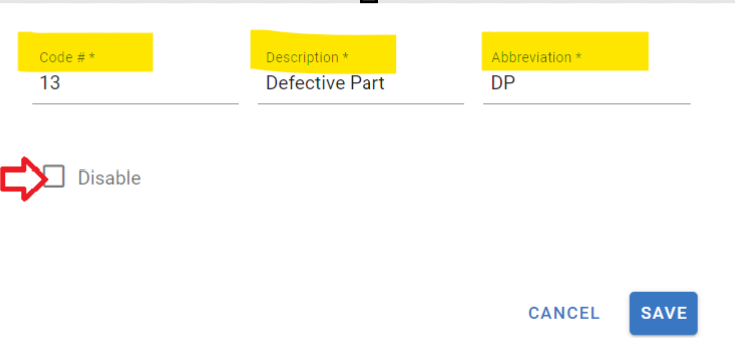
C. Click save and the new repair code should display in your codes list

Shop: These codes are used to define Shop areas. If you have multiple shop areas which you would like to track, they can be set up here. You can add up to 99 shop codes.
Click to review shop code set up
From the main menu, select Maint. & Repair> Settings> Repair
A. Select the  NEWCODE Box
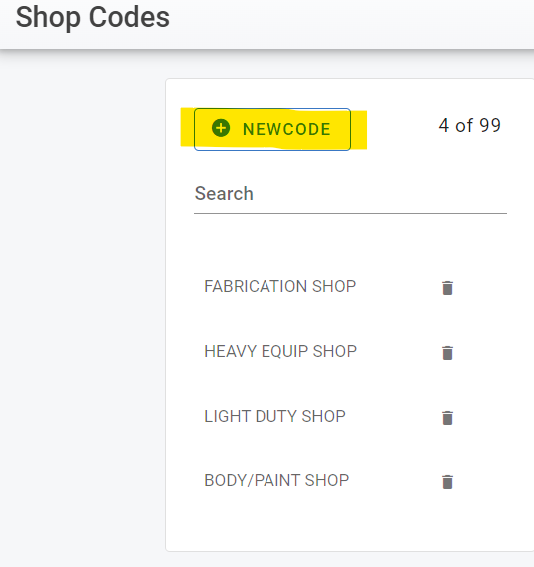
B. Add a name and description

C. Click save and the new shop code should display on your codes list

Priority: Priority code defines the importance of a work order on the shop schedule. Scaled from 1-9 with 1 being the highest priority.
Click to review priority code set up
From the main menu, select Maint. & Repair> Settings> Priority
A. Select the  NEWCODE Box

B. Add a code number and a description

C. Click save and the new priority code should display on your codes list.

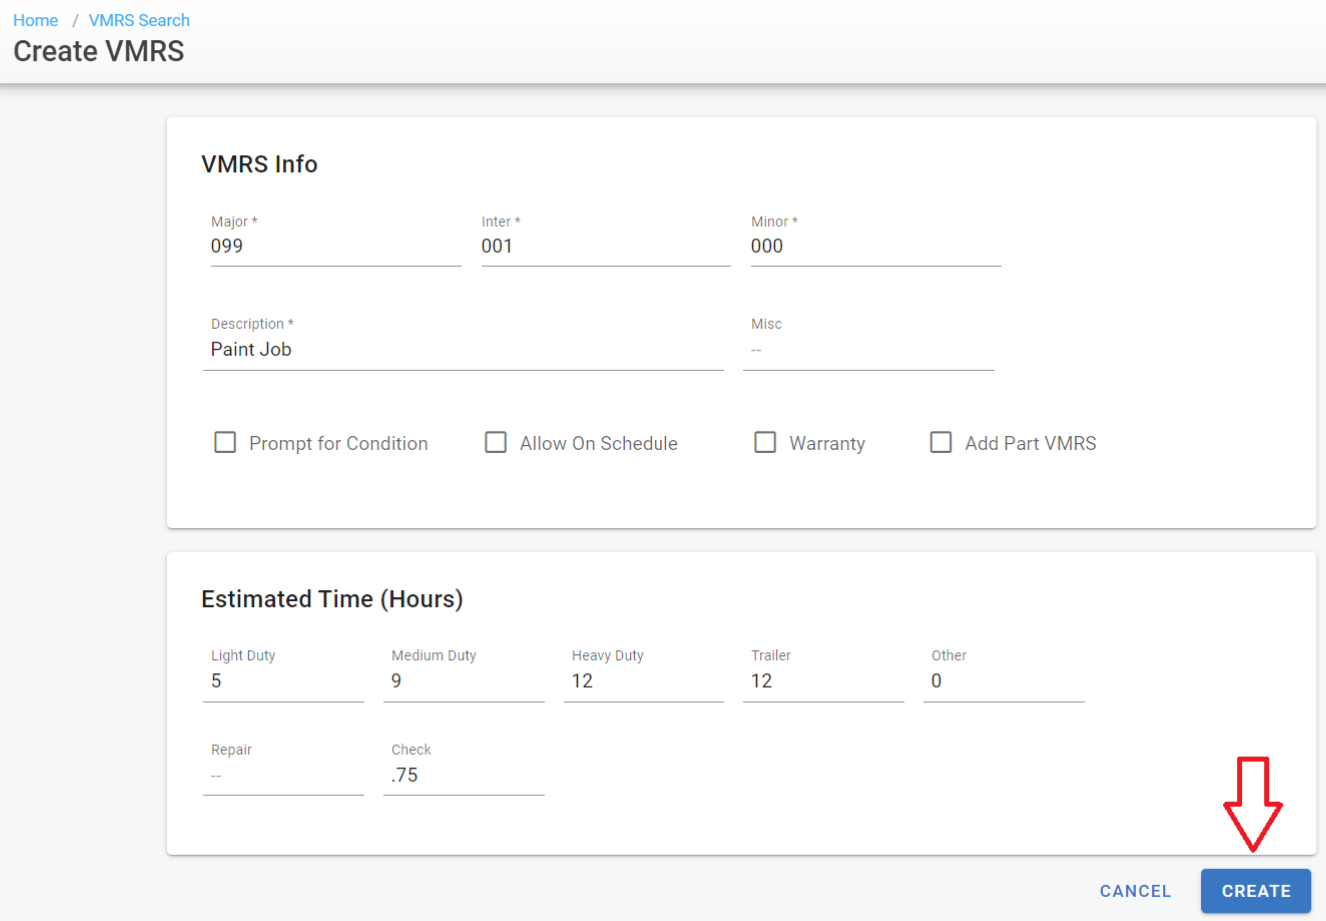
WO VMRS: Work order VMRS codes and description can be set here. You can also set your estimated work times per job to track mechanic efficiency.
Click to review WO VMRS codes set up
From the main menu, select Maint. & Repair> Settings> WO VMRS
A. Select the plus button  towards the top of the screen

B. Add the VMRS info> Major> Inter> Minor> Description and Misc if desired. You will also have the option to check the boxes below the description tab.
Major = the first three digits which indicate where on the asset the job is taking place
Intermediate = the second set of three digits which build off the major and indicate the specific job being performed in the major code area
Minor = the last set of three digits which build off the intermediate and can go even deeper. RTA has the system set to use a 6-digit VMRS so the minor will always display as 000 unless a system admin has adjusted that setting and starting using 9 digits.

C. Add Estimated Time (Hours) in the second box

D. Click create
Work Accomplished: These codes are assigned after you close a line to define the work completed by the mechanic. You can add up to 99 completion codes.
Click to review work accomplish codes set up
From the main menu, select Maint. & Repair> Settings> Work Accomplished
A. Select the  NEWCODE Box

B. Add a code number and description

C. Click save and the new completion code should display on your codes list

Work Order Status: Here you can set up your status options for your work orders. You can also create automations that will update the vehicle status if desired.
Click to review work order status set up
From the main menu, select Maint. & Repair> Settings> Work Order Status
A. To create a new status click the  New Status Box
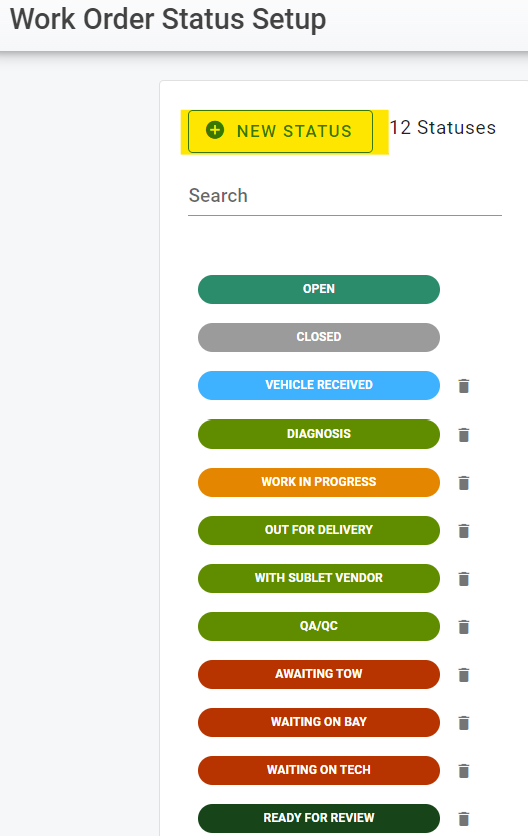
B. Select a desired name and apply a color

C. Once a color has been applied you may add Rules for this status. These rules can either have No Change in the vehicle status or reflect a change if desired

D. Select a status coding: Open/ Closed
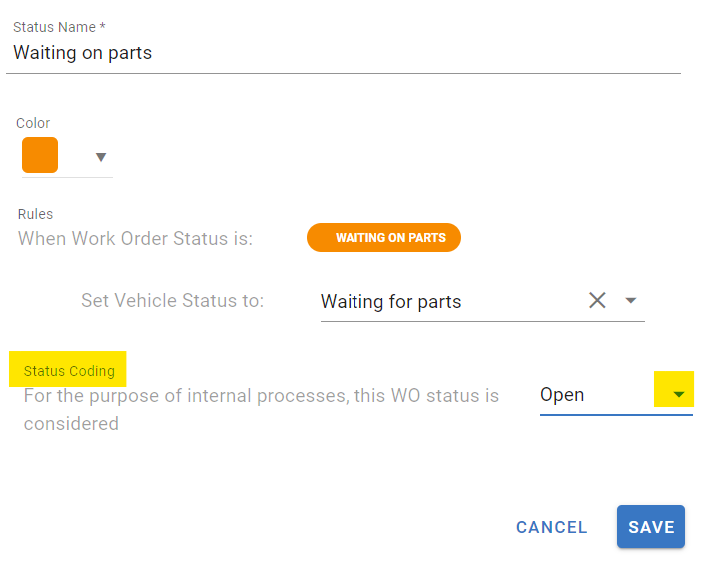
E. Click save and your new status should display in your status list


