RTA Web - Creating New Users
Setting up new users for RTA Web takes only a few steps to complete.
Before attempting to add users, be sure there are available licenses and that the proper user group(s) are decided upon.
Refer to Deleting and Editing Users if you already have users created and just need to edit or delete them.
Identifying Available Licenses
Prior to adding users, be sure that licenses are available for use. If not, contact your sales rep or reach out to our support team if your sales rep is not known to you at 1-800-279-0549.
Refer to System Admin and Licensing for information on locating and determining licenses available for use.
Before requesting more licenses, be sure that any users no longer needed have been removed. Refer to for information on removing users.
Reviewing User Groups
RTA Software comes pre-loaded with 12 pre-determined user groups which dictate access and use of the various areas of the software. Custom user groups can be created to meet additional needs or create hybrid roles.
Refer to User Groups for more information on accessing the user groups for review and creating custom groups.
Adding a User
From the main menu, select User from the Admin drop down
Click the + icon to add a user
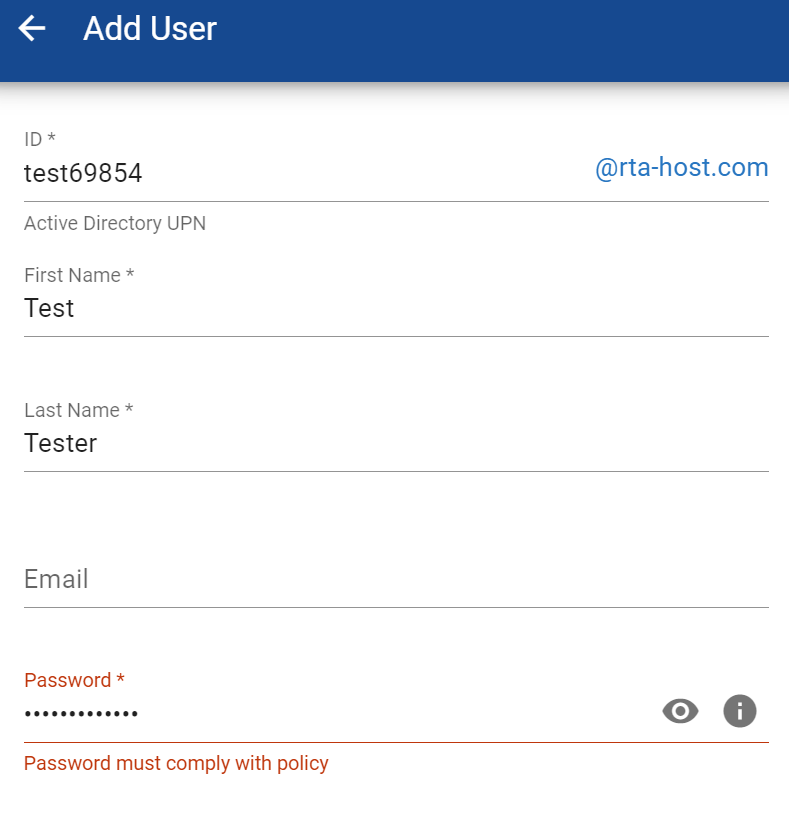
Enter the desired User ID and hit tab
If the User will also be using RTA Classic, then it is best if this matches the User ID that will also be added to the Classic Version and needs to be kept to 10 or less characters
Refer to RTA Classic User for the video information showing how to add the user in Classic as well.
The @rta-host.com suffix will automatically be included in the User ID for sign on purposes
If the message “User ID already exists” displays in red, this means that the specific User ID is already in use across the RTA Server and a new one will need to be chosen
Enter the User’s first name (Required)
Enter the User’s last name (Required)
Enter the User’s email (Optional)
Enter the User’s Password - ensuring that the password policy is adhered to
Click Save
The user will now display in the user primary search list but will display with an incomplete status
Click on the user from the user search list
Click Edit Profile
Re-enter the password used for the set up
Select the type of license to be used for this user
Add a profile picture for the user if desired
Click Save
In the Assigned User Groups Panel, click Manage
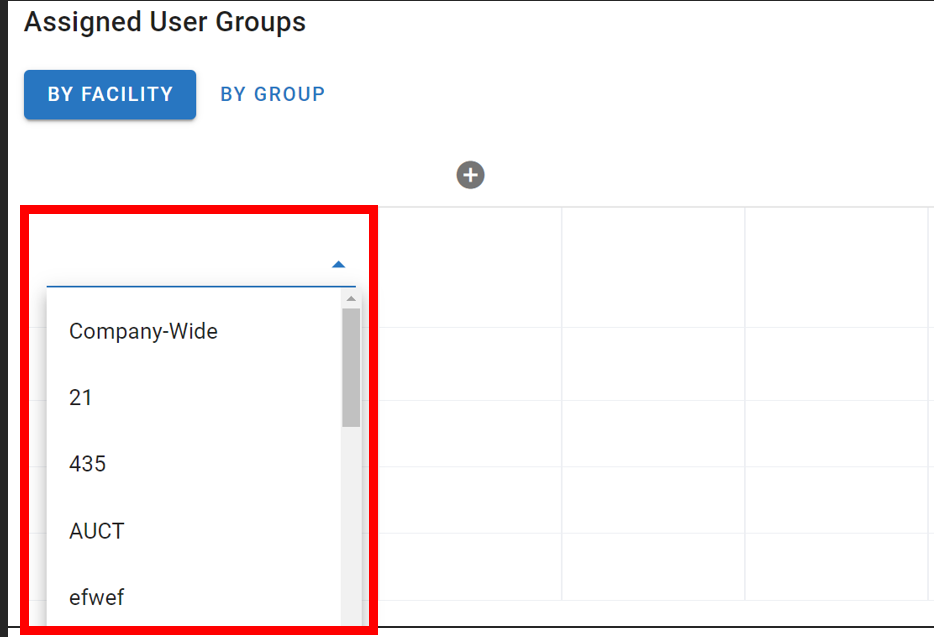
Click the + sign in the first row of the first column to select the first user group access area
Choose Company Wide if access or user groups will be granted across the entire company at all facilities
If using multiple facilities, a row defining access for each facility can be included if access will change by facility
If using multiple facilities and the access rights need to be different for each one, select the facility being described for each row
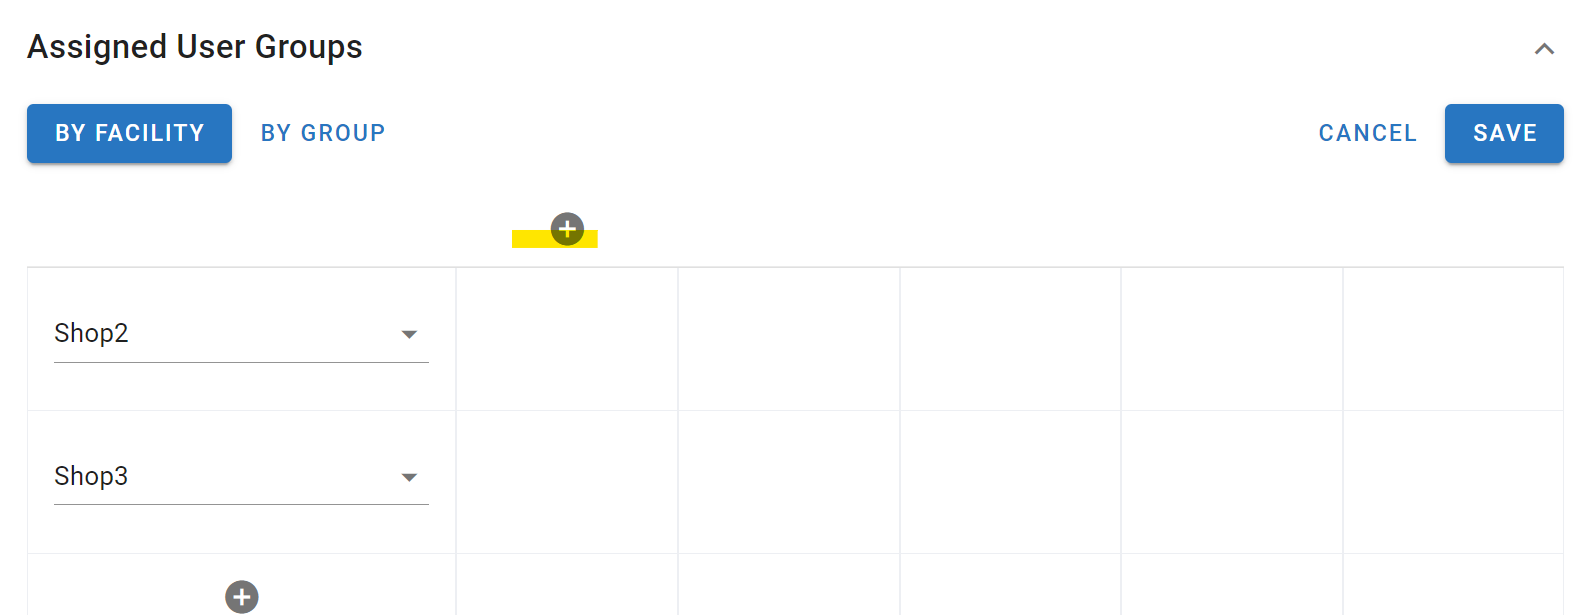
In the header of the remaining columns, click the + sign and select the user group(s) to be used
In the corresponding cell for each facility, click to check the box to connect the user group level to the appropriate facility
Click Save
For Example - In the table below, the user would have Administrator access to the SOLD facility, Parts Manager access to Shop3, and Lead Technician and Parts Manager access to Shop2.
Using the User ID and password put into the system, the user should now log in to http://app.rtafleet.com to access the system.


