Parts Merge Utility
RTA has the capability of merging parts. There are 2 ways to merge two parts - Manually or with the Parts Merge Utility.
How to Manually Merge Part Records:
1. Determine which part to keep.
2. Renumber this Part Number and the matching vendor Part Number to a temporary number.
3. Go to the part you want to dump and copy Vendor info, price, ordering info, usage, Bin location, etc
4. Renumber this part to the part number you want to keep.
5. Delete this part.
6. Renumber original Part Number and Vendor number back from temp number to the original number.
7. Add Vendor info, price, ordering info, usage, Bin location,etc from deleted number to Part you are keeping.
Part Merge Utility Setup:
This utility can be setup once in RTA and added to the User Programs menu. Adding this utility to the system gives easy access through menu options.
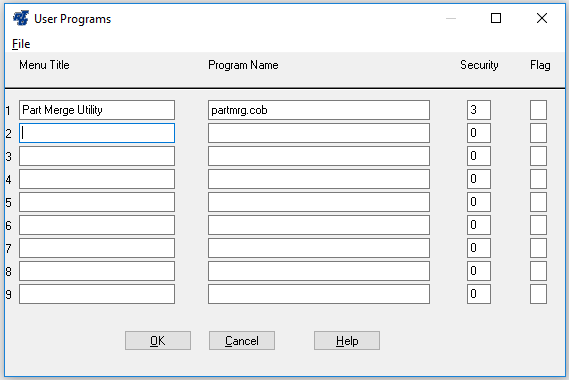
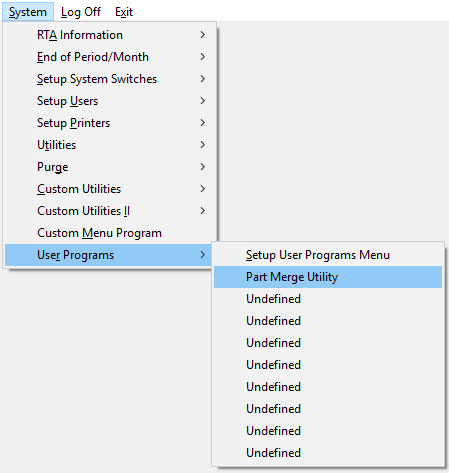
1. Go to System → User Programs → Setup User Programs Menu (SRS).
2. Enter Level 3 Password.
3. Enter a description in the program Menu Title field, such as "Part Merge Utility", in a blank available line.
4. Type "partmrg.cob" in the Program Name field.
5. Click OK.
How to Merge Part records using the Part Merge Utility:
1. System → User Programs → select Part Merge Utility (select the utility by whatever description you gave it when initially setup in RTA).
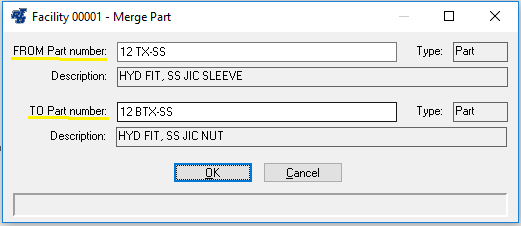
2. Enter the Facility #.
3. In the "FROM Part number", enter the part # you will be no longer using.
4. In the "TO Part number", enter the part # you will be keeping.
5. Click OK.
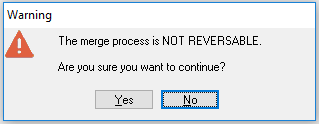
6. Answer Yes or No to the final part merge utility warning prompt to confirm whether or not you want to merge these parts. As it warns, this process is NOT REVERSIBLE.
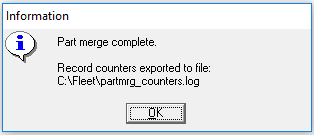
7. You will receive a confirmation once the merge is completed as shown in the example below. All record changes will be listed in the partmrg_counters.log file located in the \Fleet folder.
8. Click OK.
***Alternately, you can also run the Part Merge Utility program by going to, System → RTA Information → Special Utility Routine (SAU)***
- Type in "partmrg.cob".
- Click OK to launch the program.
- Follow Steps 2-8 as shown in the section above.
