Build a Fuel Depot
Adding Fuel Tanks
Step by Step guide
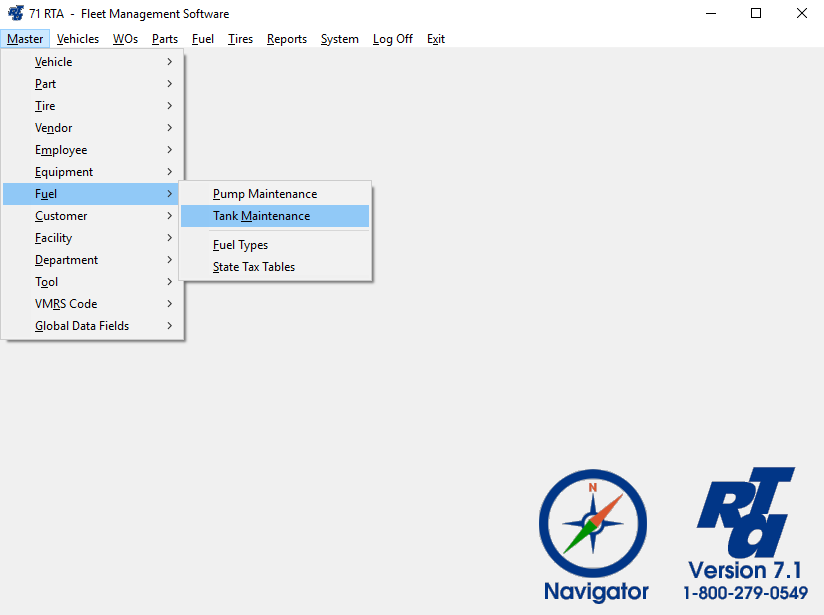
- Select Master > Fuel > Tank Maintenance (MUM) from the RTA main menu.
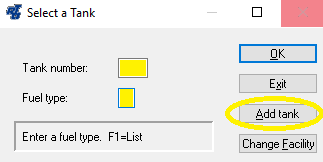
- In the “Tank Number” field, key in a numeric designation for the tank you wish to add. In the “Fuel Type” field key in the single upper-case alpha character for the fuel stored in this tank, or press “F1” for the lookup list. Select the “Add Tank” button.
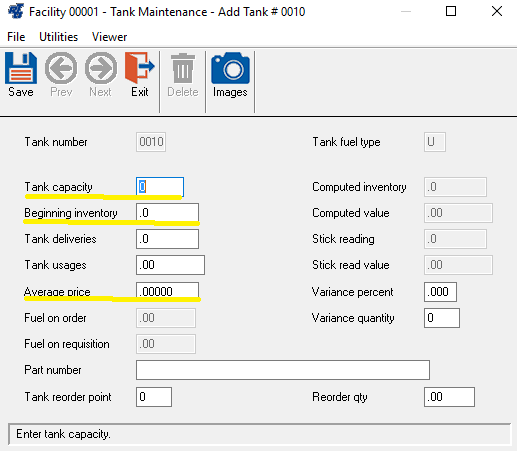
- Key the appropriate information into the “Tank Capacity”, “Beginning Inventory” and “Average Price” fields. The “Part number” field is used if you are tracking fuel purchases through purchase orders. NOTE: Do not enter anything into the “Tank Deliveries” or “Tank Usage” fields at this time; they will be updated by the system.

-
Page:
-
Page:
-
Page:
-
Page:
-
Page:
Adding Fuel Pumps
Step by Step guide
- Select Master > Fuel > Pump Maintenance (MUP) from the RTA main menu.
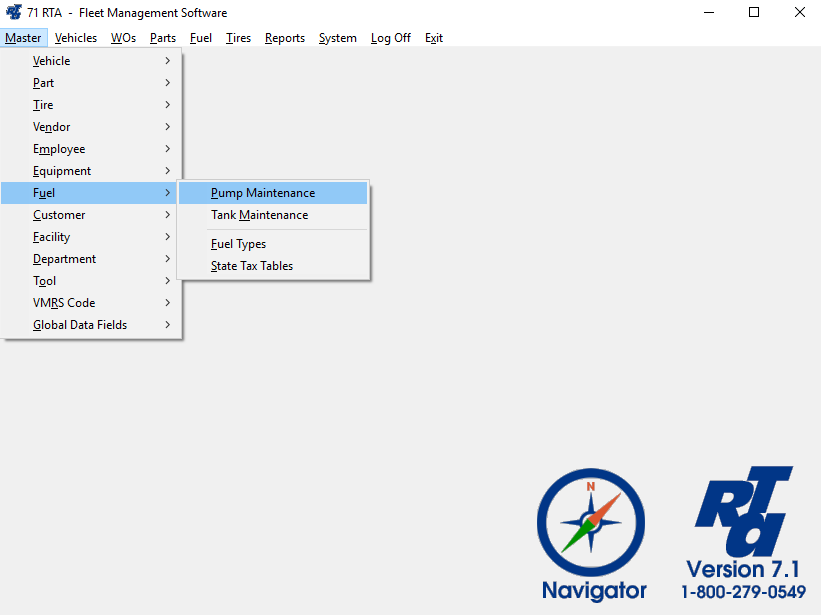
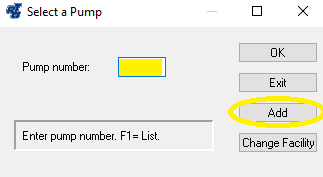
- In the “Pump Number” field, key in a numeric designation for the Pump you wish to add. Select the “Add” button.
- In the “Add Pump” screen, populate the fields as indicated below.
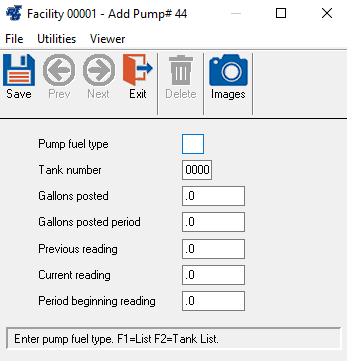
- Pump fuel type:
Key in the fuel type dispensed from this pump, or press “F1” and use the lookup list. - Tank number:
Key in the tank number associated with this pump, or press “F1” and use the lookup list. - Gallons posted:
Do not enter data into this field. It will be updated by the system. - Gallons posted previous period:
Do not enter data into this field. It will be updated by the system. - Previous reading:
Key in the current tank stick reading into this field as this is the first reading used by the RTA system. - Current reading:
Key in the current tank stick reading into this field. - Period beginning reading:
Key in the current tank stick reading into this field as this is the first reading used by the RTA system.
- Save the record.

-
Page:
-
Page:
-
Page:
-
Page:
-
Page:
Tank Deliveries
Step by Step guide
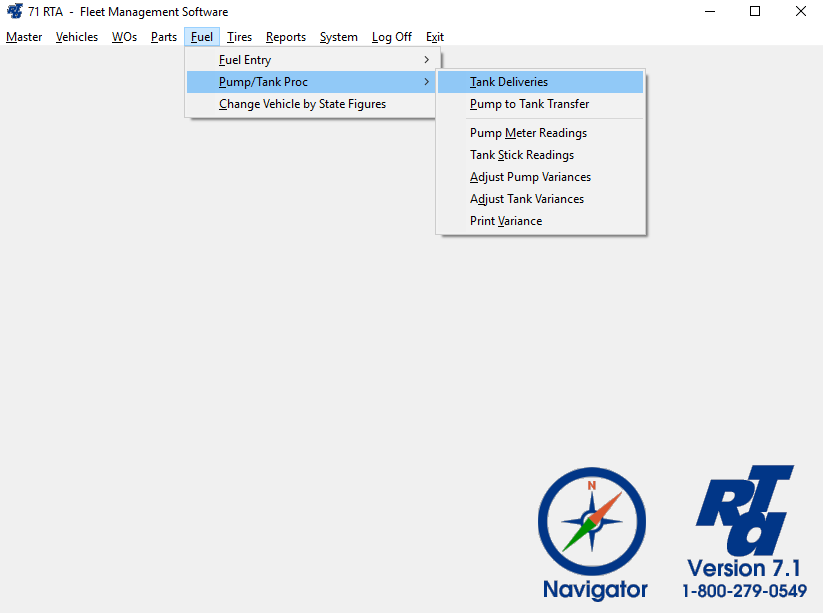
- Select Fuel > Pump/Tank Proc > Tank Deliveries (FPT) from the RTA main menu.
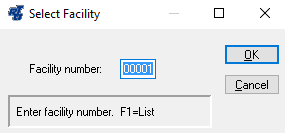
- Enter a “Facility Number” or press “F1” and use the lookup list.
- Enter a “Tank Number” or press “F1” and use the lookup list. Enter the “Tank Fuel Type” or press “F1” and use the lookup list. Enter the “Delivery Amount”, the “Cost Per Gallon” and the “Delivery Date”.
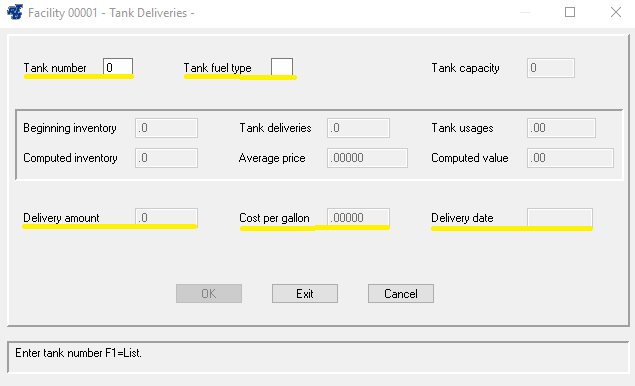
- Select the “OK” button.

-
Page:
-
Page:
-
Page:
-
Page:
-
Page:
Receiving Fuel on Purchase Orders
Step by Step guide
- Set up a part record for each tank record. If you have two tanks, you will need to add two part records. Part records can be added through Master >Part > File Maintenance (MPM). See How to Add Parts.
- Select Master > Fuel > Tank Maintenance (MUM) from the RTA main menu.
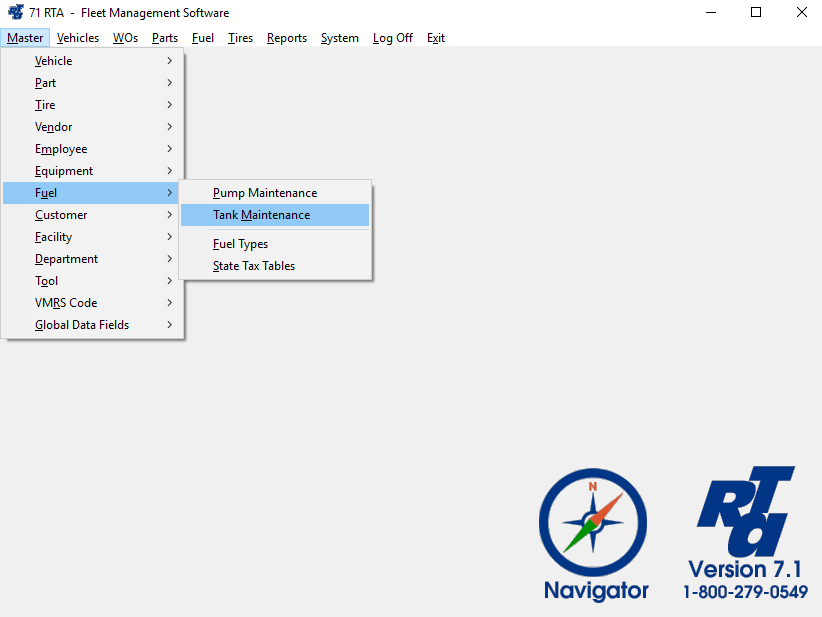
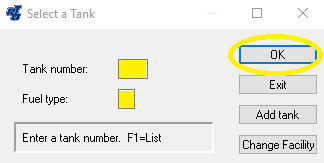
- In the “Tank Number” field, key in the number of the tank receiving the delivery. In the “Fuel Type” field key in the single upper-case alpha character for the type of fuel being delivered. Select the “OK” button.
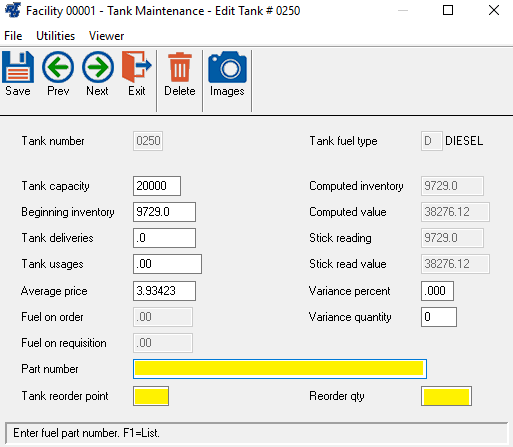
- The Tank Maintenance screen will be displayed. Key in the “Part number” for the fuel in this tank or press “F1” for the lookup list. Key in the “Tank reorder point” and “Reorder qty”.
- Save and Exit the record.
- Repeat steps #3-5 for each tank.
NOTE: Once set up, each time a pump meter reading is updated, the system checks the tank inventory. When the tank inventory drops below the reorder point, a requisition is generated (unless already on requisition or on order). From this point, the process is the same for ordering fuel as it is for ordering any other part: create a purchase order, order the Fuel, and receive the fuel when it is delivered.

-
Page:
-
Page:
-
Page:
-
Page:
-
Page:

-
Page:
-
Page:
-
Page:
-
Page:
-
Page:


