How to save a Hosted/SaaS file to your own Desktop
Basic Info: Whether you are wanting to email a file/report or export one in an editable format for data retrieval, navigating from the RTA server to your own personal desktop can be tricky if you’ve never done it before.
Below we will show you how to navigate to your own space and even edit your quick access menu within your file explorer to assist when saving a file in the future.
Ways to Save/Export a file
Exporting a Report/File from an RPV format
Exporting a Report/File from a Crystal format
Selecting “Export” on a report before selecting the view/print format
Save to RTA, then Copy and Paste locally
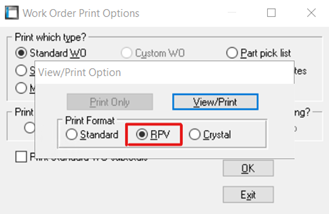
Exporting a Report/File from an RPV format
Open the WO/PO in question and click “Print”
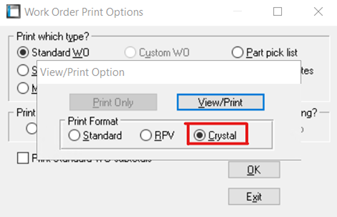
Select your print type (in the case of a WO) and select “OK”. Then select the RPV print format when prompted. Select View/Print.
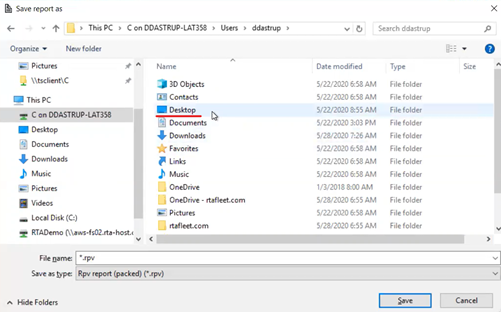
When the Print Preview displays, you can select the “Save report as” icon in the top menu. This will prompt the File Explorer to determine where you want to save the file.
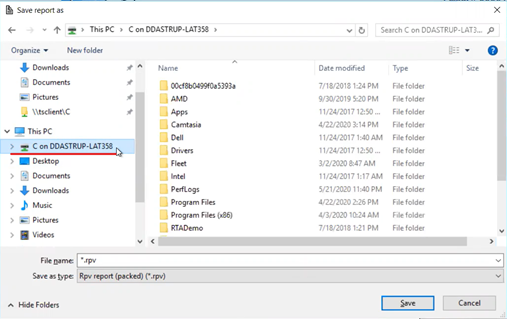
(All versions) Your File Explorer will as where to save the new file. Select the File name/type (PDF, RPV, .txt, etc.) you would like to use then you will want to navigate to your own computer desktop with the following steps:
a. Select the “C on ______” drive
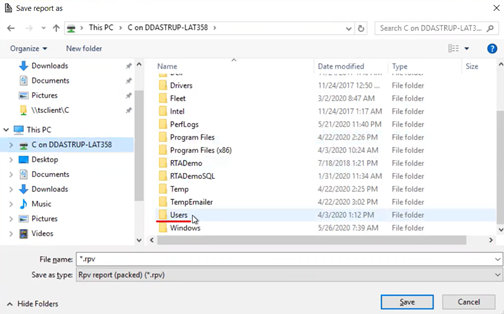
b. Choose Users (double click)
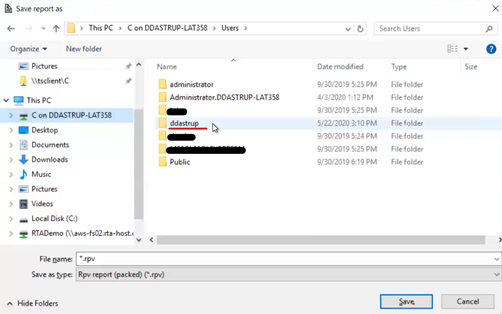
c. Choose your username/computer name (double click)
d. You have now navigated to your own computer and can choose from your desktop, Documents, Favorites, or other folders to save your new file to. Double click the one you’d like to use and save your file.
Exporting a Report/File from a Crystal format
Open the WO/PO in question and click “Print”
Select your print type (in the case of a WO) and select “OK”. Then select the Crystal print format when prompted. Select View/Print.
Select the “Export” option in the top-left corner of the menu
(Follow Step 4 from above)
Selecting “Export” on a report before selecting the view/print format
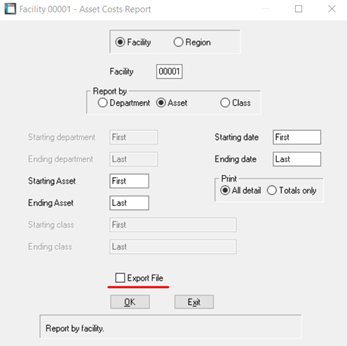
Some reports in RTA allow you to select “Export” directly from the report parameters prompt. If you see this option, you can choose to export the report in an altered format before even print/viewing it. One such example is the Vehicle Audit, or RVA report as seen here:
When you check this box and click “OK”, you can follow the process above in step 4 to export/save the report.
Save to RTA, the Copy and Paste locally
When saving/exporting a larger amount of data, it can take a greater amount of time to export directly to your local drive. Remember, RTA is not only gathering the information, but formatting it AND exporting it from one server to another. We recommend saving this file within RTA with the following steps, THEN use your mouse or keyboard to Copy and Paste to your local machine.
Export your report/list using any of the above options.
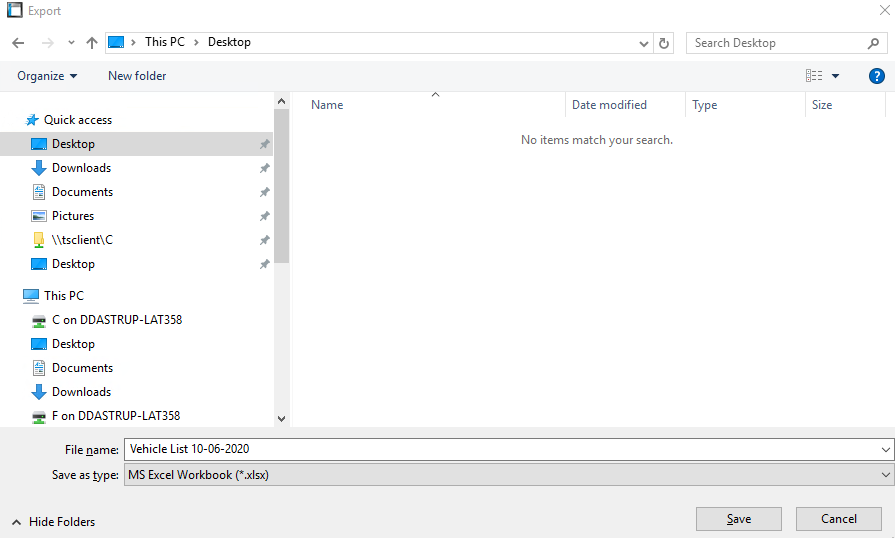
Instead of navigating to your local machine right away, select the desktop option that automatically displays in your Quick Access options.
Name your File and hit Save. The document will export much faster as it’s staying within the RTA server.
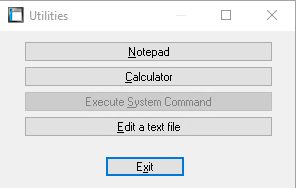
Navigate to the main Home-Screen of RTA (Not the Navigator screen, if Navigator is open, you’ll have to close it). Hit F9 on your keyboard to trigger the Utilities Menu. Choose ‘Edit a Text File’.
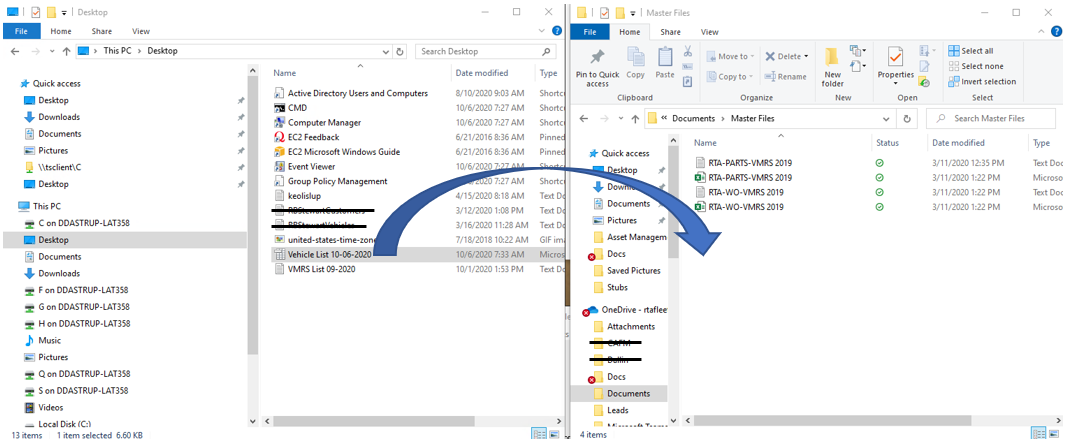
Find the export you just made, Right-Click > Copy it. Then open your computer’s File Explorer, Right-Click > Paste it where desired.
Best Practice: Setting up your Desktop to your Quick Access menu column
Once navigated to your desktop, you can choose to save your personal desktop folder to your quick access menu in the left-hand column so you can go directly to it in the future without having to follow this previously explained menu path.
To do so, simply right-click on your computer’s desktop Icon (while in the navigated screen) and select “Pin to Quick Access”. This will copy your desktop to the Quick Access in the left-hand menu. If you choose, you can then remove the desktop at the top of the Quick Access to avoid confusion of where to save in the future (as the one showing is your RTA server-desktop icon).
