Bar Coding Startup procedures
RTA is designed to allow for Bar Code processing, both creation for parts initially unmarked and recognition of parts that are bar coded by the manufacturer. This page will discuss the process and implementation of Bar Coding in RTA.
Step 1: UPC Vendor Creation
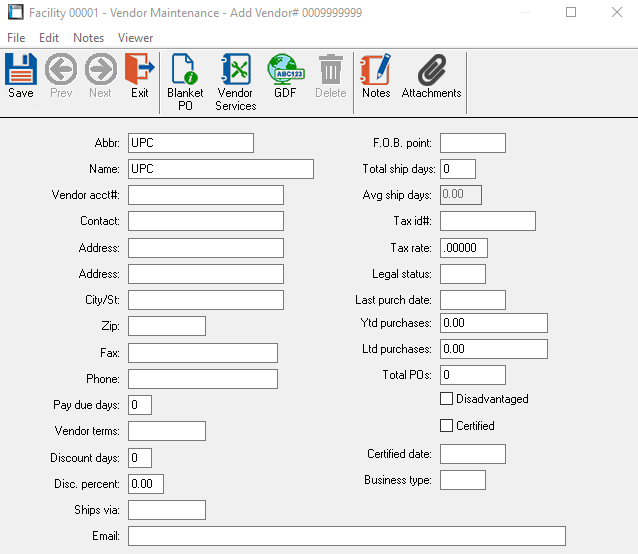
In order for RTA to recognize a barcode, it must be added to the part’s master file as a cross reference, also known as “Add Vendor”. Before a new cross reference can be added, however, there needs to be a place-holder vendor in RTA. We recommend using the Vendor name: UPC
To add this place-holder Vendor, use Master > Vendor > File Maintenance > 9999999 > ADD
We recommend using a Vendor ID such as 9999999 so it can easily be excused when running vendor reports. As this is not really a vendor, but a place-holder for bar coding purposes only.
Include the Abbr. and Name as UPC, then save and exit the Vendor file:
Step 2: Add Vendor Number to Parts (when a bar code is provided by the Vendor)
When adding/editing parts in the parts master file (Master > Parts > File Maintenance, or MPM) there is the option to include more than 1 Vendor. All other Vendors after Rank #1 are added in RTA as “cross reference” numbers. Use the Parts Master file to add the new UPC Vendor as a cross reference with “Add Vendor” in the top-menu.
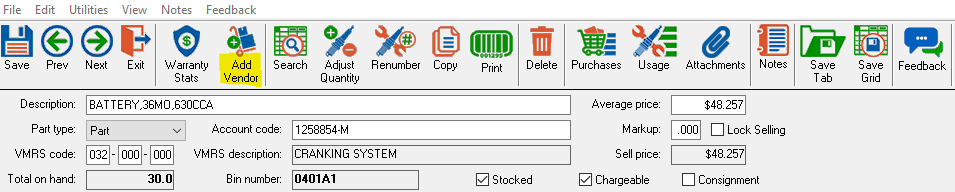
Use Vendor# 9999999, UPC. Under the Vendor’s part number, use the UPC bar code number. Rank #9, no price number. This part will not be posted to a WO or ordered through a PO, simply used as a cross-reference for the barcode identifier. This UPC barcode can be added with multiple Vendor part numbers as many times as needed.
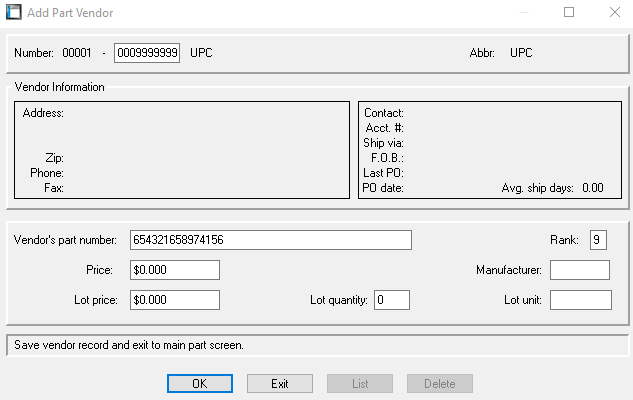
Using a scanner or bar code reader, this part will now register on any RTA screen when scanned.
Step 3: Add Vendor Number to Parts (when a barcode is not provided by the Vendor)
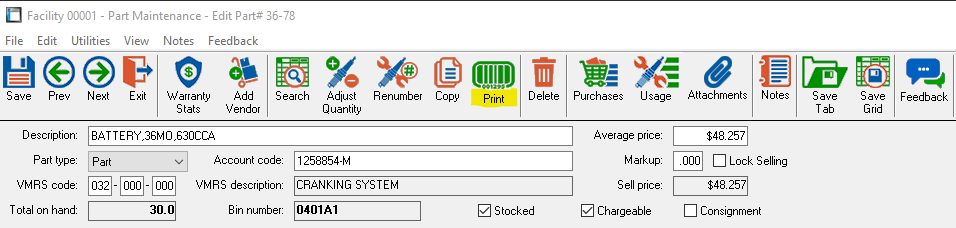
If using an RTA bar code printer, use the ‘Print' button in the Parts Master File top-menu to create a new bar code for a vendor’s part that does not currently have one. This process will use the existing part number in RTA and convert it into a scannable code, printed on a tag to be placed on the part. In the print settings, you can choose the tag quantity and select to omit the price from the tag.
Step 4: Creating Tags when Receiving Parts
Ordering parts through the PO process in RTA allows for an automatic Tags creation. A few areas need to be confirmed before this process will run.
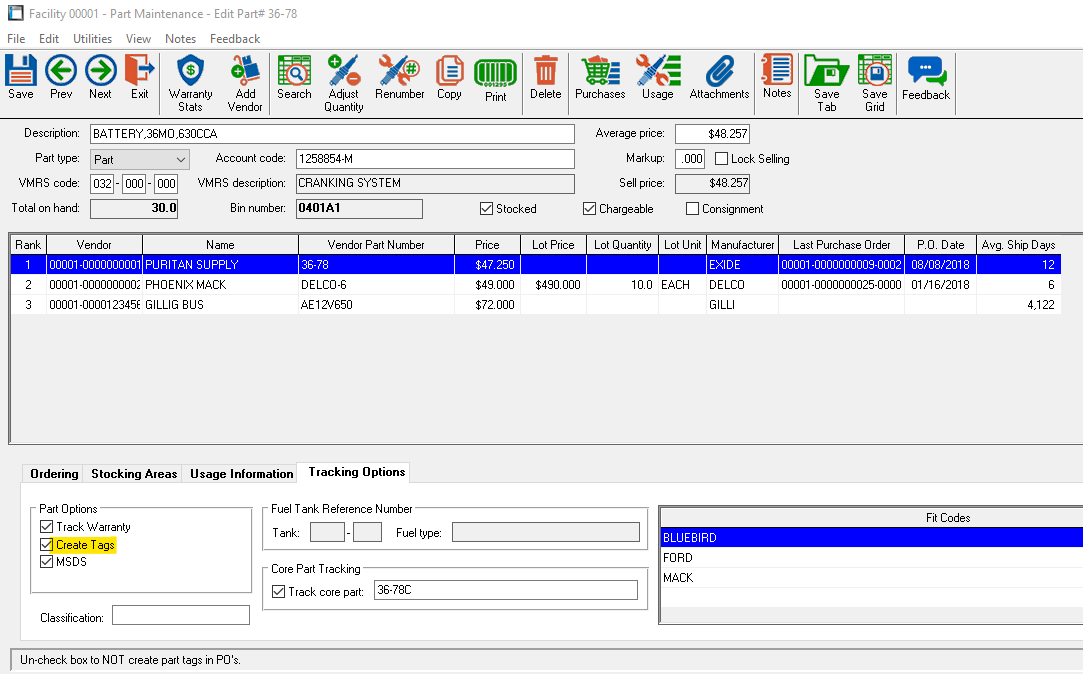
The Parts file, under the Tracking options, check the box to allow for Tags Creation
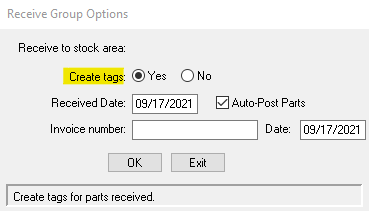
In a PO, select the “Create Tags” button in the receiving procedure.
As tags are created through the PO process, or by selecting “Print” within the part master file, they are added to a print queue for barcode labels. This queue is found under Parts > Tags/Labels > Tag Maintenance (PTM).
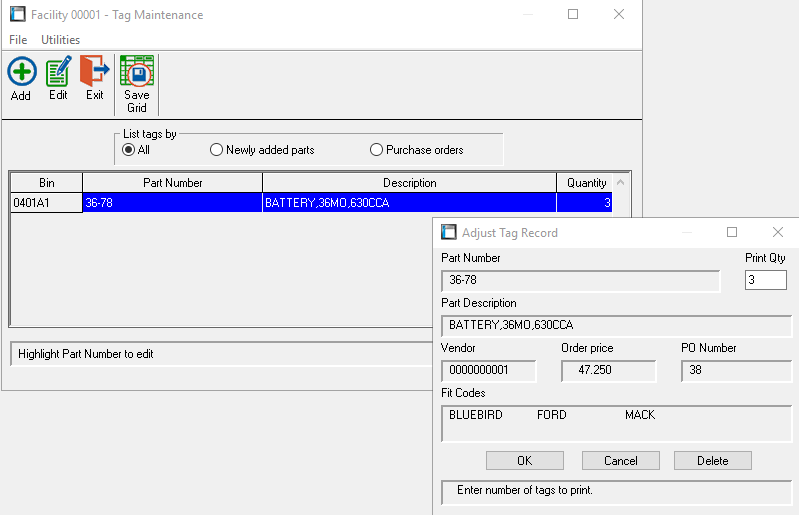
From the Tag Maintenance screen, you can edit quantities and Add/Edit the current list. Once the list is set as desired, use Parts > Tags/Labels > Print Part Tags (PTT) to begin printing the queue. Test the new barcodes, if desired, to see the link between the new UPC/Barcode and the part file by scanning the newly created bar codes.
For additional questions on barcoding, please reach out to RTA Support at support@rtafleet.com