RTA Web Vehicle - Asset Management Tab
The asset management tab holds multiple panels all designed to hold pertinent information pertaining to your vehicle. This article will cover all the panels and fields found in the asset management tab.
You can visit Vehicle File Table of Contents to access the full list of articles related to Displayed Vehicle Data in RTA Web here.
![]() Denotes fields that are editable within RTA Web
Denotes fields that are editable within RTA Web
Asset Info Panel

This panel is designated for adding additional information regarding the vehicle. While these fields are optional, RTA does recommend leveraging them. Below you will find the various panels and fields found in the Asset Info panel along with explanations for and how to use them.
 Condition – This field is related to the condition of the vehicle
Edit by clicking in the field and choosing the appropriate status from the available options
 Size – Click in the field and select the appropriate vehicle size (light, medium, heavy, etc.)
These tie into difficulty factors which determine the estimated time that will be used as a guideline for mechanics to complete a job
If mechanic productivity will not be tracked, then there is no need to be concerned with the difficulty levels
Refer to Mechanic Productivity for more information on mechanic productivity and difficulty factor set up
Last Updated Condition – This field displays the date for the last update to the condition field
 Purchase Date – Click in the field and enter the date when the vehicle was purchased and placed in service
 In Service Date – Click in the field to enter the date that will be used as the default warranty start date when vehicle warranty records are added
Primary Meter Info Panel

This panel is designated for meter information.
 Meter Type – Click in the field and select the appropriate type for this vehicle (Hours, Miles, Gallons, etc.)
 Odometer – Click in the field and enter the current odometer reading for the vehicle
Refer to Meter Readings in RTA Web for instructions on correcting odometer readings.
Fuel Meter and Life Meter – These fields are automatically updated by the RTA system; no entry can be made in these fields
They will reflect as the current meter reading initially
Fuel meter will show the meter reading from the last fuel-up
Life meter will show the units traveled by the vehicle over time
Refer to ““ for detailed instructions on Primary Meters in RTA Web
Alternate Meter Info Panel

This panel is designated for alternate meter information. Before alternate meters can be added/adjusted in RTA Web, the alternate meter types will need to be defined through RTA Desktop
Refer to Alternate Meter Type Setup for instructions on setting up alternate meter types in desktop and then those can be added in RTA Web
 Alt One, Two, Three, Four – click on Edit Description and then click on the field to choose from the type of alternate meter to use
Up to four alternate meters can be added to a vehicle
May be another meter such as an engine or component hour meter or it may represent items transported by this vehicle such as passengers, cases, boxes, tons, yards, or pallets
Refer to Meter Readings for detailed instructions on Alternate Meters in RTA Web.
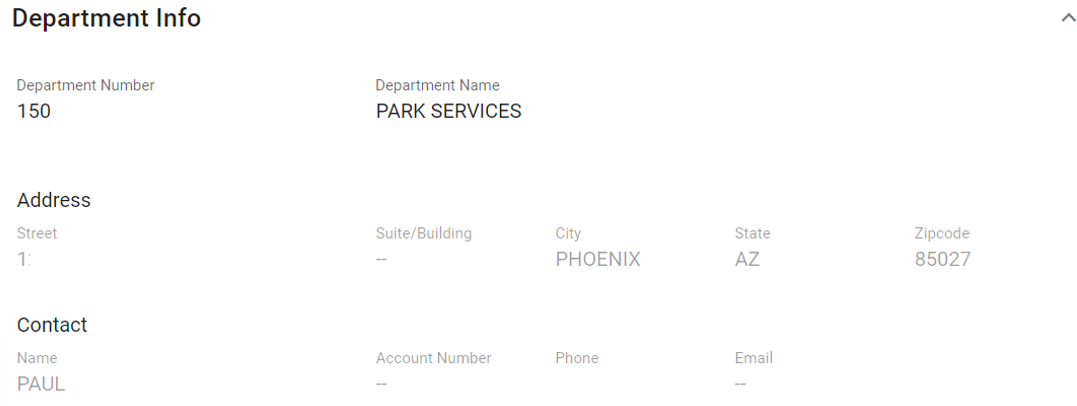
Department Info Panel

Departments are a way of separating vehicle cost within a facility. Before Departments can be added/updated in RTA Web, the department master files need to be set up in RTA Desktop.
Refer to Departments for instructions on adding departments
 Department Number – click in the field and select the appropriate department in which this vehicle belongs and click the check mark
 Department Name – click in the field and select the appropriate department name and click the check mark
Department Number and Department Name are linked. When you change one, the field for the other adjusts to reflect the corresponding data
Address – Fields populate based on the address information listed in the Department File on RTA Desktop for the specific department assigned
Contact – Fields populate based on the contact information listed in the Department File on RTA Desktop for the specific department
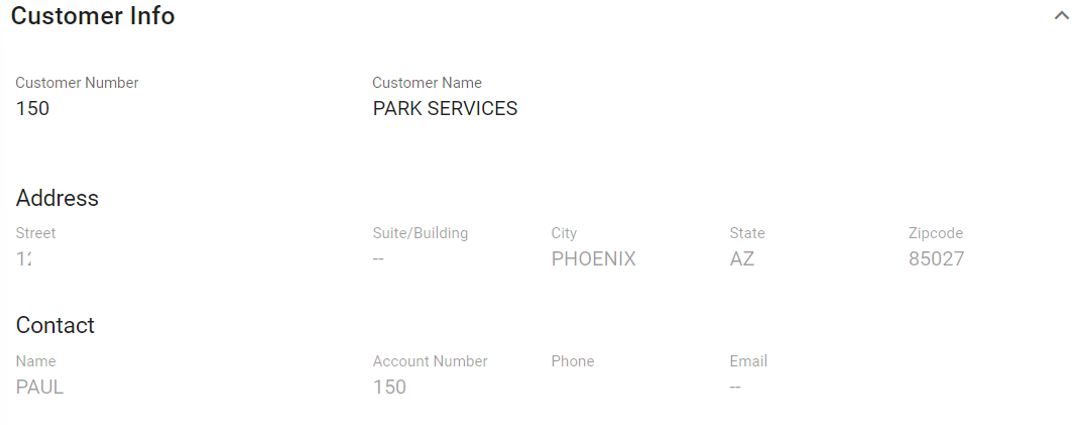
Customer Info Panel

Customers are typically used as designated cost centers. Before Customers can be added/updated in RTA Web, the department master files need to be set up in RTA Desktop.
Refer to Customers for instructions on adding departments
 Customer Number - click in the field and select the appropriate department in which this vehicle belongs and click the check mark
 Customer Name – click in the field and select the appropriate customer’s name and click the check mark
Customer Number and Customer Name are linked. When you change one, the field for the other adjusts to reflect the corresponding data
Address – Fields populate based on the address information listed in the Customer File on RTA Desktop for the specific customer assigned
Contact – Fields populate based on the contact information listed in the Customer File on RTA Desktop for the specific customer
Replacement Panel

This panel is driven by data submitted in the vehicle file via RTA Desktop and can be displayed here when input into the Vehicle File via RTA Desktop. There are many ways or methods to calculate when it is time for vehicles or equipment to be replaced. Including this type of information in the Vehicle File will assist with projections and budgeting and assist with reporting on reliability of the vehicle. Refer to the below documents for assistance with how to enter this information into the Vehicle File via RTA Desktop and how to utilize reporting.
Refer to Adding a Vehicle and navigated to the Replacement Tab section for RTA Desktop
Refer to Vehicle Replacement Scoring for utilizing the Vehicle Replacement Report
Field Definitions in RTA Web
Destination – Refers to the destination of the vehicle when it was replaced. It can be sold or reassigned to a different department or customer
Projected Year – The year the vehicle will need to be replaced
Projected Life Meter – The number of units (miles/kilometers/hours) when the vehicle will need to be replaced
Projected Resale – Estimated resale or trade-in value of the vehicle
Purchase Price – Estimated purchase price of the new vehicle
Additional Options
Use Schedule – This is checked if a replacement schedule is to be tracked for the vehicle
Class Override – This is check if there is a defined default replacement schedule by vehicle class code