
RTA Web - Posting to Work Order Lines
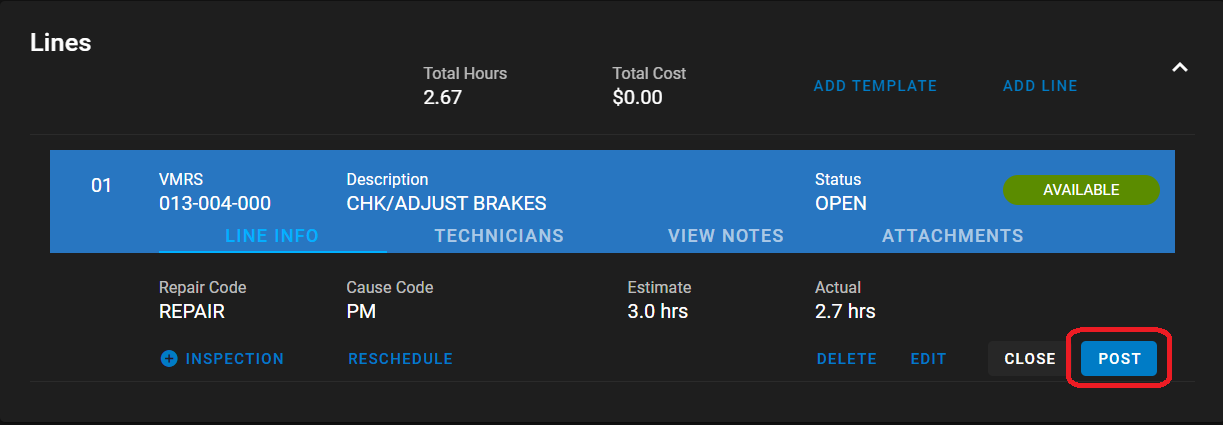
Posting to WO
In RTA Web, users will have the ability to post Parts, Labor, Warrantied Parts and Labor, and Miscellaneous items. Depending on what is being posted out to work orders, users will have the ability to toggle between the 4 different sections by clicking on the drop-down menu on the top left side of the page. Posting these items updates the vehicle cost and history as well as inventory and statistical data in the other modules.

Posting Parts
Parts can be posted out to work orders through RTA Web. To post out parts, toggle the drop-down menu at the top left-hand corner of the page and click on Parts. On the posting parts page, there may be a part probability screen that appears. This takes into account the probability of parts that may be posted out to this particular job.
Users can select a part # in the probability screen to post it to the work order. However, if there is no probability, the section will have a “No data available” message, and the user can search parts then.

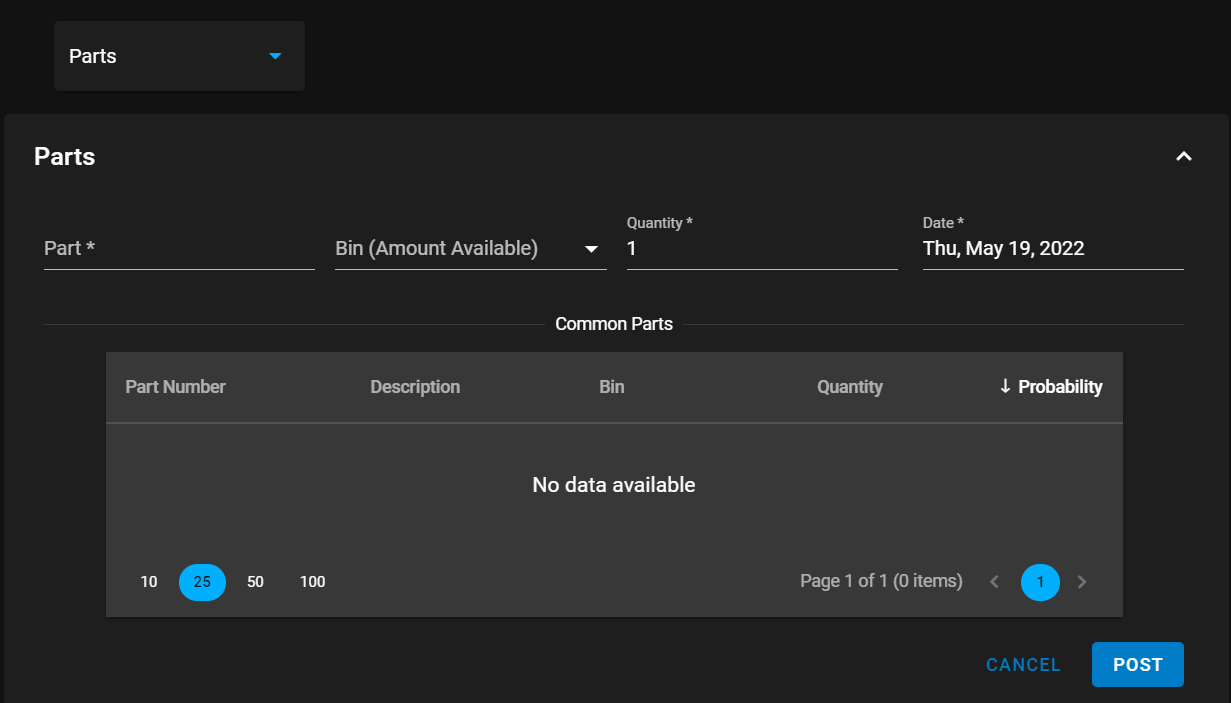
To post parts, the user will need to input the part number or name into the Part * field, choose the bin location the part is coming from and the quantity. Once you have that part, click the post button and the transactions section of the page will update with the part.
Posting Part Kits
If a work order line has a part kit pre-assigned to it, a message will display telling the user that one is assigned and a “Post Part Kit” link will be available to post all the parts in the part kit.

If the part kit is not pre-assigned to the work order line, one can be selected when posting parts.
In the Part Number field, enter the part kit number
Enter the quantity (number of) part kits to be used with the line
The description and costs will prefill based on the part kit file
Click Post

Posting Labor
Labor can be posted through work orders with a click of a button. To post out labor, toggle the drop-down menu at the top left-hand corner of the page and click on Labor.
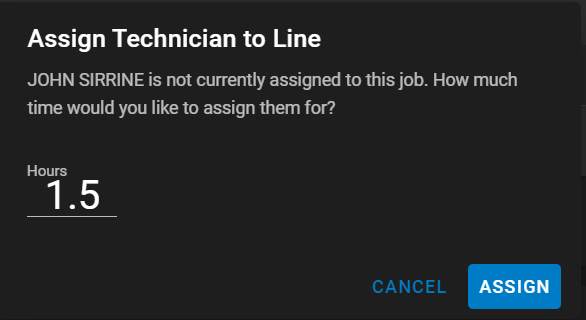
If a technician has not been assigned to the job, enter their name or abbreviation and select the technician from the Technician Search section. It will then ask for how much time is allotted for the technician to complete the job. Once this information has been filled out, click assign and the transactions section of the page will update with the labor.

If a technician has been assigned to the job, their name will appear in the labor section under Assigned Technicians. Click on the assigned technician and from here you can modify their labor rate, hours worked and billed hours. Once the changes have been made, click the post button and the transactions section of the page will update with the labor.


Posting Miscellaneous
Costs that don’t fall under parts, labor, or warranty can be posted out as a Miscellaneous option. To post out miscellaneous costs, toggle the drop-down menu at the top left-hand corner of the page and click on Miscellaneous. Then you can change the fields that are appearing on the screen - item, price, quantity, and description.
Once the changes have been made, click the post button and the transactions section of the page will update with miscellaneous.

Posting Warranty
Posting out a warranty allows you to capture warranty credits received from vendors. To post out warranty credits, toggle the drop-down menu at the top left-hand corner of the page and click on Warranty. Tracking this can save your fleet thousands of dollars every year. When posting a warranty, there are 3 different categories that you can choose from: Parts, Labor, or Tires.
Select one of these options and enter the part, technician, or tire number. Add a description (this doesn’t necessarily need to match with a number in your inventory or technician). Then enter the total post price, the quantity is -1 by default (when multiplied to the total post price, the total warranty credit will be a negative amount reducing the total work order cost).

Reverse a Posting
From time to time, a transaction will either be posted incorrectly or to the wrong line. When issues arise with the posting, whether it’s parts, labor, warranty or misc., the user can reverse the posting by using the “reverse” button.
From the Work Order Line page, under “Transactions”, see the previously posted units
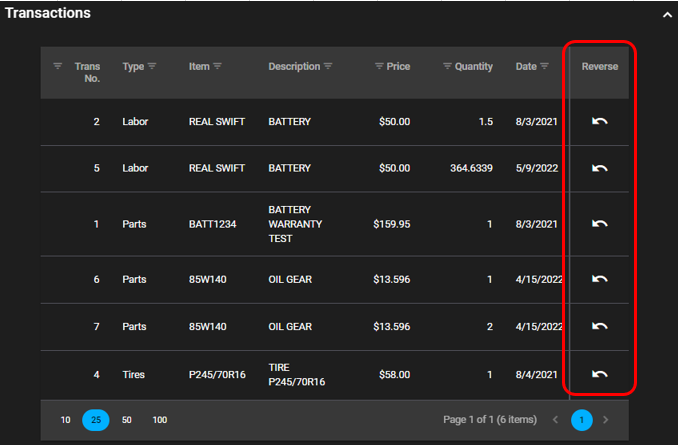
The far-right column is called “Reverse”. Any lines that need to be reversed, click on the arrow and select “Proceed” when prompted. The result will show a positive and negative posting, reversing the transaction off the line and back into inventory in the case of a part. When completed, the affected line will register as “Reversed”
