RTA Web - Work Order Lines
In RTA Web, users will be able to add lines to Work Orders with a simple click. In order to do this, the user will need to navigate to the bottom of the Work Order page and click on the section labeled Lines. Here, it will display the line details which can be modified.

If there is nothing in the WO Lines detail section, you will need to add a line to the WO.
Add Line
In order to add a line to the WO, there is a button labeled Add Line in the details section which will execute the action. If there is nothing here, the message ‘No Line Found’ will be displayed, prompting you to add a line.

It will then prompt you to add a VMRS code and a description of what the line is. The section under this will prompt you to fill out more information about the line to gather more on what is necessary to complete it.

Line Detail
Repair Type - Select a repair type code from the drop-down list to identify the type of repair that needs to be performed. The estimated hours to complete the job and how the costs are categorized may vary depending on the repair type code selected.
Cause Code (SSM, switch 39-part 2) - Select a cause code from the drop-down list. Cause codes allow you to track the cause for the repairs-driver reports, accidents, PMs, etc.
Job Account - Type an account number or select one from the drop-down list.
Vehicle Status - Status of the vehicle related to this specific repair. This may be used to determine the overall status of the vehicle.
Part Kit (SSI, Miscellaneous I tab, switch 34) - Accept the part kit shown or assign a new part kit number.
Share Paperless (SSM, switch 15) - Indicate whether the primary mechanic is allowed to share the work and request assistance from another mechanic.
Outside - This option allows the line to be flagged as an outside line if the repair type code is set to something other than OUTSIDE.
OEM Warranty - This allows a job to be flagged as an OEM warranty.
Technicians
Underneath the Line Detail section, you are able to add technicians to the line if not prompted as an outside job. If the line was selected as an outside job, the technician's section would change to asking for a PO number and a Vendor.
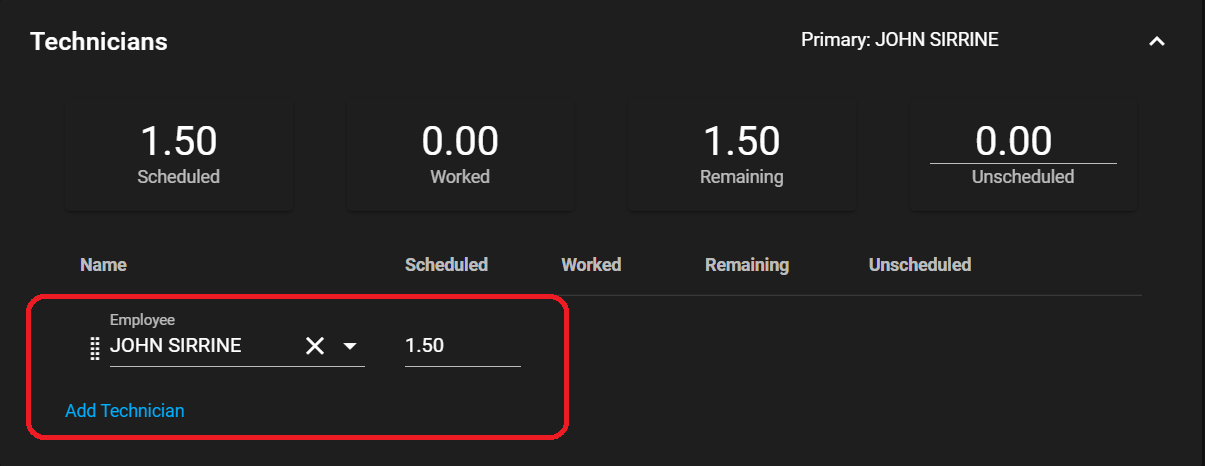
However, if not an outside job, all that the user will need to input is the mechanic on the job. Search a mechanic by their name and then choosing from the drop-down menu of suggestions. Next, you will need to input their scheduled time on the job. Once saved, it will upload.
Saving
To save the changes made on the WO line, scroll down to the bottom right-hand corner and click save. This will navigate you back to the Work Order page where you can view the information.

Edit
Once a line has been added to a Work Order, you are able to edit the line. On the WO page, click on the line you wish to modify and there should be an Edit button. This will navigate you back into the WO line where you can make your changes.

Delete WO Line
In RTA Web, users will have the ability to delete WO lines with a simple click. There may be times when you want to completely delete a job from a work order rather than reschedule it. To delete a work order line, do the following:
Select the line that you wish to delete and the line details will appear.
Click delete, which will prompt a message asking “Are you sure you want to delete? This operation cannot be undone”.

Once you have confirmed the process, the line will display the status from Open to VOIDED.

Similar to RTA Desktop, and in accordance with rules of auditing, if a Work Order Line has had transactions posted to it, the line cannot be deleted. Transactions can be reversed, but the data will remain as a positive and/or negative entry.