RTA Inspect - Completing an Inspection
The steps below will guide users through completing a basic inspection they may see in RTA Inspect. Inspection forms can be customized so you may see some varied inspection forms in your organization.
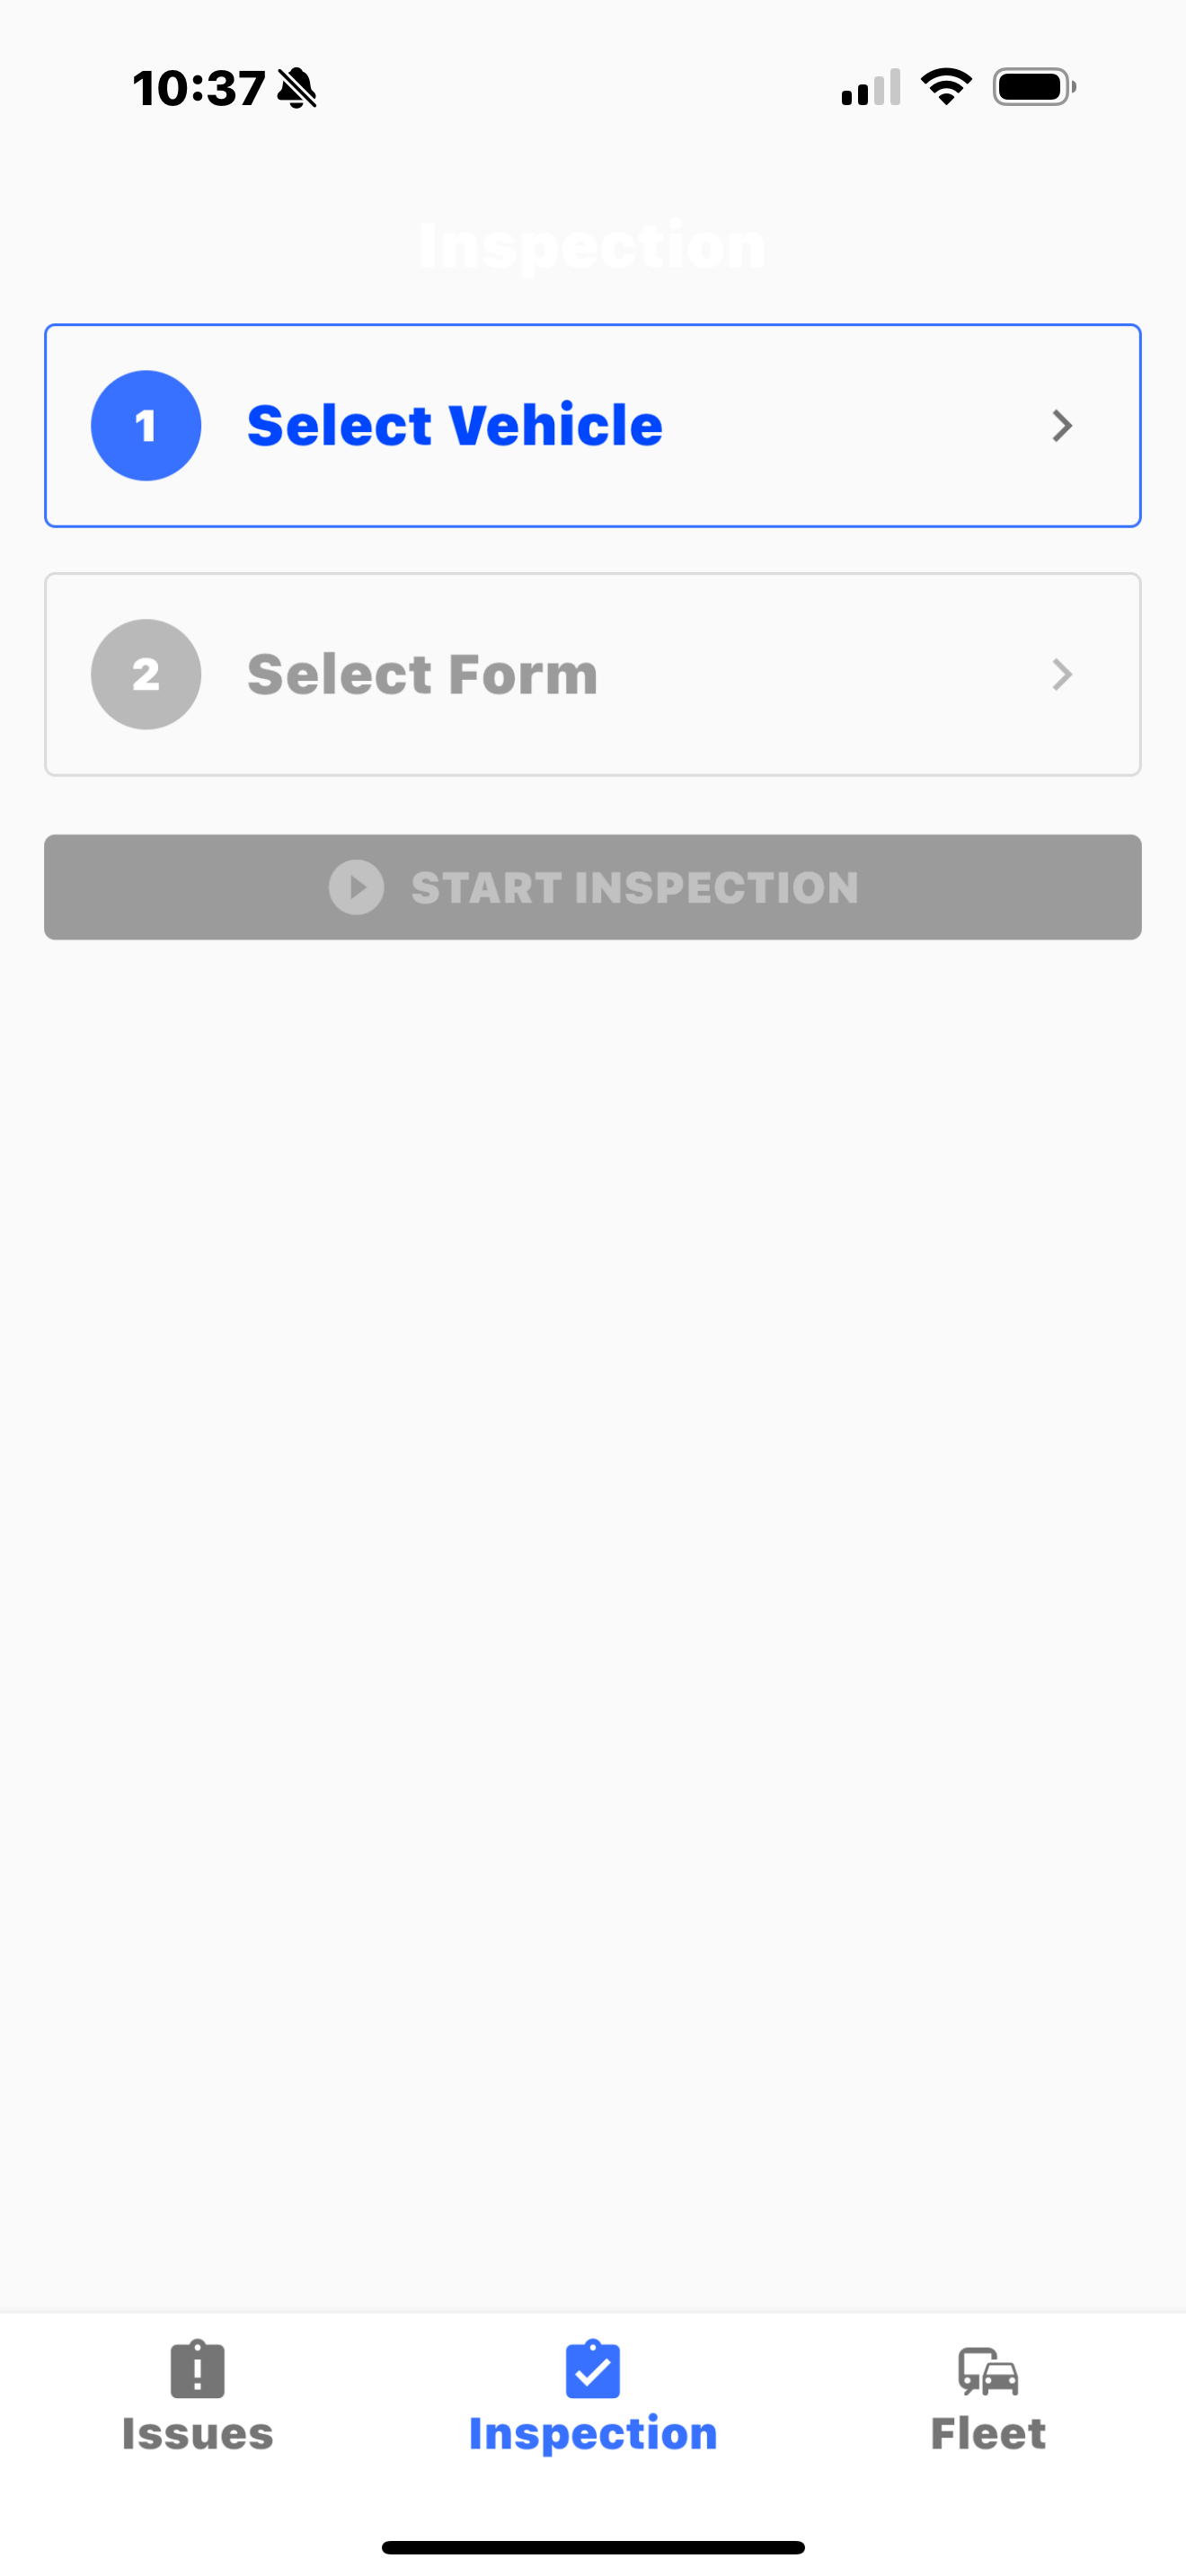
Log in to the RTA Inspect App on your device and you will see the inspection home page
Select a vehicle from the list by clicking “Select Vehicle”
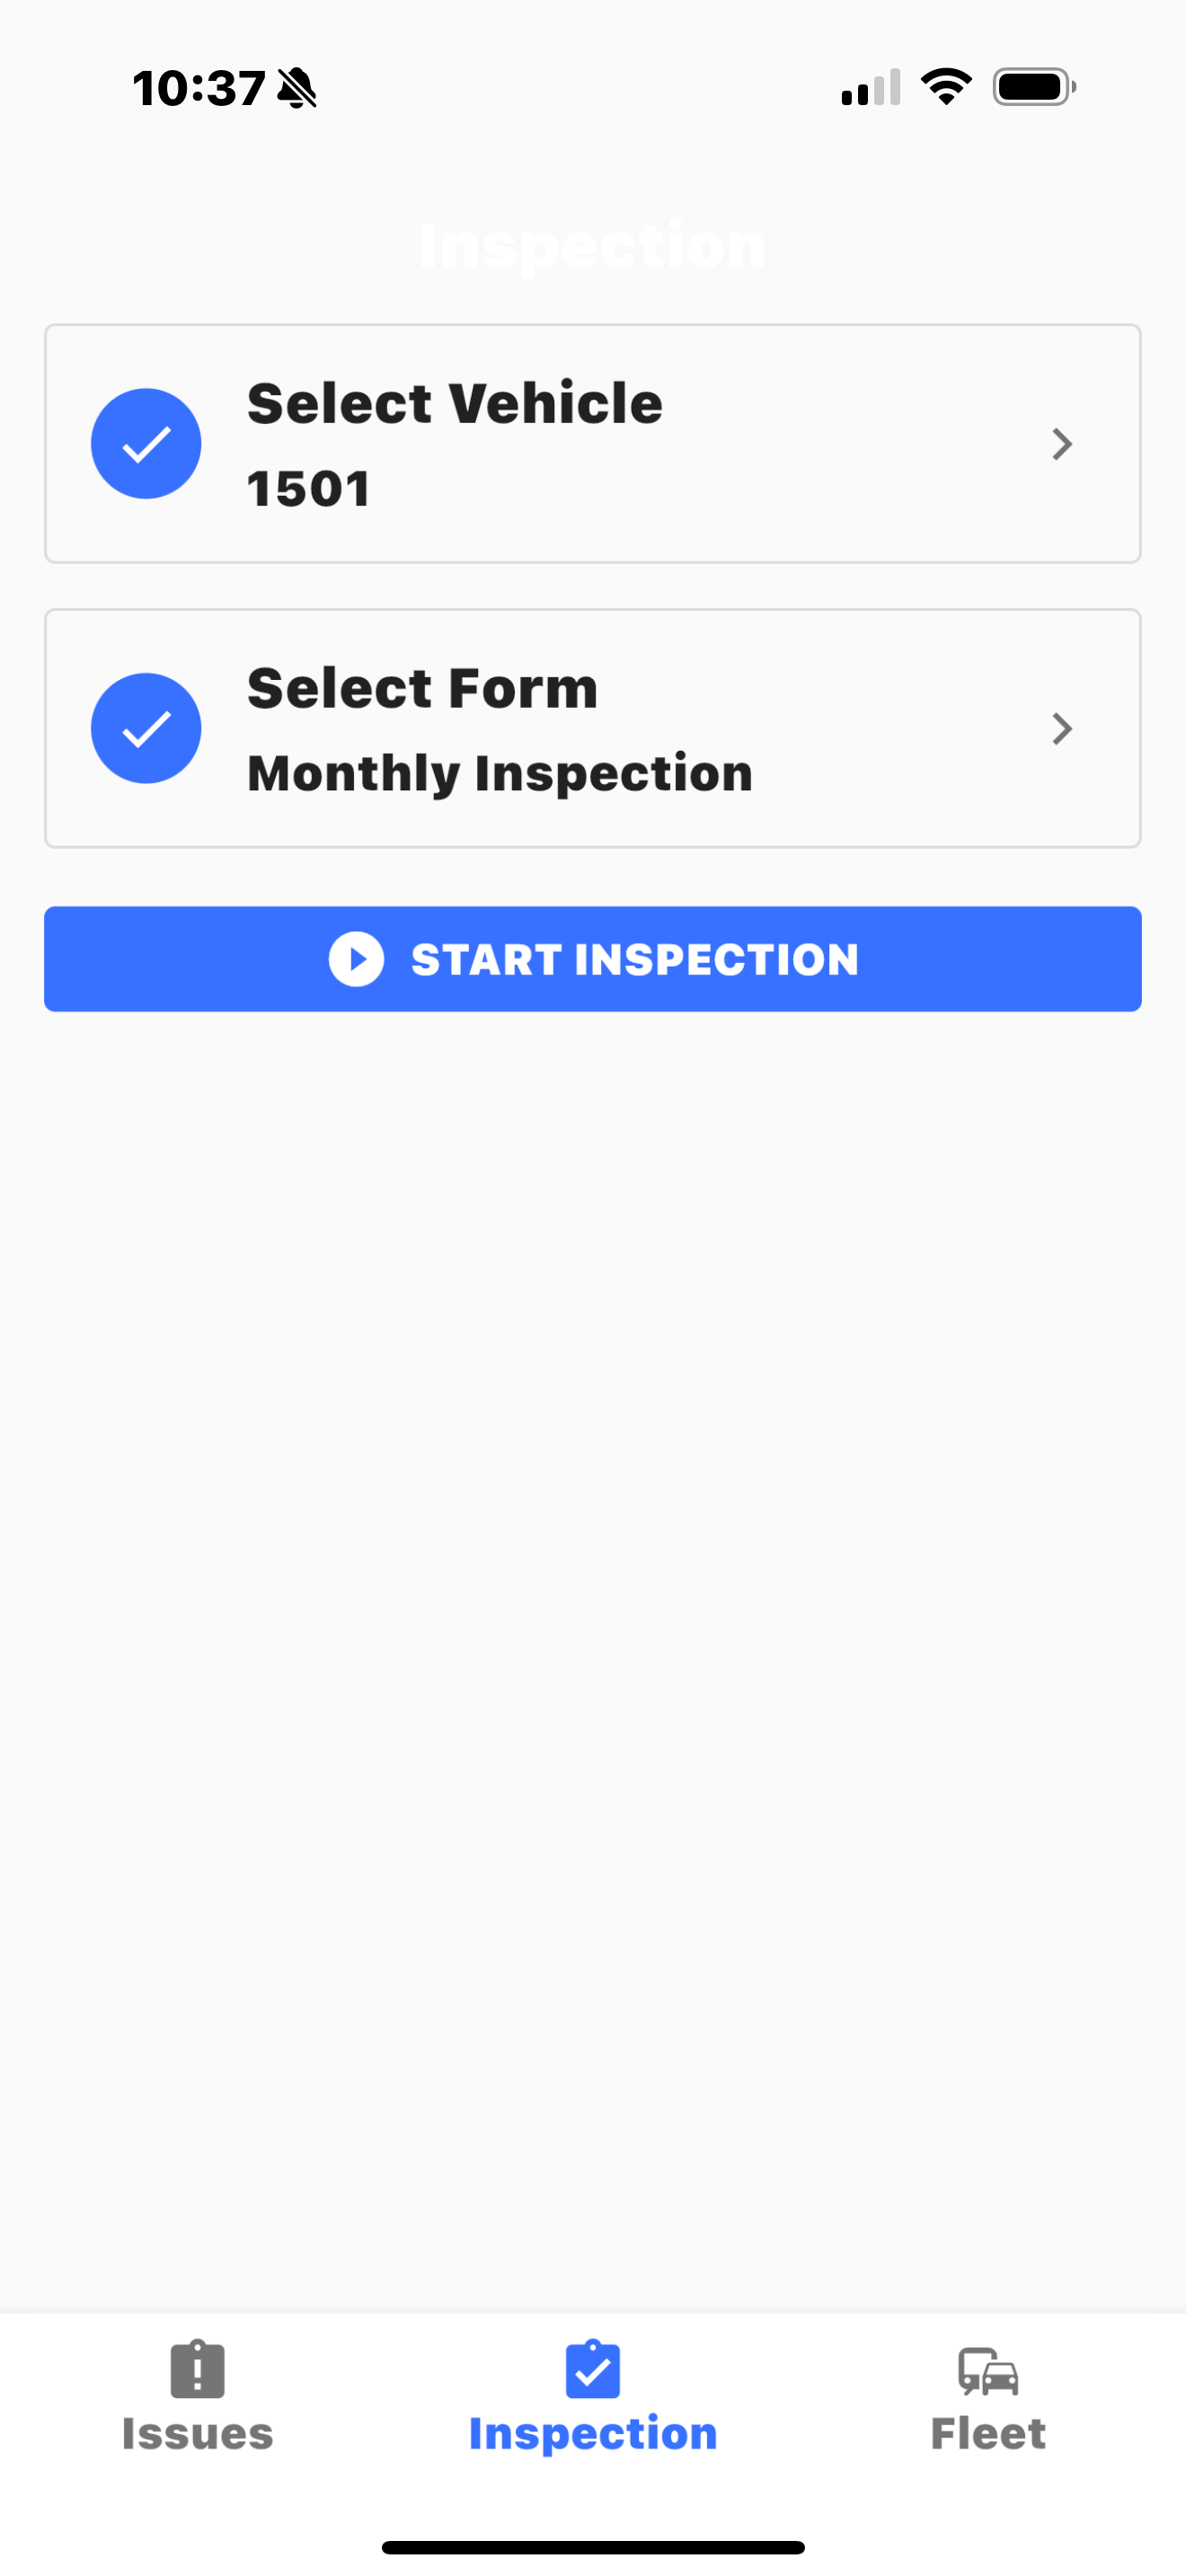
Then select an available inspection form by clicking “ Select Form”
Once the asset and form are selected click “Start Inspection”
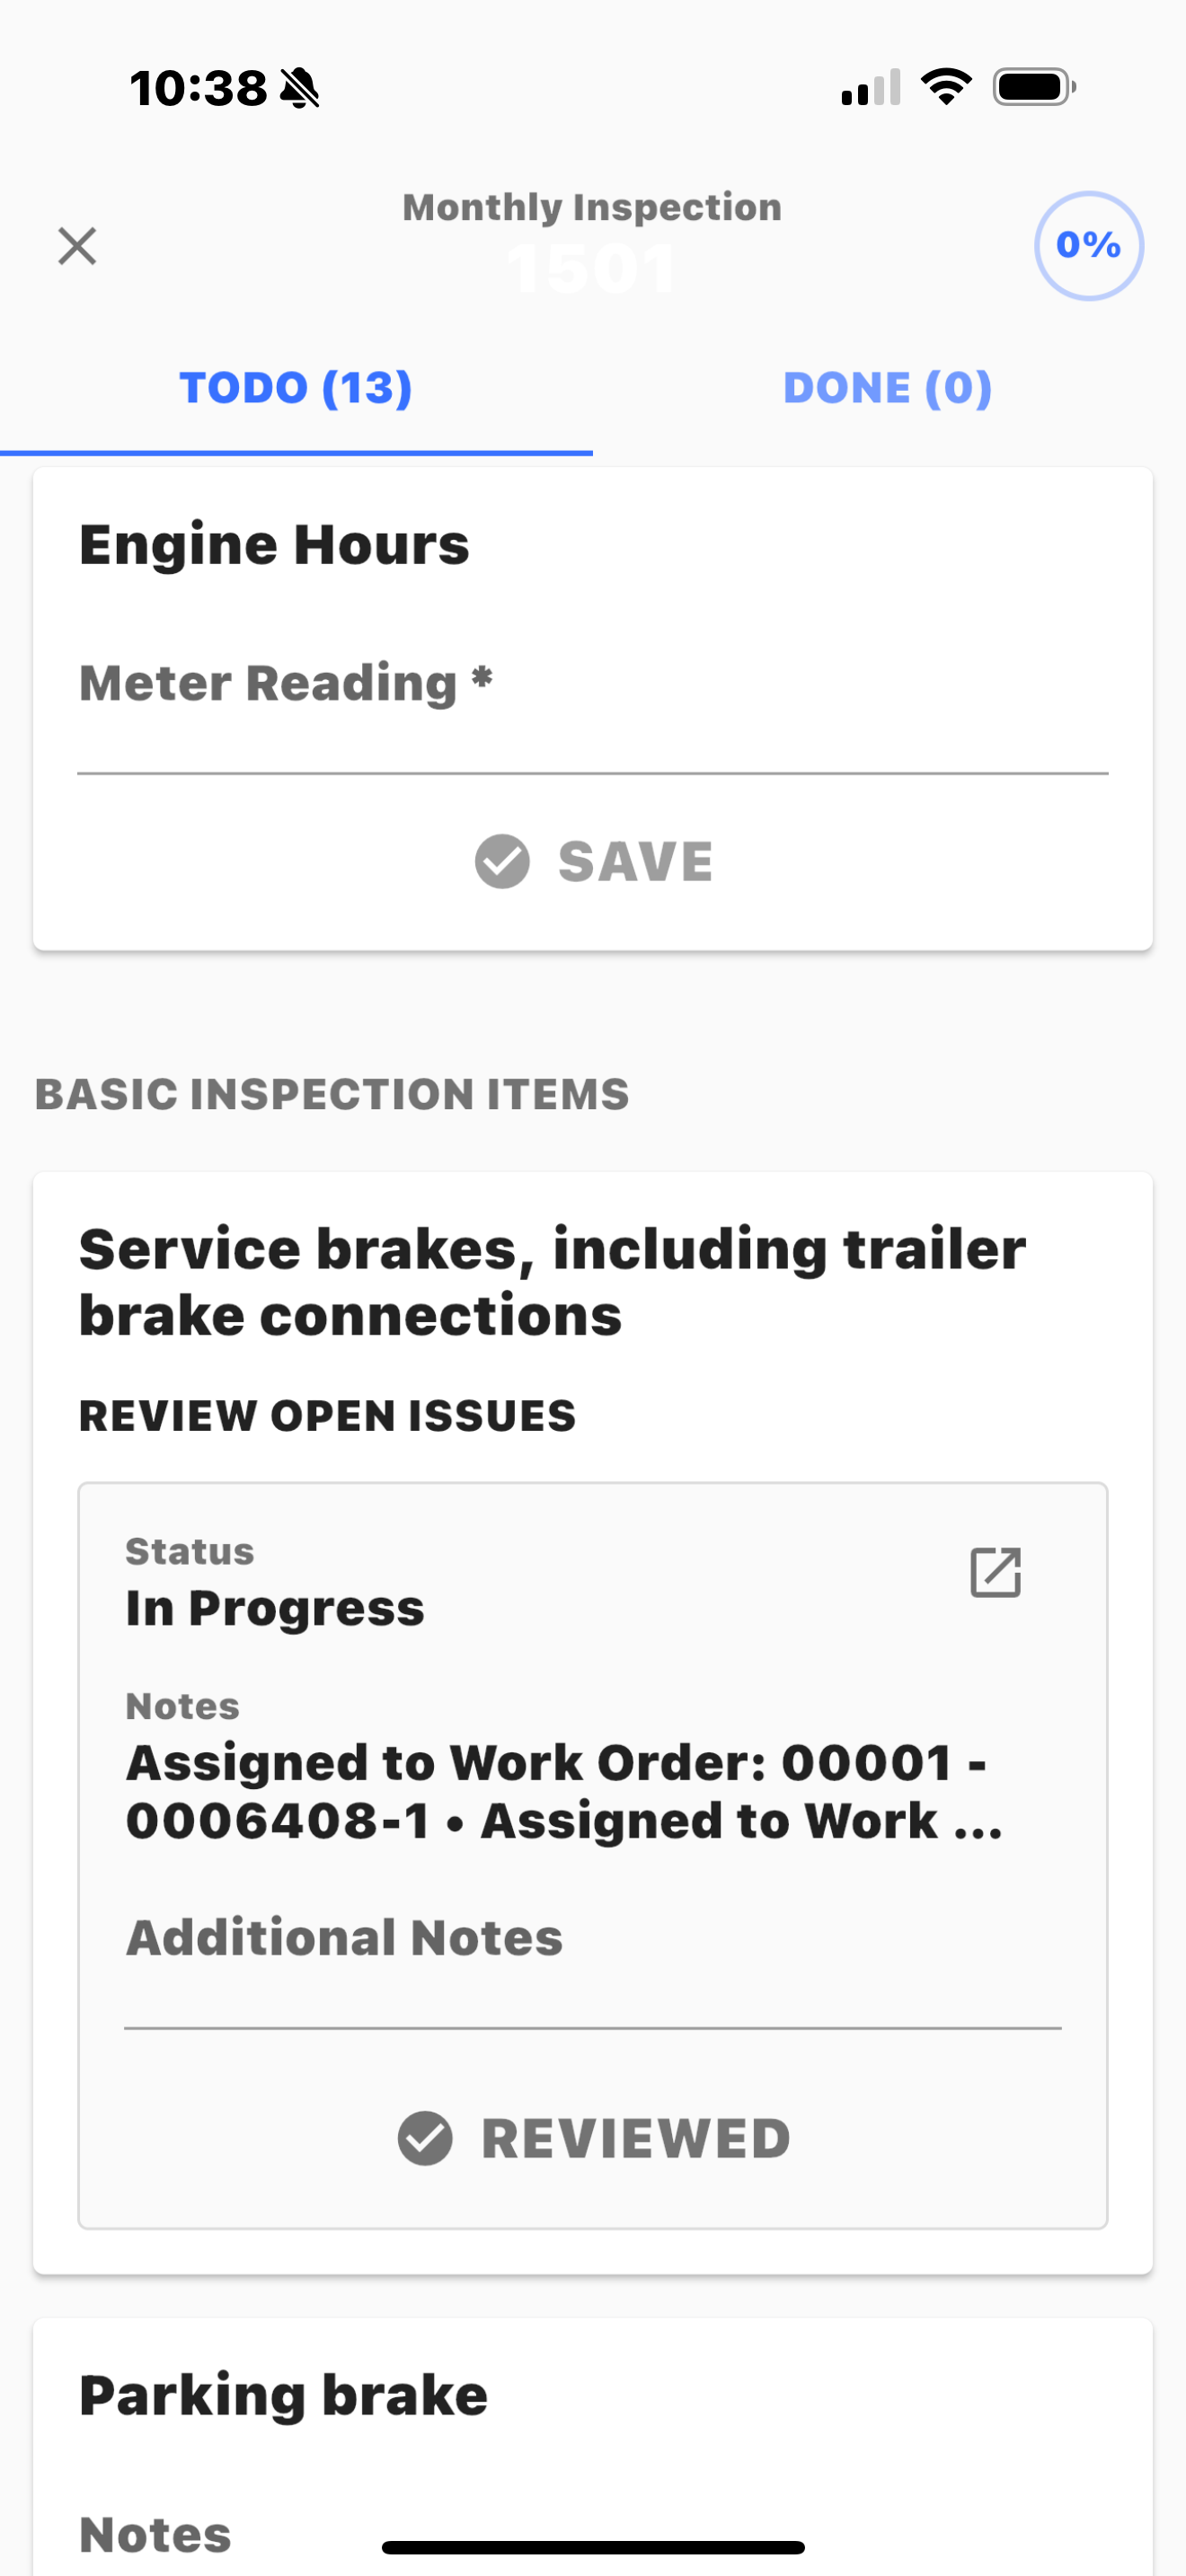
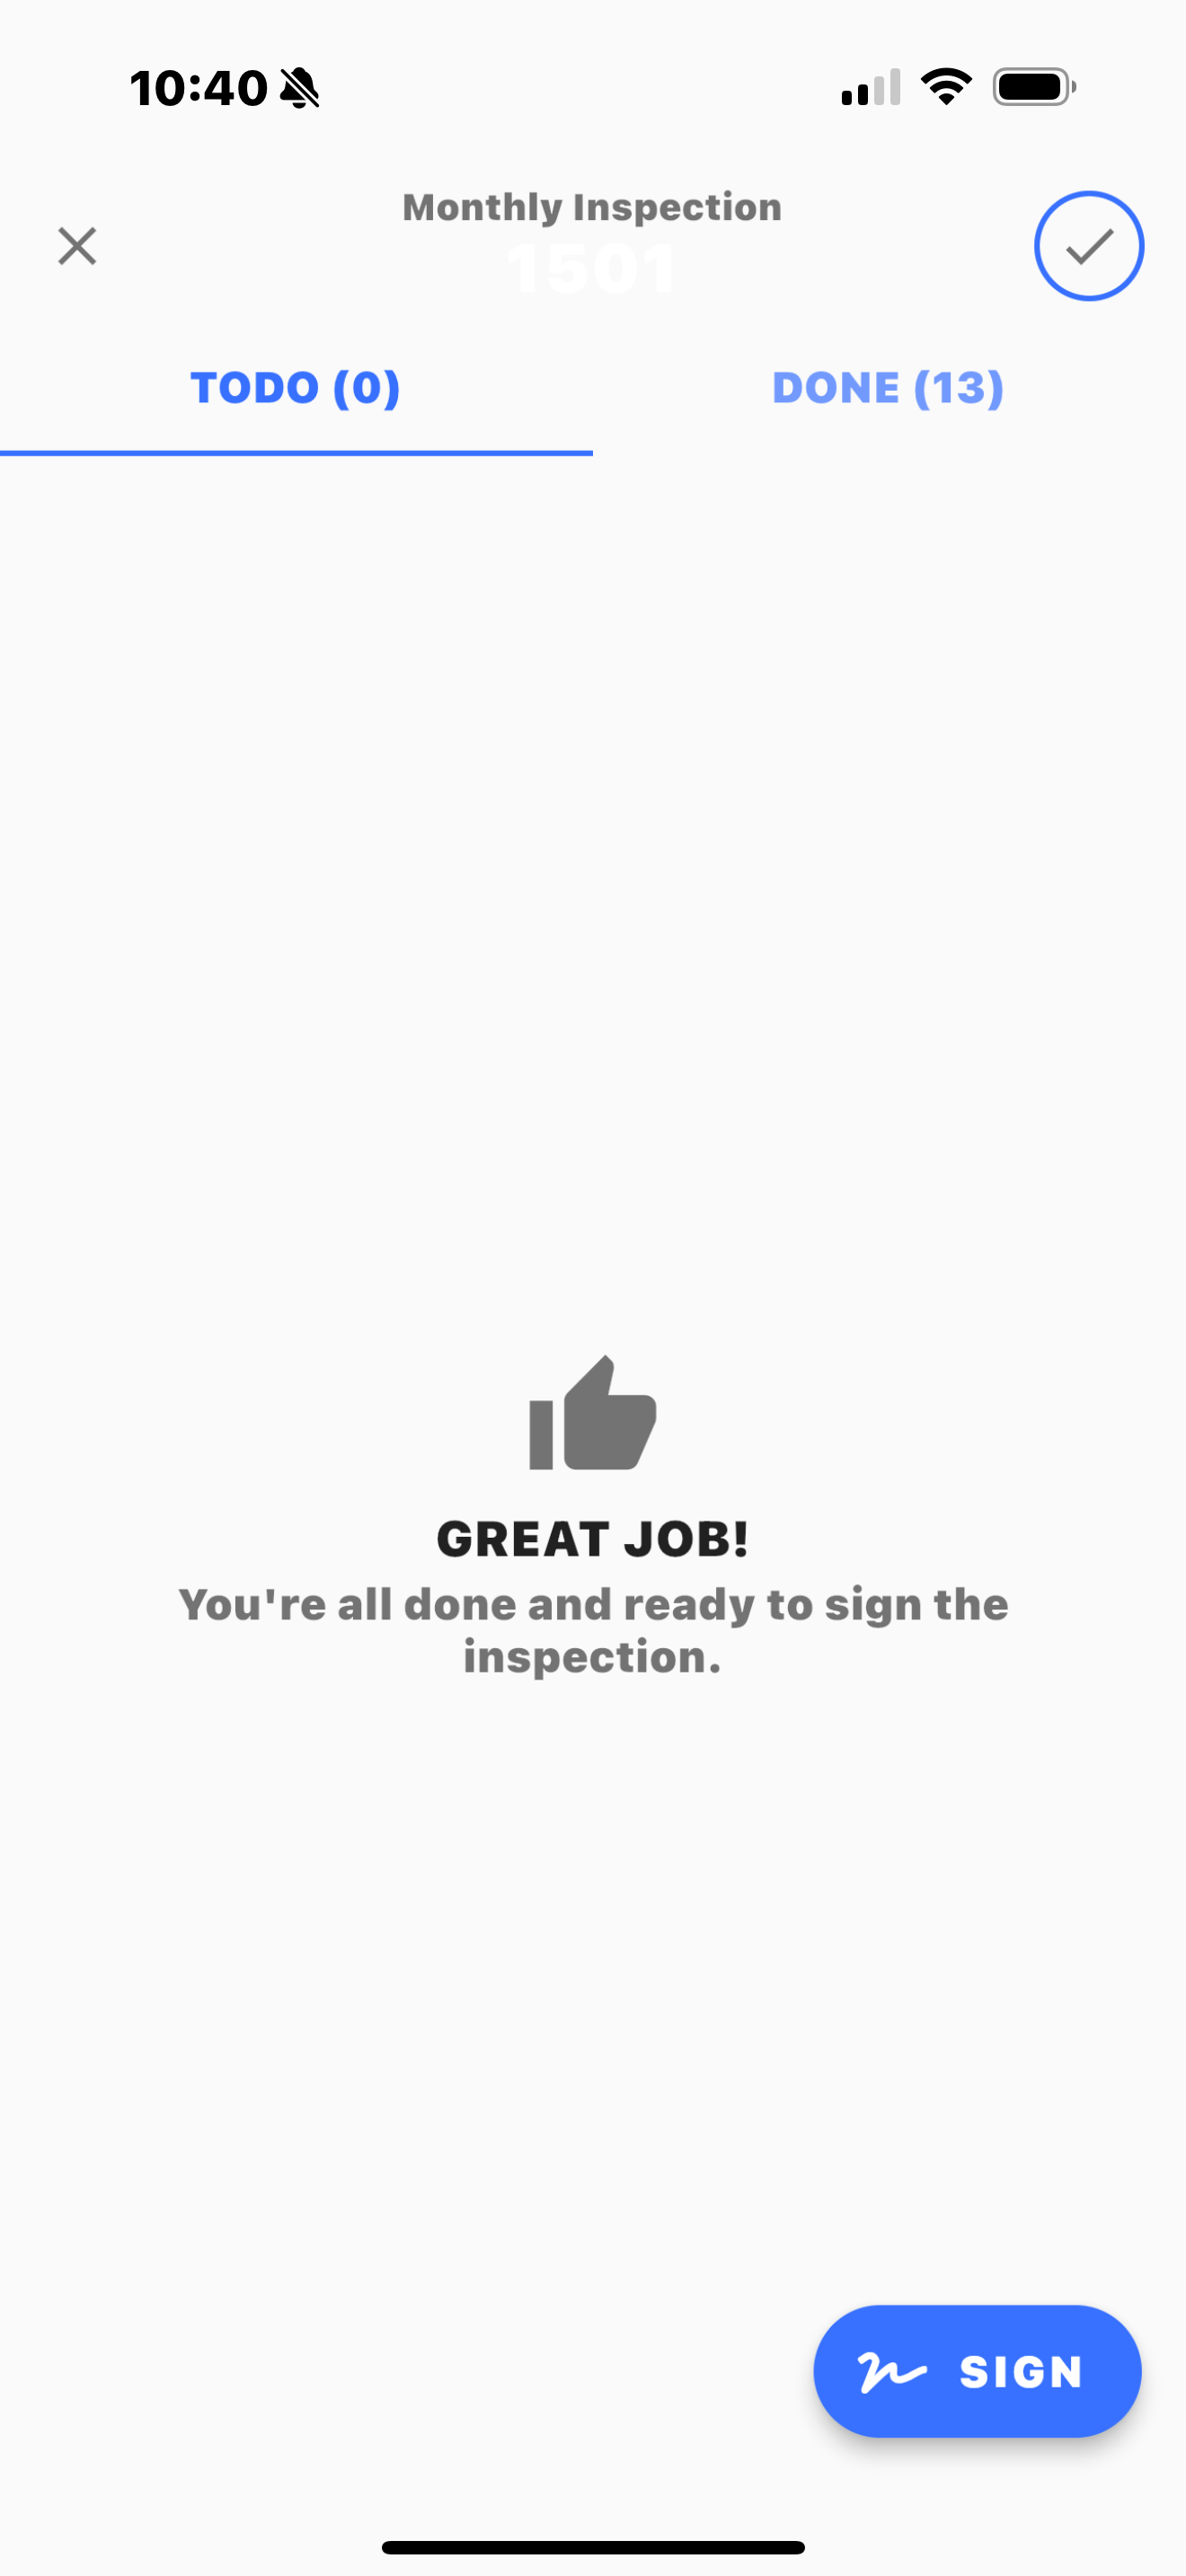
Once the inspection opens you will see the “To Do” count at the top
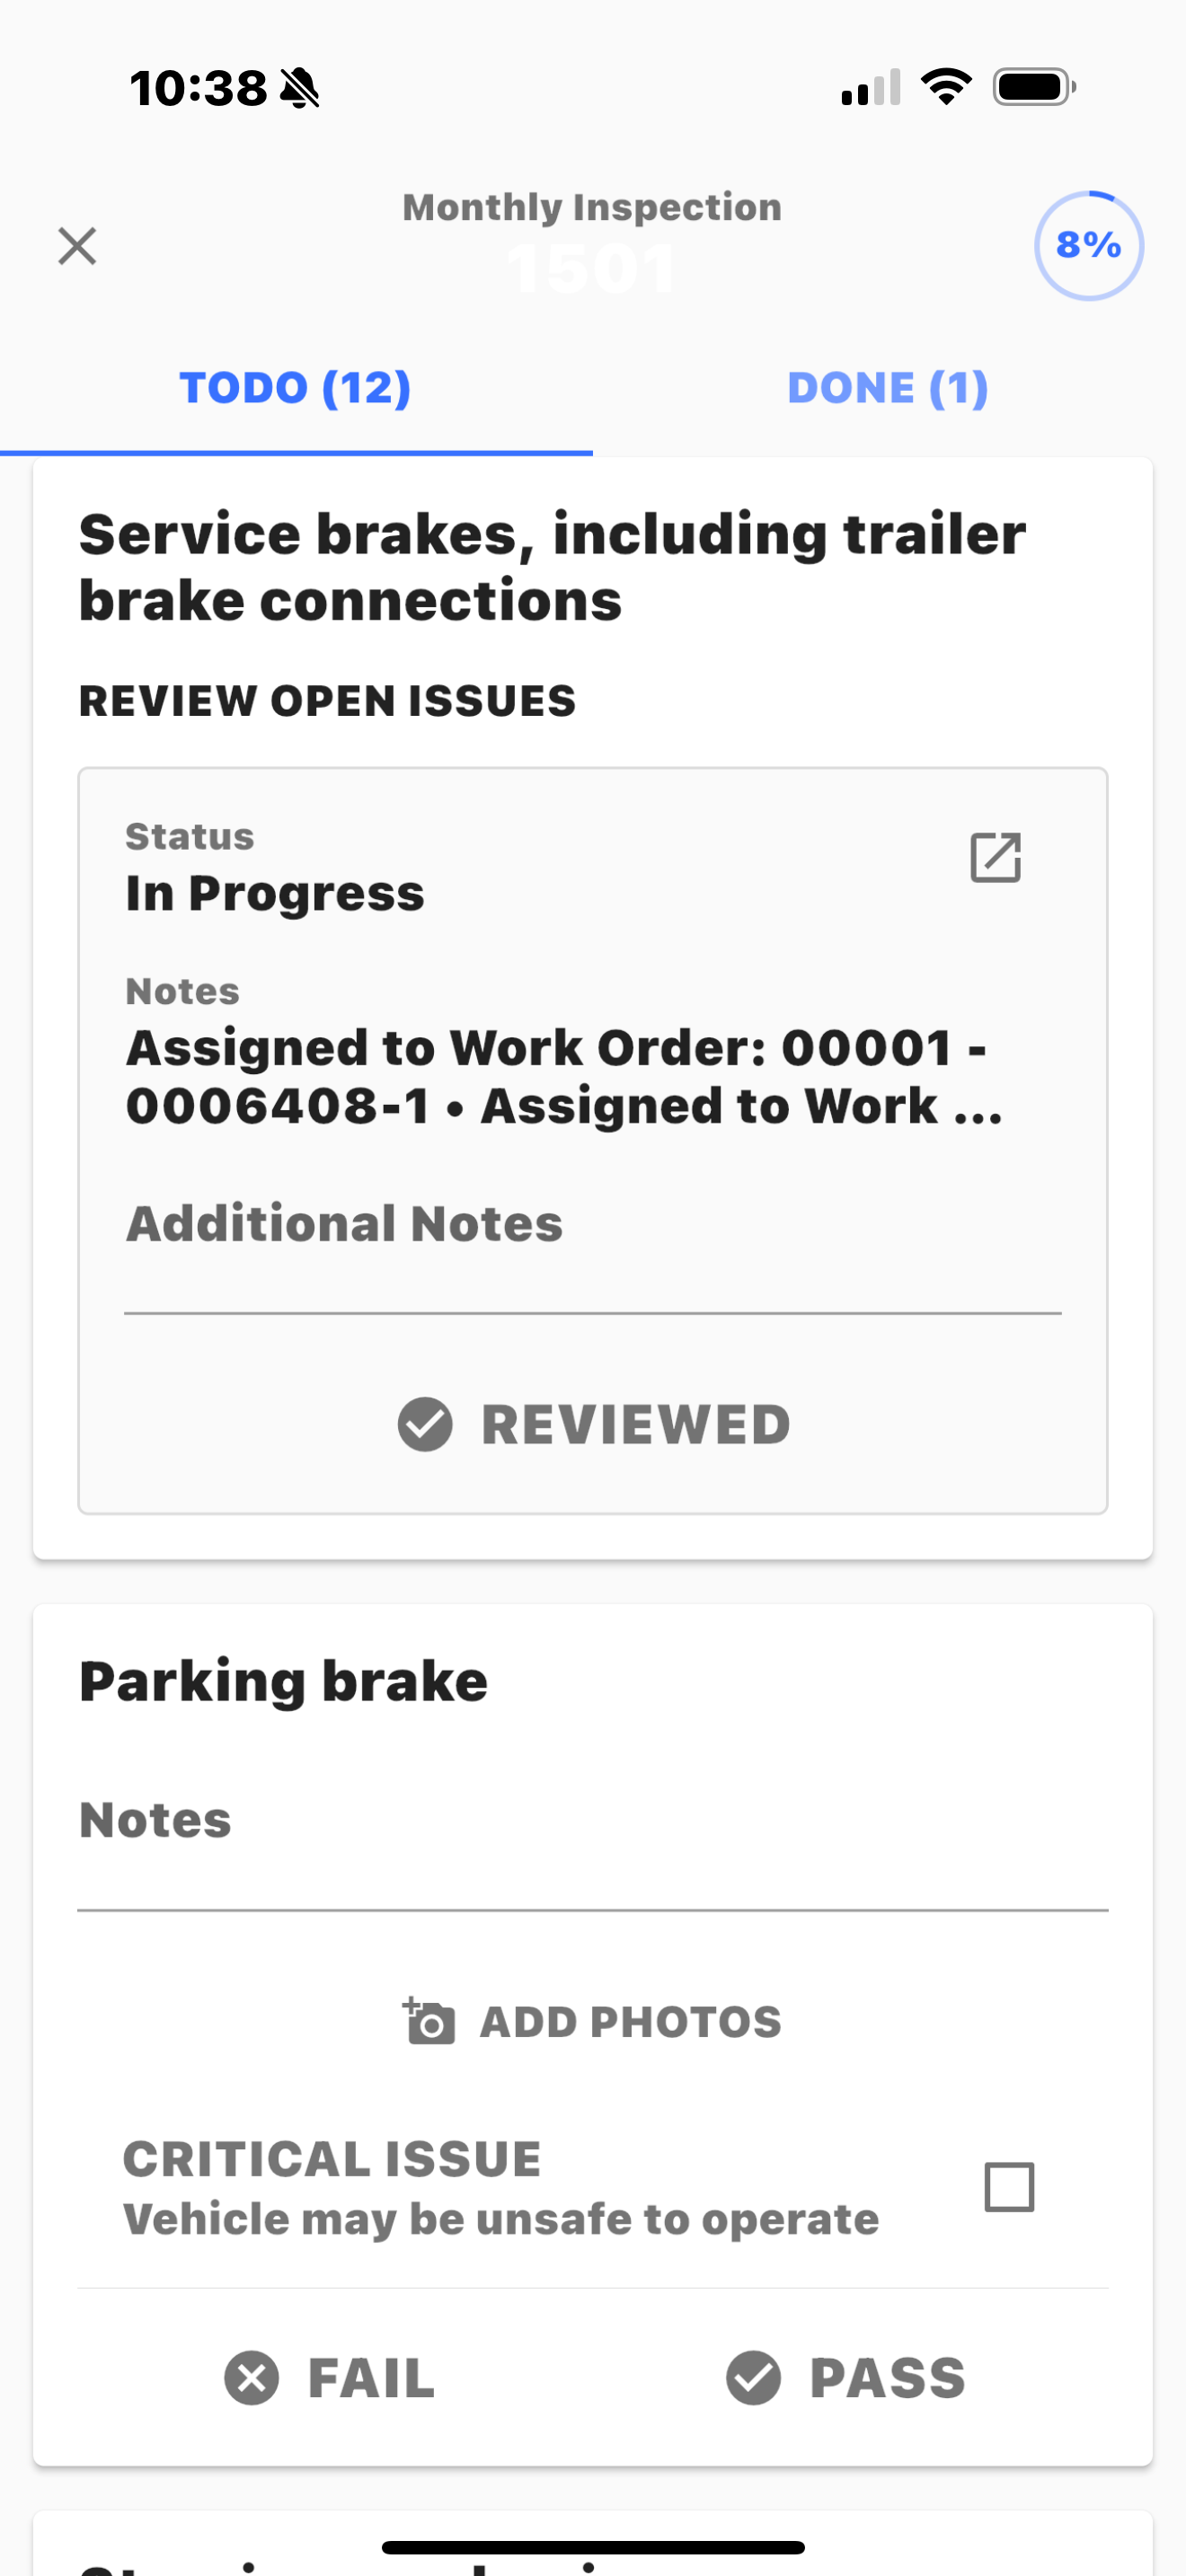
Review each section, enter any necessary information, notes, or add photos and click “Save”, “Pass/ Fail” or “Reviewed” to complete the inspection item
Once all items have been completed you will see the sign button on the bottom right
Click “Sign” and sign the inspection on your device
Inspection will be saved within the RTA Inspect App and can be emailed to anyone who may need it
Defects or failed items will be sent into RTA Fleet360 for visability in the shop to complete necessary repiars
