RTA Inspect - Adding Assets
Adding assets into RTA Inspect is required for them to be visible to operators to perfom inspections. There are two easy ways to add assets into RTA Inspect.
Link assets already in RTA Fleet360
Add assets one at a time in the RTA Inspect App.
Assets added in RTA Inspect are not linked to RTA Fleet360
Link Assets Already in RTA Fleet360
Log into RTA Fleet360
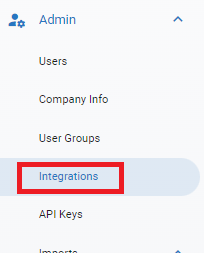
Click the “Admin > Integrations” link in the left sidebar, then select “RTA Inspect”
To Link your vehicles, click the “+” button in the top-right. You can also Unlink vehicles with the same process through the “-” button.
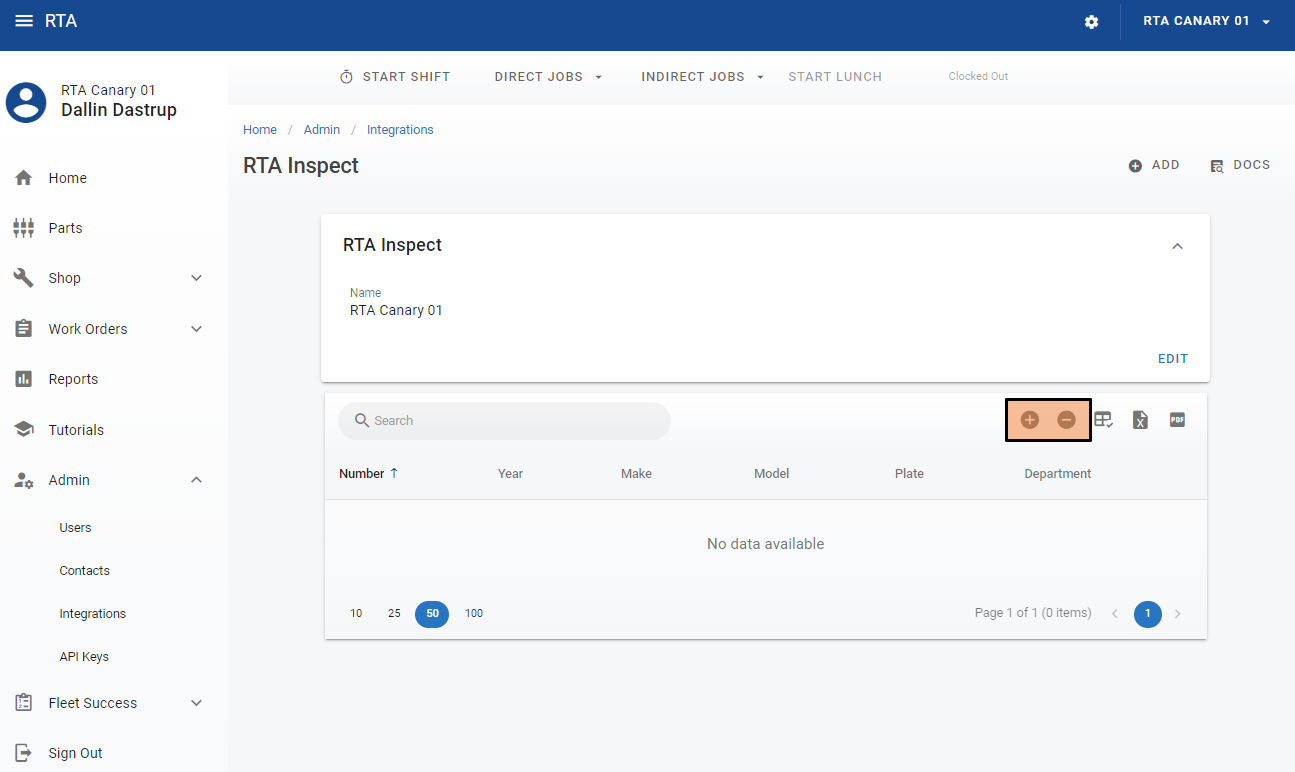
Check the boxes of the vehicles you wish to link to RTA Inspect. Click Save.
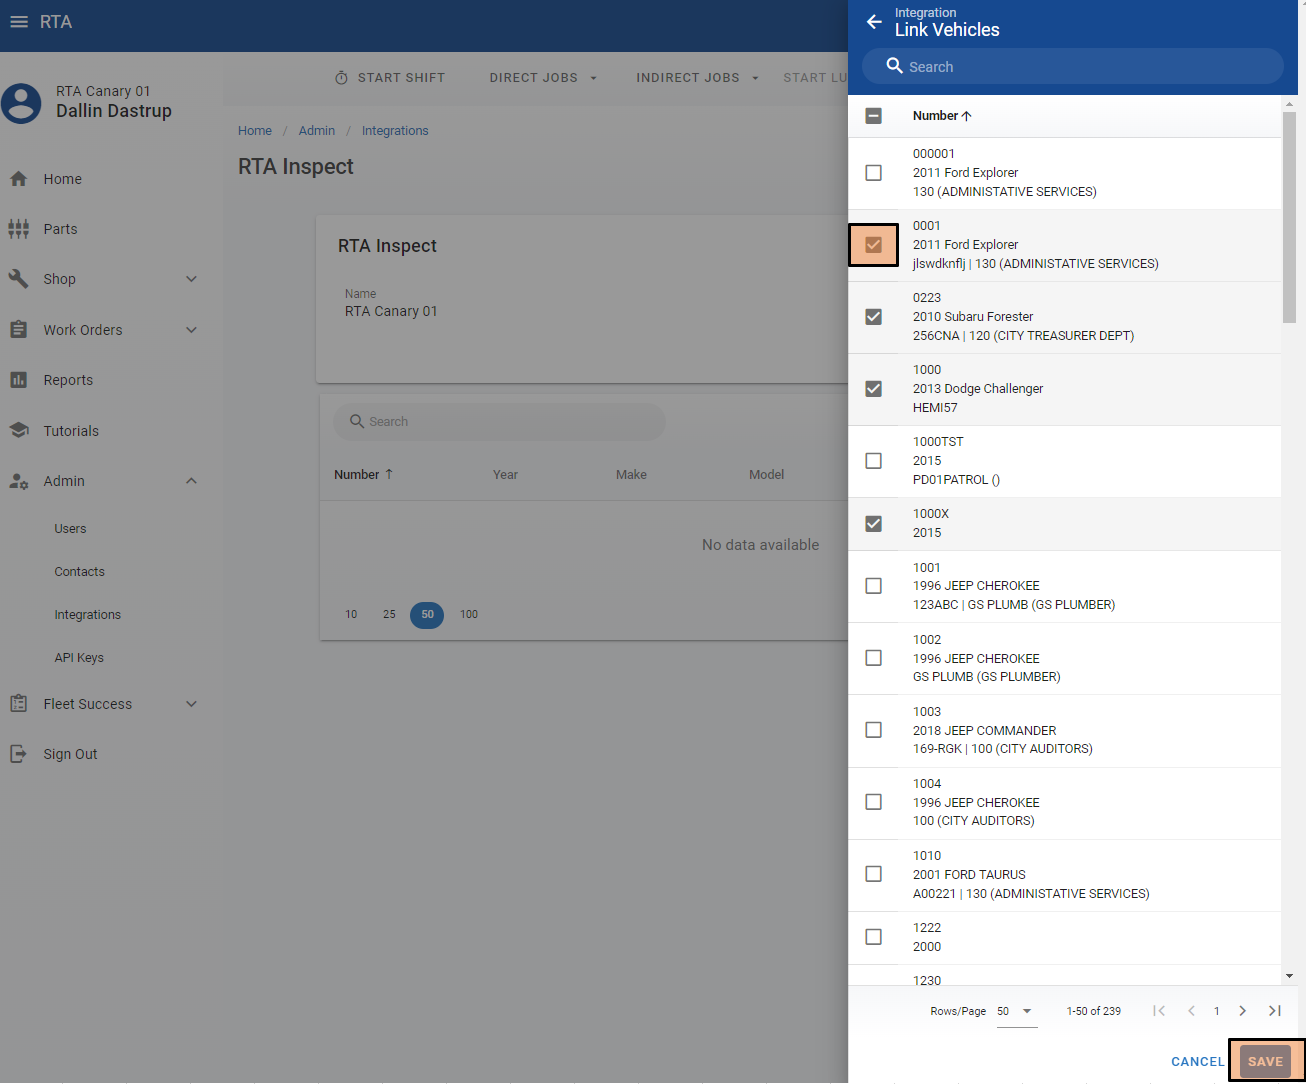
After hitting save, the assets you have selected will be linked to RTA Inspect and be visible for operators to perform inspections.
Adding Assets in RTA Inspect
Note: Only account owners can add vehicles in RTA Inspect.
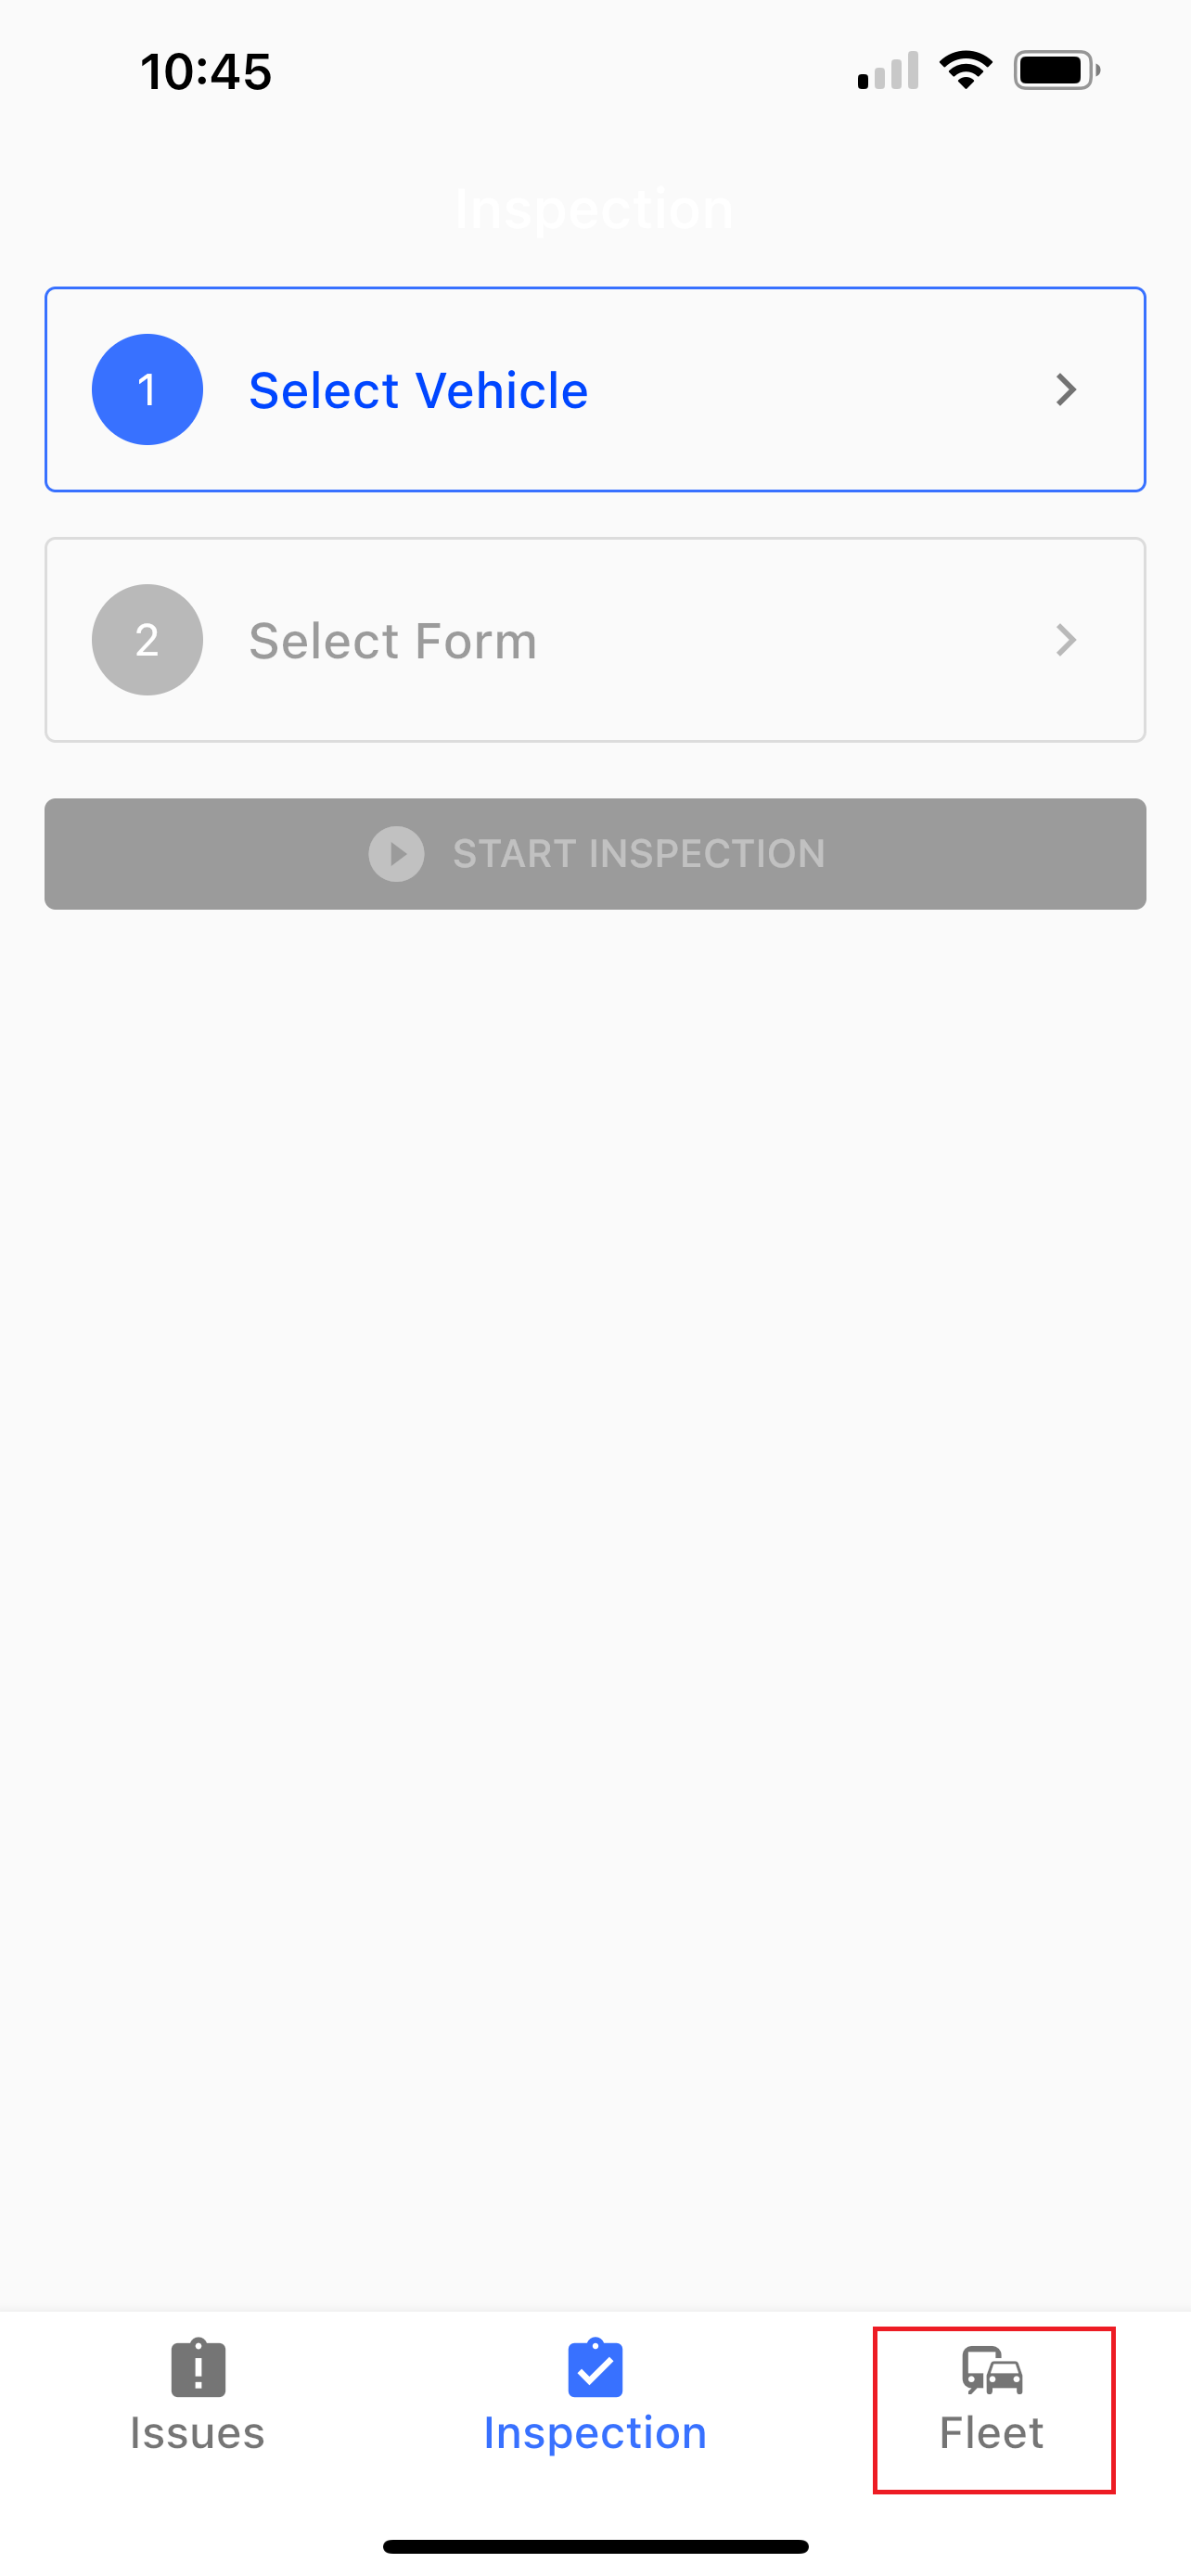
Open the RTA Inspect Inspect app on your phone or tablet device
At the bottom of the screen, tap “Fleet”
Next, tap “Vehicles” in the middle of the screen.
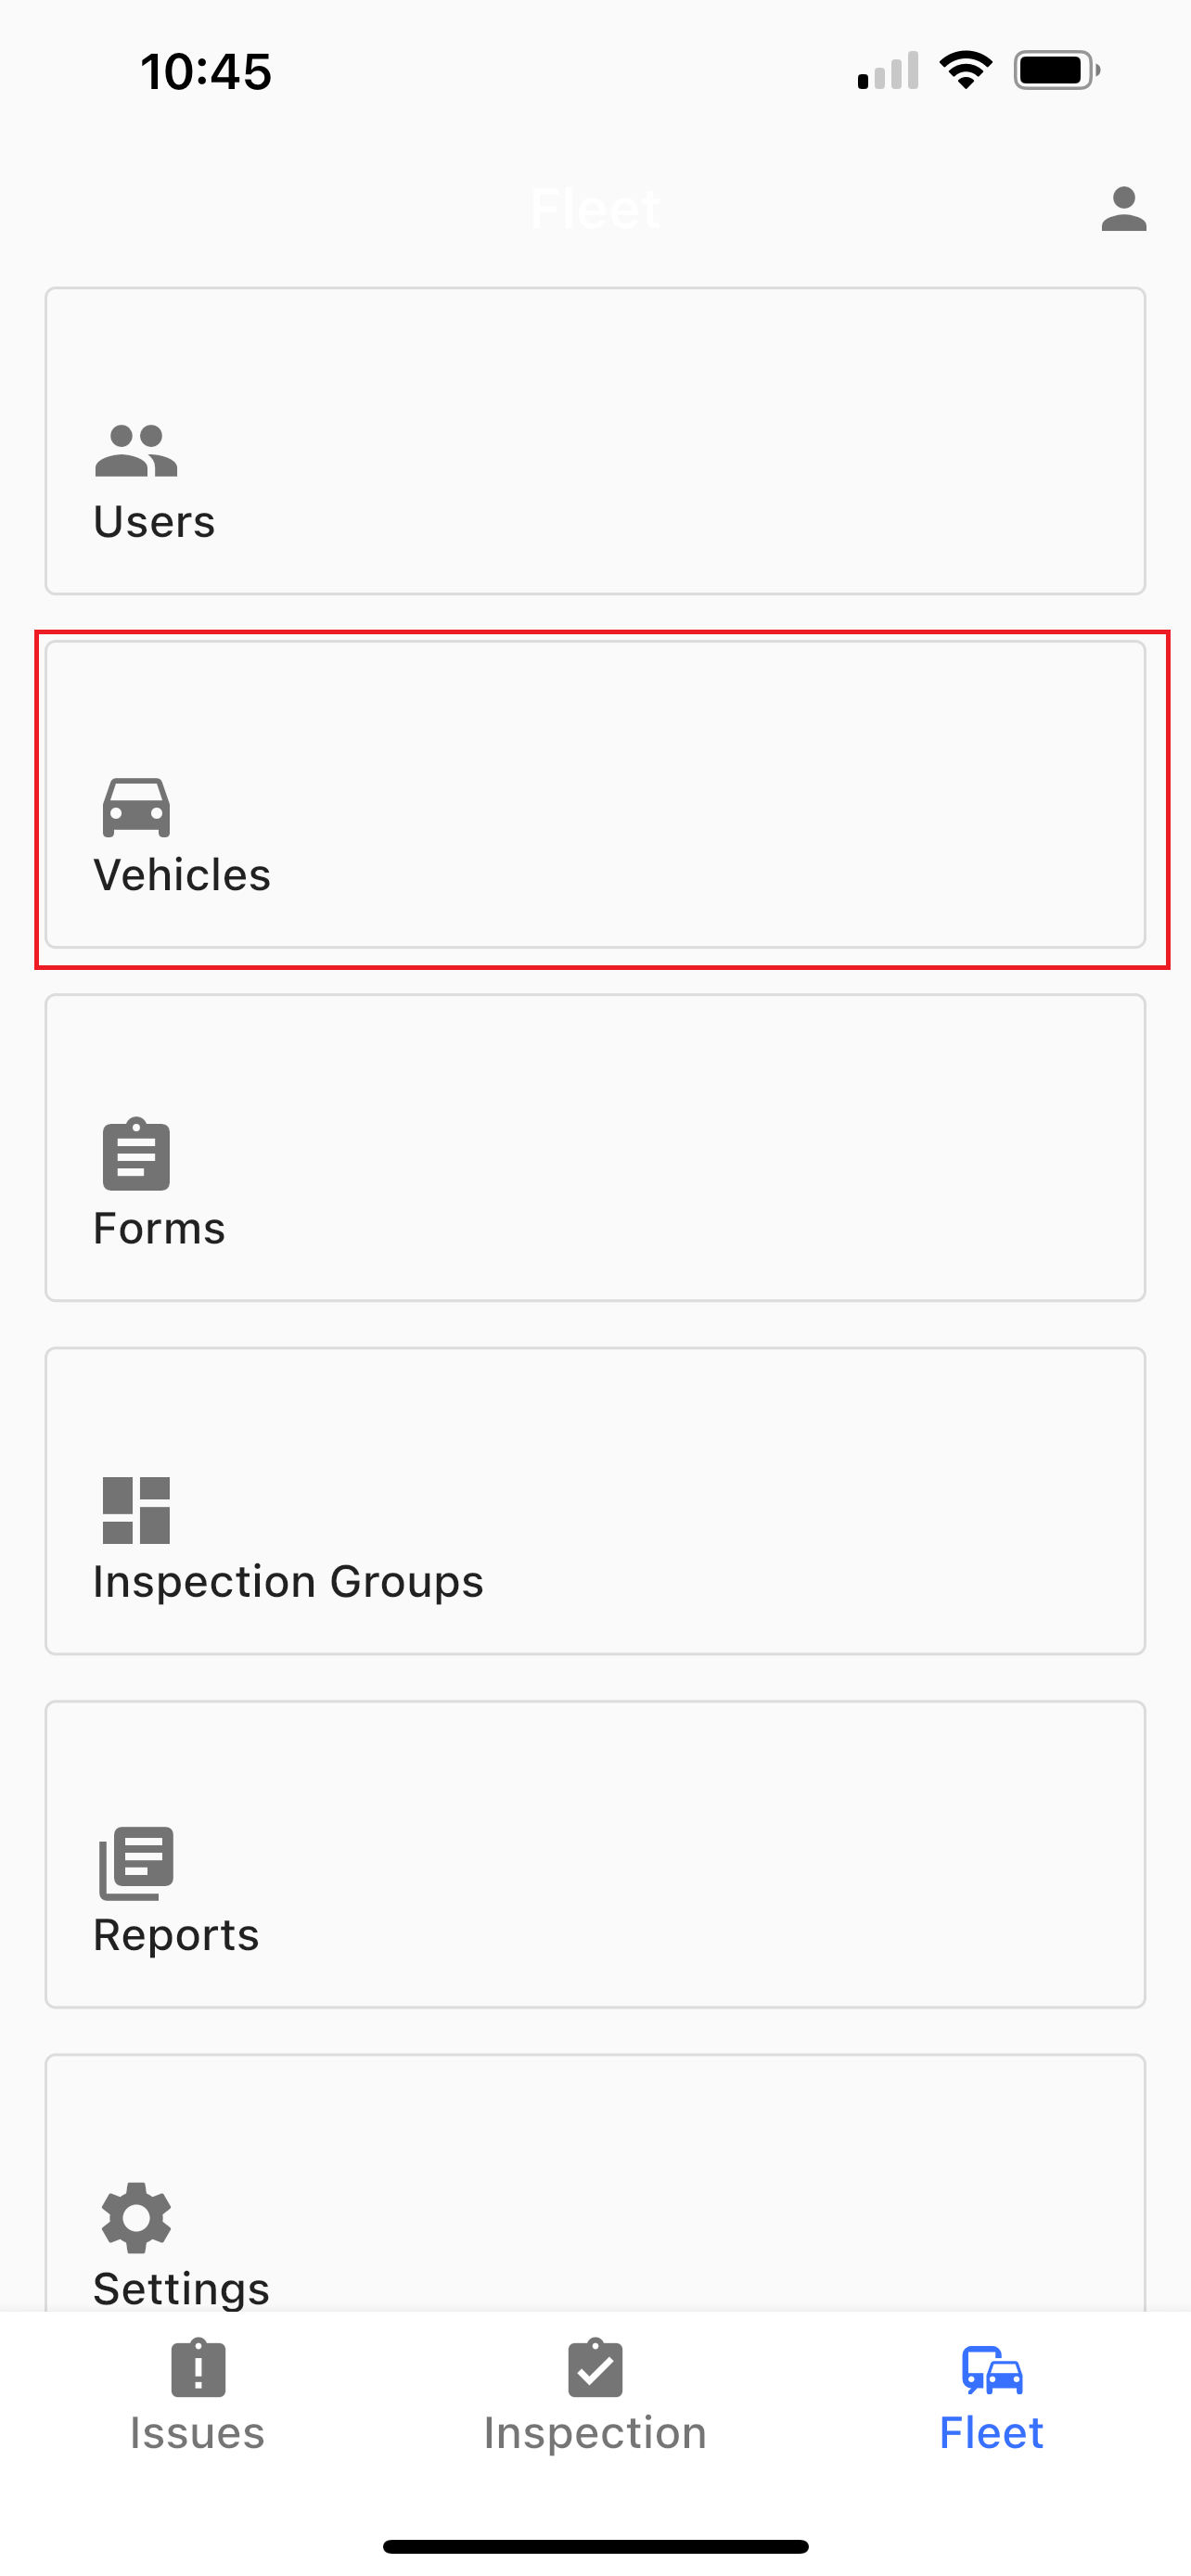
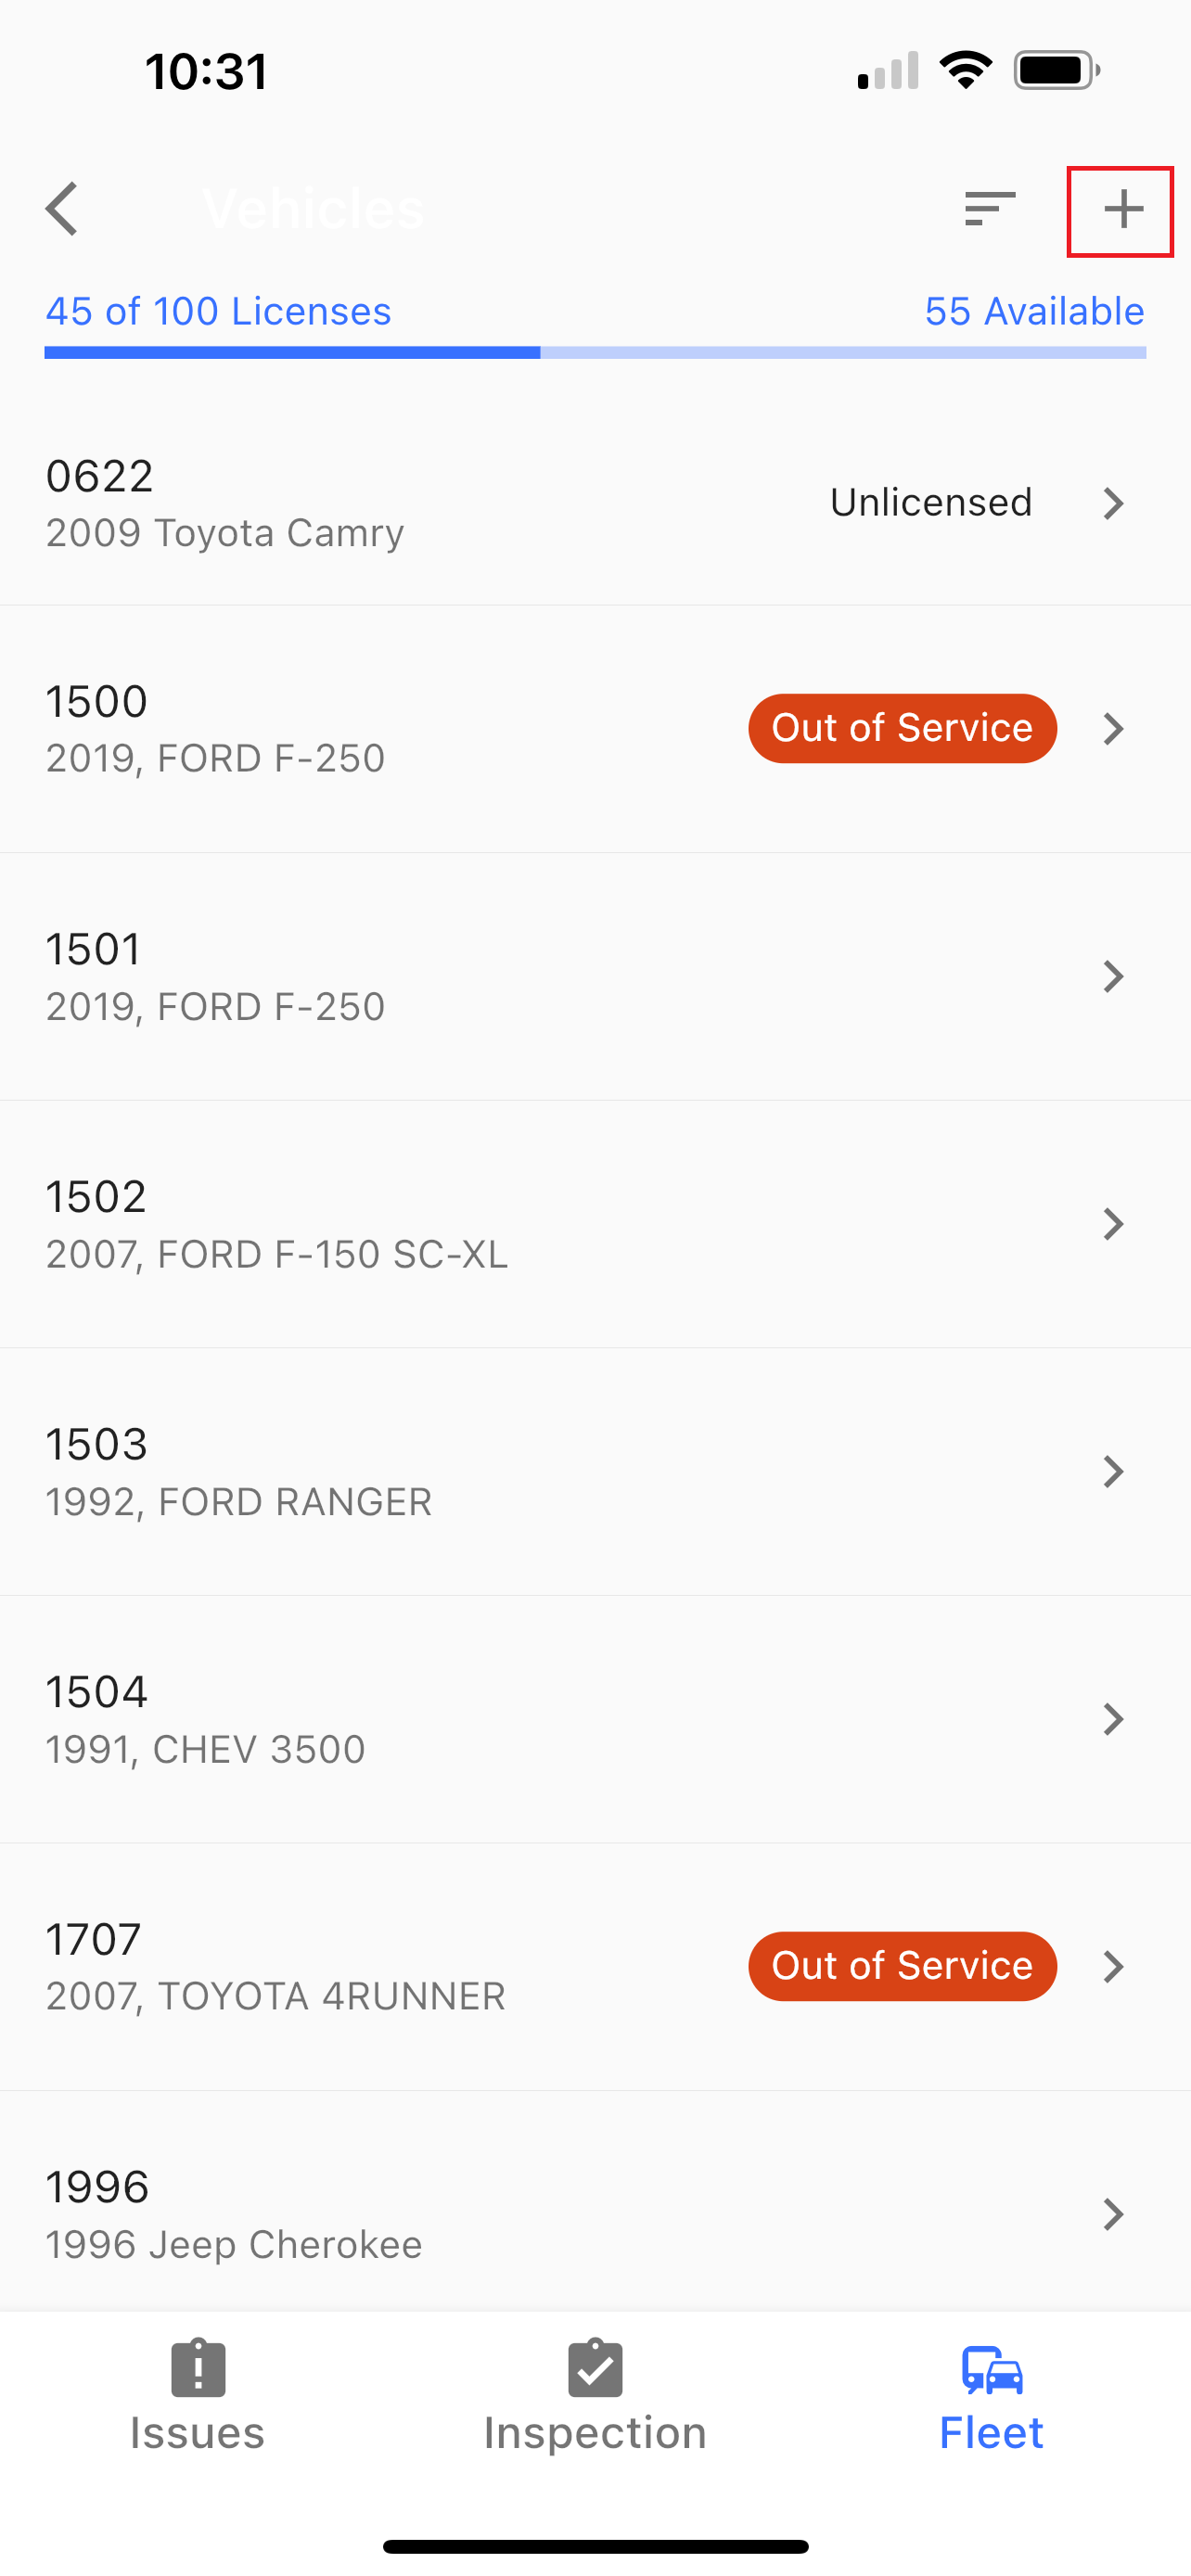
Tap the “Add” button in the center of the screen or the ➕ button in the upper right of the screen.
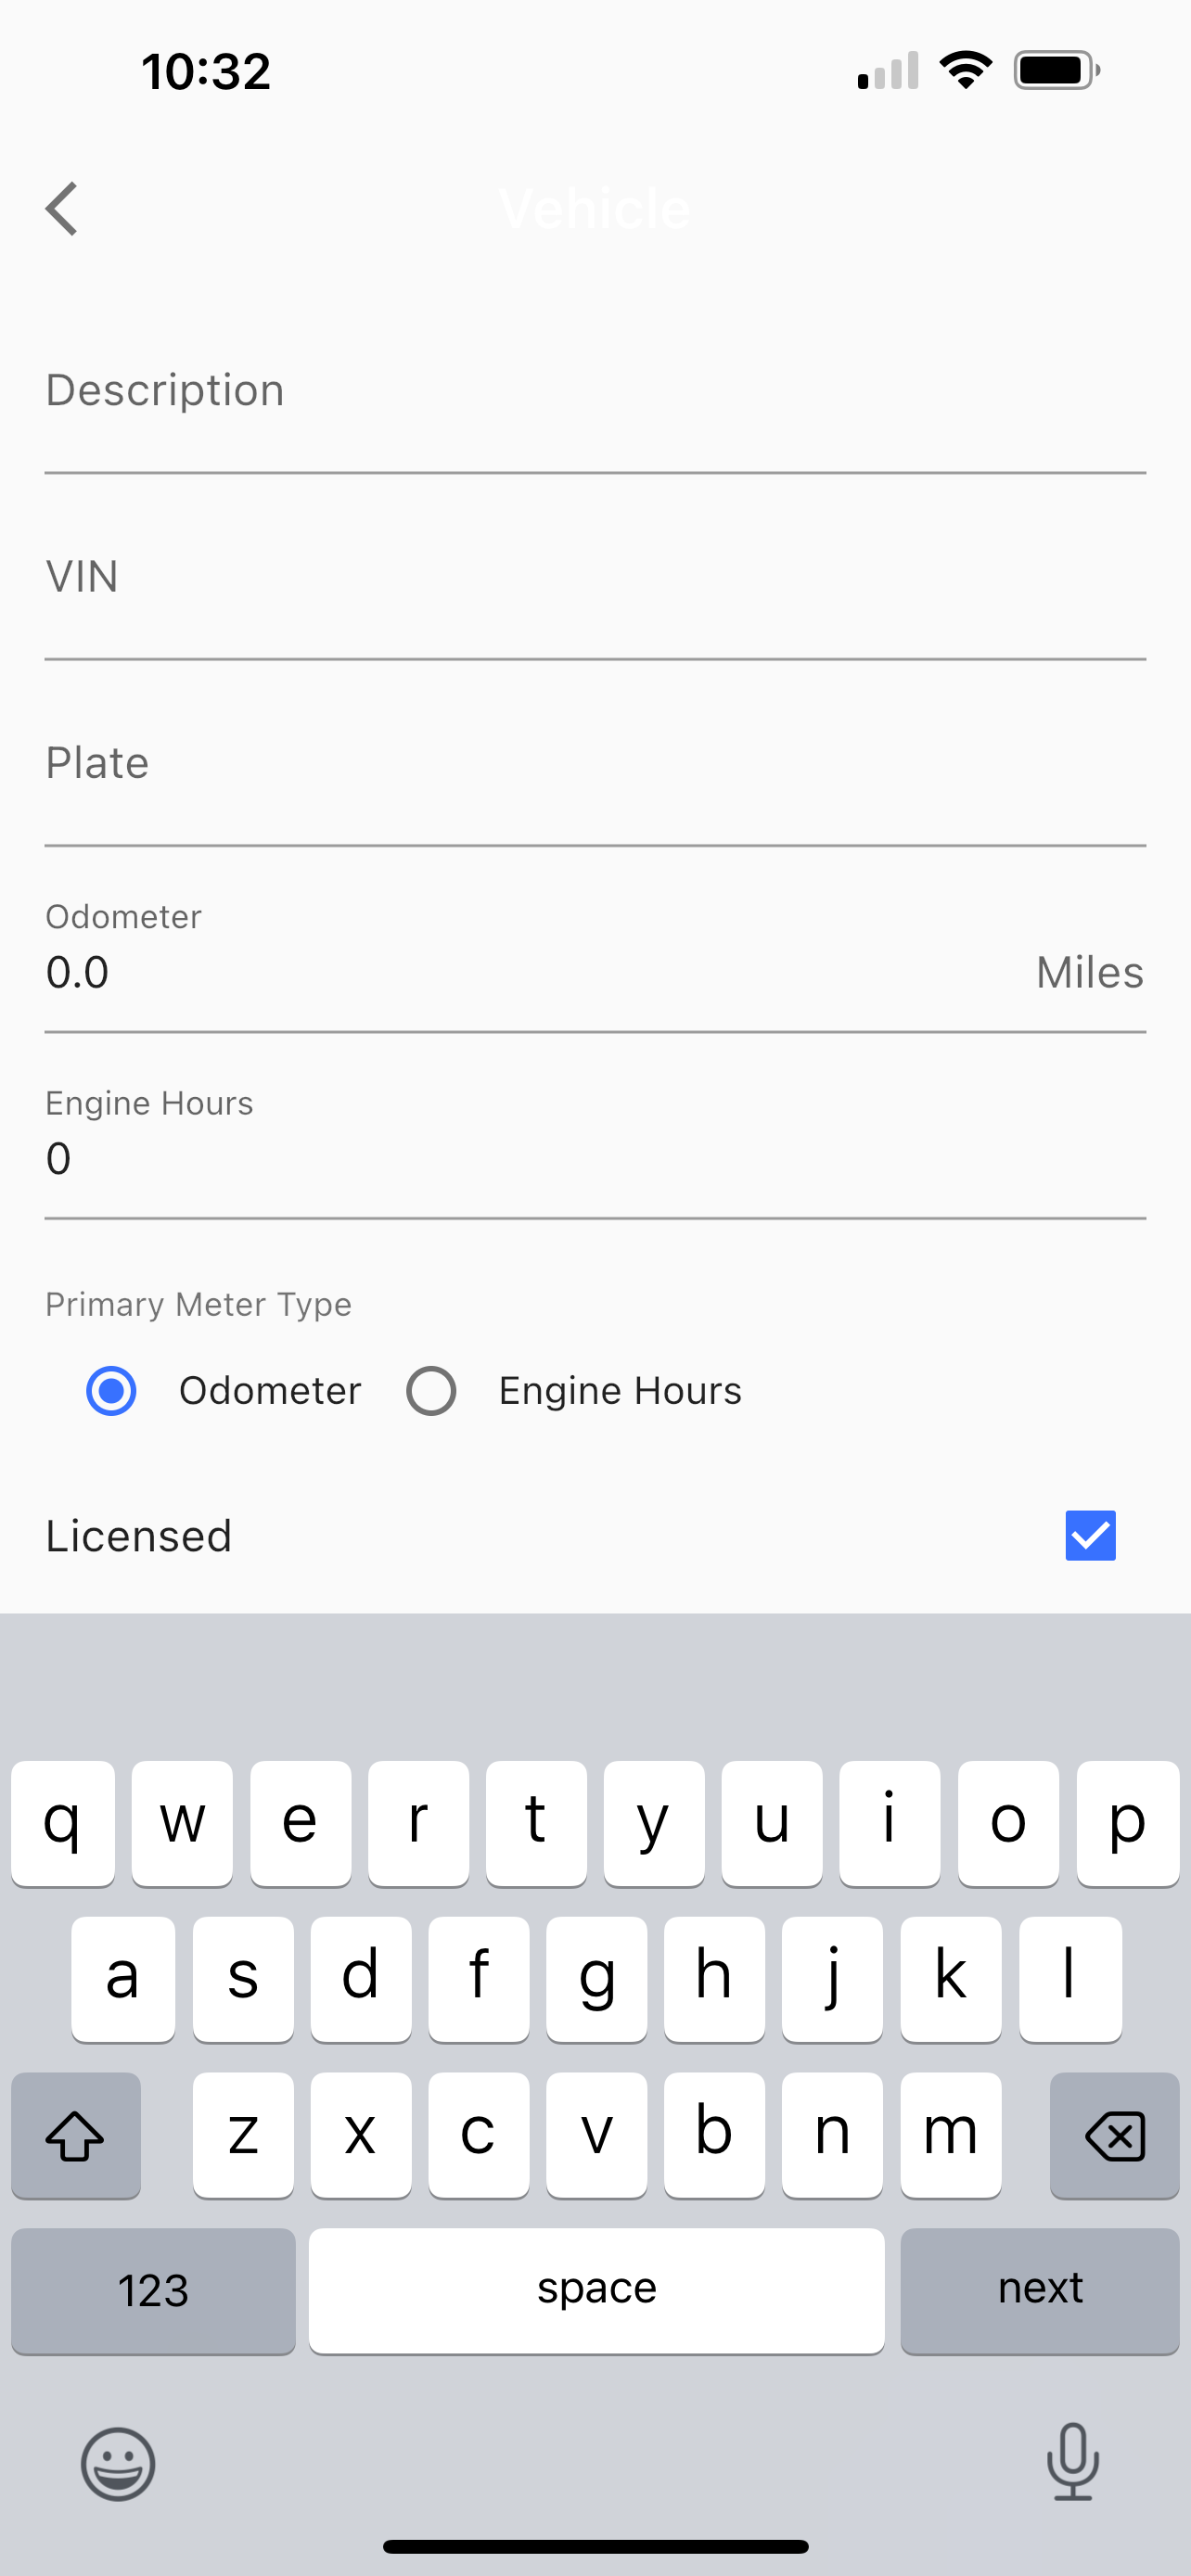
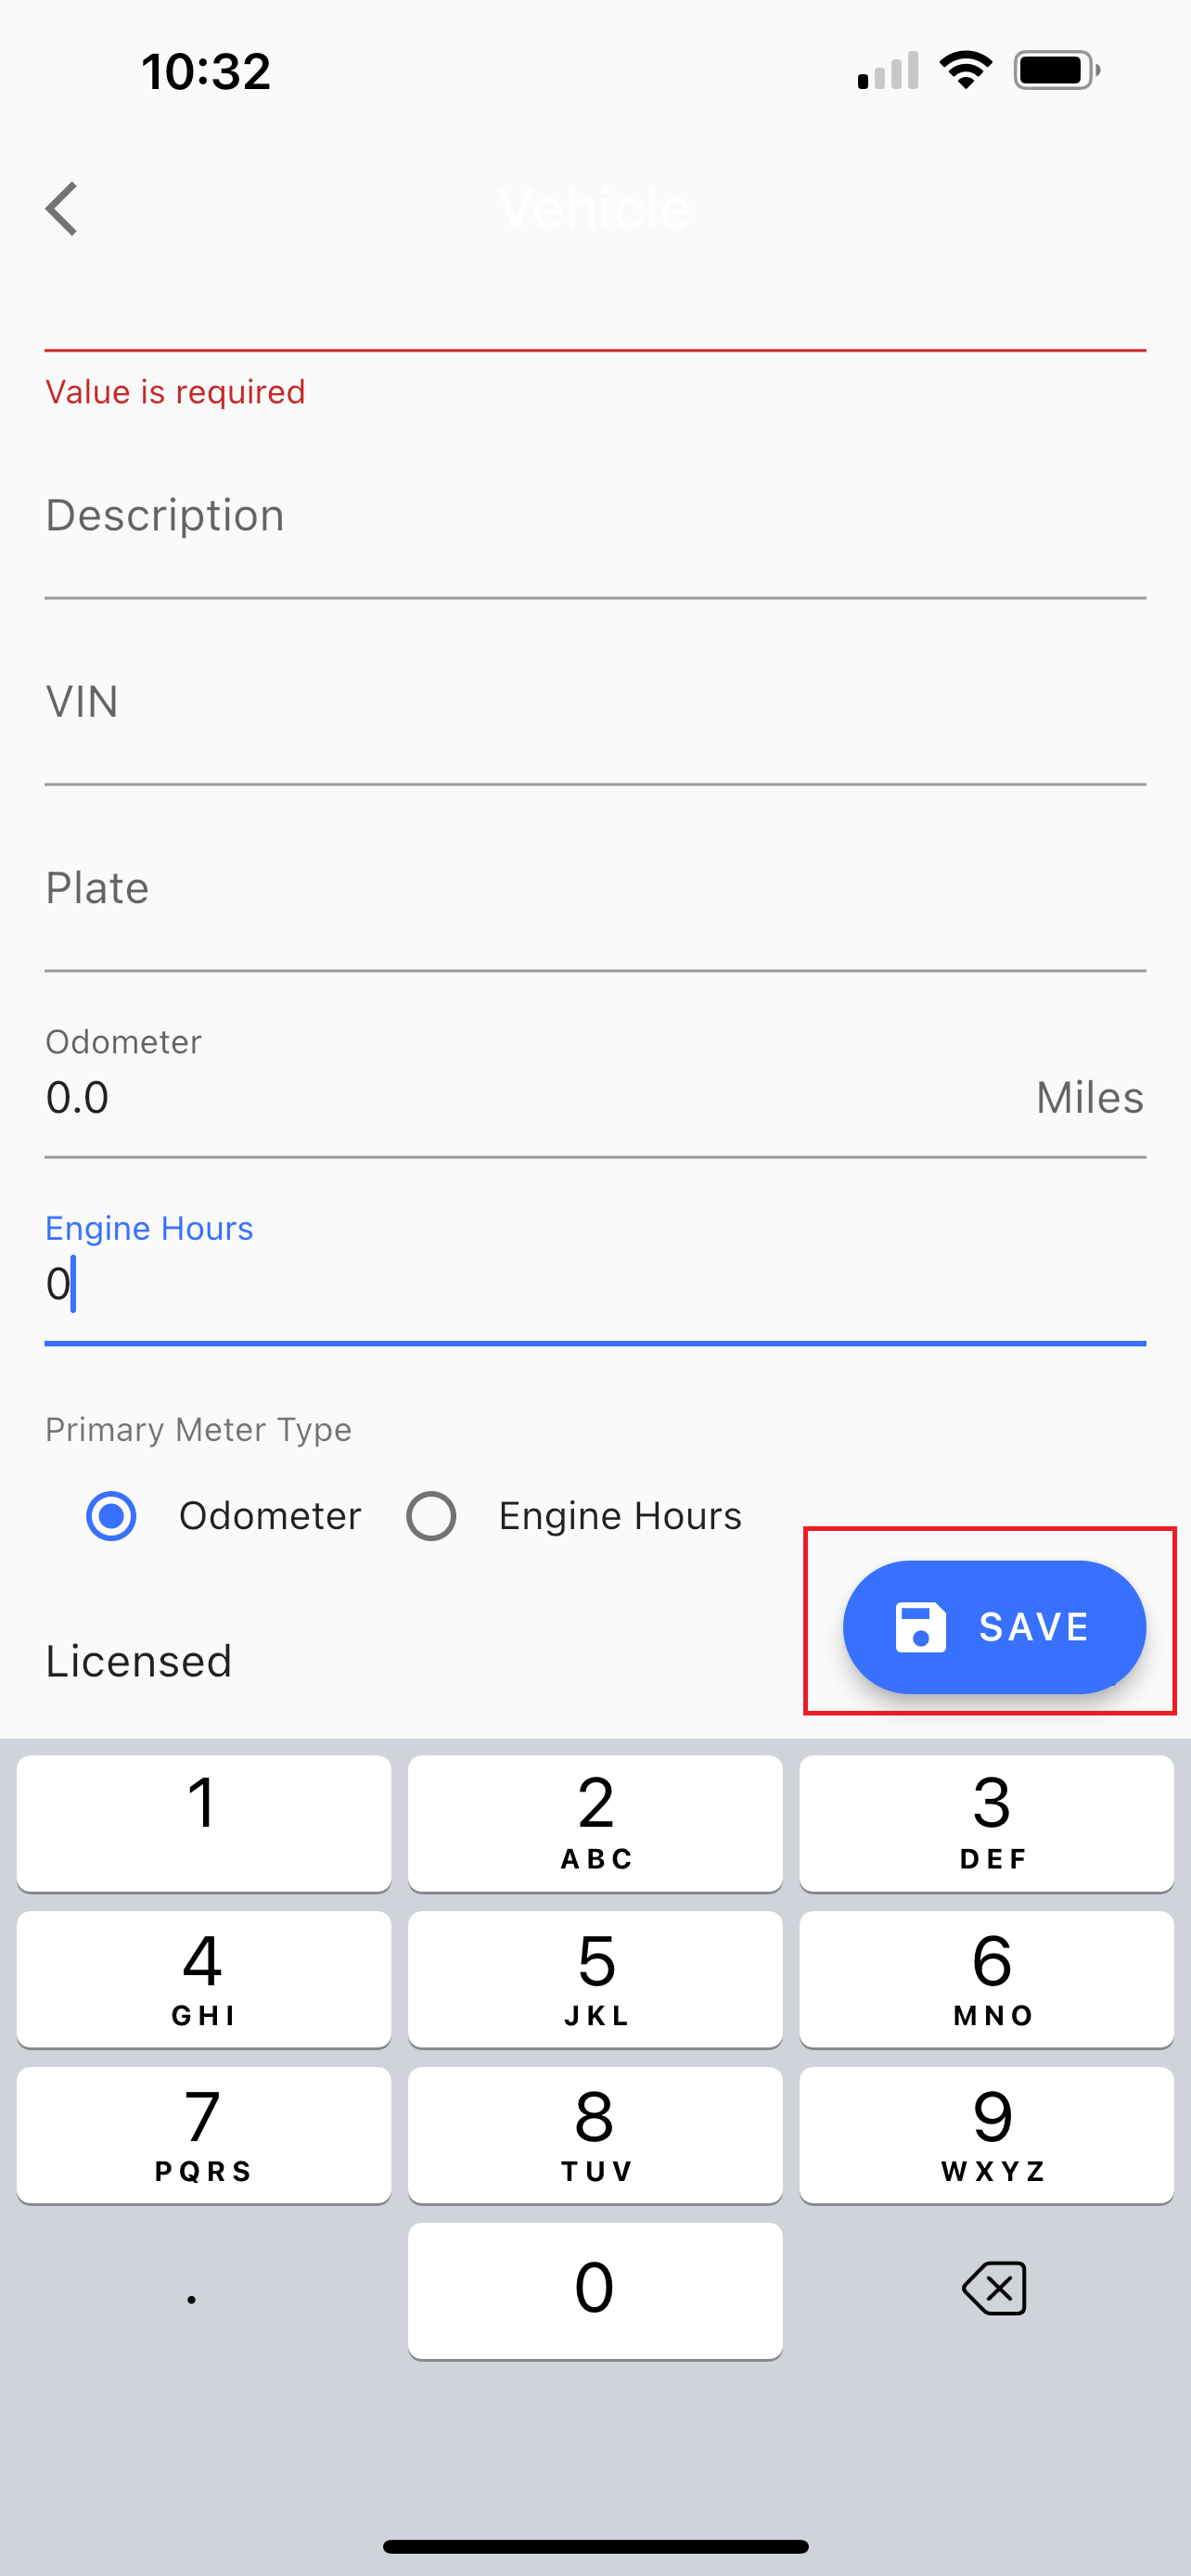
Fill out the form:
Status: Select In Service/ Out of Service
Name: Asset number or Name
Description: Year, Make and Model
VIN: VIN or Serial #
Plate: License Plate #
Odometer: Current Primary Meter Reading (Miles, Hours, Kilometers, Ect)
Engine Hours: Current Engine Hour Reading
Select the Primary Meter Type
Licensed: Check if the asset is licensed or not licensed
Click “Save”